Heim >Web-Frontend >View.js >Methoden für die Kommunikation zwischen übergeordneten und untergeordneten Vue3-Komponenten und die bidirektionale Bindung zwischen Komponenten
Methoden für die Kommunikation zwischen übergeordneten und untergeordneten Vue3-Komponenten und die bidirektionale Bindung zwischen Komponenten
- PHPznach vorne
- 2023-05-15 09:28:052990Durchsuche
Zusammenfassung dieses Artikels
Übergeordnete und untergeordnete Komponenten können über Ereignisse kommunizieren
#🎜 ?# Der Abschnitt „emissions“ organisiert Komponentenereignisse /code>Formüberprüfung externer Parameterwertkombiniert mit
$emit,v- bindundv-modelrealisieren die Kommunikation zwischen Eltern-Kind-Komponenten (bidirektionale Datenbindung)
emits板块 整理组件事件使用 组件
emits板块的Object形式 校验外传的参数值结合
$emit、v-bind与v-model实现 父子组件通信(数据双向绑定)结合
$emit、v-bind与v-model实现 父子组件通信(多个字段的应用案例)自己设置修饰符
试验
this.modelModifiers的作用下面在子组件的点击回调
handleClick()中,通过this.modelModifiers.[自己设置修饰符名]实现自己设置修饰符逻辑插槽【slot】【传组件示例】
注意,slot标签上是无法直接增加事件(修饰符)的,如有需要,可以在
外层包裹一层标签,再加上事件 插槽【传 字符串示例】
插槽【传 自己设置子组件 示例】
插槽作用域问题
插槽 UI默认值
插槽的灵活拆分与应用【具名插槽】
v-slot指令的简写普通的
v-for例子 进行 列表渲染
v-for结合v-bind、v-slot、<slot></slot>做列表渲染使用
解构概念进行简写动态组件
常规的利用
双向绑定特性,通过点击事件切换UI的写法动态组件写法
异步组件
父子组件可通过事件 进行通信
前面的笔记 —— 《Vue3 | 组件的定义及复用性、局部组件、全局组件、组件间传值及其校验、单项数据流、Non-props属性》,单向数据流的概念,
即子组件无法修改来自父组件的数据字段,
假如确要修改,可以使用下面说的方式进行通信:
首先,在子组件的UI点击回调方法中,调用this.$emit('【自己设置事件名】'),
向外发送一个事件;
接着各级父组件会收到这个事件,
则在父组件中 调用 子组件标签处,
以 @【事件名】= "回调方法名"的形式,监听该事件以及配置回调方法;回调方法中就可 对 子组件用意修改 的 父组件数据字段 进行修改;
注意,
触发事件的命名,用驼峰命名法(如下heHeDa);
监听事件的命名,用横杆间隔法(如下he-he-da)。
代码:
<!DOCTYPE html><html><head> <meta charset="UTF-8"> <meta name="viewport" content="width=device-width, initial-scale=1.0"> <title>Hello World! heheheheheheda</title> <script src="https://unpkg.com/vue@next"></script></head><body> <div id="heheApp"></div></body><script> const app = Vue.createApp({ data() { return {count: 1} }, methods: { handleItemEvent() { this.count += 1; } }, template: ` <div> <counter :count="count" @he-he-da="handleItemEvent"/> </div>` }); app.component('counter', { props: ['count'], methods: { handleItemClick() { this.$emit('heHeDa'); } }, template:` <div @click="handleItemClick">{{count}}</div> ` }); const vm = app.mount('#heheApp');</script></html>运行,点击组件: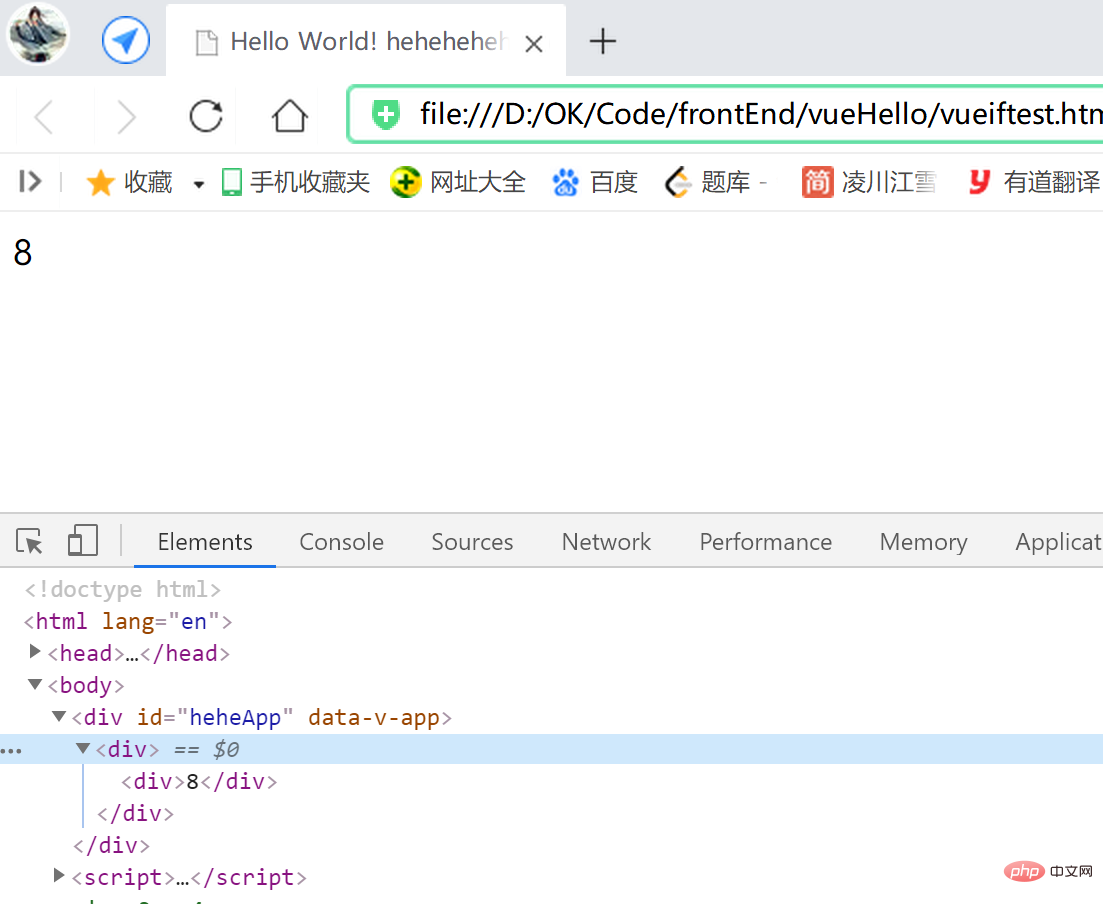
携带参数的事件 发送和监听回调
this.$emit()可以增加参数位,
父组件的监听回调中,
则可加形参位 用于接收参数(如handleItemEvent(param)中的 param);
代码:
<script> const app = Vue.createApp({ data() { return {count: 1} }, methods: { handleItemEvent(param) { this.count += param; } }, template: ` <div> <counter :count="count" @add-count="handleItemEvent"/> </div>` }); app.component('counter', { props: ['count'], methods: { handleItemClick() { this.$emit('addCount', 8); } }, template:` <div @click="handleItemClick">{{count}}</div> ` }); const vm = app.mount('#heheApp');</script>运行,点击效果:
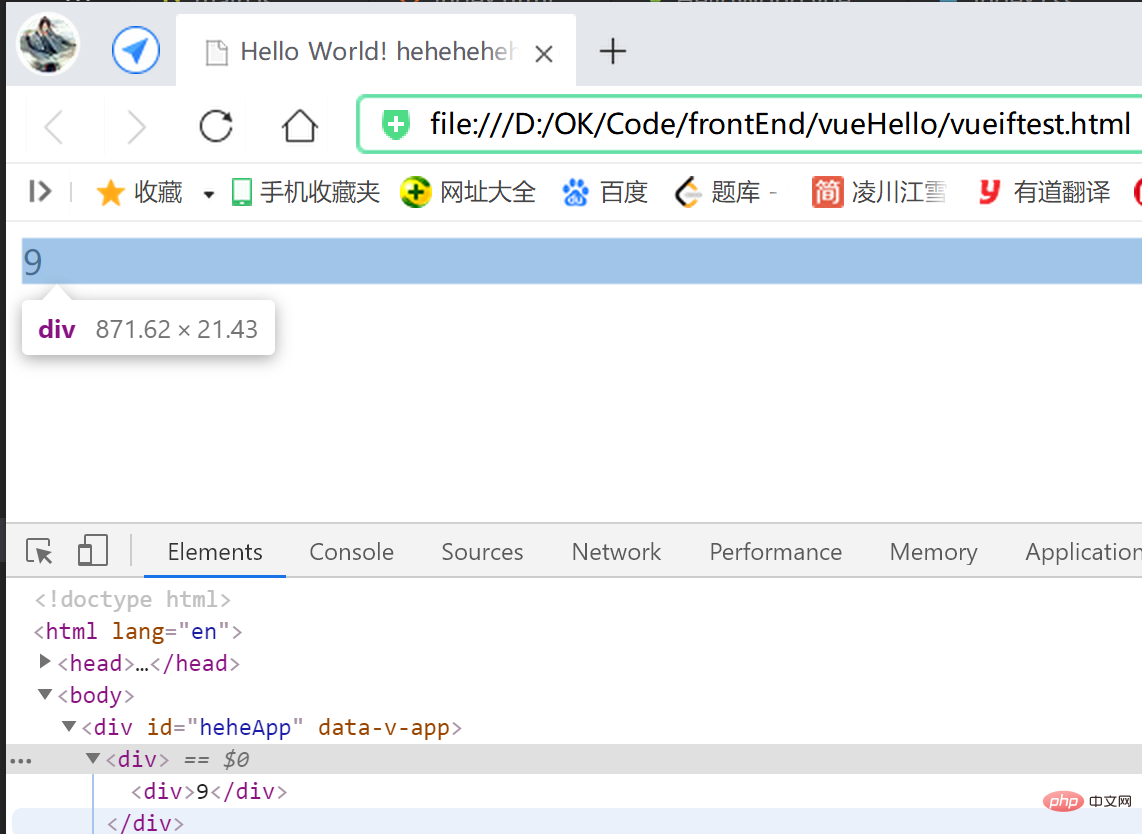
子组件需 发送多个参数 亦可,只需在this.$emit()按需增加参数位,
父组件的监听回调中,增加对应的形参 去接收就可:
<script> const app = Vue.createApp({ data() { return {count: 1} }, methods: { handleItemEvent(param1, param2, param3) { this.count = this.count + param1 + param2 + param3; console.log(this.count); } }, template: ` <div> <counter :count="count" @add-count="handleItemEvent"/> </div>` }); app.component('counter', { props: ['count'], methods: { handleItemClick() { this.$emit('addCount', 8, 2, 6); } }, template:` <div @click="handleItemClick">{{count}}</div> ` }); const vm = app.mount('#heheApp');</script>效果: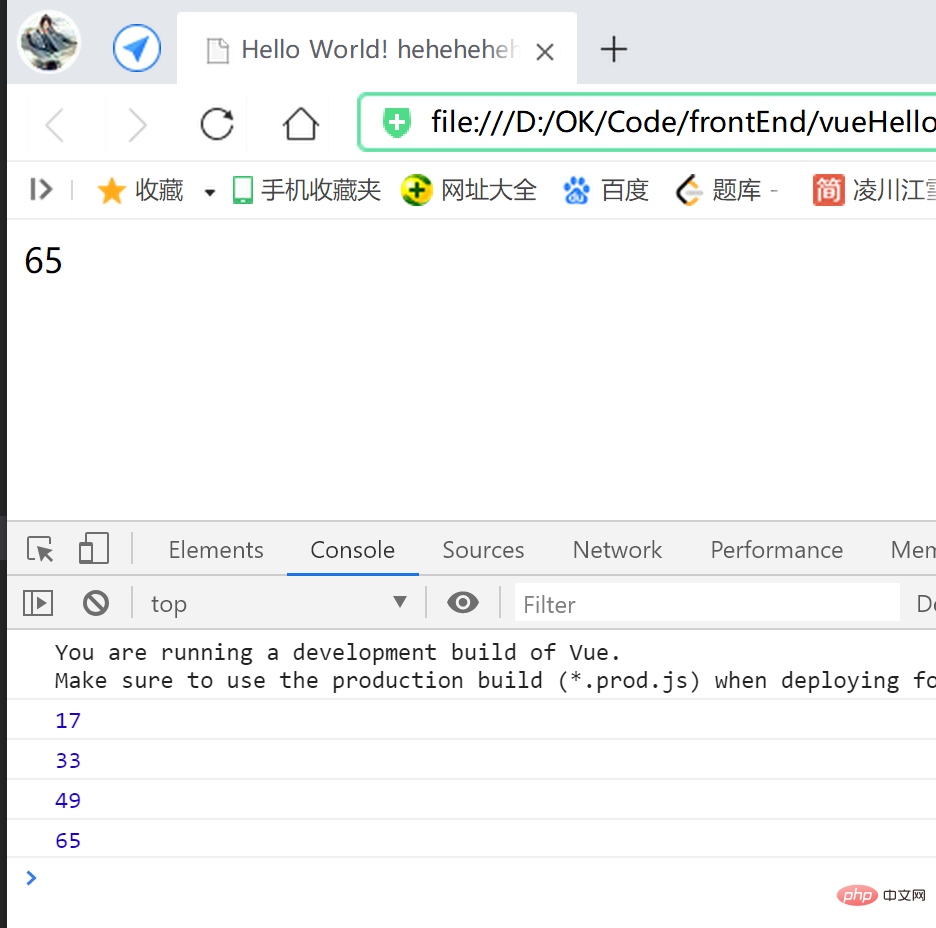
当然 父组件 接收 子组件参数 后的 计算逻辑,
可以在 子组件传参 的时候 计算完成 再传给this.$emit()!
父组件接收时,直接 受值就可(handleItemEvent(count)#🎜 🎜# Kombination von $emit, v-bind und v-model, um eine Eltern-Kind-Komponentenkommunikation zu erreichen (Anwendungsfälle mehrerer Felder) #🎜 🎜##🎜 🎜#
this.modelModifiers#🎜🎜##🎜🎜##🎜🎜##🎜🎜##🎜🎜##🎜🎜# unten im Klicken Sie auf den Rückruf der untergeordneten Komponente handleClick(), implementieren Sie die Logik zum selbständigen Festlegen des Modifikators über this.modelModifiers.[Setzen Sie den Modifikatornamen selbst fest]#🎜🎜# #? 🎜🎜#Beachten Sie, dass das Slot-Tag nicht möglich ist. Um Ereignisse (Modifikatoren) direkt hinzuzufügen, können Sie bei Bedarf ein außerhalb von v-slotDie Abkürzung des Befehls#🎜🎜##🎜🎜##🎜🎜##🎜🎜##🎜 🎜# #🎜🎜#Normales v-for-Beispiel für die Listenwiedergabe#🎜🎜##🎜🎜##🎜🎜##🎜🎜##🎜🎜##🎜🎜#v -forKombiniert mit <code>v-bind, v-slot, <slot></slot>, um Listenrendering durchzuführen#🎜🎜##🎜🎜 # #🎜🎜##🎜🎜##🎜🎜##🎜🎜#Verwenden Sie das Konzept der Dekonstruktion für die Abkürzung #🎜🎜##🎜🎜##🎜🎜##🎜🎜##🎜🎜# # 🎜🎜#dynamische Komponente#🎜🎜##🎜🎜##🎜🎜##🎜🎜##🎜🎜##🎜🎜##🎜🎜#Konventionelle Verwendung der Zwei-Wege-Bindungsfunktion, indem Sie auf „How to write Event Switching UI#🎜🎜##🎜🎜##🎜🎜##🎜🎜##🎜🎜##🎜🎜#How to write dynamische Komponenten#🎜🎜##🎜🎜##🎜🎜##🎜 🎜##🎜🎜##🎜🎜#Asynchrone Komponente#🎜🎜##🎜🎜##🎜🎜#Übergeordnete und untergeordnete Komponenten können über Ereignisse kommunizieren h4>#🎜🎜# #🎜🎜# Vorherige Anmerkungen – „Vue3 | Definition und Wiederverwendbarkeit von Komponenten, lokale Komponenten, globale Komponenten, Wertübertragung zwischen Komponenten und Verifizierung, einzelner Datenfluss, Nicht-Requisiten-Attribut“, unidirektionaler Datenfluss Konzept:
Das heißt, untergeordnete Komponenten können die Datenfelder der übergeordneten Komponente nicht ändern.
Wenn Sie sie wirklich ändern möchten, können Sie auf folgende Weise kommunizieren:
Erstens , in der untergeordneten Komponente Rufen Sie in der UI-Click-Callback-Methode this.$emit('[Legen Sie den Ereignisnamen selbst fest]') auf und senden Sie
ein event nach außen;
Dann empfangen übergeordnete Komponenten auf allen Ebenen dieses Ereignis,
rufen Sie dann das untergeordnete Komponenten-Tag in der übergeordneten Komponente auf,
mit @[Ereignisname ] = "Callback-Methodenname", <code>hören auf das Ereignis und konfigurieren Sie die
Callback-Methode; kann verwendet werden, um die Unterkomponente absichtlich zu ändern. #🎜🎜##🎜🎜##🎜🎜##🎜🎜#Beachten Sie, dass
Triggerereignisse mit camel case ( Wie unten gezeigt, heHeDa);
Um das Hörereignis zu benennen, verwenden Sie die Taktintervallmethode (wie unten gezeigt, he-he-da). #🎜🎜##🎜🎜##🎜🎜#Code: #🎜🎜#<script> const app = Vue.createApp({ data() { return {count: 1} }, methods: { handleItemEvent(count) { this.count = count; console.log(this.count); } }, template: ` <div> <counter :count="count" @add-count="handleItemEvent"/> </div>` }); app.component('counter', { props: ['count'], methods: { handleItemClick() { this.$emit('addCount', this.count + 16); } }, template:` <div @click="handleItemClick">{{count}}</div> ` }); const vm = app.mount('#heheApp');</script>#🎜🎜#Ausführen, klicken Sie auf die Komponente:  #🎜🎜#
#🎜🎜#Versenden von Ereignissen und Überwachen von Rückrufen mit Parametern# 🎜🎜##🎜🎜#this.$emit() kann Parameterbits hinzufügen,
im Listening-Callback der übergeordneten Komponente
kann formale Parameter hinzufügen Bits zum Empfangen von Parametern (z. B. param in handleItemEvent(param)); 🎜##🎜 🎜#Ausführen, Klickeffekt: #🎜🎜##🎜🎜##🎜🎜# #🎜🎜#
#🎜🎜#
Sie können auch mehrere Parameter an untergeordnete Komponenten senden, verwenden Sie einfach this.$ emit()Parameterbits nach Bedarf hinzufügen,
Fügen Sie im Überwachungsrückruf der übergeordneten Komponente einfach die entsprechenden formalen Parameter hinzu, um Folgendes zu erhalten: #🎜🎜##🎜🎜#<script> const app = Vue.createApp({ data() { return {count: 1} }, methods: { handleItemEvent(count) { this.count = count; console.log(this.count); } }, template: ` <div> <counter :count="count" @add-count="handleItemEvent"/> </div>` }); app.component('counter', { props: ['count'], emits: ['hehehe'], methods: { handleItemClick() { this.$emit('addCount', this.count + 16); } }, template:` <div @click="handleItemClick">{{count}}</div> ` }); const vm = app.mount('#heheApp');</script>#🎜🎜#Effekt:  #🎜🎜##🎜🎜#
#🎜🎜#Natürlich kann die Berechnungslogik, nachdem die übergeordnete Komponente die Parameter der untergeordneten Komponente empfängt,
berechnet werden, wenn die untergeordnete Komponente -component übergibt die Parameter und wird dann an this.$emit() übergeben! <br>Wenn die übergeordnete Komponente ihn empfängt, akzeptieren Sie einfach den Wert direkt (<code>handleItemEvent(count)); vorheriges Beispiel; #🎜🎜#使用 组件的emits板块 整理组件事件
this.$emit() kann Parameterbits hinzufügen,im Listening-Callback der übergeordneten Komponente
kann formale Parameter hinzufügen Bits zum Empfangen von Parametern (z. B.
param in handleItemEvent(param)); 🎜##🎜 🎜#Ausführen, Klickeffekt: #🎜🎜##🎜🎜##🎜🎜# #🎜🎜#
#🎜🎜#Sie können auch mehrere Parameter an untergeordnete Komponenten senden, verwenden Sie einfach
this.$ emit()Parameterbits nach Bedarf hinzufügen,Fügen Sie im Überwachungsrückruf der übergeordneten Komponente einfach die entsprechenden formalen Parameter hinzu, um Folgendes zu erhalten: #🎜🎜##🎜🎜#
<script> const app = Vue.createApp({ data() { return {count: 1} }, methods: { handleItemEvent(count) { this.count = count; console.log(this.count); } }, template: ` <div> <counter :count="count" @add-count="handleItemEvent"/> </div>` }); app.component('counter', { props: ['count'], emits: ['hehehe'], methods: { handleItemClick() { this.$emit('addCount', this.count + 16); } }, template:` <div @click="handleItemClick">{{count}}</div> ` }); const vm = app.mount('#heheApp');</script>#🎜🎜#Effekt:  #🎜🎜##🎜🎜#
#🎜🎜#Natürlich kann die Berechnungslogik, nachdem die übergeordnete Komponente die Parameter der untergeordneten Komponente empfängt,
berechnet werden, wenn die untergeordnete Komponente -component übergibt die Parameter und wird dann an
this.$emit() übergeben! <br>Wenn die übergeordnete Komponente ihn empfängt, akzeptieren Sie einfach den Wert direkt (<code>handleItemEvent(count)); vorheriges Beispiel; #🎜🎜#使用 组件的emits板块 整理组件事件
实际开发场景中,我们一个组件自己设置的触发事件可能会很多,
我们不可能一个一个去梳理核实,
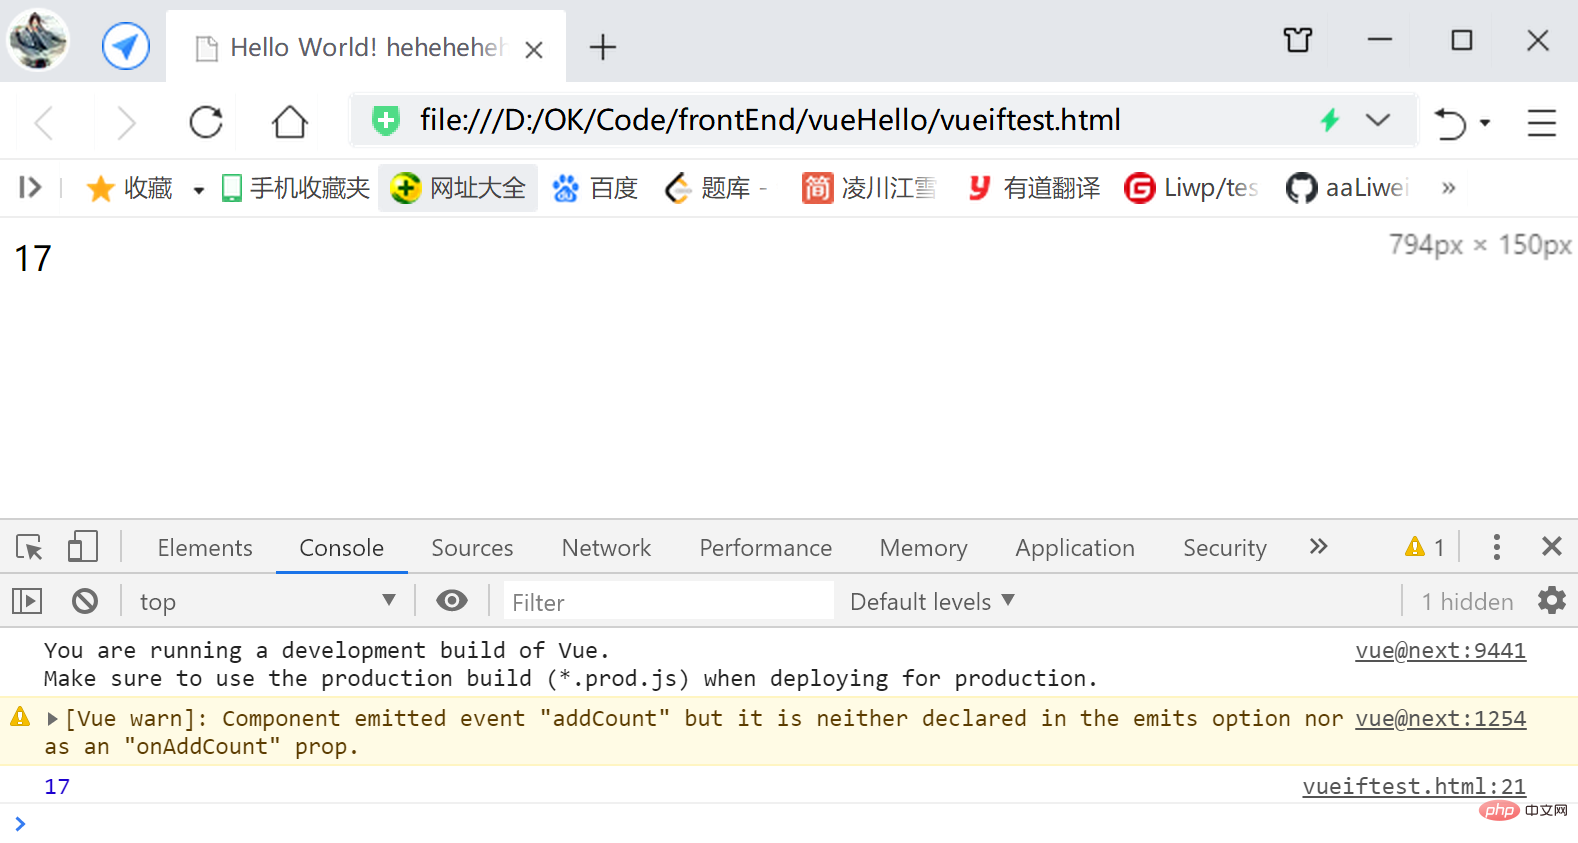
这个时候即可以使用 组件的emits板块 来整理组件的事件;
可以把组件中 自己设置到的事件都写在这里,方便梳理,提高可读性,
或者者把 想要定义的事件 写在这里,
如此一来,假如不记得编写对应的自己设置事件,
Vue系统会在运行时 给予警告:
<script> const app = Vue.createApp({ data() { return {count: 1} }, methods: { handleItemEvent(count) { this.count = count; console.log(this.count); } }, template: ` <div> <counter :count="count" @add-count="handleItemEvent"/> </div>` }); app.component('counter', { props: ['count'], emits: ['hehehe'], methods: { handleItemClick() { this.$emit('addCount', this.count + 16); } }, template:` <div @click="handleItemClick">{{count}}</div> ` }); const vm = app.mount('#heheApp');</script>假如不记得编写对应的自己设置事件,Vue系统会在运行时 给予警告:
使用 组件emits板块的 Object形式 校验外传的参数值
可以根据需要,使用 组件emits板块的 Object形式 校验外传的参数值,
如下,子组件的emits板块,
‘key’值定义对应的事件名,‘value’值定义一个校验函数,
返回true表示同意数值外传,
返回false表示不同意,会给出警告;
<script> const app = Vue.createApp({ data() { return {count: 1} }, methods: { handleItemEvent(count) { this.count = count; console.log(this.count); } }, template: ` <div> <counter :count="count" @add-count="handleItemEvent"/> </div>` }); app.component('counter', { props: ['count'], emits: { addCount: (count) => { if (count < 0) { return true; } return false; } }, methods: { handleItemClick() { this.$emit('addCount', this.count + 16); } }, template:` <div @click="handleItemClick">{{count}}</div> ` }); const vm = app.mount('#heheApp');</script>运行,点击效果: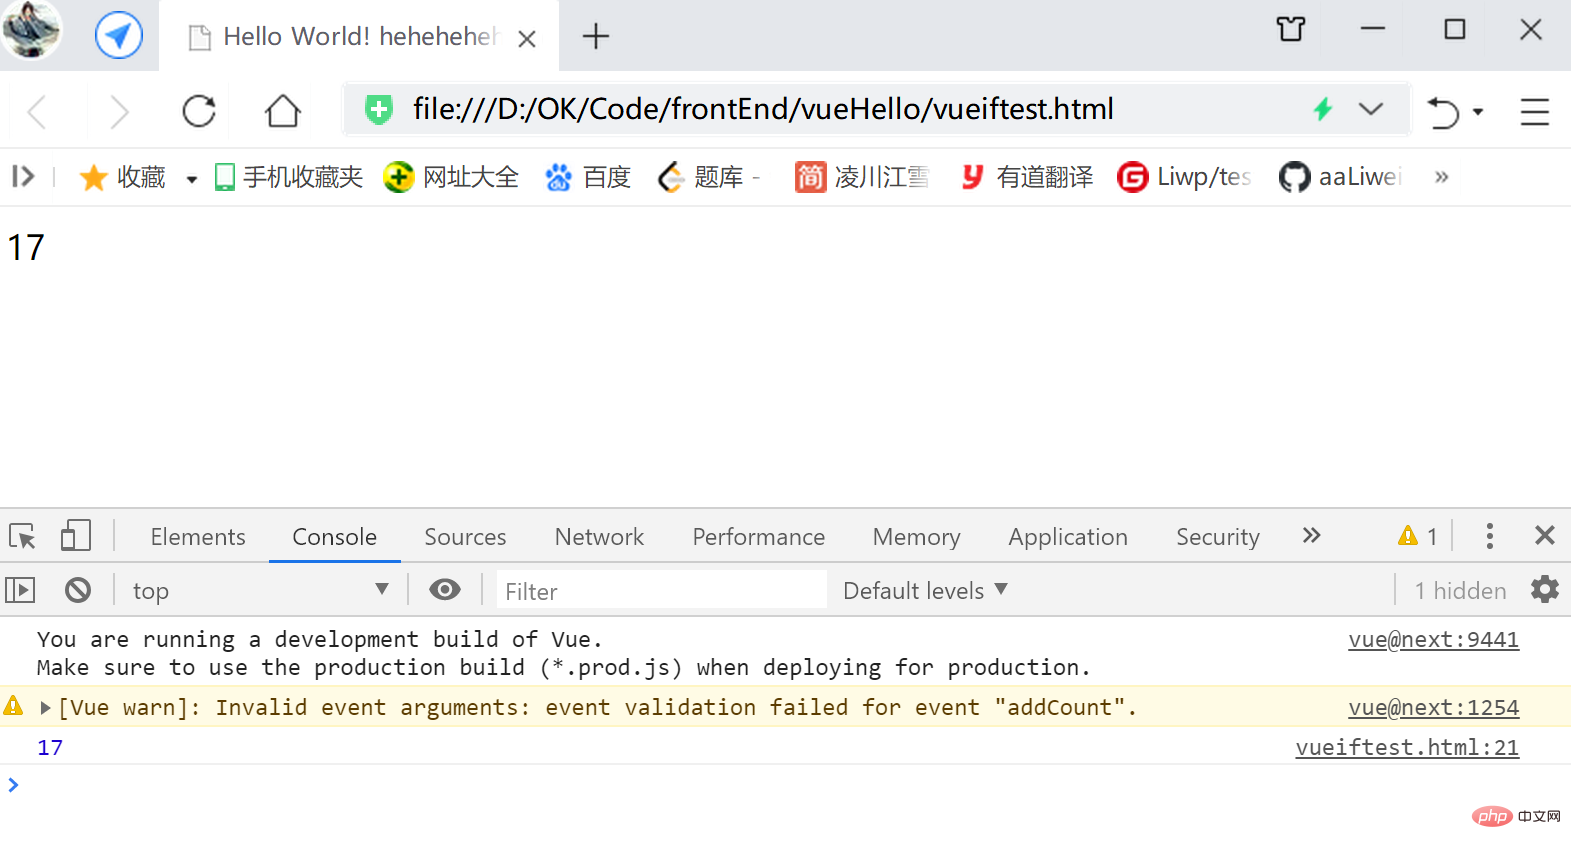
结合$emit、v-bind与v-model 实现 父子组件通信(数据双向绑定)
v-model可以实现数据字段与DOM节点内容的双向绑定,
也可以实现数据字段与数据字段之间的双向绑定;
而v-bind只能是实现单向数据流;
若不自己设置承接的字段名,则需要用modelValue作为默认的承接字段名;
同时,$emit()的一参默认为update:modelValue,二参为绑定的数据;
如下代码,
子组件 的承接变量modelValue 同父组件的count字段 双向绑定,
(实际上就是v-model的特性 —— 将 子组件的内容即modelValue 同 父组件的数据字段双向绑定)
而后显示在子组件的DOM中({{modelValue}}):
<script> const app = Vue.createApp({ data() { return {count: 1} }, template: ` <counter v-model="count"/>` }); app.component('counter', { props: ['modelValue'], methods: { handleItemClick() { this.$emit('update:modelValue', this.modelValue + 16); console.log(vm.$data.count); } }, template:` <div @click="handleItemClick">{{modelValue}}</div> ` }); const vm = app.mount('#heheApp');</script>效果: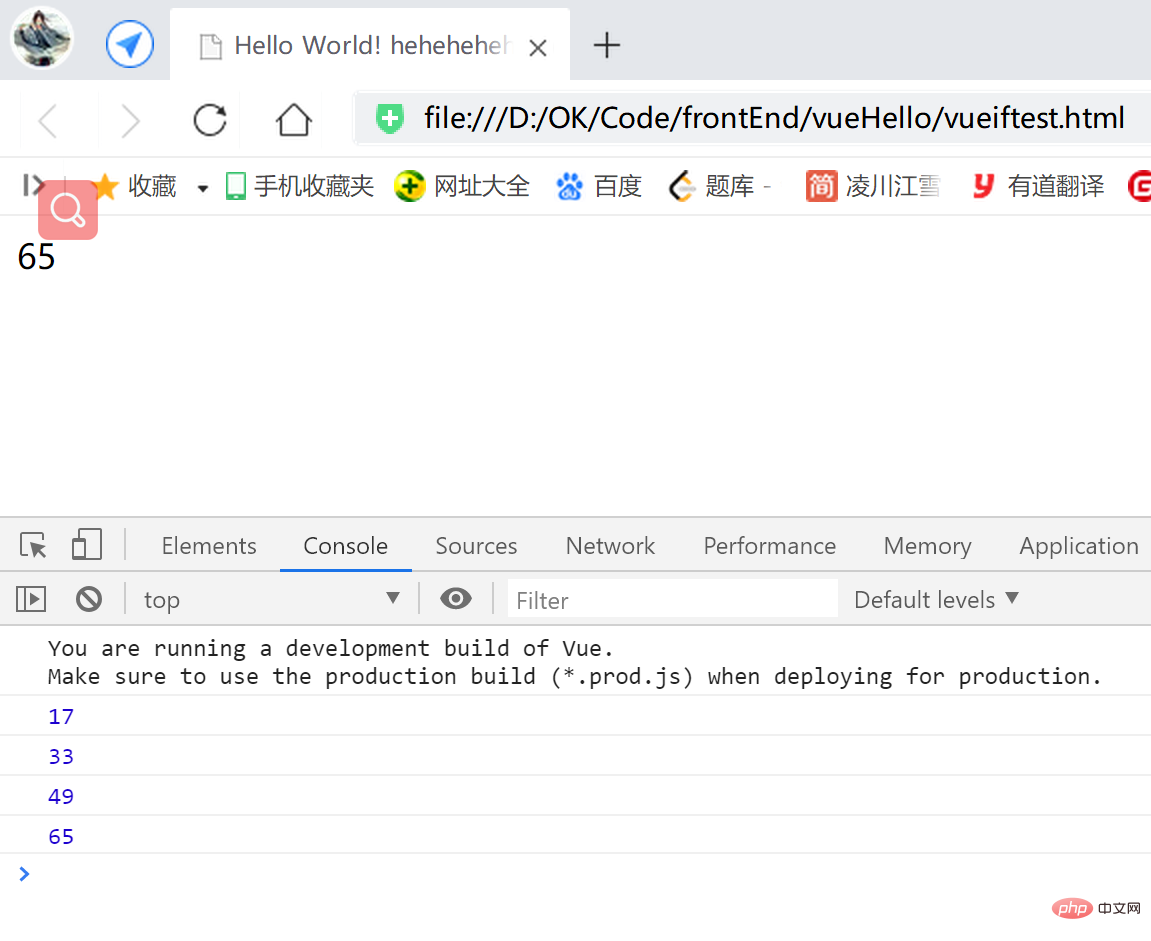
当然也可以自己设置字段名,
这种方式需要给v-model字段接一个字段名,
同时将这个字段名替代子组件中所有modelValue的位置:
<script> const app = Vue.createApp({ data() { return {count: 1} }, template: ` <counter v-model:testField="count"/>` }); app.component('counter', { props: ['testField'], methods: { handleItemClick() { this.$emit('update:testField', this.testField + 16); console.log(vm.$data.count); } }, template:` <div @click="handleItemClick">{{testField}}</div> ` }); const vm = app.mount('#heheApp');</script>实现效果与上例相同;
结合$emit、v-bind与v-model 实现 父子组件通信(多个字段的应用案例)
如下代码,
父组件的count与子组件承接的testField字段,
父组件的count1与子组件承接的testField1字段,
分别实现了双向绑定:
<script> const app = Vue.createApp({ data() { return { count: 1, count1: 1 } }, template: ` <counter v-model:testField="count" v-model:testField1="count1"/>` }); app.component('counter', { props: ['testField','testField1'], methods: { handleItemClick() { this.$emit('update:testField', this.testField + 16); console.log("vm.$data.count", vm.$data.count); }, handleItemClick1() { this.$emit('update:testField1', this.testField1 + 8); console.log("vm.$data.count1", vm.$data.count1); } }, template:` <div @click="handleItemClick">{{testField}}</div> <div @click="handleItemClick1">{{testField1}}</div> ` }); const vm = app.mount('#heheApp');</script>效果: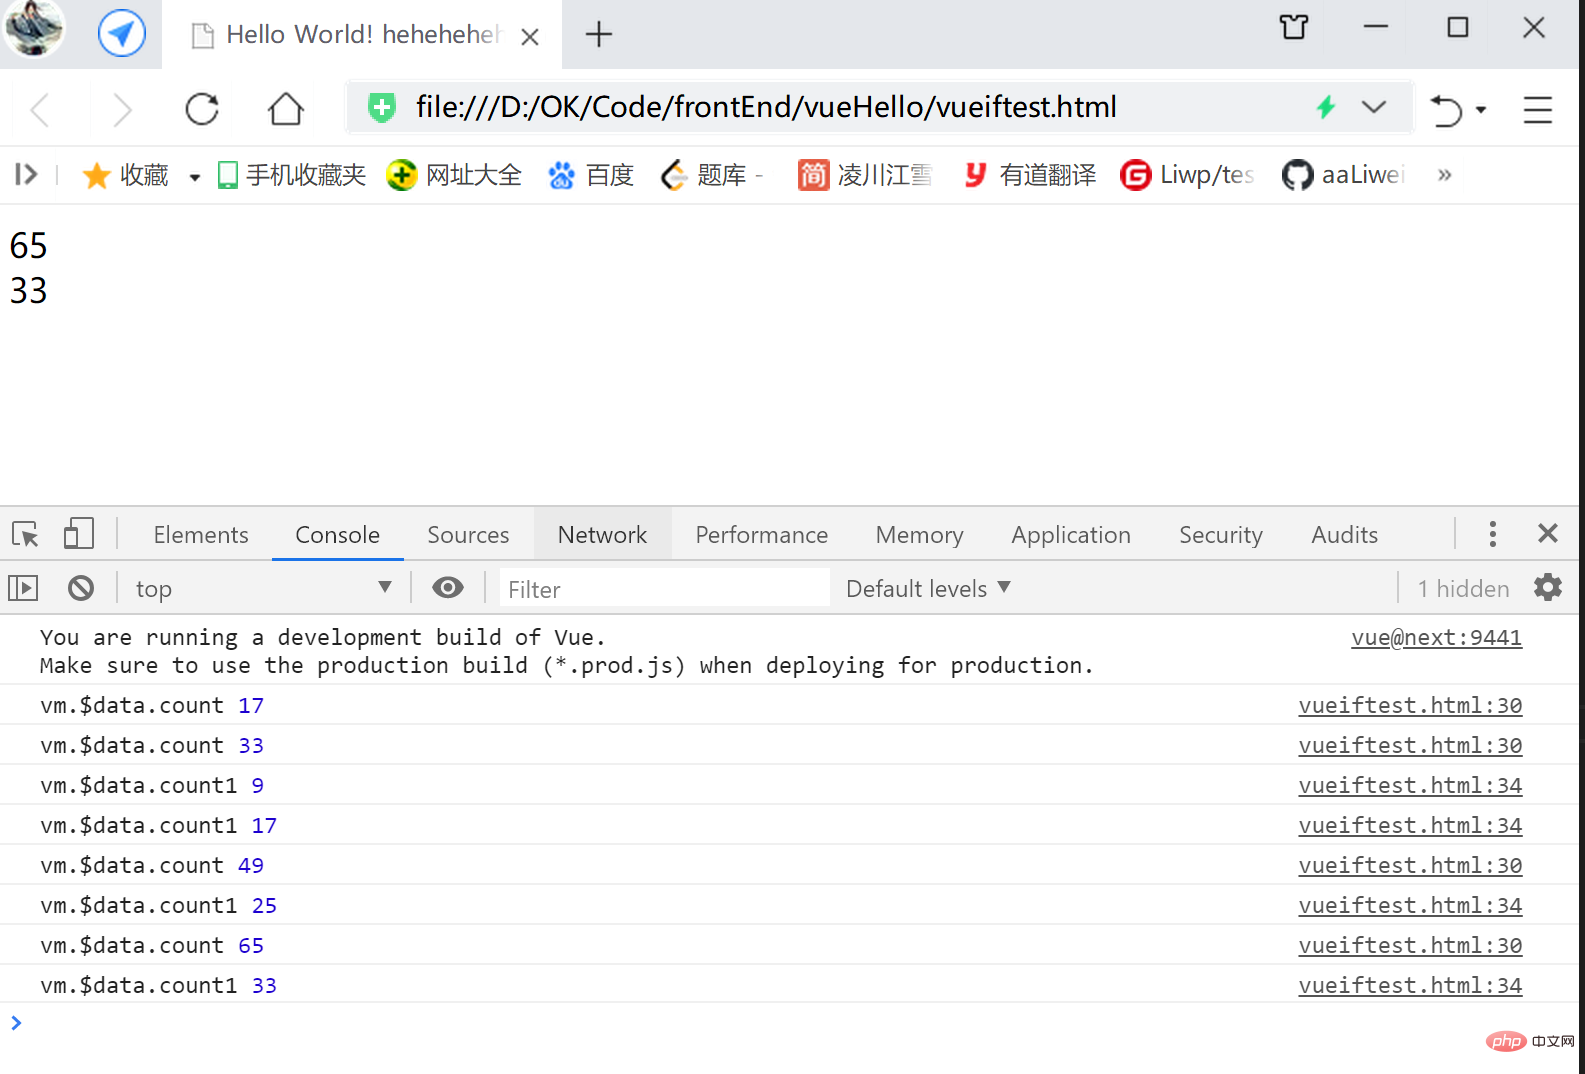
自己设置修饰符
机制:在父组件调用处,在
v-model后 使用自己设置修饰符,
在实现修饰符逻辑的地方,如点击事件中,
通过this.modelModifiers.[自己设置修饰符名]返回的布尔值,
判断客户能否使用了修饰符,
进而分别对使用与否做相应的解决;
另外'modelModifiers'板块中可以指定默认值(下代码指定为一个空对象{});
试验this.modelModifiers的作用
首先下面是一个空的解决,'modelModifiers'板块中指定默认值(下代码指定为一个空对象{}),mounted函数中打印 子组件modelModifiers属性的内容,
代码如下,
运行后,可以见打印了一个对象{captalize: true},
正是我们传入的自己设置修饰符.captalize(这里未做解决)
【假如这里v-model不接修饰符,console.log(this.modelModifiers);将打印一个空对象{}】:
<script> const app = Vue.createApp({ data() { return { char: 'a' } }, template: ` <counter v-model.captalize="char"/>` }); app.component('counter', { props: { 'modelValue': String, 'modelModifiers': { default: () => ({}) } }, mounted() { console.log(this.modelModifiers); }, methods: { handleClick() { this.$emit('update:modelValue', this.modelValue + 'h'); console.log("vm.$data.count", vm.$data.char); } }, template:` <div @click="handleClick">{{modelValue}}</div> ` }); const vm = app.mount('#heheApp');</script>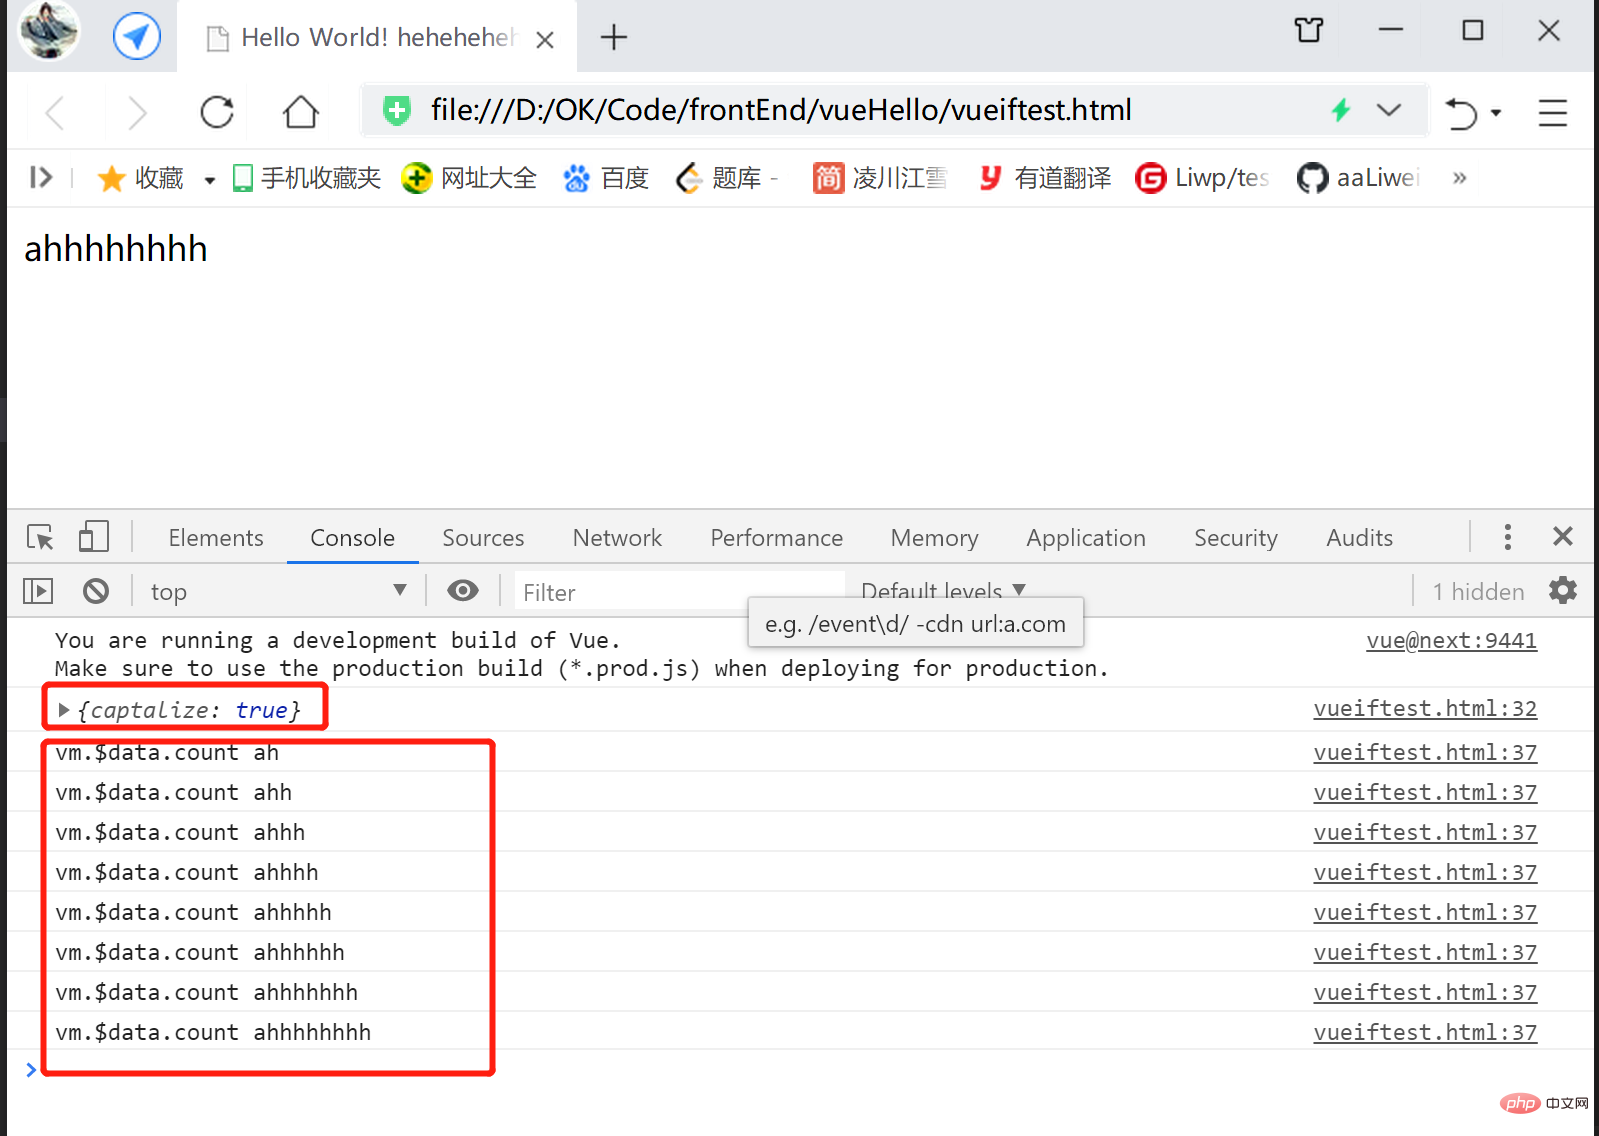
下面在子组件的点击回调handleClick()中,通过this.modelModifiers.[自己设置修饰符名]实现自己设置修饰符逻辑
实现效果即 点击之后使得对应的字符串 全变大写;
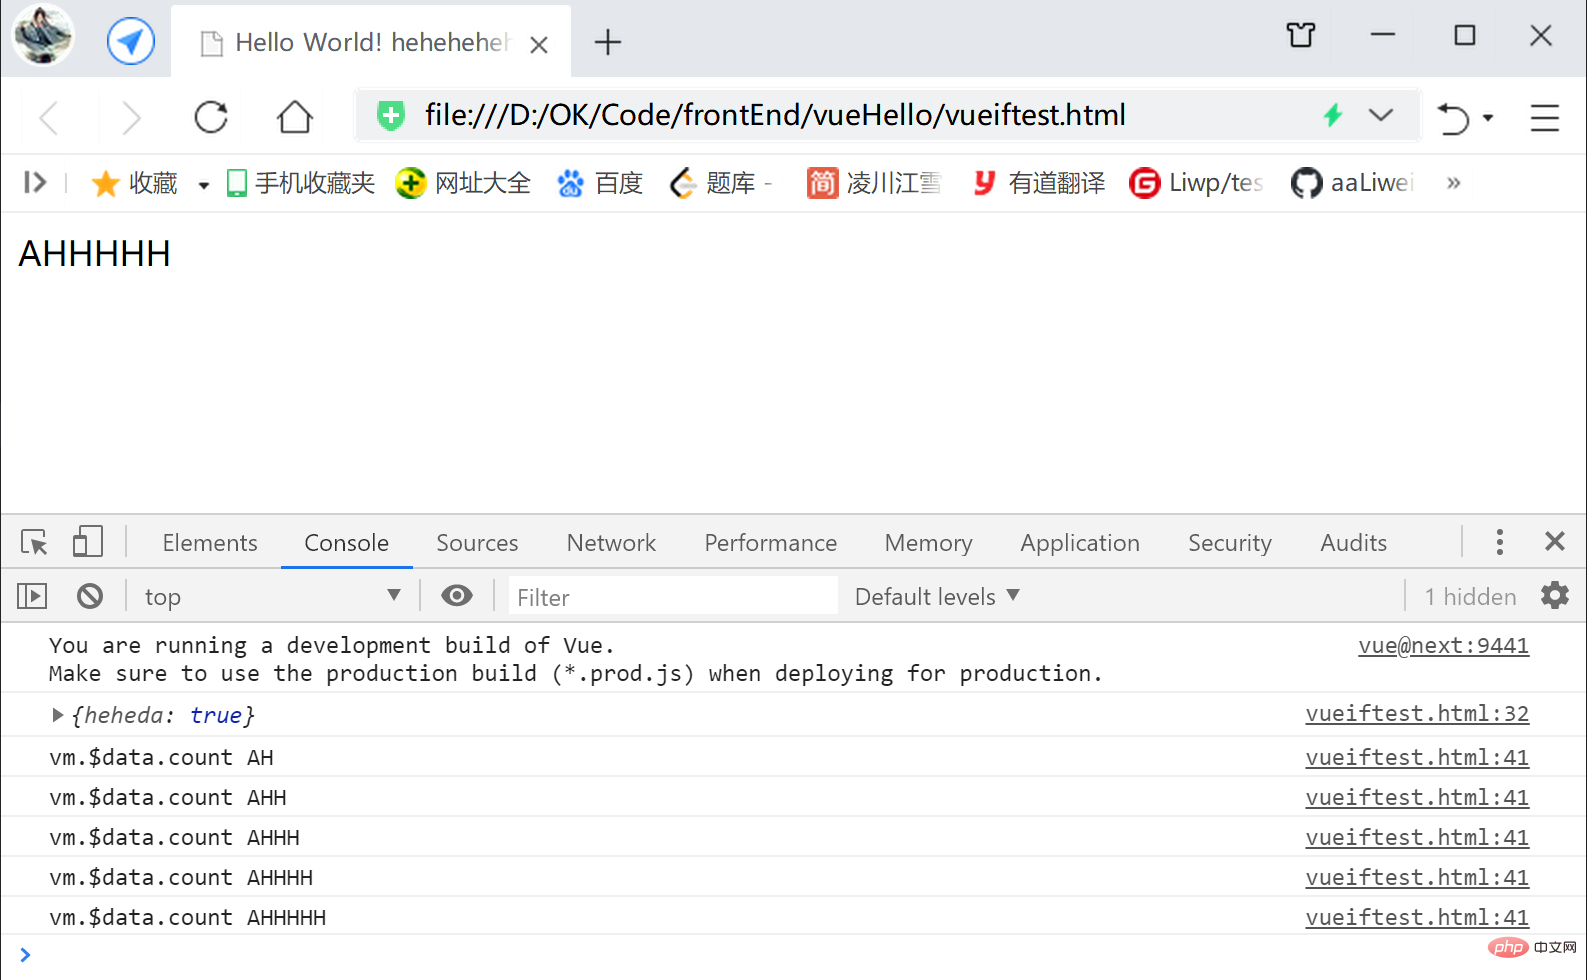
<script> const app = Vue.createApp({ data() { return { testString: 'a' } }, template: ` <counter v-model.heheda="testString"/>` }); app.component('counter', { props: { 'modelValue': String, 'modelModifiers': { default: () => ({}) } }, mounted() { console.log(this.modelModifiers); }, methods: { handleClick() { let newValue = this.modelValue + 'h'; if(this.modelModifiers.heheda) { newValue = newValue.toUpperCase(); } this.$emit('update:modelValue', newValue); console.log("vm.$data.count", vm.$data.testString); } }, template:` <div @click="handleClick">{{modelValue}}</div> ` }); const vm = app.mount('#heheApp');</script>效果:
插槽【slot】【传组件示例】
使用关键 主要分两个部分:
自己设置子组件:
在需要 被父组件插入组件的位置,
使用<slot></slot>标签对临时占位;
父组件:
在调用子组件标签对时,
往子组件标签对间
写上 要替换子组件标签对中<slot></slot>位置的组件
【slot】的出现,
方便父子组件之间数据的传递,
方便DOM的传递;
<!DOCTYPE html><html><head> <meta charset="UTF-8"> <meta name="viewport" content="width=device-width, initial-scale=1.0"> <title>Hello World! heheheheheheda</title> <script src="https://unpkg.com/vue@next"></script></head><body> <div id="heheApp"></div></body><script> const app = Vue.createApp({ template: ` <myform> <div>提交</div> </myform> <myform> <button>提交</button> </myform>` }); app.component('myform', { template:` <div> <input /> <slot></slot> <br><br> </div> ` }); const vm = app.mount('#heheApp');</script></html>运行效果: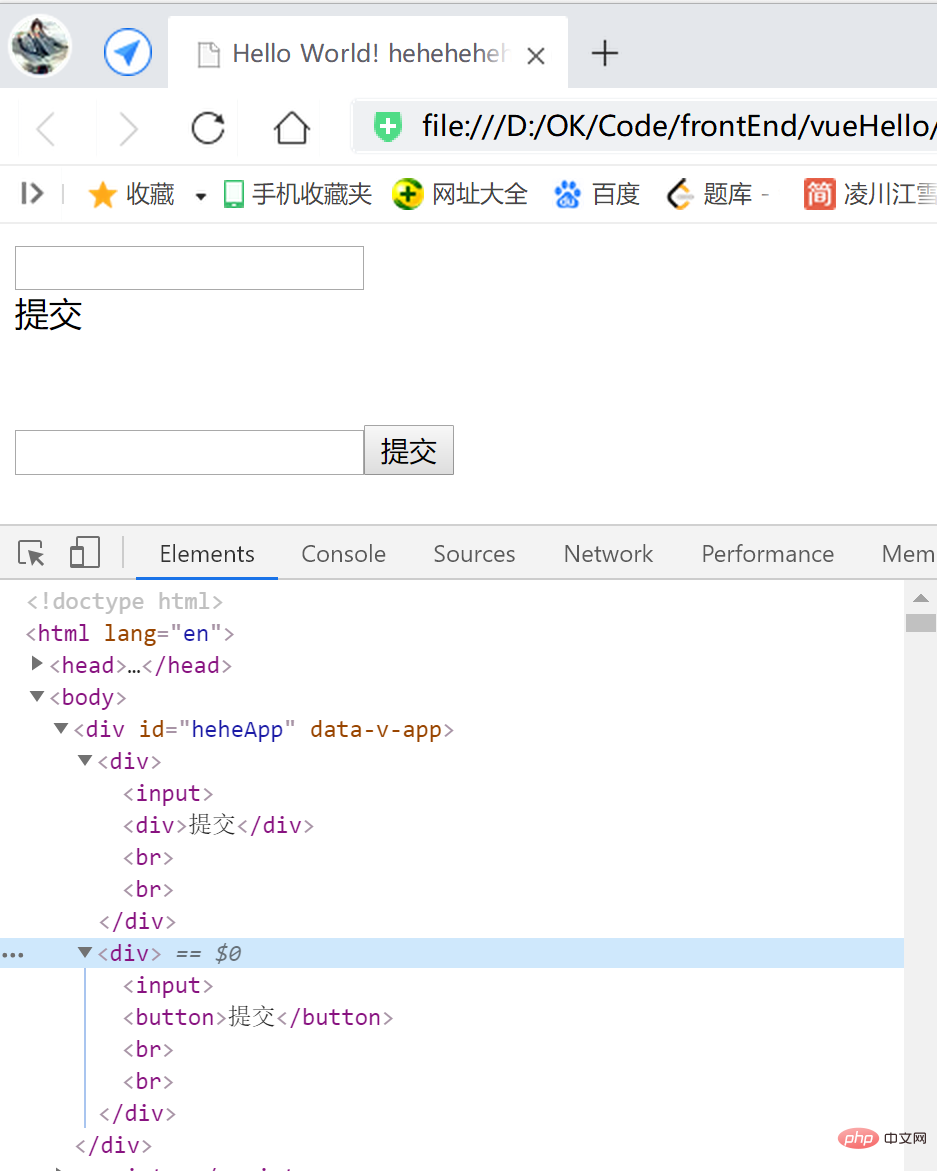
注意,slot标签上是无法直接增加事件(修饰符)的,如有需要,可以在外层包裹一层标签,再加上事件
<script> const app = Vue.createApp({ template: ` <myform> <div>提交</div> </myform> <myform> <button>提交</button> </myform>` }); app.component('myform', { methods: { handleClick() { console.log("heheda!!==="); } }, template:` <div> <input /> <span @click="handleClick"> <slot></slot> </span> <br><br> </div> ` }); const vm = app.mount('#heheApp');</script>运行,点击提交文本或者按钮: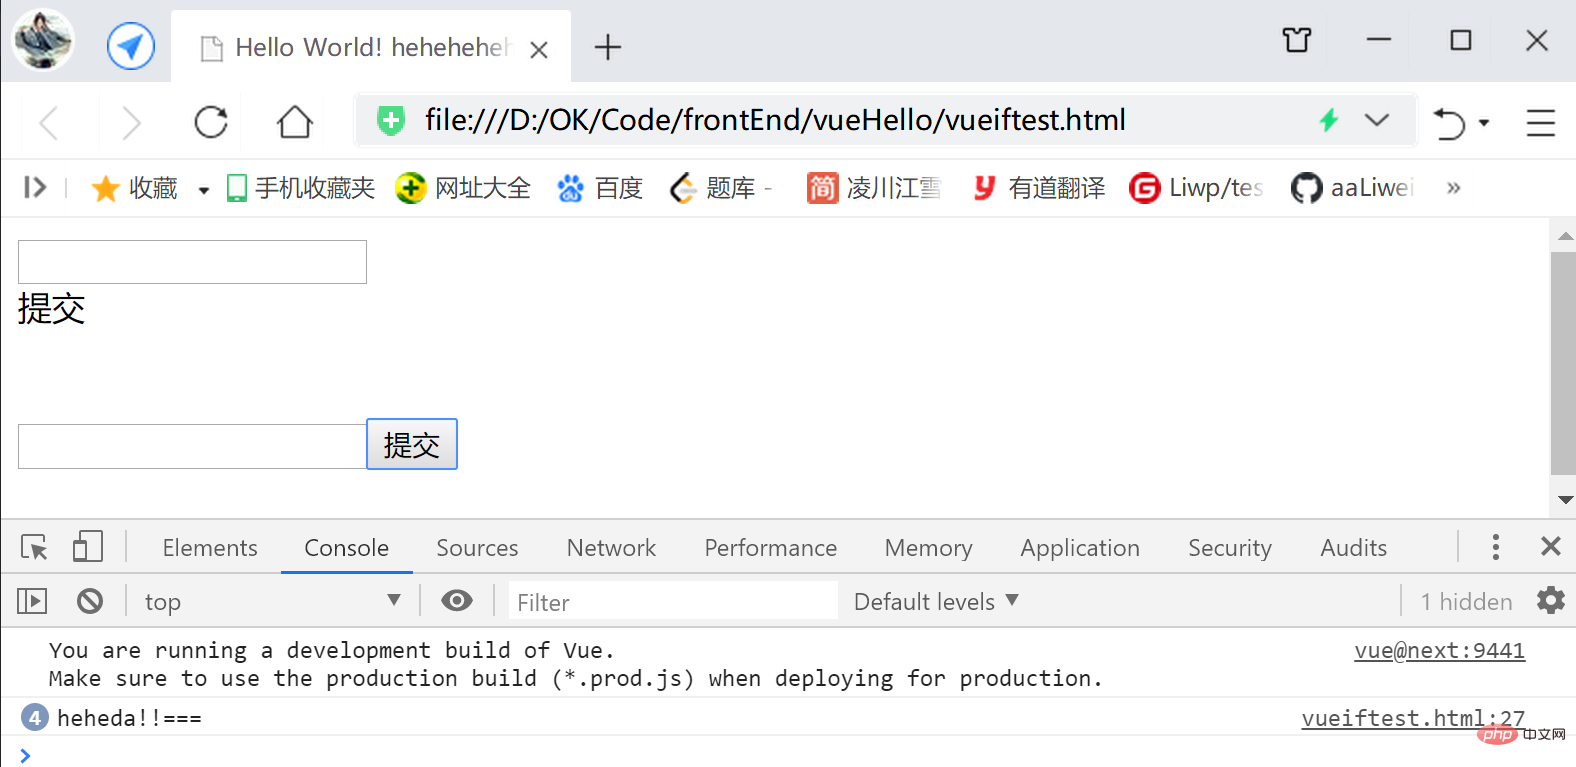
插槽【传 字符串示例】
<script> const app = Vue.createApp({ template: ` <myform> 66666 </myform> <myform> 88888 </myform>` }); app.component('myform', { methods: { handleClick() { console.log("heheda!!==="); } }, template:` <div> <input /> <span @click="handleClick"> <slot></slot> </span> <br><br> </div> ` }); const vm = app.mount('#heheApp');</script>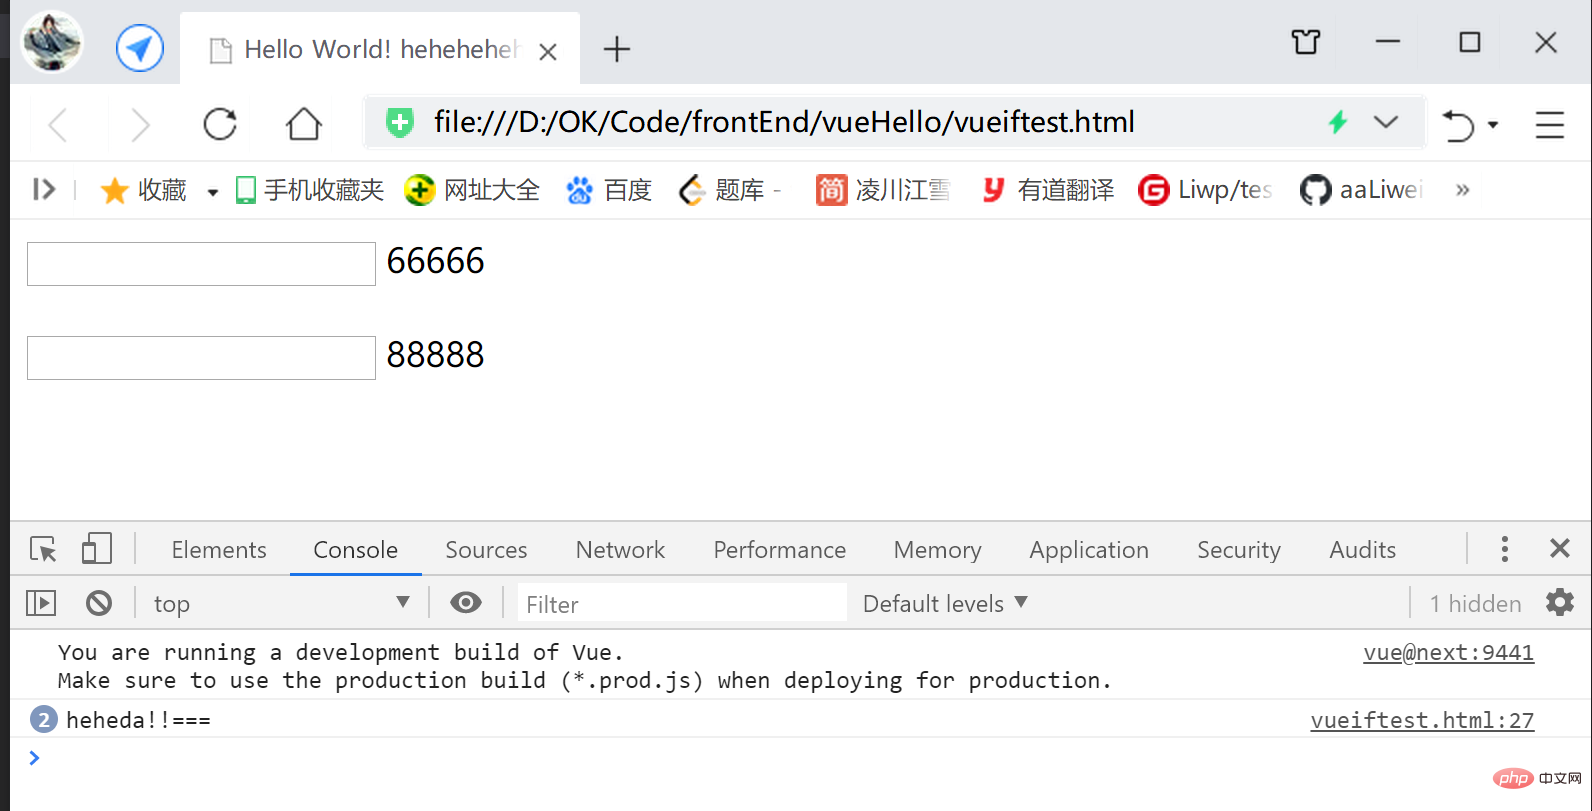
插槽【传 自己设置子组件 示例】
<script> const app = Vue.createApp({ template: ` <myform> <test /> </myform> <myform> 88888 </myform>` }); app.component('test', { template: `<div>test component</div>` }) app.component('myform', { methods: { handleClick() { console.log("heheda!!==="); } }, template:` <div> <input /> <span @click="handleClick"> <slot></slot> </span> <br><br> </div> ` }); const vm = app.mount('#heheApp');</script>运行: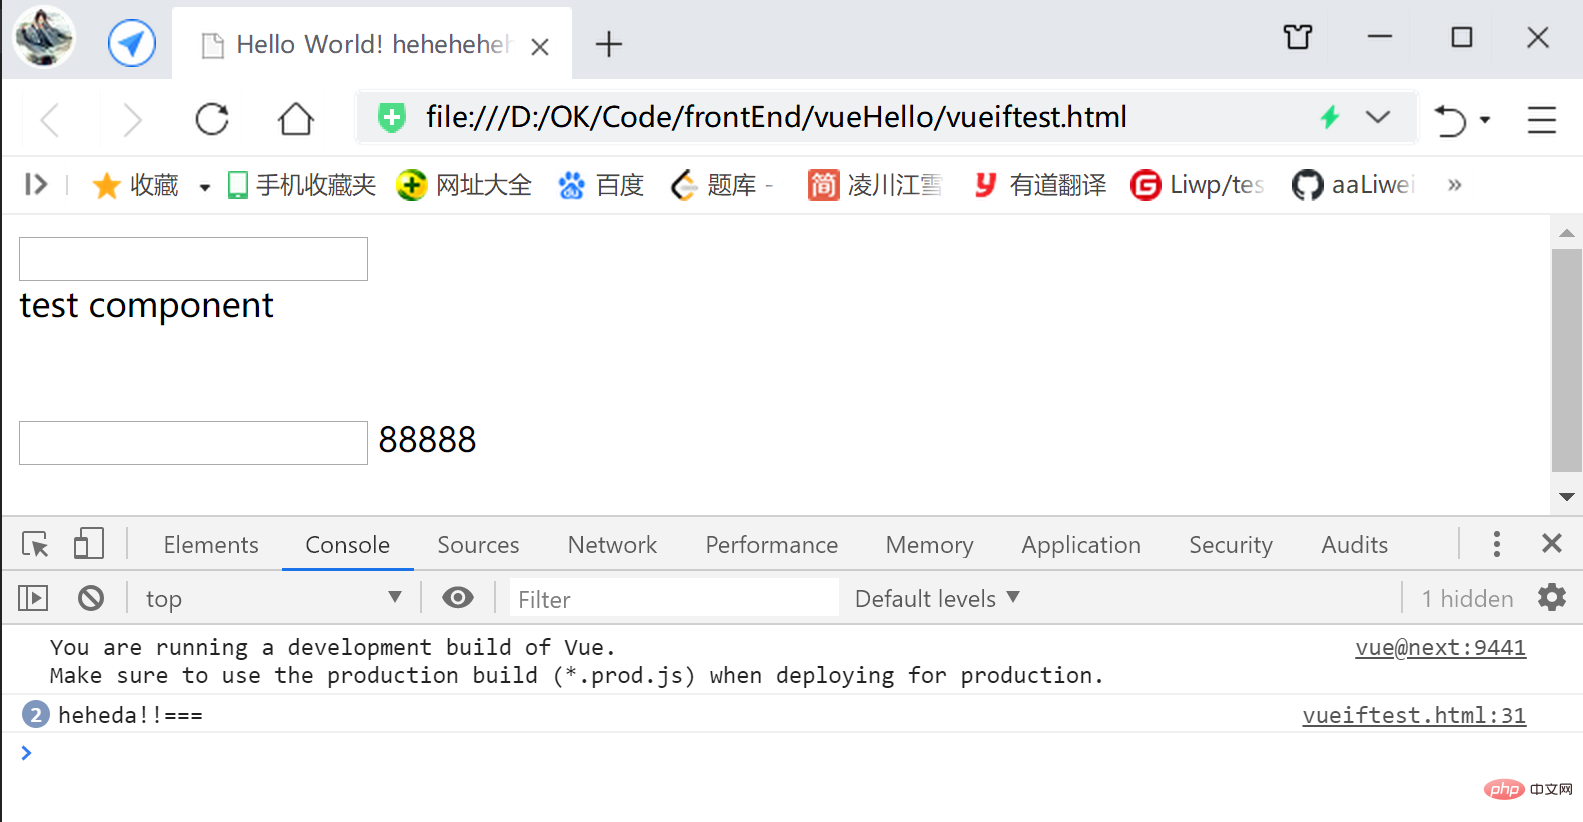
插槽作用域问题
尽管,
父组件中 往子组件标签间 插入的组件 会替换子组件的插槽位,
但是父组件中 往子组件标签间 插入的组件,
其所使用的数据字段,依然是父组件的,而非子组件;
父组件的template中 调用的数据是 父组件中的 data;
子组件的template中 调用的数据是 子组件中的 data;
<script> const app = Vue.createApp({ data() { return { text: '提交' } }, template: ` <myform> <div>{{text}}</div> </myform> <myform> <button>{{text}}</button> </myform>` }); app.component('myform', { methods: { handleClick() { console.log("heheda!!==="); } }, template:` <div> <input /> <span @click="handleClick"> <slot></slot> </span> <br><br> </div> ` }); const vm = app.mount('#heheApp');</script>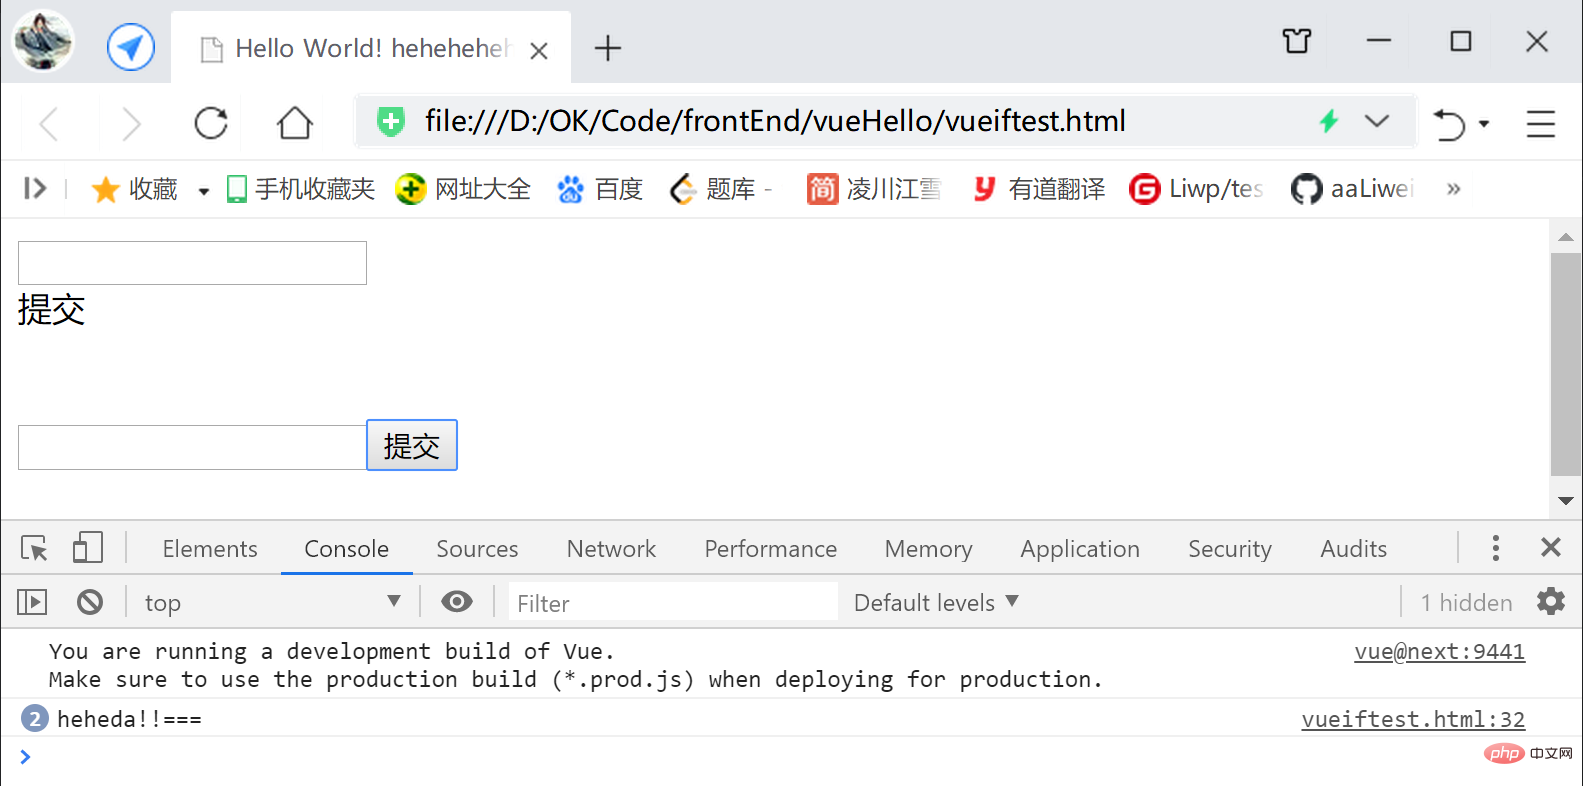
插槽 UI默认值
可以在子组件的
插槽<slot>标签</slot>间 编写默认值,
假如父组件没有使用 组件 注入插槽,
则对应位置 会显示默认值:
<script> const app = Vue.createApp({ data() { return { text: '提交' } }, template: ` <myform> <div>{{text}}</div> </myform> <myform> <button>{{text}}</button> </myform> <myform> </myform>` }); app.component('myform', { methods: { handleClick() { console.log("heheda!!==="); } }, template:` <div> <input /> <span @click="handleClick"> <slot>default value</slot> </span> <br><br> </div> ` }); const vm = app.mount('#heheApp');</script>效果: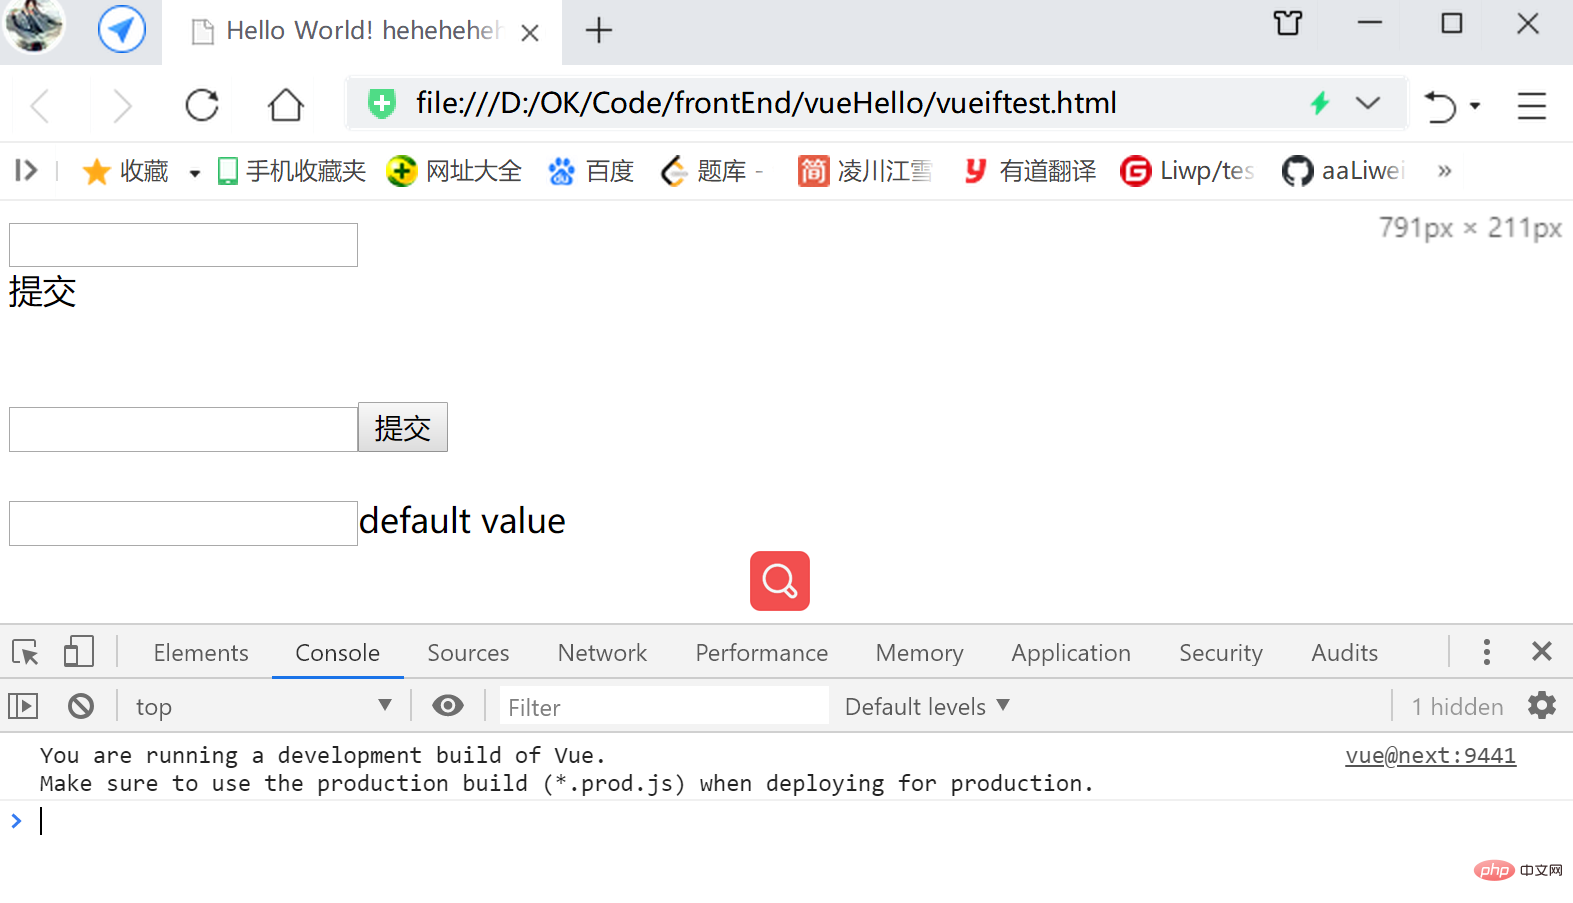
插槽的灵活拆分与应用【具名插槽】
使得插槽的 父组件注入部分 和 子组件占位部分,能够更加灵活的布局,
可以通过v-slot:[插槽名]来对一组插槽命名,
父组件定义之后插槽名及其对应的组件之后,
子组件只要要在要占位的地方,
配合name属性 使用对应命名的标签,
就可将对应的父组件插槽组件占用过来;父组件 的插槽注入部分的组件,
需要用标签组包裹起来,
使用v-slot:[插槽名]命名一组插槽;子组件使用
<slot name="[插槽名]"></slot>的形式,进行插槽组件块的临时占用;
<script> const app = Vue.createApp({ template: ` <layout> <template v-slot:header> <div>头部</div> </template> <template v-slot:footer> <div>尾部</div> </template> </layout>` }); app.component('layout', { template:` <div> <slot name="header"></slot> <div>content</div> <slot name="footer"></slot> </div> ` }); const vm = app.mount('#heheApp');</script>效果: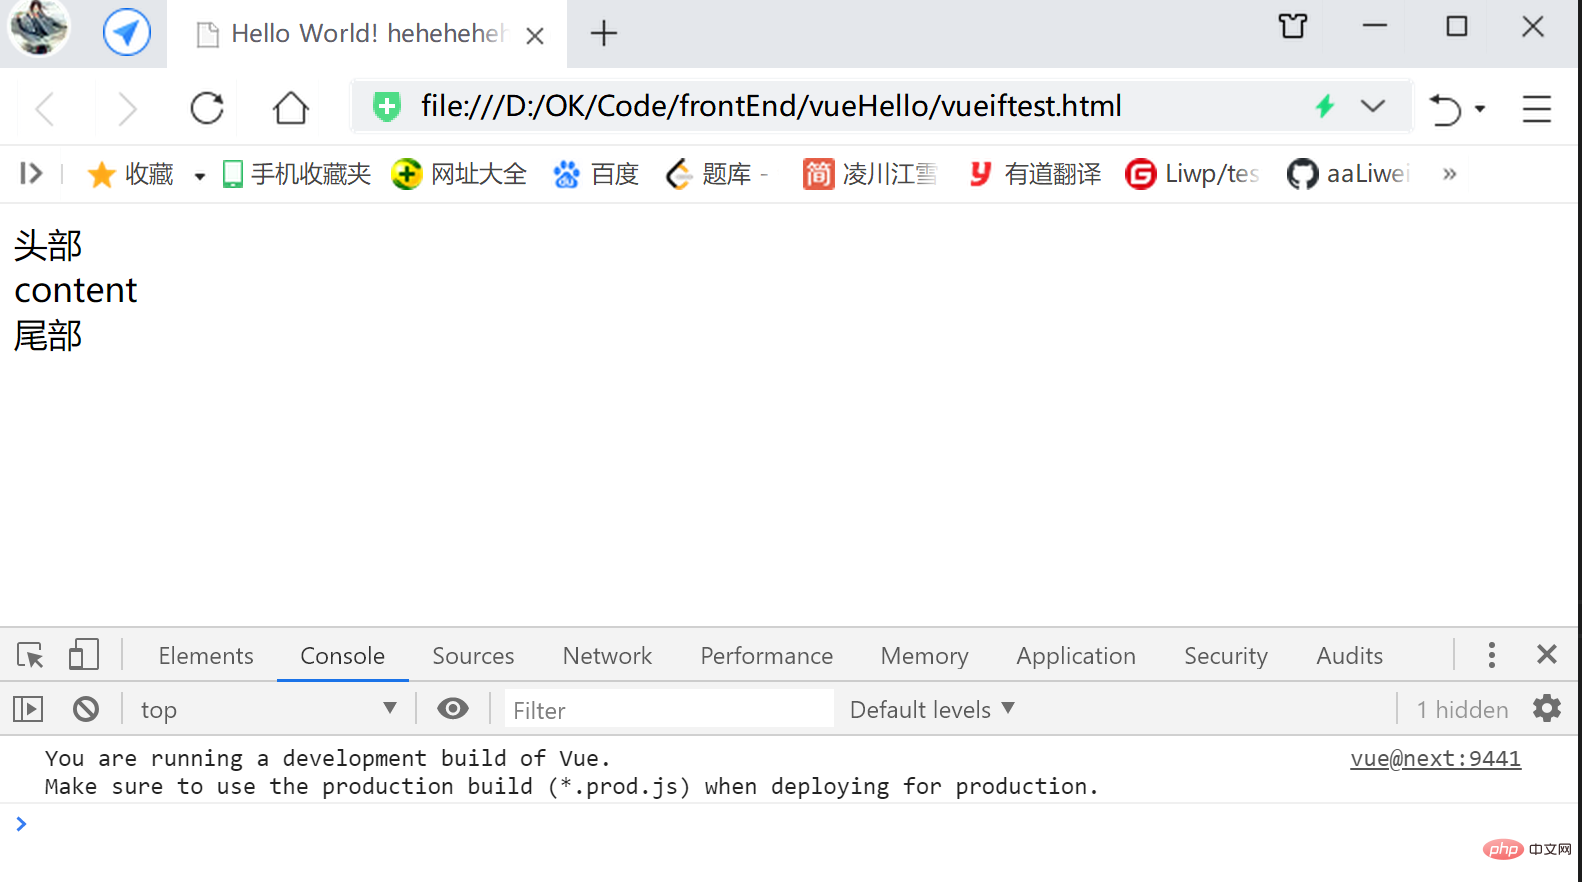
v-slot指令的简写
v-slot:[插槽名] 可以简写成 #[插槽名]
<script> const app = Vue.createApp({ template: ` <layout> <template #header> <div>头部</div> </template> <template #footer> <div>尾部</div> </template> </layout>` }); app.component('layout', { template:` <div> <slot name="header"></slot> <div>content</div> <slot name="footer"></slot> </div> ` }); const vm = app.mount('#heheApp');</script>实现的效果同上例;
普通的v-for例子 进行 列表渲染
下面在子组件中,
使用v-for指令 循环 子组件的数据,创立DOM组件:
<script> const app = Vue.createApp({ template: ` <test-list />` }); app.component('test-list', { data(){ return { list: ["heheda", "xixi" , "lueluelue"] } }, template:` <div> <div v-for="item in list">{{item}}</div> </div> ` }); const vm = app.mount('#heheApp');</script>运行效果: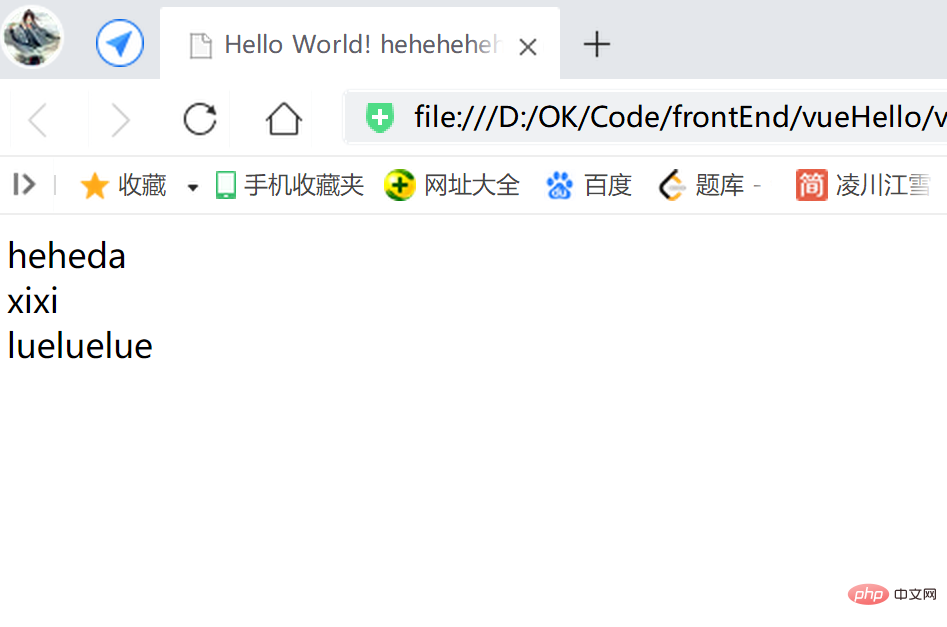
v-for结合v-bind、v-slot、<slot></slot>做列表渲染
作用:给
数据由子组件提供,
但列表UI实现由父组件调用处提供,
相似于回调接口的设计逻辑!!!
子组件使用v-for循环获取数据,
每一轮迭代 取得的子项数据,
通过v-bind设置到占位的<slot>标签</slot>中,
父组件中,在引用的 子组件标签上,
使用v-slot承接 子组件通过v-bind传来的所有数据字段,
同时将这些字段打包成一个相似JSONObject的结构 字段,
并为这个字段 指定一个形参名(如下代码中的mySlotProps);
【注意!
前面是,
使用v-slot命名父组件中 拟填充插槽的组件,
子组件在<slot>标签</slot>上,通过name=使用 父组件的命名,灵活填充插槽;
而这里是,
的slot反而是起到了相似props的作用,而非之前的命名组件作用!】
在 拟填充插槽的DOM组件中,
使用方才 v-slot指定的形参,用于开箱取数据:
<script> const app = Vue.createApp({ template: ` <test-list v-slot="mySlotProps"> <div>{{mySlotProps.item}}</div> </test-list>` }); app.component('test-list', { data(){ return { list: ["heheda", "xixi" , "lueluelue"] } }, template:` <div> <slot v-for="item in list" :item="item" /> </div> ` }); const vm = app.mount('#heheApp');</script>运行效果同上例;
使用解构概念进行简写
使用v-slot="{item}"替代前面的props的结构逻辑形式;
意义是,把mySlotProps这个承接属性的字段,
里面的item属性直接解构 剥取出来,直接拿来用;
<script> const app = Vue.createApp({ template: ` <test-list v-slot="{item}"> <div>{{item}}</div> </test-list>` }); app.component('test-list', { data(){ return { list: ["heheda", "xixi" , "lueluelue"] } }, template:` <div> <slot v-for="item in list" :item="item" /> </div> ` }); const vm = app.mount('#heheApp');</script>运行效果同上例;
动态组件
常规的利用双向绑定特性,通过点击事件切换UI的写法:
<script> const app = Vue.createApp({ data() { return { currentItem: 'input-item' } }, methods: { handlerClick() { this.currentItem === 'input-item'? this.currentItem = 'div-item': this.currentItem = 'input-item' } }, template: ` <input-item v-show="currentItem === 'input-item'" /> <div-item v-show="currentItem === 'div-item'" /> <button @click="handlerClick">切换DOM组件</button>` }); app.component('input-item', { template:` <input />` }); app.component('div-item', { template:`<div>heheda</div>` }); const vm = app.mount('#heheApp');</script>运行效果:
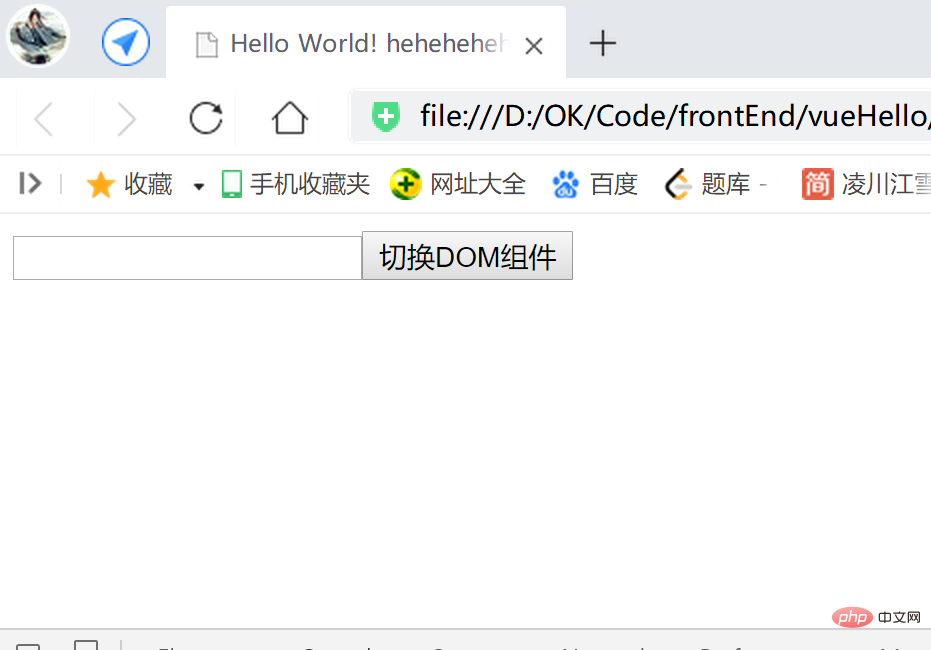
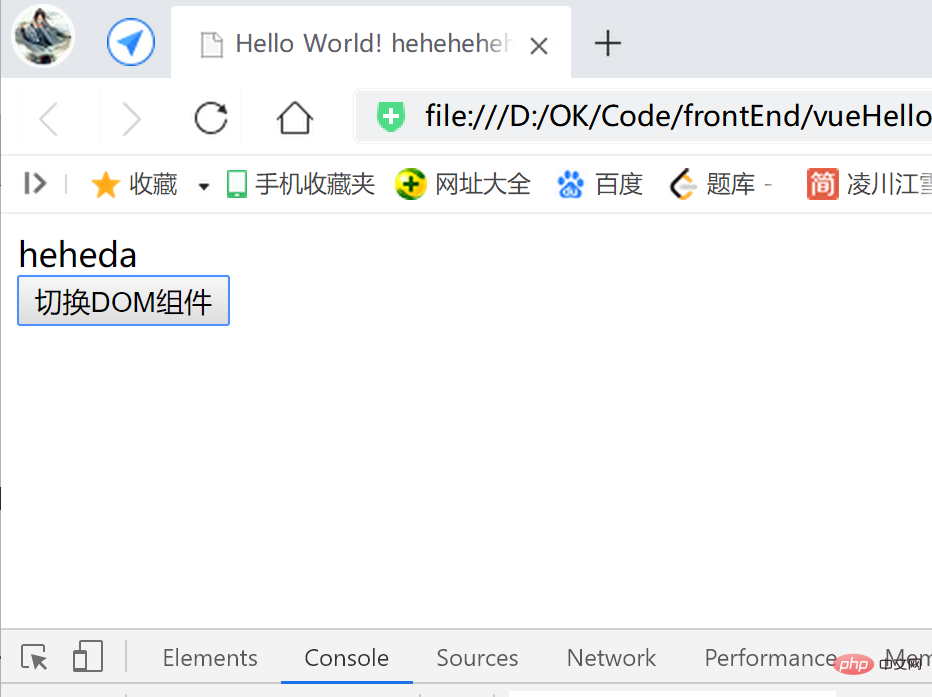
动态组件写法
语法:
一般在父组件中,
使用占位标签<component :is="[需显示的 子组件名]"></component>,
效果即 占位位置,会显示is属性 指定组件名的子组件;
另外,
使用<keep-alive></keep-alive>标签,包裹<component :is="[需显示的 子组件名]"></component>,
可以是切换组件的时候,能够缓存组件的数据,
如一个有输入数据的 切换成一个其余组件 再切换 回来的时候,
可以保留一开始的输入数据:
<script> const app = Vue.createApp({ data() { return { currentItem: 'input-item' } }, methods: { handlerClick() { console.log("handlerClick ----- "); this.currentItem === 'input-item'? this.currentItem = 'div-item': this.currentItem = 'input-item' } }, template: ` <keep-alive> <component :is="currentItem" /> </keep-alive> <button @click="handlerClick">切换DOM组件</button>` }); app.component('input-item', { template:` <input />` }); app.component('div-item', { template:`<div>heheda</div>` }); const vm = app.mount('#heheApp');</script>运行效果:
初始为有输入数据的输入框:
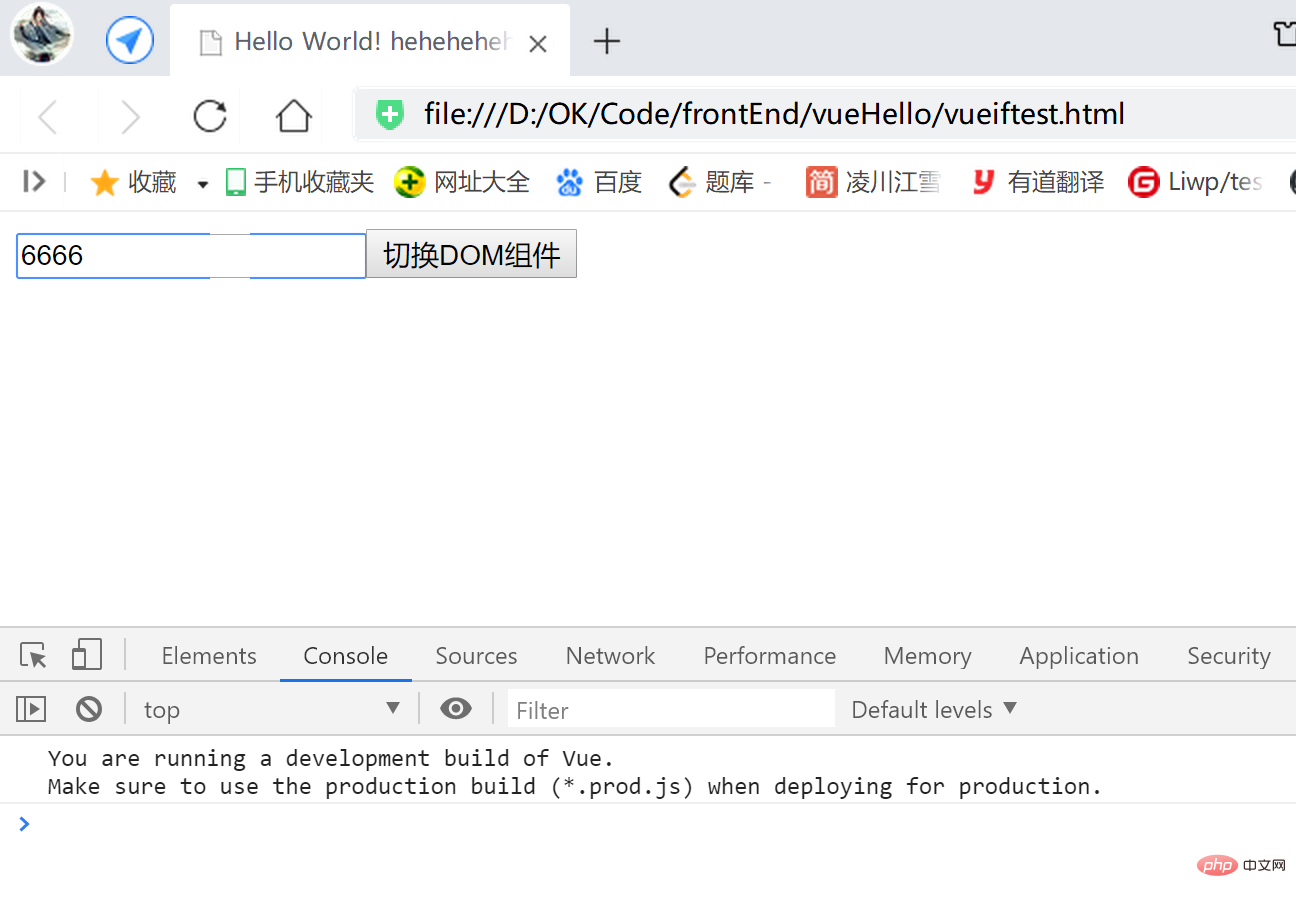 点击切换为文本组件:
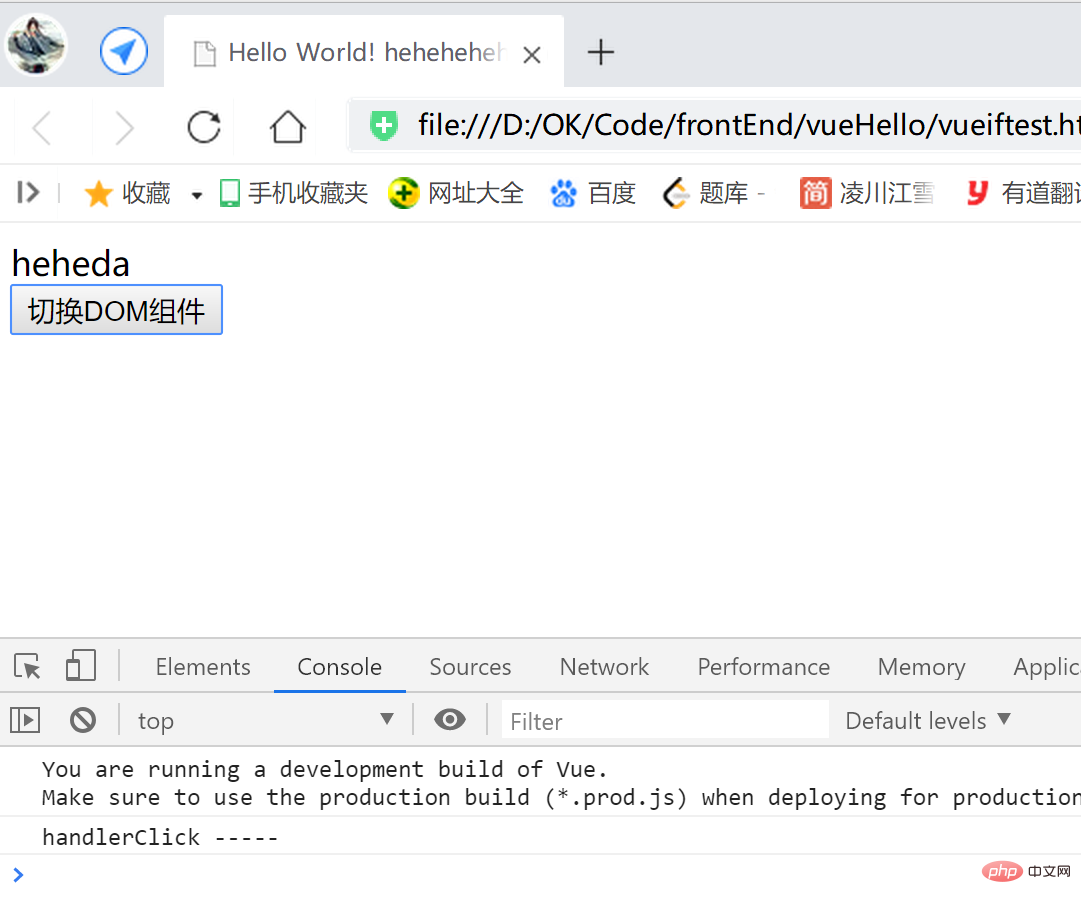 再次点击,切换为
有输入数据的输入框,
因为<keep-alive></keep-alive>的作用,数据缓存下来,没有丢失,
假如没加<keep-alive></keep-alive>,这里会是空的输入框: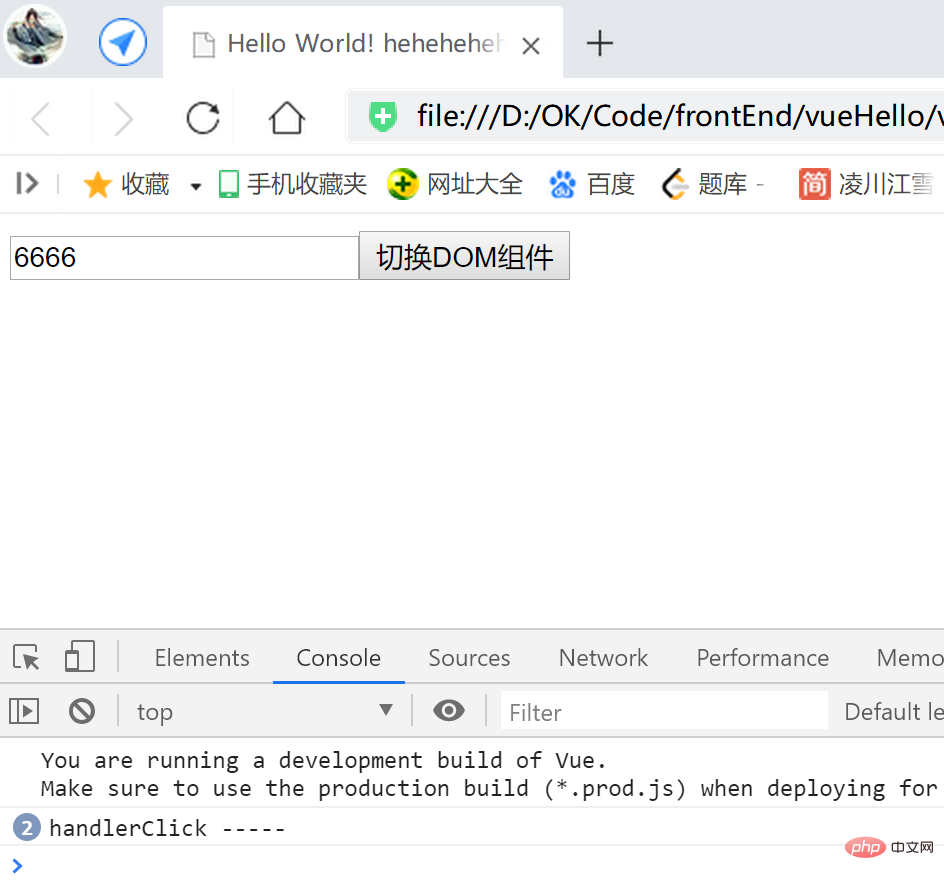
异步组件
首先,
本文在此案例之前的所有案例,都是同步组件,
即随即渲染,一个线程运行;
下面是异步(自己设置子)组件,
可以设定在某个时刻开始,推迟一个时延后,再执行渲染:
<script> const app = Vue.createApp({ template: ` <div> <div-item /> <my-async-item /> </div>` }); app.component('div-item', { template:`<div>heheda heheda</div>` }); app.component('my-async-item', Vue.defineAsyncComponent(() => { return new Promise((resolve, reject) => { setTimeout(() => { resolve({ template: `<div>this is my async component</div>` }) }, 4000) }) })) const vm = app.mount('#heheApp');</script>关键代码【异步(自己设置子)组件】:
app.component('my-async-item', Vue.defineAsyncComponent(() => { return new Promise((resolve, reject) => { setTimeout(() => { resolve({ template: `<div>this is my async component</div>` }) }, 4000) }) }))运行效果: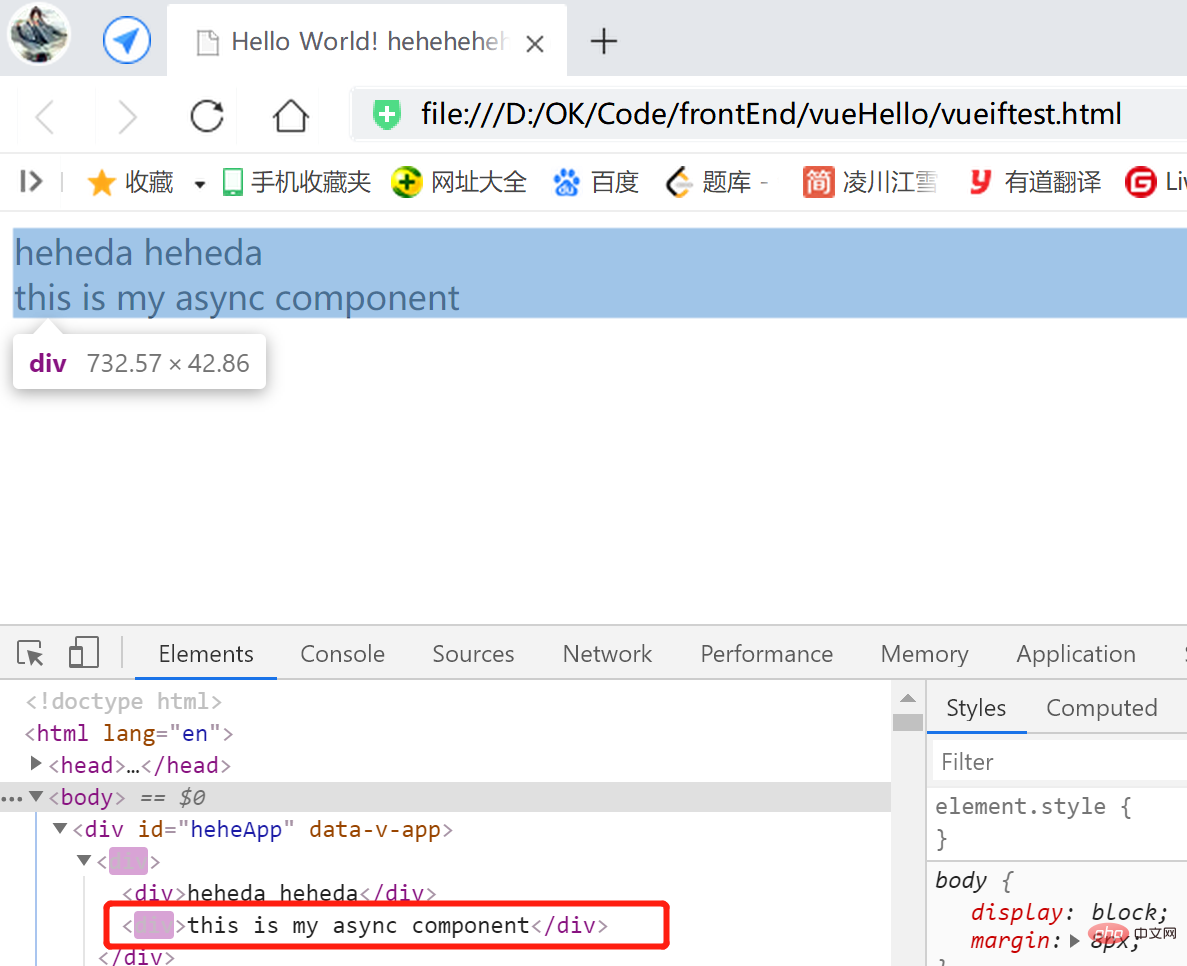
Das obige ist der detaillierte Inhalt vonMethoden für die Kommunikation zwischen übergeordneten und untergeordneten Vue3-Komponenten und die bidirektionale Bindung zwischen Komponenten. Für weitere Informationen folgen Sie bitte anderen verwandten Artikeln auf der PHP chinesischen Website!
In Verbindung stehende Artikel
Mehr sehen- Über Vue mit Validator: VeeValidate3
- Was sind die Unterschiede zwischen berechnet und Methode in Vue?
- Einführung in die Methode zum Deaktivieren der Eslint-Überprüfung im Vue-Projekt
- Einführung in verschiedene Methoden zum Definieren von Komponentenvorlagen in Vue.js
- Vier Orte zur Implementierung von AJAX in Vue-Anwendungen

