Heim >häufiges Problem >So beheben Sie, dass der Microsoft Store unter Windows 11 nicht funktioniert
So beheben Sie, dass der Microsoft Store unter Windows 11 nicht funktioniert
- 王林nach vorne
- 2023-05-01 20:22:042317Durchsuche
Microsoft Store 是一个官方网站,供 Windows 用户下载应用程序到他们的系统。一些用户注意到,MS Store 在下载应用程序时不断崩溃或无法打开,或冻结。在某些情况下,人们已经看到这个问题超过一年了。
如果您在系统上的 MS Store 中遇到此问题,请不要担心。我们编译了一些修复程序,可帮助您解决 Microsoft Store 的此问题。
修复 1:更改区域设置
1.使用Windows+R打开运行窗口。
2. 键入命令 ms-settings:regionlanguage并按Enter。
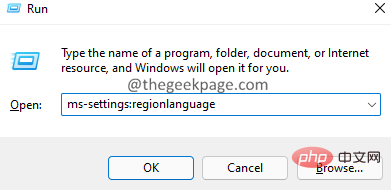
3. 在打开的窗口中,在语言 部分下,找到Windows 显示语言。
4. 单击旁边的下拉菜单并选择适当的语言。
5. 向下滚动到区域部分。
6. 从国家或地区旁边的下拉列表中,选择您的国家。
7. 从区域格式旁边的下拉列表中,选择推荐 或适当的格式。
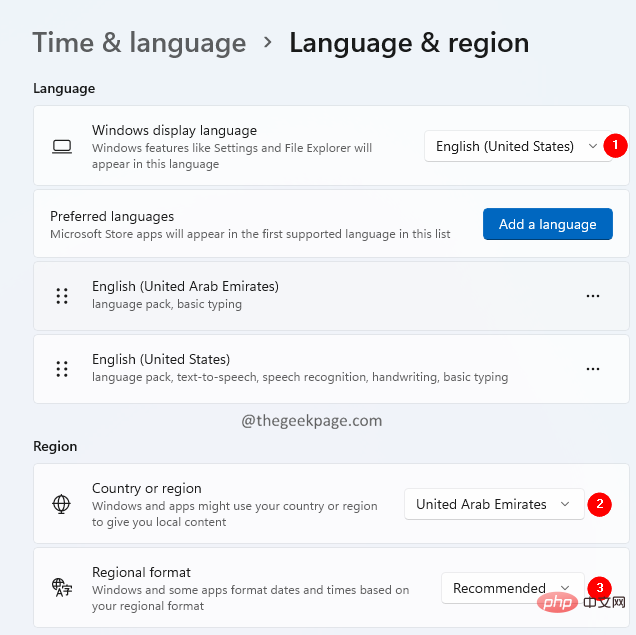
8. 更改完成后,重新启动系统。
修复 2:重置存储缓存
1.使用Windows+R打开运行对话框。
2. 键入wsreset.exe并单击确定按钮。
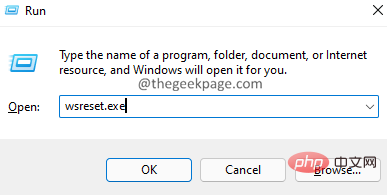
3. 现在,您应该看到一个黑色的窗口打开。窗口运行并重置缓存。
5. 耐心等待,因为这需要一些时间。
4. 重置完成后,尝试打开 MS Store。
修复 3:卸载并重新安装 Microsoft 软件包
1.使用Windows+R打开运行对话框。
2. 键入powershell并按住Ctrl+Shift+Enter 键。这将在管理员模式下打开 PowerShell。
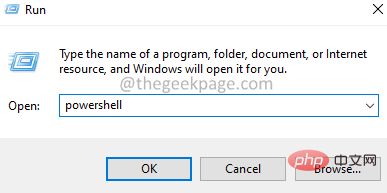
3. 如果您看到 UAC 窗口弹出,请单击是。
4. 在打开的 PowerShell 窗口中,粘贴以下命令并按 Enter。
获取-AppxPackage -allusers Microsoft.WindowsStore | 选择包全名
5. 将显示 Windows 应用商店的包全名。复制全名。

6.现在,输入以下命令
Add-AppxPackage -register “C:\Program Files\WindowsApps\\AppXManifest.xml” –DisableDevelopmentMode
在我们的例子中,由于包全名是Microsoft.WindowsStore_22112.1401.2.0_x64__8wekyb3d8bbwe,我们将上述命令调整为:
添加-AppxPackage -注册“C:\Program Files\WindowsApps\Microsoft.WindowsStore_22112.1401.2.0_x64__8wekyb3d8bbwe\AppXManifest.xml

笔记:
- 确保使用步骤 5 中复制的 PackageFullName 更改上述命令中的 PackageFullName >。
- 我们在上面的命令中使用C : 因为操作系统安装在 C 驱动器中。如果操作系统安装在其他位置,请确保使用正确的磁盘名称。
修复 4:重新注册 MS Store
1. 打开PowerShell窗口(请参阅修复 3 中的步骤 1-3)。
2. 在打开的 PowerShell 窗口中,粘贴以下命令并按 Enter。
PowerShell -ExecutionPolicy Unrestricted -Command "& {$manifest = (Get-AppxPackage Microsoft.WindowsStore).InstallLocation + 'AppxManifest.xml' ; Add-AppxPackage -DisableDevelopmentMode -Register $manifest}"
修复 5:部署应用程序包
1. 以管理员权限打开PowerShell窗口(请参阅修复 3 中的步骤 1-3)。
2. 在打开的窗口中,输入以下命令并按 Enter。
((Get-ChildItem “HKLM:SOFTWARE\Microsoft\Windows\CurrentVersion\Appx\AppxAllUserStore\InboxApplications”) | Get-ItemProperty).Path | 添加-AppxPackage -Register -DisableDevelopmentMode
修复 6:重新安装所有应用程序
1. 以管理员权限打开PowerShell窗口(请参阅修复 3 中的步骤 1-3)。
2. 在打开的窗口中,输入以下命令并按 Enter。
获取-AppxPackage -AllUsers| Foreach {Add-AppxPackage -DisableDevelopmentMode -Register “$($_.InstallLocation)\AppXManifest.xml”}修复 7:从设置中重置 MS Store
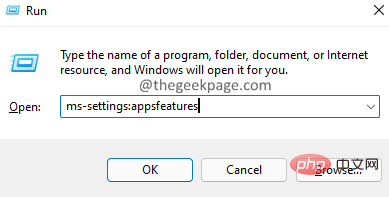
1.使用Windows+R打开运行对话框。
2.输入 ms-settings:appsfeatures 并点击Ok按钮。
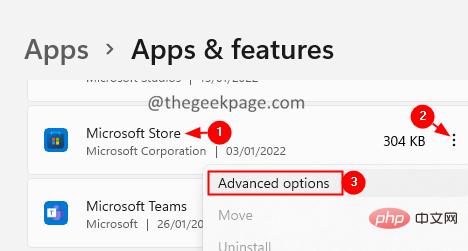
3. 在出现的窗口中,向下滚动并找到Microsoft Store。
4. 单击Microsoft Store旁边的三个点。
5. Klicken Sie im Kontextmenü auf Erweiterte Optionen.
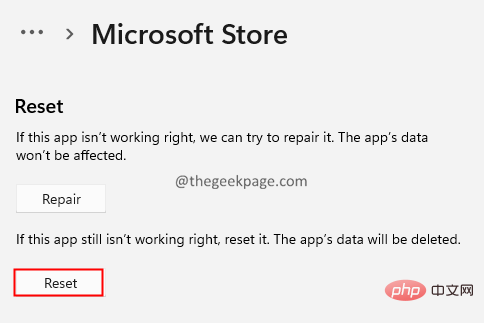
6. Scrollen Sie im sich öffnenden Fenster nach unten zum Abschnitt RESET.
7. Klicken Sie auf die Schaltfläche RESET .
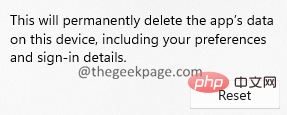
8. Klicken Sie im angezeigten Fenster auf die Schaltfläche RESET.
9. Starten Sie das System neu.
Fix 8: MS Store-Fehlerbehebung ausführen
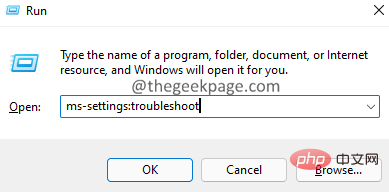
1. Verwenden Sie Windows+R, um das Dialogfeld Ausführen zu öffnen.
2. Geben Sie den Befehl ms-settings:troubleshoot ein und drücken Sie zur Eingabe .
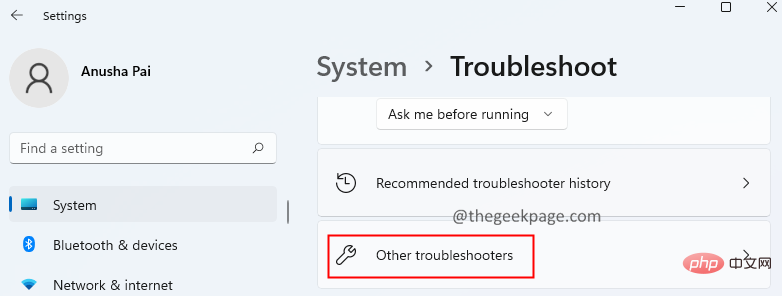
3. Klicken Sie im sich öffnenden Fenster auf Andere Fehlerbehebungen.
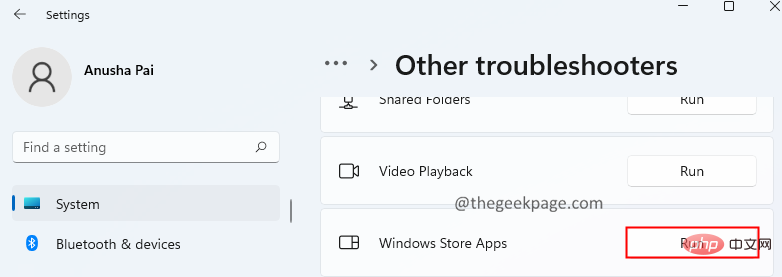
4. Scrollen Sie nach unten und finden Sie Windows Store Apps.
5. Klicken Sie auf die Schaltfläche Ausführen neben Windows Store App
#🎜 🎜 #
Das obige ist der detaillierte Inhalt vonSo beheben Sie, dass der Microsoft Store unter Windows 11 nicht funktioniert. Für weitere Informationen folgen Sie bitte anderen verwandten Artikeln auf der PHP chinesischen Website!
In Verbindung stehende Artikel
Mehr sehen- Was bedeutet Iframe im Frontend?
- Aus wie vielen Teilen besteht eine HTTP-Nachricht?
- Apple-Fans schnappen sich den iPod Touch, alle Modelle sind in den USA ausverkauft
- Was ist eine Marketing-Website?
- Apple untersucht, wie HomePods, Macs und iPhones zur Verbesserung der Schlafüberwachung eingesetzt werden können

