Heim >Web-Frontend >Bootstrap-Tutorial >Wie man mit Django und Bootstrap einen Taschenrechner erstellt (praktisch)
Wie man mit Django und Bootstrap einen Taschenrechner erstellt (praktisch)
- 青灯夜游nach vorne
- 2021-12-13 19:02:162873Durchsuche
Dieser Artikel führt Sie Schritt für Schritt durch die Verwendung von Django+ Bootstrap zum Erstellen eines Taschenrechners. Ich hoffe, er wird Ihnen hilfreich sein!

Vorbereitung
Erstellen Sie eine Anwendung.

Anwendung zur Konfiguration hinzufügen

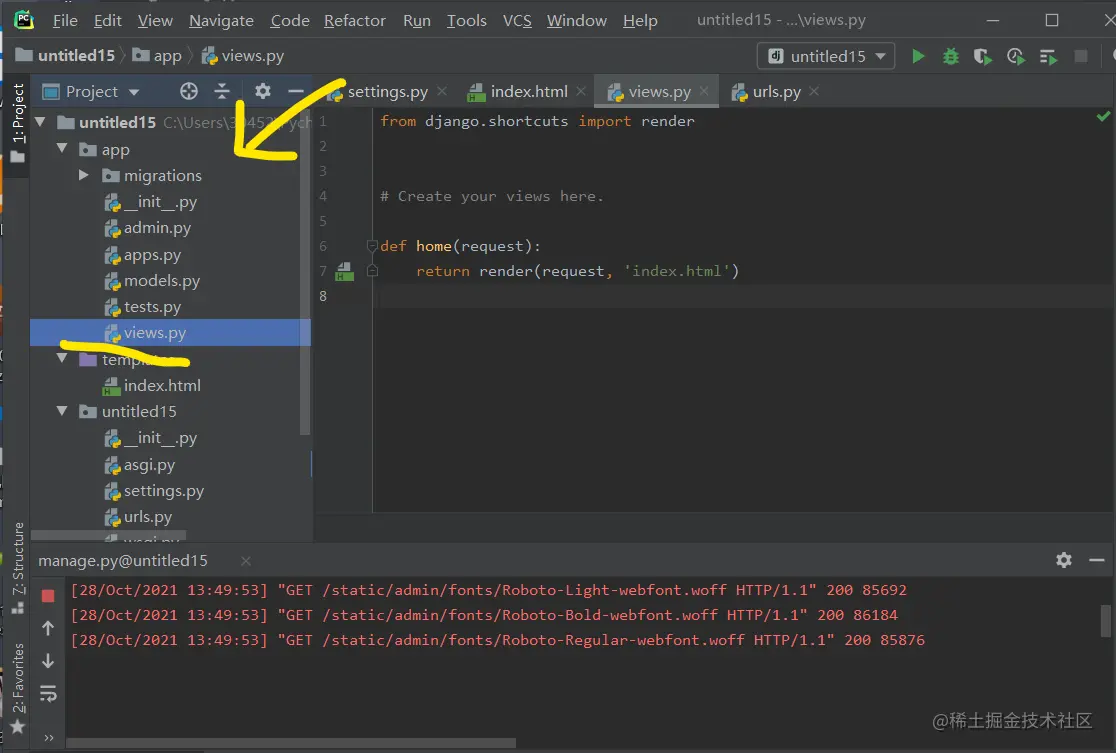
from django.shortcuts import render


# Create your views here.

def home(request):
    return render(request, 'index.html')

Download-Adresse: Schriftarten, js Beim Kopieren in den statischen Ordner wird der Ordner erstellt. [Verwandte Empfehlungen: „ Bootstrap-Tutorial

from django.contrib import admin
from django.urls import path,include

from app.views import home

urlpatterns = [
    path('admin/', admin.site.urls),
    path('',home,name='hoome'),
]
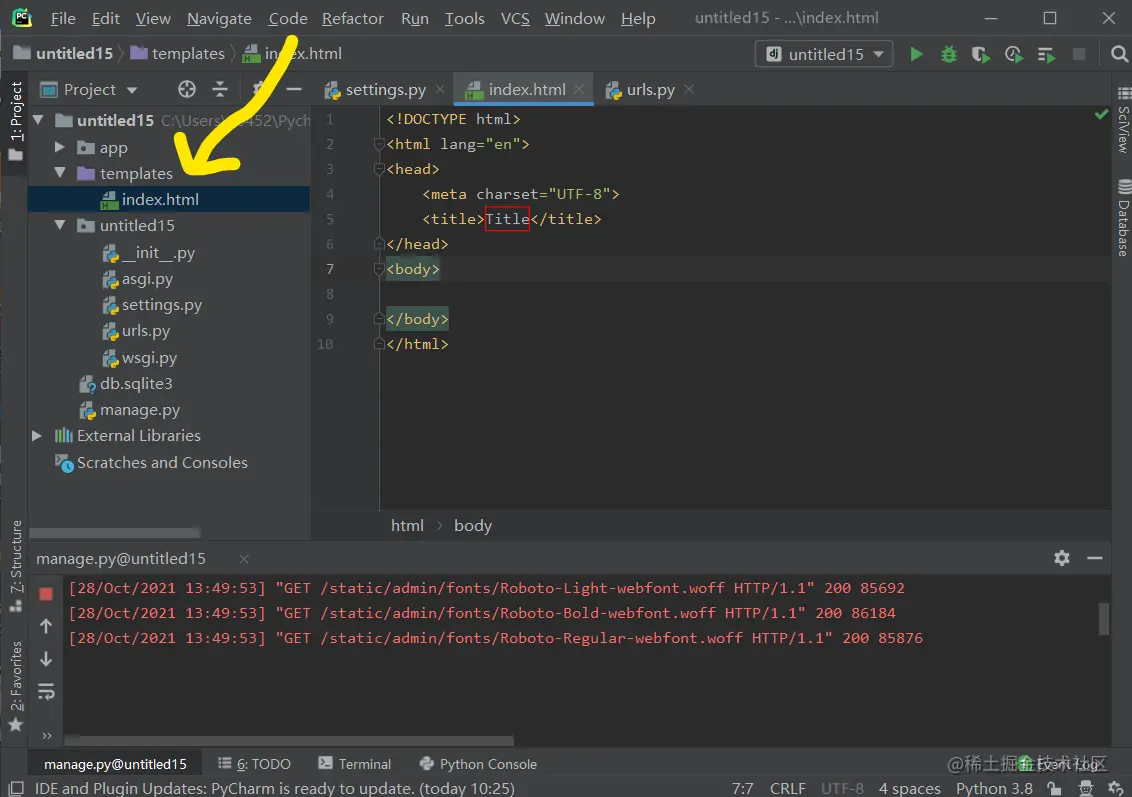
Schreiben von Ansichtsfunktionen{% load static %}
<!DOCTYPE html>
<html>
<head>
<meta charset="UTF-8">
<title>计算器</title>
<link rel="stylesheet" href="{% static 'css/bootstrap.min.css' %}">
<script ></script>
<script src="{% static 'js/bootstrap.min.js' %}"></script>
<style>
body{
background-position: center 0;
background-repeat: no-repeat;
background-attachment: fixed;
background-size: cover;
-webkit-background-size: cover;
-o-background-size: cover;
-moz-background-size: cover;
-ms-background-size:cover;
}
.input_show{
margin-top: 35px;
max-width: 280px;
height: 35px;
}
.btn_num{
margin:1px 1px 1px 1px;
width: 60px;
}
.btn_clear{
margin-left: 40px;
margin-right: 20px;
}
.extenContent{
height: 300px;
}
</style>
</head>
<body>
<div>
<div>
<div class="col-xs-1 col-sm-4"> </div>
<div id="computer" class="col-xs-1 col-sm-6">
<input type="text" id="txt_code" name="txt_code" value="" class="form-control input_show" placeholder="" disabled>
<input type="text" id="txt_result" name="txt_result" value="" class="form-control input_show" placeholder="结果" disabled>
<br>
<div>
<button type="button" class="btn btn-default btn_num" onclick="fun_7()">7</button>
<button type="button" class="btn btn-default btn_num" onclick="fun_8()">8</button>
<button type="button" class="btn btn-default btn_num" onclick="fun_9()">9</button>
<button type="button" class="btn btn-default btn_num" onclick="fun_div()">/</button>
<br>
<button type="button" class="btn btn-default btn_num" onclick="fun_4()">4</button>
<button type="button" class="btn btn-default btn_num" onclick="fun_5()">5</button>
<button type="button" class="btn btn-default btn_num" onclick="fun_6()">6</button>
<button type="button" class="btn btn-default btn_num" onclick="fun_mul()">*</button>
<br>
<button type="button" class="btn btn-default btn_num" onclick="fun_1()">1</button>
<button type="button" class="btn btn-default btn_num" onclick="fun_2()">2</button>
<button type="button" class="btn btn-default btn_num" onclick="fun_3()">3</button>
<button type="button" class="btn btn-default btn_num" onclick="fun_sub()">-</button>
<br>
<button type="button" class="btn btn-default btn_num" onclick="fun_0()">0</button>
<button type="button" class="btn btn-default btn_num" onclick="fun_00()">00</button>
<button type="button" class="btn btn-default btn_num" onclick="fun_dot()">.</button>
<button type="button" class="btn btn-default btn_num" onclick="fun_add()">+</button>
</div>
<div>
<br>
<button type="button" class="btn btn-success btn-lg btn_clear" id="lgbut_clear" onclick="fun_clear()">
清空
</button>
<button type="button" class="btn btn-primary btn-lg" id="lgbut_compute" >
计算
</button>
</div>
</div>
<div class="col-xs-1 col-sm-2"></div>
</div>
</div>
<div></div>
<script>
var x=document.getElementById("txt_code");
var y=document.getElementById("txt_result");
function fun_7() {
x.value+='7';
}
function fun_8() {
x.value+='8';
}
function fun_9() {
x.value+='9';
}
function fun_div() {
x.value+='/';
}
function fun_4() {
x.value+='4';
}
function fun_5() {
x.value+='5';
}
function fun_6() {
x.value+='6';
}
function fun_mul() {
x.value+='*';
}
function fun_1() {
x.value+='1';
}
function fun_2() {
x.value+='2';
}
function fun_3() {
x.value+='3';
}
function fun_sub() {
x.value+='-';
}
function fun_0() {
x.value+='0';
}
function fun_00() {
x.value+='00';
}
function fun_dot() {
x.value+='.';
}
function fun_add() {
x.value+='+';
}
function fun_clear() {
x.value='';
y.value='';
}
</script>
<script>
function ShowResult(data) {
var y = document.getElementById('txt_result');
y.value = data['result'];
}
</script>
<script>
$('#lgbut_compute').click(function () {
$.ajax({
url:'compute/',
type:'POST',
data:{
'code':$('#txt_code').val()
},
dataType:'json',
success:ShowResult
})
})
</script>
</body>
</html>
Testen)
Mehr relevantes Wissen über Bootstrap , können Sie besuchen:
Bootstrap Basic Tutorial! !
Das obige ist der detaillierte Inhalt vonWie man mit Django und Bootstrap einen Taschenrechner erstellt (praktisch). Für weitere Informationen folgen Sie bitte anderen verwandten Artikeln auf der PHP chinesischen Website!
Stellungnahme:
Dieser Artikel ist reproduziert unter:juejin.cn. Bei Verstößen wenden Sie sich bitte an admin@php.cn löschen
Vorheriger Artikel:Wie erreiche ich einen Ladeeffekt in Bootstrap? Lesen Sie die Symbolkomponente (Spinners).Nächster Artikel:Wie erreiche ich einen Ladeeffekt in Bootstrap? Lesen Sie die Symbolkomponente (Spinners).
In Verbindung stehende Artikel
Mehr sehen- Informationen zur Zeichensatzkonfiguration von MySQL in Django
- Verwendung von Django-Redis von Redis
- Wie füge ich eine Liste in Bootstrap hinzu? Eine kurze Analyse der Verwendung von Listengruppen
- Wie verwende ich modale Boxen in Bootstrap? Eine kurze Analyse der Verwendung modaler Komponenten
- Wie verwende ich die Toasts-Komponente in Bootstrap? (Beispielerklärung)


)