Heim >Web-Frontend >uni-app >Einführungs-Tutorial zur Uni-App: Datenbindung, Stilbindung und Ereignisverarbeitung
Einführungs-Tutorial zur Uni-App: Datenbindung, Stilbindung und Ereignisverarbeitung
- coldplay.xixinach vorne
- 2021-01-07 10:01:083594Durchsuche

Empfohlen (kostenlos): Uni-App-Entwicklungs-Tutorial
Artikelverzeichnis
- Vorwort
- 1. Vorlagensyntax und Datenbindung
- 1
- 2 . Bedingtes Rendern
- 2. Klassen- und Stilbindung
- 1. Klassensyntax
- 2. Stilsyntax
- 3. Groß- und Kleinschreibung – dynamische Menüumschaltung
- 3. Ereignisse und Ereignisbindung
- 1.Uni-App-Ereignis
- 2.Ereignisbindung
- 3.Übergabe von Ereignisparametern
- Zusammenfassung
Vorwort
Der Inhalt dieses Artikels besteht hauptsächlich aus 3 Teilen: Deklarieren und Rendern von Variablen, einschließlich bedingtem Rendern ; Die Definition von Stilen über Klasse und Stil sowie die dynamische Bindung umfassen die Übergabe von Ereignisparametern. Alle drei Teile verfügen über dynamische Bindungseigenschaften.
1. Vorlagensyntax und Datenbindung
1. Variablen deklarieren und rendern
Bevor Sie Variablen verwenden, müssen Sie sie zuerst deklarieren, normalerweise im Datenblock, z. B. im Index im Hallo-Uniapp-Projekt. Die in vue definierten Titelvariablen lauten wie folgt:
data() {
    return {
        title: 'Hello'
    }},
Sie können mehrere Variablen im Datenblock des Skriptsprachenblocks definieren und {<!-- -->{}} in der Ansicht verwenden Der Blockcode der Vorlagensprache> ruft Variablen auf und kann mehrere Arten von Variablen binden, einschließlich grundlegender Datentypen, Arrays usw. <code>{<!-- -->{}}调用变量,并且可以绑定多种类型的变量,包括基本数据类型、数组等。
先测试基础数据调用,index.vue如下:
<template>
	<view class="content">
		<image class="logo" src="/static/logo.png"></image>
		<view class="text-area">
			<text class="title">{{title}}</text>
		</view>
		<view class="red">
			hello-{{name}}		</view>
	</view></template><script>
	export default {
		data() {
			return {
				title: 'Hello',
				name: 'Corley'
			}
		},
		onLoad() {
			console.log('index onload')
		},
		onShow() {
			console.log('index onshow')
		},
		onHide() {
			console.log('index onhide')
		},
		methods: {

		}
	}</script><style>
	.content {
		display: flex;
		flex-direction: column;
		align-items: center;
		justify-content: center;
	}

	.logo {
		height: 200rpx;
		width: 200rpx;
		margin-top: 200rpx;
		margin-left: auto;
		margin-right: auto;
		margin-bottom: 50rpx;
	}

	.text-area {
		display: flex;
		justify-content: center;
	}

	.title {
		font-size: 36rpx;
		color: #8f8f94;
	}</style>
显示: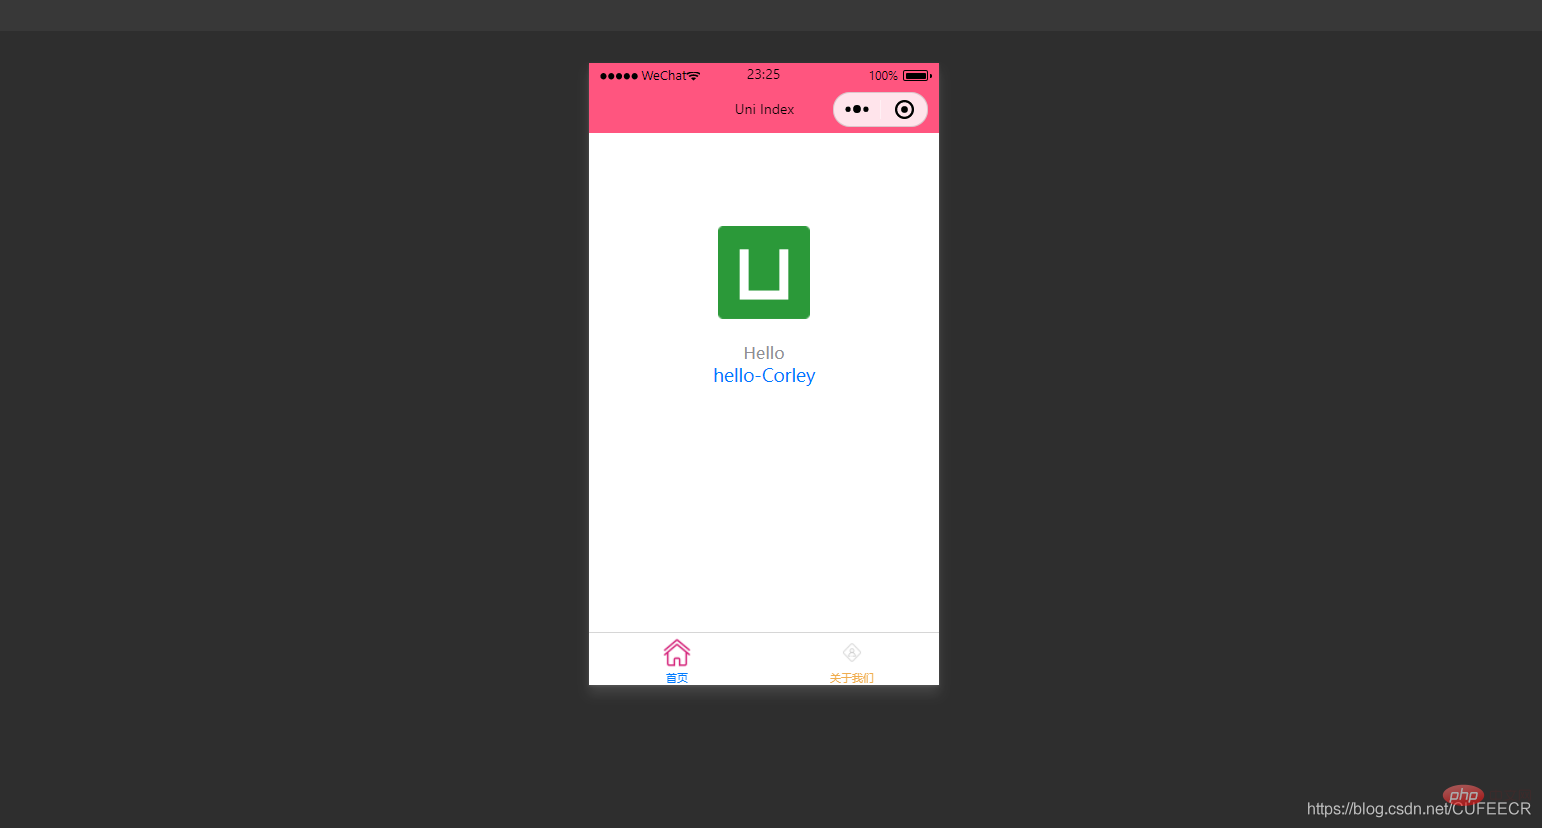
可以看到,定义的title和name变量渲染到了视图中。
需要注意,声明的变量都是响应式的,即视图中渲染的结果与变量本身是绑定的,会同步变化,index.vue如下:
<template>
	<view class="content">
		<image class="logo" src="/static/logo.png"></image>
		<view class="text-area">
			<text class="title">{{title}}</text>
		</view>
		<view class="red">
			hello-{{name}}-{{age}}		</view>
	</view></template><script>
	var _self;
	export default {
		data() {
			return {
				title: 'Hello',
				name: 'Corley',
				age: 18
			}
		},
		onLoad() {
			_self = this;
			setTimeout(function(){
				_self.age = 20
			}, 3000);
		},
		onShow() {
			console.log('index onshow')
		},
		onHide() {
			console.log('index onhide')
		},
		methods: {

		}
	}</script><style>
	.content {
		display: flex;
		flex-direction: column;
		align-items: center;
		justify-content: center;
	}

	.logo {
		height: 200rpx;
		width: 200rpx;
		margin-top: 200rpx;
		margin-left: auto;
		margin-right: auto;
		margin-bottom: 50rpx;
	}

	.text-area {
		display: flex;
		justify-content: center;
	}

	.title {
		font-size: 36rpx;
		color: #8f8f94;
	}</style>
显示: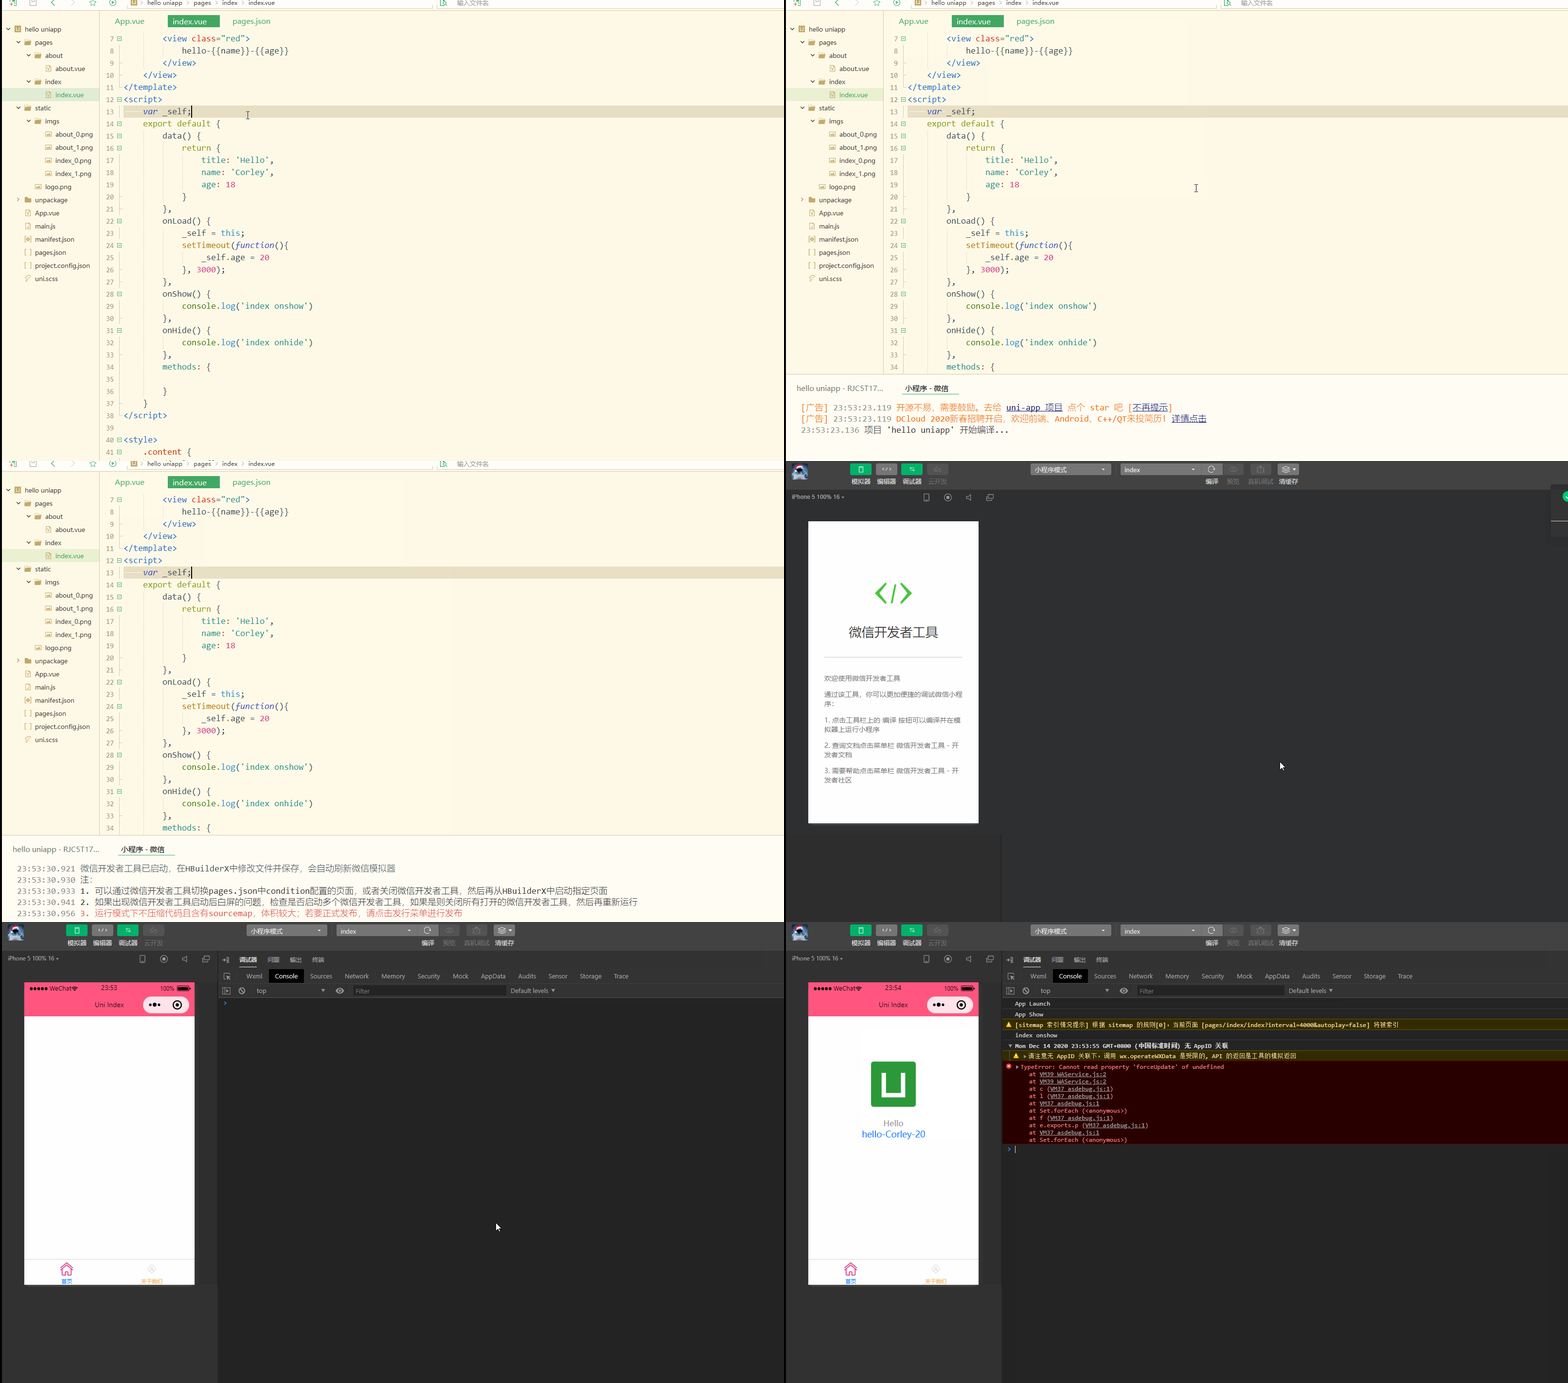
可以看到,在进入onLoad阶段后,渲染的age变量也发生变化,变为20。
还可以对数组进行数据绑定,可以获取数组的单个元素及其属性,如下:
<template>
	<view class="content">
		<image class="logo" src="/static/logo.png"></image>
		<view class="text-area">
			<text class="title">{{title}}</text>
		</view>
		<view class="red">
			{{students[0]}}<br>
			{{students[0].name}}		</view>
	</view></template><script>
	var _self;
	export default {
		data() {
			return {
				title: 'Hello',
				name: 'Corley',
				age: 18,
				students: [{
						name: "张三",
						age: 18
					},
					{
						name: "李四",
						age: 20
					}
				]
			}
		},
		onLoad() {
			_self = this;
			setTimeout(function() {
				_self.age = 20
			}, 3000);
		},
		onShow() {
			console.log('index onshow')
		},
		onHide() {
			console.log('index onhide')
		},
		methods: {

		}
	}</script><style>
	.content {
		display: flex;
		flex-direction: column;
		align-items: center;
		justify-content: center;
	}

	.logo {
		height: 200rpx;
		width: 200rpx;
		margin-top: 200rpx;
		margin-left: auto;
		margin-right: auto;
		margin-bottom: 50rpx;
	}

	.text-area {
		display: flex;
		justify-content: center;
	}

	.title {
		font-size: 36rpx;
		color: #8f8f94;
	}</style>
显示: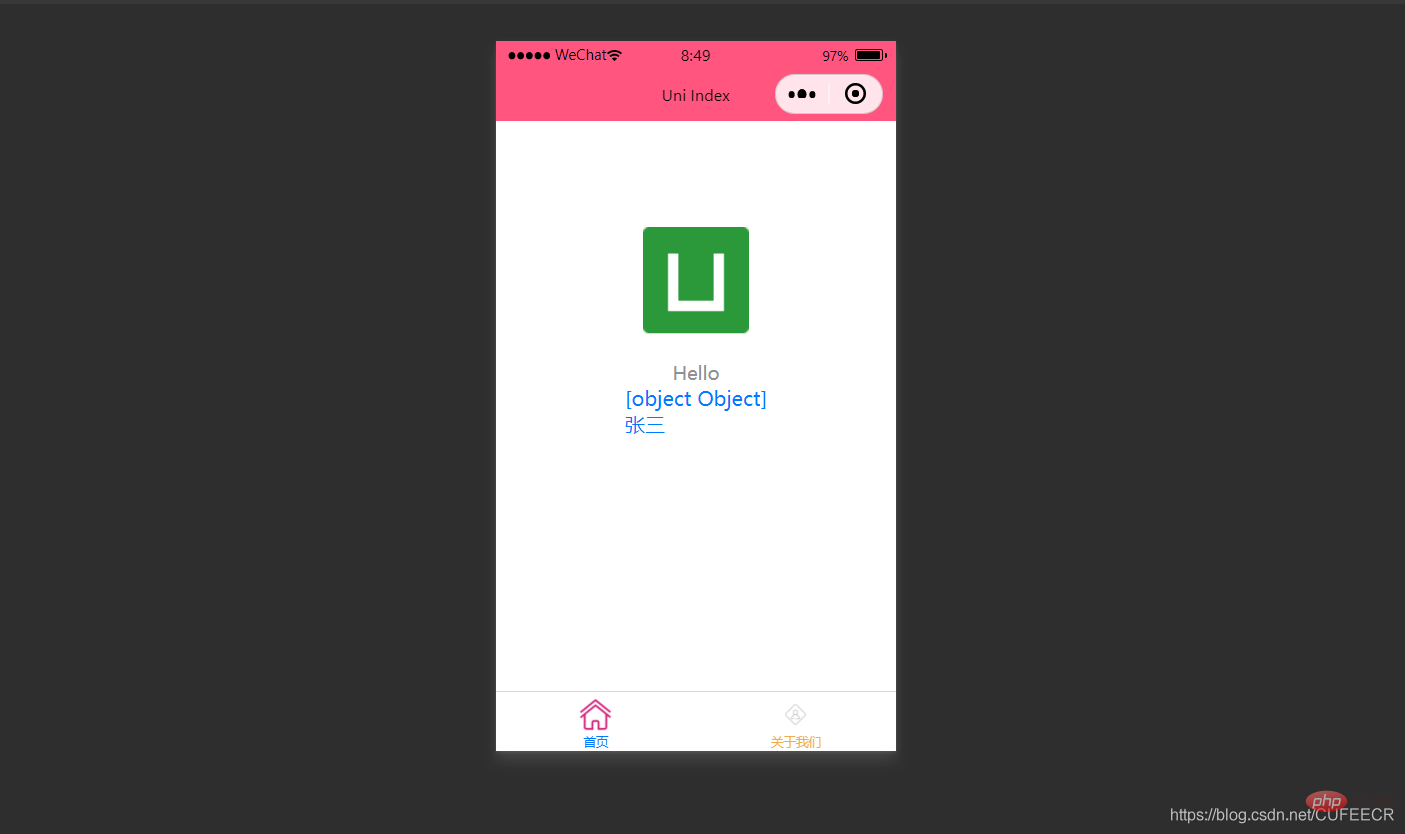
也可以使用循环来遍历数组,即使用v-for进行遍历。
index.vue如下:
<template>
	<view class="content">
		<image class="logo" src="/static/logo.png"></image>
		<view class="text-area">
			<text class="title">{{title}}</text>
		</view>
		<view v-for="(item, index) in students">
			{{index}} - {{item.name}} : {{item.age}}		</view>
	</view></template><script>
	var _self;
	export default {
		data() {
			return {
				title: 'Hello',
				name: 'Corley',
				age: 18,
				students: [{
						name: "张三",
						age: 18
					},
					{
						name: "李四",
						age: 20
					}
				]
			}
		},
		onLoad() {
			_self = this;
			setTimeout(function() {
				_self.age = 20
			}, 3000);
		},
		onShow() {
			console.log('index onshow')
		},
		onHide() {
			console.log('index onhide')
		},
		methods: {

		}
	}</script><style>
	.content {
		display: flex;
		flex-direction: column;
		align-items: center;
		justify-content: center;
	}

	.logo {
		height: 200rpx;
		width: 200rpx;
		margin-top: 200rpx;
		margin-left: auto;
		margin-right: auto;
		margin-bottom: 50rpx;
	}

	.text-area {
		display: flex;
		justify-content: center;
	}

	.title {
		font-size: 36rpx;
		color: #8f8f94;
	}</style>
显示: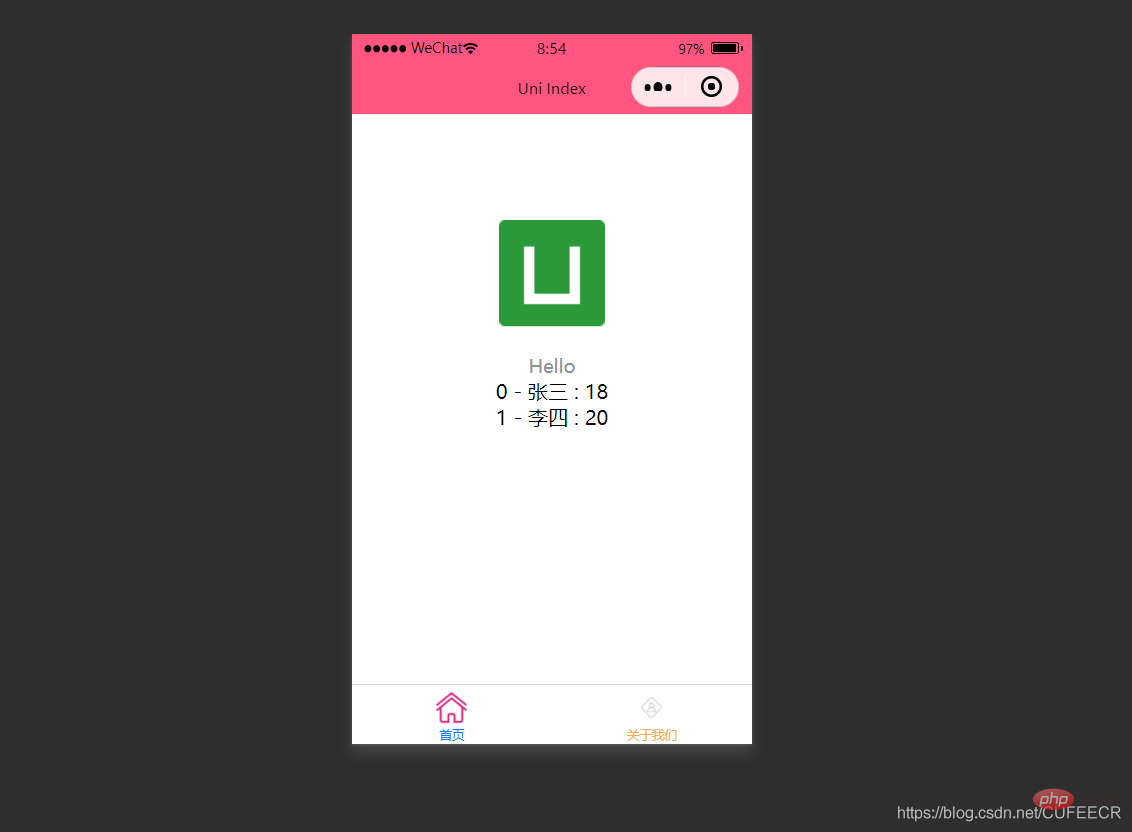
显然,此时遍历出了数组中的所有元素。
2.条件渲染
条件渲染是指满足某个条件才渲染某个元素,使用v-if。
如下:
<template>
	<view class="content">
		<image class="logo" src="/static/logo.png"></image>
		<view class="text-area">
			<text class="title">{{title}}</text>
		</view>
		<view v-if="show1">
			show1...		</view>
		<view v-if="show2">
			show2...		</view>
	</view></template><script>
	var _self;
	export default {
		data() {
			return {
				title: 'Hello',
				name: 'Corley',
				age: 18,
				show1: true,
				show2: false
			}
		},
		onLoad() {
			_self = this;
			setTimeout(function() {
				_self.age = 20
			}, 3000);
		},
		onShow() {
			console.log('index onshow')
		},
		onHide() {
			console.log('index onhide')
		},
		methods: {

		}
	}</script><style>
	.content {
		display: flex;
		flex-direction: column;
		align-items: center;
		justify-content: center;
	}

	.logo {
		height: 200rpx;
		width: 200rpx;
		margin-top: 200rpx;
		margin-left: auto;
		margin-right: auto;
		margin-bottom: 50rpx;
	}

	.text-area {
		display: flex;
		justify-content: center;
	}

	.title {
		font-size: 36rpx;
		color: #8f8f94;
	}</style>
显示: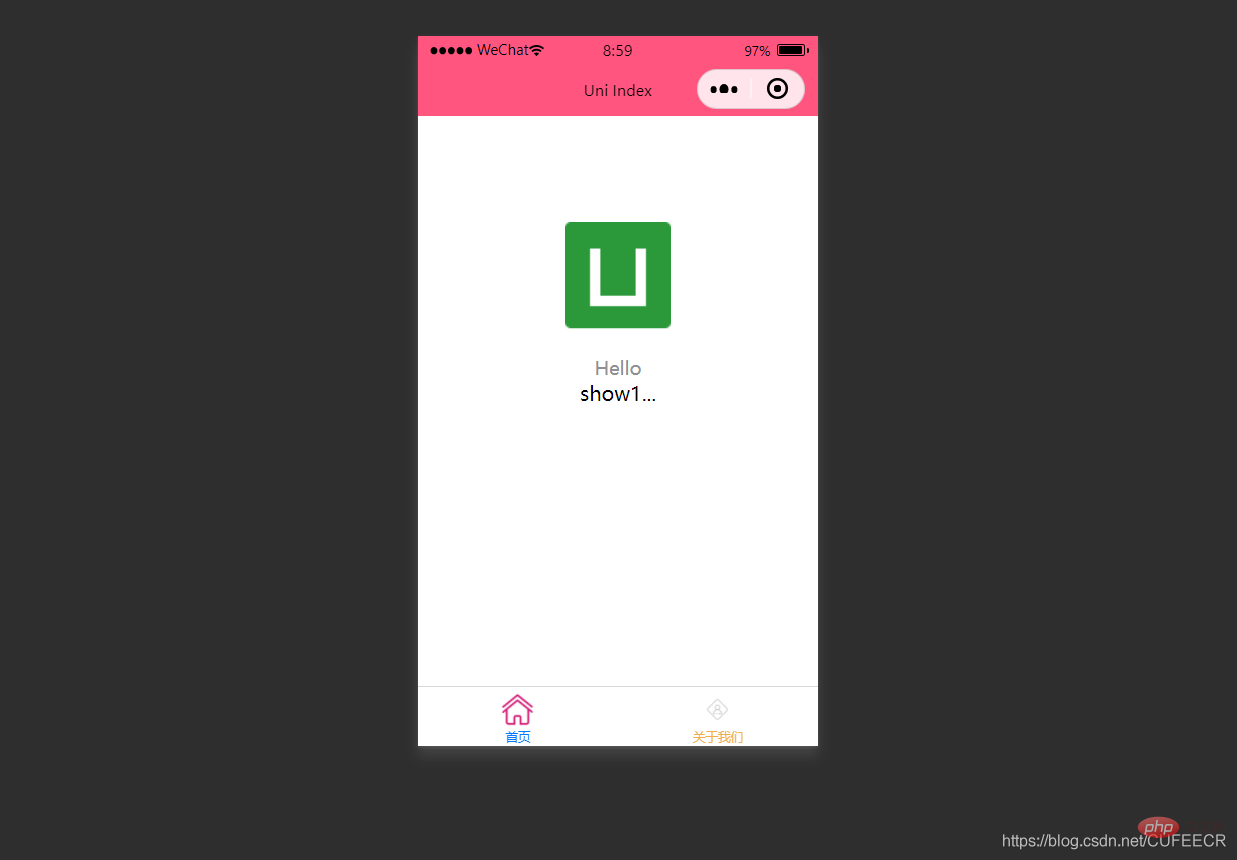
此时根据v-if中传的值判断是否渲染。
:hidden属性用来定义是否隐藏某个元素,如下:
<template>
	<view class="content">
		<image class="logo" src="/static/logo.png"></image>
		<view class="text-area">
			<text class="title">{{title}}</text>
		</view>
		<view :hidden="show1">
			show1...		</view>
		<view :hidden="show2">
			show2...		</view>
	</view></template><script>
	var _self;
	export default {
		data() {
			return {
				title: 'Hello',
				name: 'Corley',
				age: 18,
				show1: true,
				show2: false
			}
		},
		onLoad() {
			_self = this;
			setTimeout(function() {
				_self.age = 20
			}, 3000);
		},
		onShow() {
			console.log('index onshow')
		},
		onHide() {
			console.log('index onhide')
		},
		methods: {

		}
	}</script><style>
	.content {
		display: flex;
		flex-direction: column;
		align-items: center;
		justify-content: center;
	}

	.logo {
		height: 200rpx;
		width: 200rpx;
		margin-top: 200rpx;
		margin-left: auto;
		margin-right: auto;
		margin-bottom: 50rpx;
	}

	.text-area {
		display: flex;
		justify-content: center;
	}

	.title {
		font-size: 36rpx;
		color: #8f8f94;
	}</style>
显示: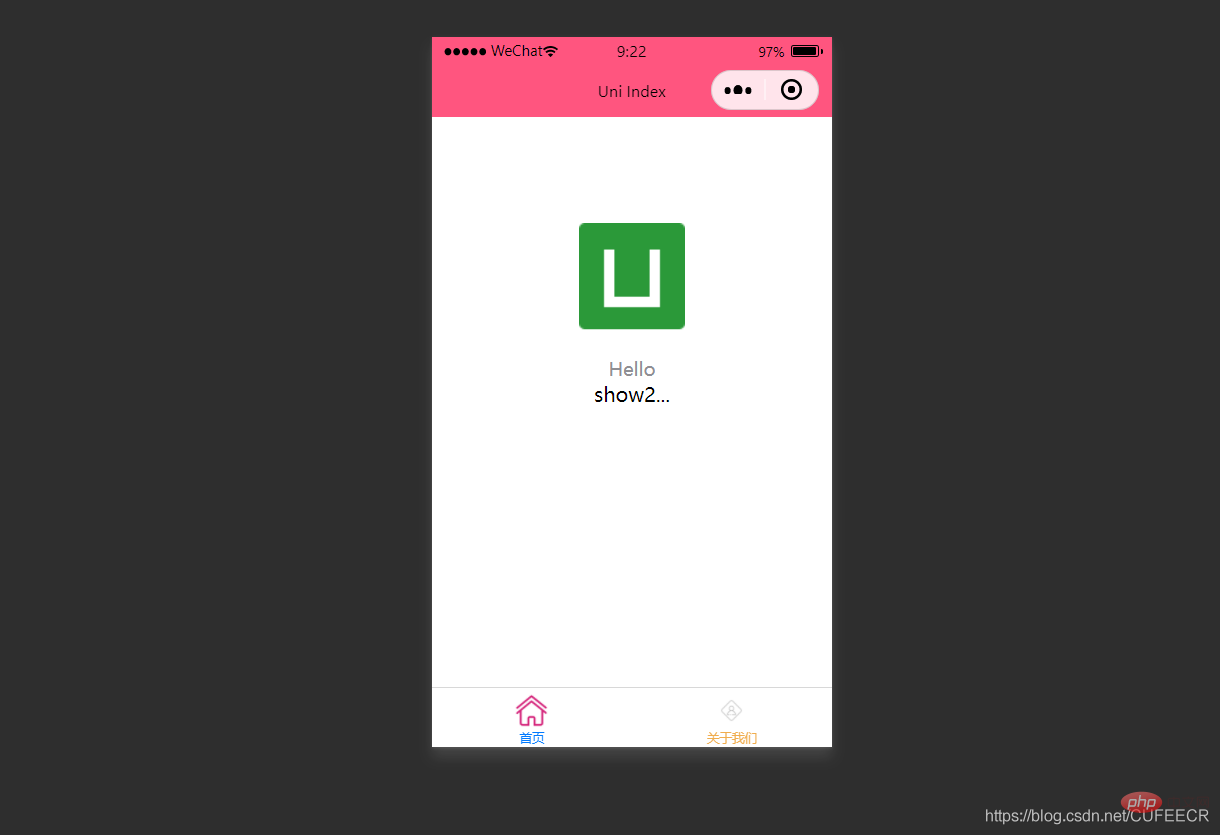
可以看到,v-if和:hidden的效果相反,但是原理上还是有一定区别:v-if是根据条件决定是否渲染,:hidden会渲染但根据条件决定是否展示,可以根据具体需要进行选择。
二、class和style绑定
前面已经提到过,可以在template语言块的某个标签中通过style属性直接定义样式,也可以在style语言块中通过选择器定义样式,再在template语言块中使用。
为节约性能,可以将Class与Style的表达式通过compiler硬编码到uni-app中,通过条件判断来决定是否显示某个样式。
1.class语法
class支持的语法方式如下:
<!-- 1 --><view class="static" v-bind:class="{ active: isActive, 'text-danger': hasError }">111</view><!-- 2 --><view class="static" v-bind:class="[isActive ? activeClass : '', errorClass]">222</view><!-- 3 --><view class="static" v-bind:class="[{ active: isActive }, errorClass]">333</view><!-- 4 --><view :class="{ active: isActive }">444</view><!-- 5 --><view class="static" :class="[activeClass, errorClass]">555</view>
其中,前3种为完整形式,后2种为简写形式;isActive ? activeClass : ''Testen Sie zunächst den Basisdatenaufruf, index.vue lautet wie folgt:
<template>
<view class="content">
<image class="logo" src="/static/logo.png"></image>
<view class="text-area">
<text class="title">{{title}}</text>
</view>
<view :class="{'red' : isRed}">
class bind 2... </view>
<view :class="[isBlue ? 'blue' : 'red']">
class bind 3... </view>
</view></template><script>
export default {
data() {
return {
title: 'Hello',
name: 'Corley',
age: 18,
isRed: true,
isBlue: true
}
},
onLoad() {
},
onShow() {
console.log('index onshow')
},
onHide() {
console.log('index onhide')
},
methods: {
}
}</script><style>
.content {
display: flex;
flex-direction: column;
align-items: center;
justify-content: center;
}
.logo {
height: 200rpx;
width: 200rpx;
margin-top: 200rpx;
margin-left: auto;
margin-right: auto;
margin-bottom: 50rpx;
}
.text-area {
display: flex;
justify-content: center;
}
.title {
font-size: 36rpx;
color: #8f8f94;
}
.blue {
color: #007AFF;
}</style>Anzeige: 
Sie können sehen, dass die definierten Titel- und Namensvariablen in der Ansicht gerendert werden. 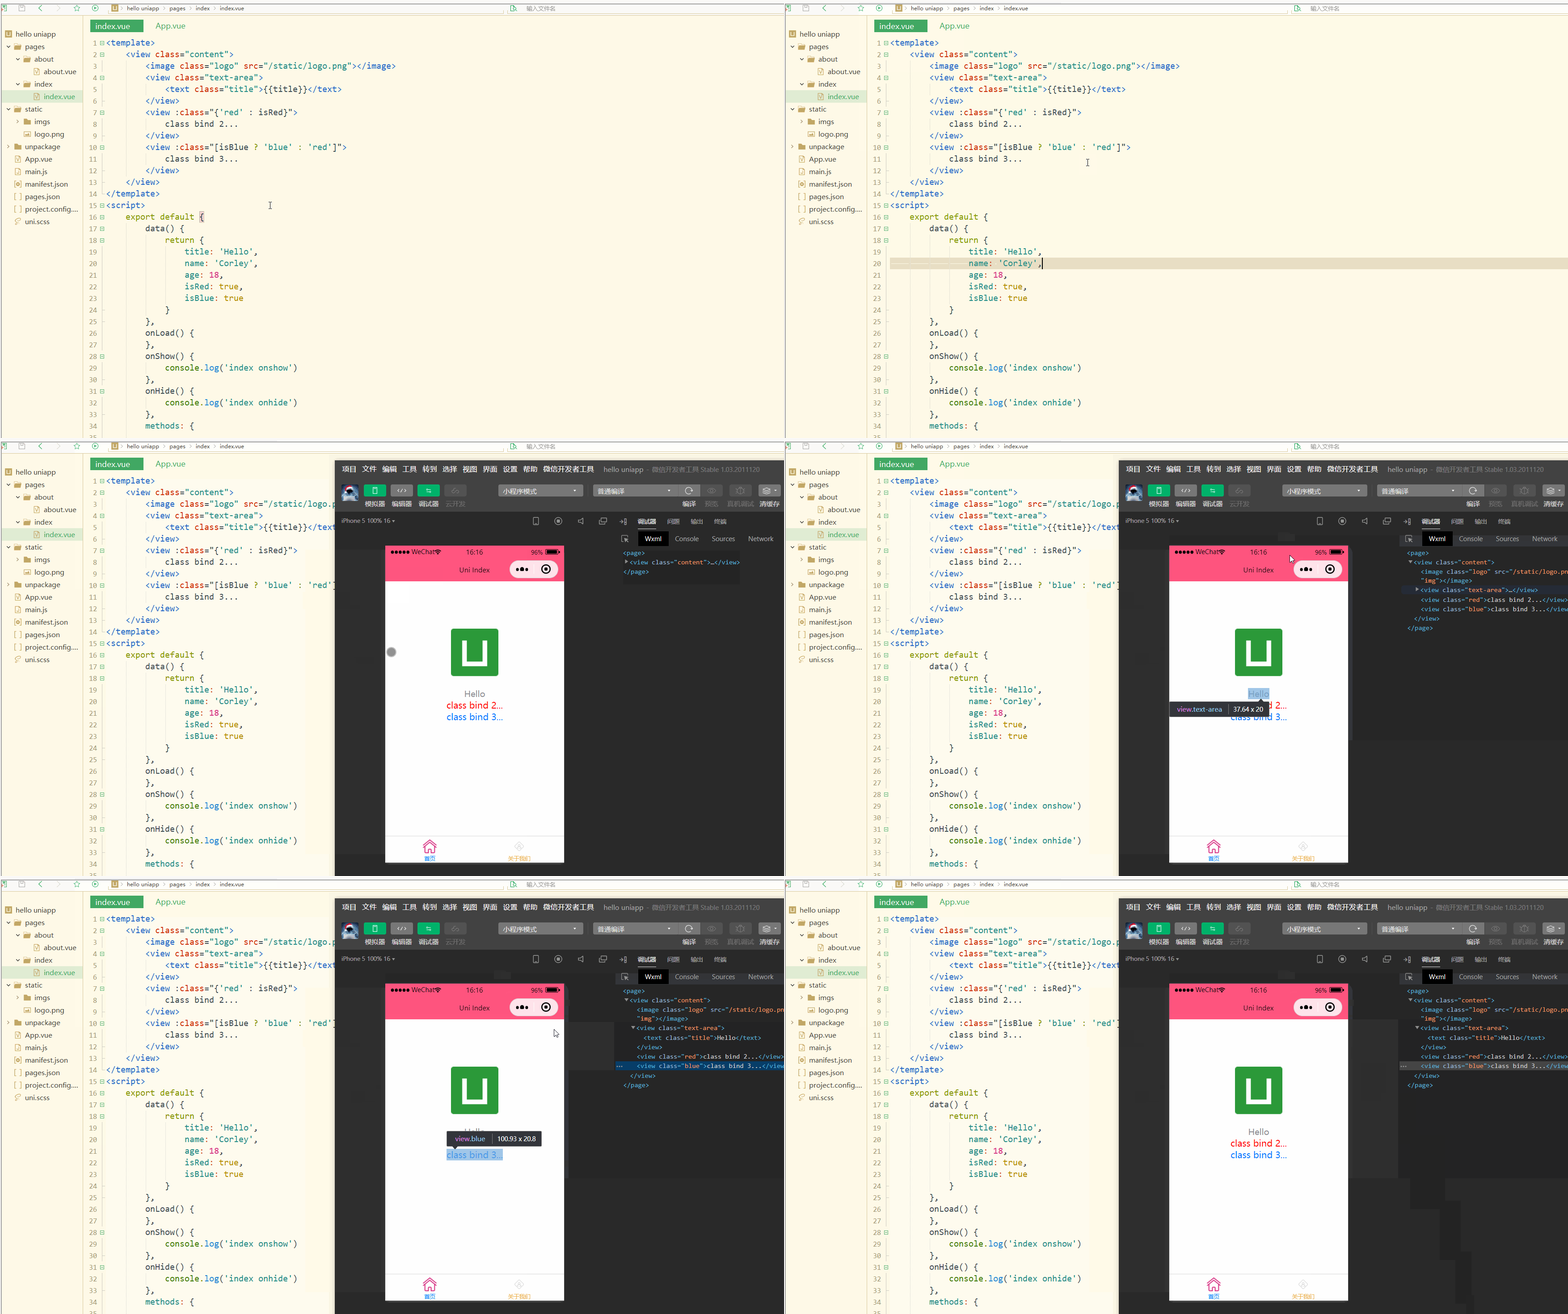 Es ist zu beachten, dass die deklarierten Variablen alle

Das können Sie nach der Eingabe sehen onLoad-Phase ändert sich auch die gerenderte Altersvariable und wird zu 20. <strong></strong>Sie können auch eine Datenbindung für das Array durchführen und die einzelnen Elemente des Arrays und seine Attribute wie folgt abrufen:
<!-- 1 --><view v-bind:style="{ color: activeColor, fontSize: fontSize + 'px' }">111</view><!-- 2 --><view v-bind:style="[{ color: activeColor, fontSize: fontSize + 'px' }]">222</view><!-- 3 --><view :style="{ color: activeColor, fontSize: fontSize + 'px' }">333</view><!-- 4 --><view :style="[{ color: activeColor, fontSize: fontSize + 'px' }]">444</view>
Anzeige:
 Sie können das Array auch mit einer Schleife durchlaufen, d. h. mit
 v-for zum Durchqueren. <p> index.vue lautet wie folgt: </p>
<pre class="brush:php;toolbar:false"><template>
<view class="content">
<image class="logo" src="/static/logo.png"></image>
<view class="text-area">
<text class="title">{{title}}</text>
</view>
<view style="font-size: 10px;">
style static... </view>
<view :style="{fontSize: fontSize+&#39;px&#39;}">
class dynamic... </view>
</view></template><script>
var _self;
export default {
data() {
return {
title: 'Hello',
name: 'Corley',
age: 18,
fontSize: 20
}
},
onLoad() {
_self = this;
setTimeout(function(){
_self.fontSize = 30;
}, 3000)
},
onShow() {
console.log('index onshow')
},
onHide() {
console.log('index onhide')
},
methods: {
}
}</script><style>
.content {
display: flex;
flex-direction: column;
align-items: center;
justify-content: center;
}
.logo {
height: 200rpx;
width: 200rpx;
margin-top: 200rpx;
margin-left: auto;
margin-right: auto;
margin-bottom: 50rpx;
}
.text-area {
display: flex;
justify-content: center;
}
.title {
font-size: 36rpx;
color: #8f8f94;
}
.blue {
color: #007AFF;
}</style></pre>
<p>Anzeige: <br><img src="https://img.php.cn/upload/article/000/000/052/20a44a6c6ede02ae21dea082a83edc47-3.png" alt="uniapp-Variable array vfor "><img src="https://img.php.cn/upload/article/000/000/052/0b477ac040af0cc9e7934aa8cbfd1bfc-7.gif" alt="uniapp css style"></p>Offensichtlich wurden zu diesem Zeitpunkt alle Elemente im Array durchlaufen. <p></p>🎜2. Bedingtes Rendern🎜🎜🎜Bedingtes Rendern bedeutet, dass ein Element nur dann gerendert wird, wenn eine bestimmte Bedingung erfüllt ist, wobei <code>v-if verwendet wird. 🎜🎜Wie folgt: 🎜<template>
<view>
<!-- 支持 -->
<view class="container" :class="computedClassStr"></view>
<view class="container" :class="{active: isActive}"></view>
<!-- 不支持 -->
<view class="container" :class="computedClassObject"></view>
</view> </template>🎜Anzeige: 🎜 🎜🎜Zu diesem Zeitpunkt wird anhand des in
 v-if übergebenen Werts beurteilt, ob gerendert werden soll. 🎜🎜:hidden-Attribut wird verwendet, um zu definieren, ob ein Element ausgeblendet werden soll, wie folgt: 🎜<template>
<view>
<view v-for="(item, index) in menus" class="menu">
{{item}} </view>
</view></template><script>
var _self;
export default {
data() {
return {
menus: [
'新闻', '汽车', '读书'
]
}
},
onLoad() {
},
onShow() {
console.log('index onshow')
},
onHide() {
console.log('index onhide')
},
methods: {
}
}</script><style>
.menu {
padding: 10px;
float: left;
margin: 5px;
line-height: 36px;
}</style>🎜Anzeige: 🎜 🎜🎜Sie können sehen, dass
 v-if und :hidden das haben Gegenteiliger Effekt. Aber es gibt immer noch einige prinzipielle Unterschiede: 🎜v-if bestimmt 🎜 ob gerendert werden soll 🎜 basierend auf Bedingungen, :hidden wird gerendert, bestimmt aber 🎜 ob angezeigt werden soll 🎜 Basierend auf den Bedingungen müssen bestimmte Entscheidungen getroffen werden. 🎜🎜🎜2. Klassen- und Stilbindung🎜🎜🎜Wie bereits erwähnt, können Sie den Stil direkt über das Stilattribut in einem Tag des Vorlagensprachblocks definieren, oder Sie können den Stil über den Selektor im Stilsprachenblock definieren. und dann in Vorlagensprachblöcken verwendet. 🎜🎜Um Leistung zu sparen, können die Ausdrücke von Klasse und Stil über den Compiler fest 🎜 in Uni-App codiert werden, und eine bedingte Beurteilung kann verwendet werden, um zu bestimmen, ob ein bestimmter Stil angezeigt werden soll. 🎜🎜🎜1.class-Syntax🎜🎜🎜class unterstützt die folgenden Syntaxmethoden:🎜<template>
<view>
<view v-for="(item, index) in menus" class="menu" :class="[activeIndex==index?'menuActive':'']">
{{item}} </view>
</view></template><script>
var _self;
export default {
data() {
return {
menus: [
'新闻', '汽车', '读书'
],
activeIndex: 0
}
},
onLoad() {
},
onShow() {
console.log('index onshow')
},
onHide() {
console.log('index onhide')
},
methods: {
}
}</script><style>
.menu {
padding: 10px;
float: left;
margin: 5px;
line-height: 36px;
}
.menuActive {
color: #FF0000 !important;
}</style>🎜Davon sind die ersten drei vollständige Formen und die letzten beiden abgekürzte Formen;🎜isActive ? code> ist der 🎜ternäre Operator🎜. 🎜🎜index.vue lautet wie folgt: 🎜<pre class="brush:php;toolbar:false"><template>
<view>
<view v-for="(item, index) in menus" class="menu" :class="[activeIndex==index?&#39;menuActive&#39;:&#39;&#39;]" @click="menuClick" :id="index">
{{item}} </view>
</view></template><script>
var _self;
export default {
data() {
return {
menus: [
'新闻', '汽车', '读书'
],
activeIndex: 0
}
},
onLoad() {
_self = this
},
onShow() {
console.log('index onshow')
},
onHide() {
console.log('index onhide')
},
methods: {
menuClick: function(e){
var aid = e.target.id;
console.log(aid);
_self.activeIndex = aid;
}
}
}</script><style>
.menu {
padding: 10px;
float: left;
margin: 5px;
line-height: 36px;
}
.menuActive {
color: #FF0000 !important;
}</style></pre>🎜Anzeige: 🎜🎜🎜🎜Sie können sehen, dass die wxml in den WeChat-Entwicklertools nach der Kompilierung und Auswahl den gerenderten Klassenwert anzeigt. 🎜🎜🎜2.style-Syntax🎜🎜🎜style unterstützt die folgende Syntax:🎜<pre class="brush:php;toolbar:false"><template>
<view>
<view class="demo" @click="clickTest" @longtap="longtap"></view>
</view></template><script>
var _self;
export default {
data() {
return {
}
},
onLoad() {
_self = this
},
onShow() {
console.log('index onshow')
},
onHide() {
console.log('index onhide')
},
methods: {
clickTest : function(e){
console.log("click")
},
longtap : function(e){
console.log("longtap")
},
}
}</script><style>
.demo {
width: 600rpx;
height: 600rpx;
background: #DD524D;
}</style></pre>🎜Davon sind die ersten beiden vollständige Formulare und die letzten beiden abgekürzte Formulare. 🎜🎜index.vue sieht so aus: 🎜<pre class="brush:php;toolbar:false"><template>
<view>
<view v-for="(item, index) in students" class="persons" @click="menuClick" v-bind:id="index">{{index}} - {{item.name}}</view>
</view></template><script>
var _self;
export default {
data() {
return {
students: [{
name: "张三",
age: 18
},
{
name: "李四",
age: 20
}
]
}
},
onLoad() {
_self = this
},
onShow() {
console.log('index onshow')
},
onHide() {
console.log('index onhide')
},
methods: {
menuClick: function(e) {
console.log(e);
console.log(e.target.id);
},
}
}</script><style>
.demo {
width: 600rpx;
height: 600rpx;
background: #DD524D;
}</style></pre>🎜 zeigt: 🎜🎜🎜🎜Natürlich können sich Stile dynamisch ändern. 🎜<p>需要注意,uni-app不支持 Vue官方文档中Class 与 Style 绑定 中的 classObject 和 styleObject 语法,但是可以用 computed 方法生成 class 或者 style 字符串,插入到页面中,如下:</p>
<pre class="brush:php;toolbar:false"><template>
<view>
<!-- 支持 -->
<view class="container" :class="computedClassStr"></view>
<view class="container" :class="{active: isActive}"></view>
<!-- 不支持 -->
<view class="container" :class="computedClassObject"></view>
</view> </template></pre>
<p><strong>3.案例–动态菜单切换</strong></p>
<p>本案例实现动态切换导航栏。</p>
<p>先展示横向排列的导航栏,index.vue如下:</p>
<pre class="brush:php;toolbar:false"><template>
<view>
<view v-for="(item, index) in menus" class="menu">
{{item}} </view>
</view></template><script>
var _self;
export default {
data() {
return {
menus: [
'新闻', '汽车', '读书'
]
}
},
onLoad() {
},
onShow() {
console.log('index onshow')
},
onHide() {
console.log('index onhide')
},
methods: {
}
}</script><style>
.menu {
padding: 10px;
float: left;
margin: 5px;
line-height: 36px;
}</style></pre>
<p>显示:<br><img src="https://img.php.cn/upload/article/000/000/052/788cf13e12e26e9c10b4442ca730dd5e-8.png" alt="uniapp css case row"></p>
<p>此时已经可以将导航栏横向展示了。</p>
<p>再实现当前的导航栏显示不一样的颜色,如下:</p>
<pre class="brush:php;toolbar:false"><template>
<view>
<view v-for="(item, index) in menus" class="menu" :class="[activeIndex==index?&#39;menuActive&#39;:&#39;&#39;]">
{{item}} </view>
</view></template><script>
var _self;
export default {
data() {
return {
menus: [
'新闻', '汽车', '读书'
],
activeIndex: 0
}
},
onLoad() {
},
onShow() {
console.log('index onshow')
},
onHide() {
console.log('index onhide')
},
methods: {
}
}</script><style>
.menu {
padding: 10px;
float: left;
margin: 5px;
line-height: 36px;
}
.menuActive {
color: #FF0000 !important;
}</style></pre>
<p>显示:<br><img src="https://img.php.cn/upload/article/000/000/052/7acd028cacf0e9b27d7d2a7308c5c7dc-9.png" alt="uniapp css case row red first"></p>
<p>此时,第1个导航栏变为红色。</p>
<p>进一步实现点击时,颜色动态变化,如下:</p>
<pre class="brush:php;toolbar:false"><template>
<view>
<view v-for="(item, index) in menus" class="menu" :class="[activeIndex==index?&#39;menuActive&#39;:&#39;&#39;]" @click="menuClick" :id="index">
{{item}} </view>
</view></template><script>
var _self;
export default {
data() {
return {
menus: [
'新闻', '汽车', '读书'
],
activeIndex: 0
}
},
onLoad() {
_self = this
},
onShow() {
console.log('index onshow')
},
onHide() {
console.log('index onhide')
},
methods: {
menuClick: function(e){
var aid = e.target.id;
console.log(aid);
_self.activeIndex = aid;
}
}
}</script><style>
.menu {
padding: 10px;
float: left;
margin: 5px;
line-height: 36px;
}
.menuActive {
color: #FF0000 !important;
}</style></pre>
<p>使用了事件来达到动态切换的效果。</p>
<p>显示:<br><img src="https://img.php.cn/upload/article/000/000/052/7acd028cacf0e9b27d7d2a7308c5c7dc-10.gif" alt="uniapp css case complete"></p>
<p>可以看到,点击不同的导航栏实现了颜色同步变化的效果。</p>
<p><strong>三、事件和事件绑定</strong></p>
<p><strong>1.uni-app事件</strong></p>
<p>事件映射表定义了WEB事件和uni-app事件之间的对应关系,具体如下:</p>
<table>
<thead><tr class="firstRow">
<th>Web事件</th>
<th>uni-app事件</th>
<th>说明</th>
</tr></thead>
<tbody>
<tr>
<td>click</td>
<td>‘tap’</td>
<td>被点击</td>
</tr>
<tr>
<td>touchstart</td>
<td>‘touchstart’</td>
<td>手指开始在元素上触摸时</td>
</tr>
<tr>
<td>touchmove</td>
<td>‘touchmove’</td>
<td>移动</td>
</tr>
<tr>
<td>touchcancel</td>
<td>‘touchcancel’</td>
<td>取消</td>
</tr>
<tr>
<td>touchend</td>
<td>‘touchend’</td>
<td>结束</td>
</tr>
<tr>
<td>tap</td>
<td>‘tap’</td>
<td>单机</td>
</tr>
<tr>
<td>longtap</td>
<td>‘longtap’</td>
<td>长按</td>
</tr>
<tr>
<td>input</td>
<td>‘input’</td>
<td>输入</td>
</tr>
<tr>
<td>change</td>
<td>‘change’</td>
<td>改变</td>
</tr>
<tr>
<td>submit</td>
<td>‘submit’</td>
<td>表单提交</td>
</tr>
<tr>
<td>blur</td>
<td>‘blur’</td>
<td>失焦</td>
</tr>
<tr>
<td>focus</td>
<td>‘focus’</td>
<td>聚焦</td>
</tr>
<tr>
<td>reset</td>
<td>‘reset’</td>
<td>表单重置</td>
</tr>
<tr>
<td>confirm</td>
<td>‘confirm’</td>
<td>确认</td>
</tr>
<tr>
<td>columnchange</td>
<td>‘columnchange’</td>
<td>字段变化</td>
</tr>
<tr>
<td>linechange</td>
<td>‘linechange’</td>
<td>行比那花</td>
</tr>
<tr>
<td>error</td>
<td>‘error’</td>
<td>错误</td>
</tr>
<tr>
<td>scrolltoupper</td>
<td>‘scrolltoupper’</td>
<td>滚动到顶部</td>
</tr>
<tr>
<td>scrolltolower</td>
<td>‘scrolltolower’</td>
<td>滚动到底部</td>
</tr>
<tr>
<td>scroll</td>
<td>‘scroll’</td>
<td>滚动</td>
</tr>
</tbody>
</table>
<p>说明:<br> (1)在 input 和 textarea 中 change 事件会被转为 blur 事件;<br> (2)列表中没有的原生事件也可以使用,例如map组件的regionchange 事件直接在组件上添加<code>@regionchange修饰即可,同时这个事件也非常特殊,它的 event type 有 begin 和 end 两个,导致我们无法在handleProxy 中区分到底是什么事件,所以在监听此类事件的时候同时监听事件名和事件类型,即<map @regionchange="functionName" @end="functionName" @begin="functionName"><map>;(3)由于平台的差异,bind 和 catch 事件同时绑定时,只会触发 bind,catch 不会被触发,使用时需要注意。
(4)件修饰符:
- 使用stop会阻止冒泡,但是同时绑定了一个非冒泡事件,会导致该元素上的 catchEventName 失效;
- prevent 可以直接结束事件,因为uni-app里没有什么默认事件,比如 submit 并不会跳转页面;
- self 没有可以判断的标识;
- once 也不能做,因为uni-app没有 removeEventListener, 虽然可以直接在 handleProxy 中处理,但是并不优雅;
(5)按键修饰符:
uni-app运行在手机端,没有键盘事件,所以不支持按键修饰符。
2.事件绑定
使用@对元素进行事件绑定,当事件被触发时,会导致相应的操作。
index.vue如下:
<template>
	<view>
		<view class="demo" @click="clickTest" @longtap="longtap"></view>
	</view></template><script>
	var _self;
	export default {
		data() {
			return {
			}
		},
		onLoad() {
			_self = this
		},
		onShow() {
			console.log('index onshow')
		},
		onHide() {
			console.log('index onhide')
		},
		methods: {
			clickTest : function(e){
				console.log("click")
			},
			longtap : function(e){
				console.log("longtap")
			},
		}
	}</script><style>
	.demo {
		width: 600rpx;
		height: 600rpx;
		background: #DD524D;
	}</style>
显示: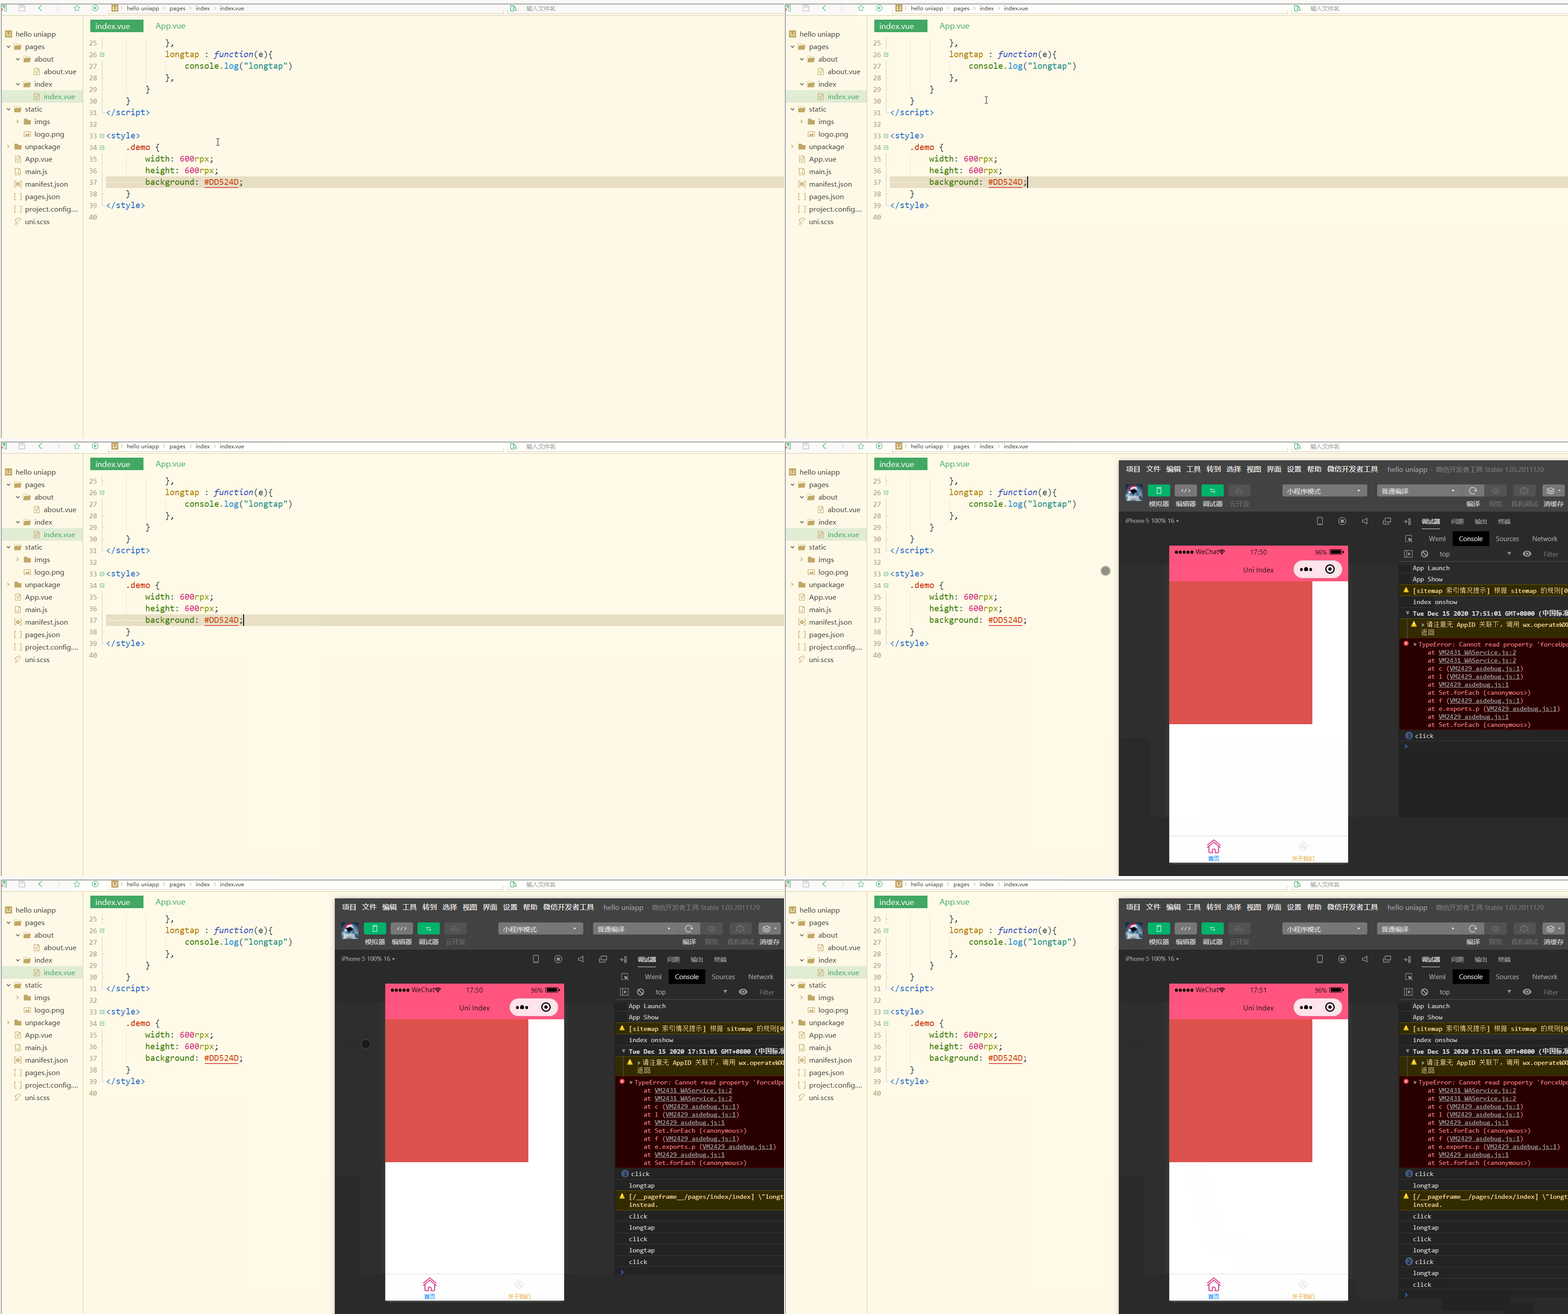
可以看到,在进行点击和长按时,会触发不同的事件、执行不同的操作。
可以在小程序中观察对应事件对象,并利用此对象获取更多信息。
3.事件传参
在触发事件时,还可以传入动态参数。
如下:
<template>
	<view>
		<view v-for="(item, index) in students" class="persons" @click="menuClick" v-bind:id="index">{{index}} - {{item.name}}</view>
	</view></template><script>
	var _self;
	export default {
		data() {
			return {
				students: [{
						name: "张三",
						age: 18
					},
					{
						name: "李四",
						age: 20
					}
				]
			}
		},
		onLoad() {
			_self = this
		},
		onShow() {
			console.log('index onshow')
		},
		onHide() {
			console.log('index onhide')
		},
		methods: {
			menuClick: function(e) {
				console.log(e);
				console.log(e.target.id);
			},
		}
	}</script><style>
	.demo {
		width: 600rpx;
		height: 600rpx;
		background: #DD524D;
	}</style>
显示: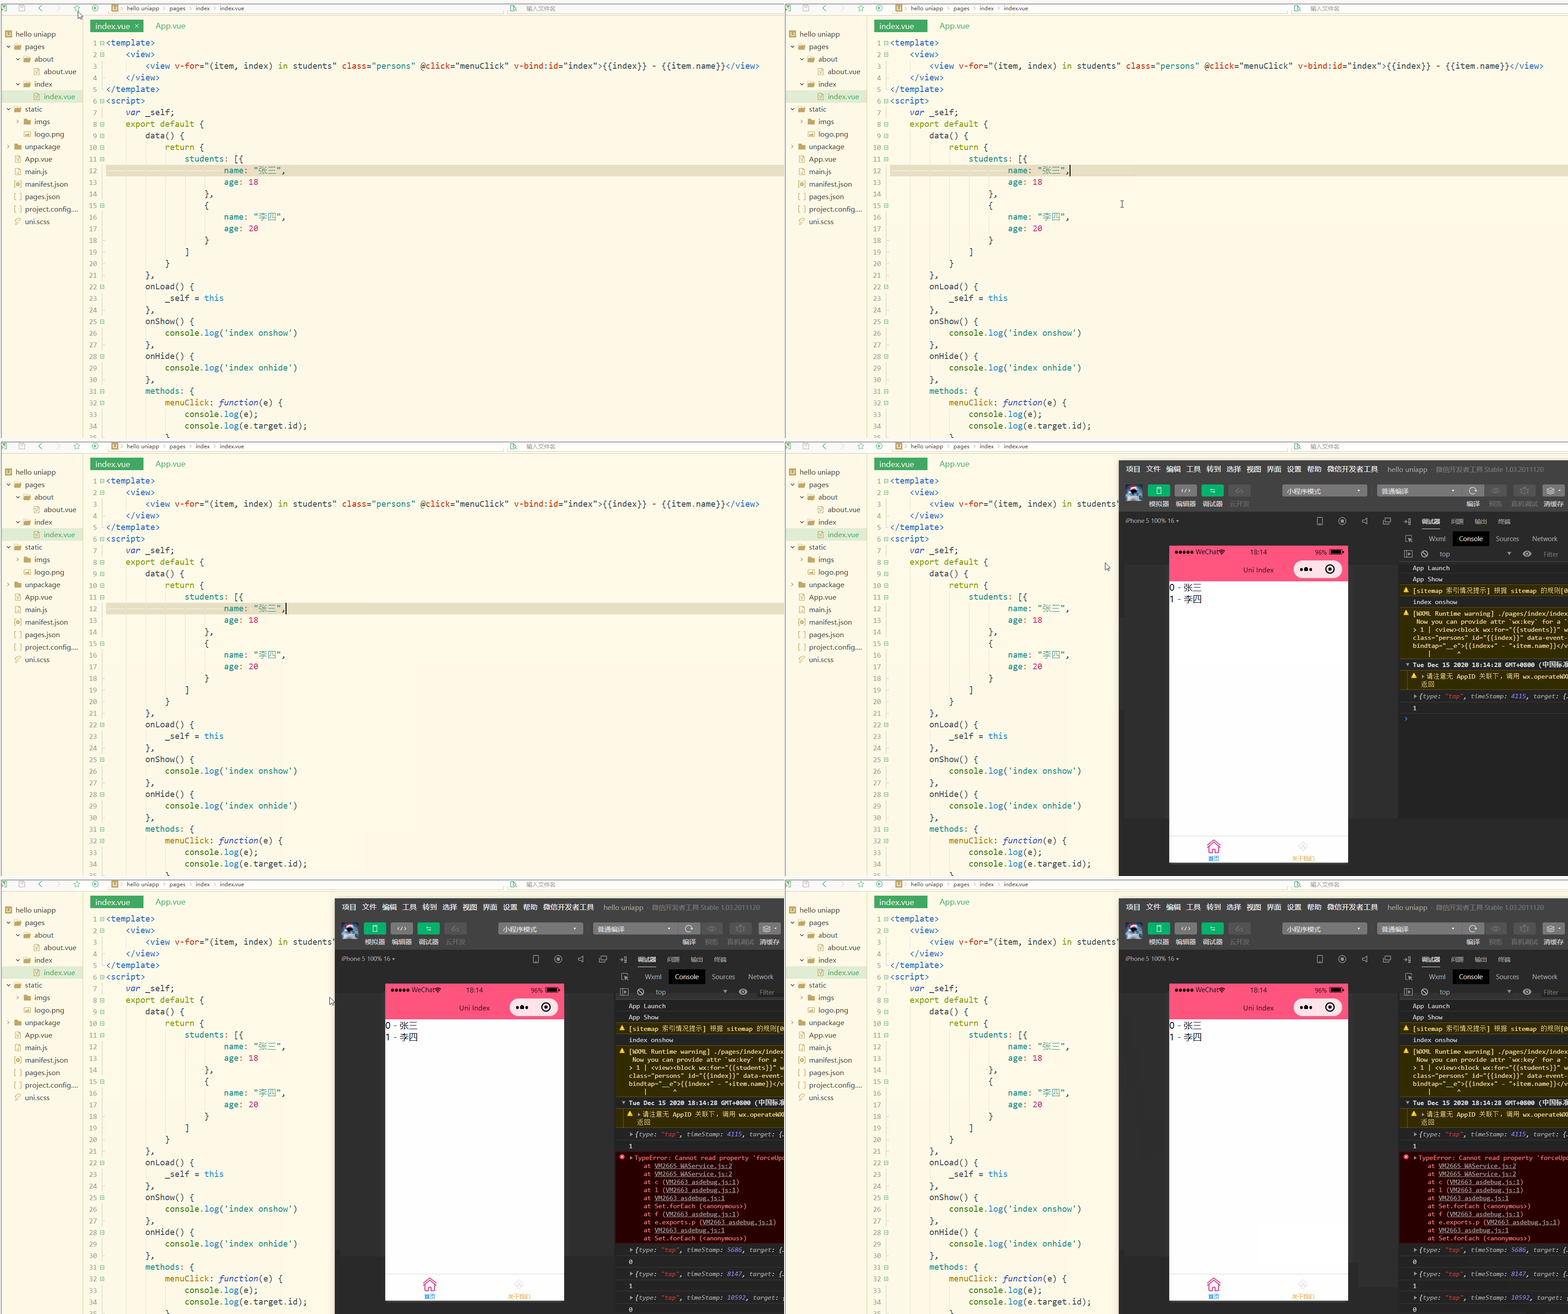
可以看到,在进行点击时,控制台打印出了事件对象和e.target.id的值。
再如:
<template>
	<view>
		<view class="demo" id="outid" @click="clickTest" @longtap="longtap">
			<view id="inid" style="width: 400rpx;height: 400rpx;background: #007AFF;"></view>
		</view>
	</view></template><script>
	var _self;
	export default {
		data() {
			return {
			}
		},
		onLoad() {
			_self = this
		},
		onShow() {
			console.log('index onshow')
		},
		onHide() {
			console.log('index onhide')
		},
		methods: {
			clickTest : function(e){
				console.log(e.currentTarget.id)
				console.log(e.target.id)
			},
			longtap : function(e){
				console.log("longtap")
			},
		}
	}</script><style>
	.demo {
		width: 600rpx;
		height: 600rpx;
		background: #DD524D;
	}</style>
显示: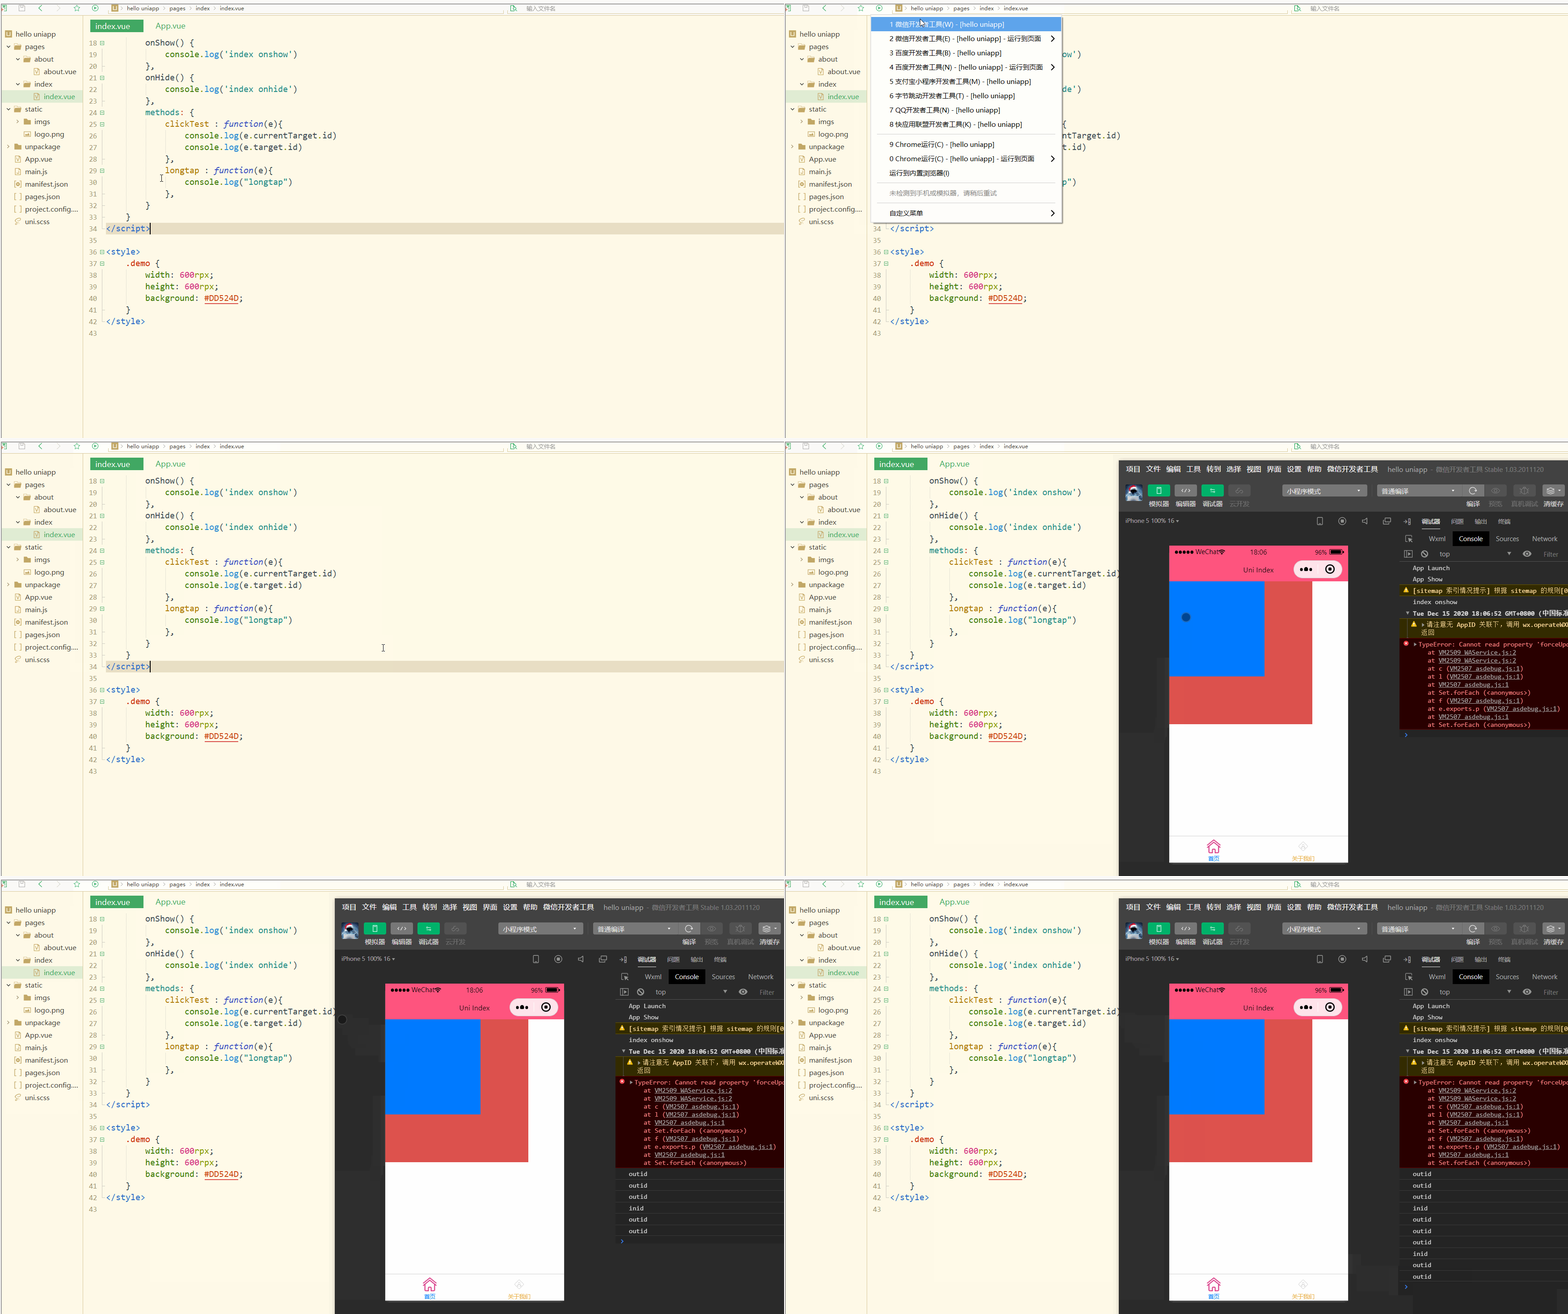
可以看到,在点击外部红色区域时,打印的两个id值相同;
而在点击内部蓝色区域时,e.target变为内部的view元素,所以打印出的也是inid,所以在使用属性传参时尽量使用e.currentTarget。
总结
在uni-app中,不论是对于数据(变量),还是对于以class或style定义的样式,亦或定义的事件,都可以进行动态绑定、同步变化,这些特性有利于更高效地开发出所需功能,大大降低了开发成本。
Das obige ist der detaillierte Inhalt vonEinführungs-Tutorial zur Uni-App: Datenbindung, Stilbindung und Ereignisverarbeitung. Für weitere Informationen folgen Sie bitte anderen verwandten Artikeln auf der PHP chinesischen Website!

