
Heim >Web-Frontend >js-Tutorial >So erstellen Sie ein MPVUE-Applet-Projekt
So erstellen Sie ein MPVUE-Applet-Projekt
- php中世界最好的语言Original
- 2018-05-28 11:15:043315Durchsuche
Dieses Mal zeige ich Ihnen, wie Sie ein MPvue-Applet-Projekt erstellen und welche Vorsichtsmaßnahmen beim Erstellen eines MPvue-Applet-Projekts gelten. Das Folgende ist ein praktischer Fall, schauen wir uns das an.
Vorwort
mpvue ist ein von Meituan entwickeltes Open-Source-Frontend-Framework, das die gleiche Syntax wie vue.js hat und sich schnell entwickeln lässt Kleine Programme. Auf der offiziellen Website heißt es, dass eine Reihe von Codes verwendet werden können, um Miniprogramme und H5-Schnittstellen zu erreichen. Mithilfe dieses Frameworks erhalten Entwickler ein umfassendes Vue.js-Entwicklungserlebnis und bieten gleichzeitig Funktionen zur Wiederverwendung von Code für H5- und Miniprogramme. Wenn Sie ein H5-Projekt in ein kleines Programm umwandeln möchten oder wenn Sie ein kleines Programm entwickeln und es in H5 konvertieren möchten, ist mpvue eine sehr geeignete Lösung.
Offizielle Mpvue-Website: http://mpvue.com/
Demo-Adresse: https://github.com/ccwyn/mpvuedemo/tree/master/my-project
Warum mpvue verwenden?
Zunächst empfiehlt das WeChat-Applet eine einfache Entwicklungsmethode, um schlanke Produktfunktionen durch mehrseitige Aggregation zu vervollständigen. Das Miniprogramm wird lokal als Offline-Paket heruntergeladen, geladen und über den WeChat-Client gestartet. Die Entwicklungsspezifikationen sind einfach, die Technologie ist vollständig gekapselt und es verfügt über ein eigenes Entwicklungssystem. Es ist als einfaches logisches View-Layer-Framework positioniert wird offiziell nicht für die Entwicklung komplexer Anwendungen empfohlen, aber Geschäftsanforderungen sind schwer zu vereinfachen. Komplexe Anwendungen stellen höhere Anforderungen an Entwicklungsmethoden wie Komponenten und Modularisierung, automatische Konstruktion und Integration, Wiederverwendung von Code und Entwicklungseffizienz usw. Kleine Programmentwicklungsspezifikationen schränken diese Fähigkeiten jedoch erheblich ein. Um die oben genannten Probleme zu lösen, die Entwicklungseffizienz zu verbessern und ein besseres Entwicklungserlebnis zu bieten, wird das WeChat-Applet daher unter Verwendung des auf Vue.js basierenden mpvue-Frameworks entwickelt.
Funktionen von mpvue
Umfassende Komponentenentwicklungsfunktionen: Code verbessern
Umfassende Vue.js-Entwicklungserfahrung
Praktische Vuex-Datenverwaltungslösung: Einfache Erstellung komplexer Anwendungen
Schnelle Webpack-Erstellung Mechanismus: Benutzerdefinierter Build Strategie, HotReload während der Entwicklungsphase
Unterstützt die Verwendung externer npm-Abhängigkeiten
Verwenden Sie das Vue.js-Befehlszeilentool vue-cli schnell Initialisierungsprojekt
Die Möglichkeit, H5-Code in kleinen Programmzielcode umzuwandeln
Projekt Build
Projektzusammensetzung
1. Verwenden Sie das offizielle Gerüst von mpvue, um die dem Projekt zugrunde liegende Struktur zu erstellen
2 Bibliothek
3. Verwenden Sie den Stift als Projekt-CSS-Vorverarbeitungstool.
Struktur und Dateien des ProjektrahmensVerzeichnisstruktur
Konzentrieren Sie sich hauptsächlich auf das src-Verzeichnis, in dem sich der Anwendungscode befindet
├── src // 我们的项目的源码编写文件
│ ├── components // 组件目录
│ │ └── head //导航组件
│ ├── config //公共配置
│ │ └── tips // 提示与加载工具类
│ ├── http //http请求配置文件
│ │ └── api // 接口调用文件
│ │ └── config //fly 配置文件
│ ├── pages //项目页面目录
│ ├── store //状态管理 vuex配置目录
│ │ └── actions.js //actions异步修改状态
│ │ └── getters.js //getters计算过滤操作
│ │ └── mutation-types.js //mutations 类型
│ │ └── mutations.js //修改状态
│ │ └── index.js //我们组装模块并导出 store 的地方
│ │ └── state.js //数据源定义
│ ├── stylus //stylus css处理器目录
│ │ └── common.styl // 全局css样式
│ │ └── index.styl // stylus 出口
│ │ └── mixin.styl //mixin 方法
│ │ └── reset.styl //reset css
│ ├── untils //工具函数目录
│ │ └── index.js
│ ├── App.vue // APP入口文件
│ ├── main.js // 主配置文件
Erstellungsprozess
1. Erstellen Sie schnell ein kleines Programm anhand offizieller Dokumente http://mpvue.com/ mpvue/
# 全局安装 vue-cli
$ npm install --global vue-cli
# 创建一个基于 mpvue-quickstart 模板的新项目
$ vue init mpvue/mpvue-quickstart my-project
# 安装依赖
$ cd my-project
$ npm install
# 启动构建
$ npm run dev
2. Öffnen Sie das dist-Verzeichnis in den WeChat-Entwicklertools und prüfen Sie, ob die Seite angezeigt wird.
3. Konfigurieren Sie fly
# npm安装 flyio
$ npm install flyio --save
1. Erstellen Sie das http-Verzeichnis unter src .js
 │ ├── http       //http请求配置文件
 │ │  └── api.js      // 接口调用文件
 │ │  └── config.js     //fly 配置文件
3. api.js
//引入 fly
var Fly=require("flyio/dist/npm/wx")
var fly=new Fly;
//配置请求基地址
// //定义公共headers
// fly.config.headers={xx:5,bb:6,dd:7}
// //设置超时
// fly.config.timeout=10000;
// //设置请求基地址
// fly.config.baseURL="https://wendux.github.io/"
//添加拦截器
fly.interceptors.request.use((config,promise)=>{
 //给所有请求添加自定义header
 config.headers["X-Tag"]="flyio";
 return config;
})
// Vue.prototype.$http=fly //将fly实例挂在vue原型上
export default fly
4. Stift konfigurierenimport fly from './config'
import qs from 'qs'
// 配置API接口地址
let root ='接口域名';
/**
* 接口模版====post
*
* export const test = params => {return fly.post(`${root}/xx/xx`, qs.stringify(params))};
*
* 接口模版====get
*
* export const test1 = function(){return fly.get(`${root}/api/getNewsList`)}
*
*
* 用法:
* 在 页面用引入 test
* import {test} from '../../http/api.js'
*
* test(params).then(res=>{ console.log(res) })
*/
export const test = params => {return fly.post(`${root}/xx/xx`, qs.stringify(params))};
# npm安装 flyio
$ npm install stylus --save-dev
$ npm install stylus-loader --save-dev
In Anbetracht der Tatsache, dass es in Zukunft in h5-Projekten wiederverwendet werden kann, ist hier ein Einheitenumrechnungsmethode [px2rem] 】 und verwendet rpx nicht mit Plattformunterschieden. Selbst wenn es in Zukunft ins Web migriert wird, muss es sich nur mit der Einheitenumrechnungslogik von [px2rem]
 │ ├── stylus //stylus css处理器目录
 │ │ └── common.styl // 全局css样式
 │ │ └── index.styl // stylus 出口
 │ │ └── mixin.styl //mixin 方法
 │ │ └── reset.styl //reset css
befassen
3. index.stylus// 单行显示省略号
no-wrap()
text-overflow: ellipsis
overflow: hidden
white-space: nowrap
// 多行显示省略号
no-wrap-more($col)
display: -webkit-box
-webkit-box-orient: vertical
-webkit-line-clamp: $col
overflow: hidden
//rem转换 $px / 75 *1rem
px2rem($px)
$px * 1rpx
in app.vue ein und führe
@import "./mixin.styl"
@import "./reset.styl"
@import "./common.styl"
** ein Wenn Sie die Methode in mixin.stylus verwenden möchten, müssen Sie sie der Seite hinzufügen. Der mixin.stylus
wird separat in der Stiftdatei1. Erstellen Sie das Konfigurationsverzeichnis unter src. Die Verzeichnisstruktur ist:
│ ├── config      //公共配置
│ │  └── tips.js     // 提示与加载工具类
2、tips.js
考虑到将来可能要复用到h5项目中 所以这里将微信提供的提示与加载框封装成工具类,以后即便迁移到web 端, 只需要删除tips.js的wx api就可以了。
可以在 main.js中引入,绑定到原型上
import Tips from './config/tip'
Vue.prototype.$tips=Tips
在页面中 this.$tips.alert("请输入手机号")调用
/**
 * 提示与加载工具类
 */
export default class Tips {
 constructor() {
 this.isLoading = false;
 }
 /**
 * 弹出提示框
 */
 static success(title, duration = 500) {
 setTimeout(() => {
  wx.showToast({
  title: title,
  icon: "success",
  mask: true,
  duration: duration
  });
 }, 300);
 if (duration > 0) {
  return new Promise((resolve, reject) => {
  setTimeout(() => {
   resolve();
  }, duration);
  });
 }
 }
 /**
 * 弹出确认窗口
 */
 static confirm(text, payload = {}, title = "提示") {
 return new Promise((resolve, reject) => {
  wx.showModal({
  title: title,
  content: text,
  showCancel: true,
  success: res => {
   if (res.confirm) {
   resolve(payload);
   } else if (res.cancel) {
   reject(payload);
   }
  },
  fail: res => {
   reject(payload);
  }
  });
 });
 }
 static toast(title, onHide, icon = "success") {
 setTimeout(() => {
  wx.showToast({
  title: title,
  icon: icon,
  mask: true,
  duration: 500
  });
 }, 300);
 // 隐藏结束回调
 if (onHide) {
  setTimeout(() => {
  onHide();
  }, 500);
 }
 }
 /**
 * 弹出加载提示
 */
 static loading(title = "加载中") {
 if (Tips.isLoading) {
  return;
 }
 Tips.isLoading = true;
 wx.showLoading({
  title: title,
  mask: true
 });
 }
 /**
 * 加载完毕
 */
 static loaded() {
 if (Tips.isLoading) {
  Tips.isLoading = false;
  wx.hideLoading();
 }
 }
 static share(title, url, desc) {
 return {
  title: title,
  path: url,
  desc: desc,
  success: function(res) {
  Tips.toast("分享成功");
  }
 };
 }
 static alert (text, ok) {
 if (ok === void 0) { ok = function (res) { }; }
 if (!text) {
  return;
 }
 wx.showModal({
  content: text,
  showCancel: false,
  confirmColor: '#000000',
  cancelColor: '#000000',
  success: ok
 });
 };
}
/**
 * 静态变量,是否加载中
 */
Tips.isLoading = false;
六、配置vuex
1、在src下 创建 store目录 目录结构为:
│ ├── store      //状态管理 vuex配置目录
│ │  └── actions.js    //actions异步修改状态
│ │  └── getters.js    //getters计算过滤操作
│ │  └── mutation-types.js    //mutations 类型
│ │  └── mutations.js    //修改状态
│ │  └── index.js    //我们组装模块并导出 store 的地方
│ │  └── state.js    //数据源定义
2、main.js中引入store, 并绑定到Vue构造函数的原型上,这样在每个vue的组件都可以通过this.$store访问store对象。
import store from './store'
Vue.prototype.$store=store;
3、state.js
在数据源文件中定义变量:
const state={
 test: 0,
}
export default state
4、mutation-types.js
在mutation-types.js中定义你的Mutation的名字
export const TEST = 'TEST' // 这是测试的
5、mutations.js
在mutations.js中写处理方法
import * as types from './mutation-types'
const matations={
 /**
  * state:当前状态树
  * data: 提交matations时传的参数
  */
 //是否有渠道
 [types.TEST] (state,data) {
  state.TEST = data;
 },
}
export default matations
6、使用方法
# 在 store index.js 中引入
import Vue from 'vue';
import Vuex from 'vuex';
import state from './state'
import mutations from './mutations'
Vue.use(Vuex);
export default new Vuex.Store({
 state,
 mutations,
})
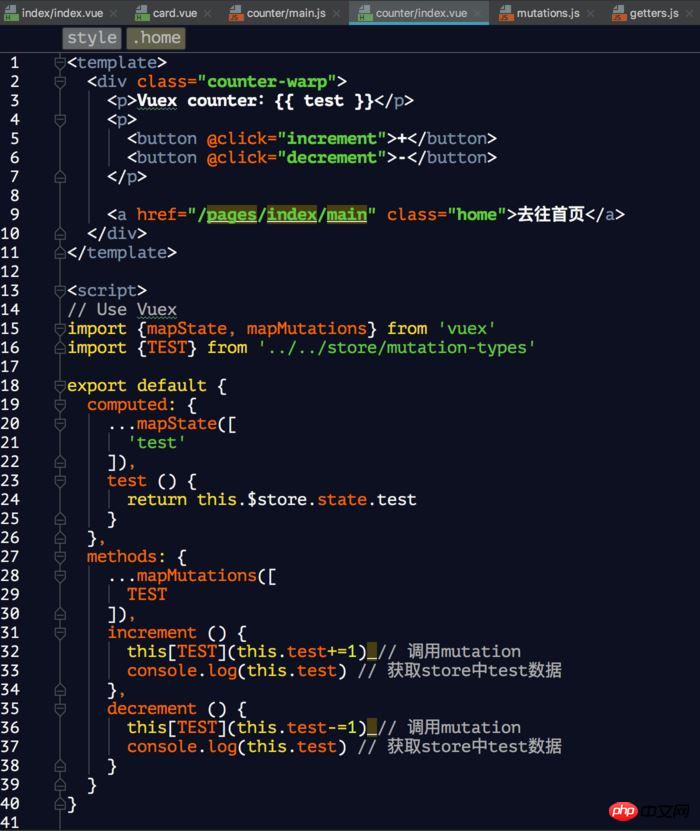
在页面中引用
7、将vuex中的数据持久化到本地 (使用vuex-persistedstate)
# 安装vuex-persistedstate
$ npm install vuex-persistedstate --save
在 store index.js 引入
import Vue from 'vue';
import Vuex from 'vuex';
import state from './state'
import mutations from './mutations'
import createPersistedState from 'vuex-persistedstate'
Vue.use(Vuex);
export default new Vuex.Store({
 state,
 mutations,
 plugins: [
 createPersistedState({
  storage: {
  getItem: key => wx.getStorageSync(key),
  setItem: (key, value) => wx.setStorageSync(key, value),
  removeItem: key => {}
  }
 })
 ]
})
相信看了本文案例你已经掌握了方法,更多精彩请关注php中文网其它相关文章!
推荐阅读:
Das obige ist der detaillierte Inhalt vonSo erstellen Sie ein MPVUE-Applet-Projekt. Für weitere Informationen folgen Sie bitte anderen verwandten Artikeln auf der PHP chinesischen Website!
In Verbindung stehende Artikel
Mehr sehen- Eine eingehende Analyse der Bootstrap-Listengruppenkomponente
- Detaillierte Erläuterung des JavaScript-Funktions-Curryings
- Vollständiges Beispiel für die Generierung von JS-Passwörtern und die Erkennung der Stärke (mit Download des Demo-Quellcodes)
- Angularjs integriert WeChat UI (weui)
- Wie man mit JavaScript schnell zwischen traditionellem Chinesisch und vereinfachtem Chinesisch wechselt und wie Websites den Wechsel zwischen vereinfachtem und traditionellem Chinesisch unterstützen – Javascript-Kenntnisse