Heim >Web-Frontend >js-Tutorial >Verwenden von Cropperjs in Vue
Verwenden von Cropperjs in Vue
- php中世界最好的语言Original
- 2018-03-17 13:12:532361Durchsuche
Dieses Mal zeige ich Ihnen, wie Sie CropperJS in Vue verwenden und welche Vorsichtsmaßnahmen für die Verwendung von CropperJS in Vue gelten. Das Folgende ist ein praktischer Fall, schauen wir uns das an.
In Projekten, die Vue verwenden, müssen Bilder zugeschnitten werden, daher bin ich bei der Verwendung auf einige Fallstricke gestoßen. Im Folgenden finden Sie eine Zusammenfassung der Verwendungsmethoden und Erkenntnisse aus CropperJs in der .vue-Datei :
Führen Sie vor der Verwendung Folgendes ein:

Führen Sie im Projekt Folgendes aus:
npm install cropperjs -save
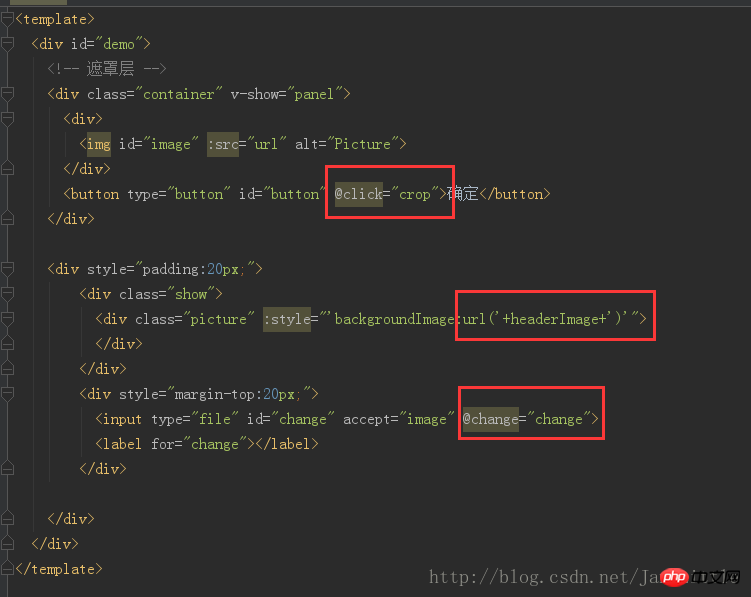
In der Vorlage:
<p>
  <!-- 遮罩层 -->
  </p><p>
   </p><p>
    <img  src="/static/imghwm/default1.png" data-src="url" class="lazy" alt="Verwenden von Cropperjs in Vue" >
   </p>
   <button>确定</button>

  <p>
    </p><p>
     </p><p>
     </p>

    <p>
     <input>
     <label></label>
    </p>

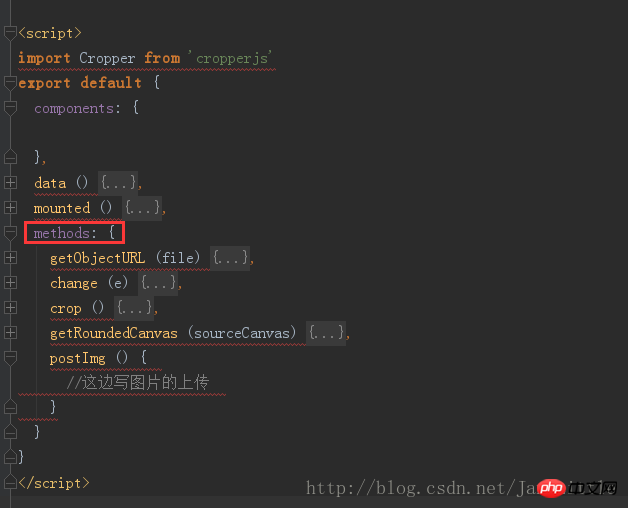
JS-Code:
import Cropper from 'cropperjs'
export default {
 components: {
 },
 data () {
  return {
   headerImage:'',
   picValue:'',
   cropper:'',
   croppable:false,
   panel:false,
   url:''
  }
 },
 mounted () {
  //初始化这个裁剪框
  var self = this;
  var image = document.getElementById('image');
  this.cropper = new Cropper(image, {
   aspectRatio: 1,
   viewMode: 1,
   background:false,
   zoomable:false,
   ready: function () {
    self.croppable = true;
   }
  });
 },
 methods: {
  getObjectURL (file) {
   var url = null ;
   if (window.createObjectURL!=undefined) { // basic
    url = window.createObjectURL(file) ;
   } else if (window.URL!=undefined) { // mozilla(firefox)
    url = window.URL.createObjectURL(file) ;
   } else if (window.webkitURL!=undefined) { // webkit or chrome
    url = window.webkitURL.createObjectURL(file) ;
   }
   return url ;
  },
  change (e) {
   let files = e.target.files || e.dataTransfer.files;
   if (!files.length) return;
   this.panel = true;
   this.picValue = files[0];
   this.url = this.getObjectURL(this.picValue);
   //每次替换图片要重新得到新的url
   if(this.cropper){
    this.cropper.replace(this.url);
   }
   this.panel = true;
  },
  crop () {
    this.panel = false;
    var croppedCanvas;
    var roundedCanvas;
    if (!this.croppable) {
     return;
    }
    // Crop
    croppedCanvas = this.cropper.getCroppedCanvas();
    console.log(this.cropper)
    // Round
    roundedCanvas = this.getRoundedCanvas(croppedCanvas);
    this.headerImage = roundedCanvas.toDataURL();
    this.postImg()
  },
  getRoundedCanvas (sourceCanvas) {
   var canvas = document.createElement('canvas');
   var context = canvas.getContext('2d');
   var width = sourceCanvas.width;
   var height = sourceCanvas.height;
   canvas.width = width;
   canvas.height = height;
   context.imageSmoothingEnabled = true;
   context.drawImage(sourceCanvas, 0, 0, width, height);
   context.globalCompositeOperation = 'destination-in';
   context.beginPath();
   context.arc(width / 2, height / 2, Math.min(width, height) / 2, 0, 2 * Math.PI, true);
   context.fill();
   return canvas;
  },
  postImg () {
   //这边写图片的上传
  }
 }
}
Gesamteffekt:

CSS-Code (er ist ziemlich lang, ich wollte ihn ursprünglich nicht posten, aber weil ich die Demo direkt ausführen wollte, habe ich ihn trotzdem gepostet, sorry für die Länge):
*{
 margin: 0;
 padding: 0;
}
#demo #button {
 position: absolute;
 right: 10px;
 top: 10px;
 width: 80px;
 height: 40px;
 border:none;
 border-radius: 5px;
 background:white;
}
#demo .show {
 width: 100px;
 height: 100px;
 overflow: hidden;
 position: relative;
 border-radius: 50%;
 border: 1px solid #d5d5d5;
}
#demo .picture {
 width: 100%;
 height: 100%;
 overflow: hidden;
 background-position: center center;
 background-repeat: no-repeat;
 background-size: cover;
}
#demo .container {
  z-index: 99;
  position: fixed;
  padding-top: 60px;
  left: 0;
  top: 0;
  right: 0;
  bottom: 0;
  background:rgba(0,0,0,1);
}
#demo #image {
 max-width: 100%;
}
.cropper-view-box,.cropper-face {
 border-radius: 50%;
}
/*!
 * Cropper.js v1.0.0-rc
 * https://github.com/fengyuanchen/cropperjs
 *
 * Copyright (c) 2017 Fengyuan Chen
 * Released under the MIT license
 *
 * Date: 2017-03-25T12:02:21.062Z
 */
.cropper-container {
 font-size: 0;
 line-height: 0;
 position: relative;
 -webkit-user-select: none;
 -moz-user-select: none;
 -ms-user-select: none;
 user-select: none;
 direction: ltr;
 -ms-touch-action: none;
 touch-action: none
}
.cropper-container img {
 /* Avoid margin top issue (Occur only when margin-top <p style="text-align: left;"></p><p style="text-align: left;"><span style="color: #ff0000"></span></p><p>Ich glaube, dass Sie die Methode beherrschen, nachdem Sie den Fall in diesem Artikel gelesen haben. Weitere spannende Informationen erhalten Sie zu anderen verwandten Artikeln auf der chinesischen PHP-Website! </p><p>Empfohlene Lektüre: </p><p><a href="http://www.php.cn/js-tutorial-388955.html" target="_blank">So implementieren Sie eine Back-Force-Aktualisierung auf der WeChat-Webseite</a></p><p><a href="http://www.php.cn/js-tutorial-388951.html" target="_blank">Verwenden Sie js, um schnell die Adresse des Bildes zu erhalten in der HTML-Seite</a><br></p><p><a href="http://www.php.cn/js-tutorial-388941.html" target="_blank">Automatische Aktualisierung und automatische Erfassung des Cookie-Ablaufs einstellen</a><br></p>
Das obige ist der detaillierte Inhalt vonVerwenden von Cropperjs in Vue. Für weitere Informationen folgen Sie bitte anderen verwandten Artikeln auf der PHP chinesischen Website!
In Verbindung stehende Artikel
Mehr sehen- Eine eingehende Analyse der Bootstrap-Listengruppenkomponente
- Detaillierte Erläuterung des JavaScript-Funktions-Curryings
- Vollständiges Beispiel für die Generierung von JS-Passwörtern und die Erkennung der Stärke (mit Download des Demo-Quellcodes)
- Angularjs integriert WeChat UI (weui)
- Wie man mit JavaScript schnell zwischen traditionellem Chinesisch und vereinfachtem Chinesisch wechselt und wie Websites den Wechsel zwischen vereinfachtem und traditionellem Chinesisch unterstützen – Javascript-Kenntnisse

