Heim >Web-Frontend >js-Tutorial >HTML Canvas leicht gemacht: Ein Leitfaden für Anfänger.
HTML Canvas leicht gemacht: Ein Leitfaden für Anfänger.
- Mary-Kate OlsenOriginal
- 2024-12-20 13:38:10766Durchsuche
Inhaltsverzeichnis
- Einführung
- Erste Schritte
- Grundlagen des Zeichnens
- Text hinzufügen
- Fazit und nächste Schritte
? Einführung
HTML

Die Verwendung von
Anwendungsfälle von HTML
- Formen und Linien zeichnen: Es können Formen, Muster und Linien gezeichnet werden, einschließlich des Hinzufügens von Farben und Farbverläufen zu den Objekten.
- Animation und Interaktion: Die von
können animiert werden und auch Benutzerinteraktionen - Bildmanipulation: Dies kann zum Ändern der Größe oder zum Zuschneiden von Bildern verwendet werden.
- Spielgrafiken: Sie werden auch von Spieleentwicklern verwendet, um schöne Benutzeroberflächen für Spiele zu erstellen
- Datenvisualisierung: Zur Erstellung von Grafiken und Diagrammen.
?Erste Schritte
Das HTML
Zuerst müssen wir eine index.html-Datei erstellen und den
<!doctype html>
   <html lang="en">
     <head>
       <meta charset="UTF-8" />
       <meta name="viewport" content="width=device-width, initial-scale=1.0" />
       <title>HTML Canvas Example</title>
     </head>
     <body>
       <canvas>


<p>Then we add a script tag so we can define the behavior of the object.<br>
</p>

<pre class="brush:php;toolbar:false"><!doctype html>
   <html lang="en">
     <head>
       <meta charset="UTF-8" />
       <meta name="viewport" content="width=device-width, initial-scale=1.0" />
       <title>HTML Canvas Example</title>
     </head>
     <body>
       <canvas>


<p>Wowu !!! We get the output.</p>

<p><img src="/static/imghwm/default1.png" data-src="https://img.php.cn/upload/article/000/000/000/173467309470040.jpg" class="lazy" alt="HTML Canvas Made Simple: A Guide for Beginners."></p>

<p>Looking at the structure of the code. We define canvas wrapper having an id attribute, this is can only be done by id and not class because of uniqueness which is used to reference the canvas with the id name.<br>
To access this we need to retrieve the node created in the Document Object Model(DOM) by using the getElementById("myCanvas") and have access to it using the getContext("2d") method.</p>

<p>This method make us to have access to different drawing methods like</p>
- fillRect(x, y, width, height): This method is to draw a filled rectangle at a position(x, y) with a specified width and height.
- fillStyle = colorName: It is a property to set the color for the object. It could be a colorname, RGB or hex code for the object.
Other methods are:
- strokeRect(x, y, width, height): This method to to make a outline stroke on the rectangle, this may be used independently or combined with fillStyle and fillRect(x, y, width, height).
- clearRect(x, y, width, height): to clear the rectangle by making it transparent.

? Drawing basics
Different shapes and lines can be drawn using some specific methods depending on the object.
1. Path:
Examples are line, wavy line, zigzag e.t.c

For creating a line, the following method needs to be set up:
- beginPath(): This method is to start a new path for a drawing.
- moveTo(x, y): This is to move the drawing to the specified points.
- lineTo(x, y): This is to draw from the current position to the specified points.
- stroke(): This is to draw the line.

2. Rectangle and Square
- Rectangle

- Square

These following methods are used in creating a rectangle or square:
- fillRect: this method is for create rectangle and square only.
- clearRect(x, y, width, height): this method is to clear rectangle hence making it transparent.
- strokeRect(x, y, width, height): is used to create an outline rectangle or square.
- fillStyle: this is used to fill the container of the rectangle or square.
- strokeStyle: this method is for add stroke color to an outline rectangle.
- roundRect(x, y, width, height, radii): this method is for creating round border rectangle.
3. Circle

These following methods are used in creating a circle:
- beginPath(): this method to begin a path.
- arc(x, y, radius, startAngle, endAngle, anticlockwise): this is for to create circle where x and y is for center coordinate of the center, radius is the radius of the circle, startAngle and endAngle which is an angle for the circle.
4. Polygon
To create a polygon, you need to determine the sides of the shape, it could be a triangle(3 sides), pentagon (5 sides), hexagon(6 sides) or decagon (10 sides).

These following methods are used in creating a circle:
- beginPath(): this method is to create a new shape.
- closePath(): this method is to end the shape.
- cx: its value for the center of x co-ordinates.
- cy: its value specifies the center for y co-ordinates.
- radius: radius of the shape.
To get the angle, you have to calculate with this formula by dividing the circle into two;
angle = 2π/ n
wobei π 3,14 ist; n ist die Anzahl der Seiten. Sie müssen auch π/2 minus, um die Position der Form von oben nach unten zu erhalten.


? Text mit

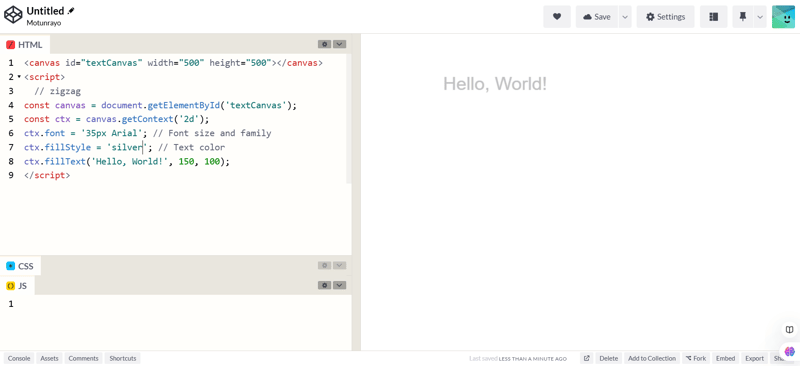
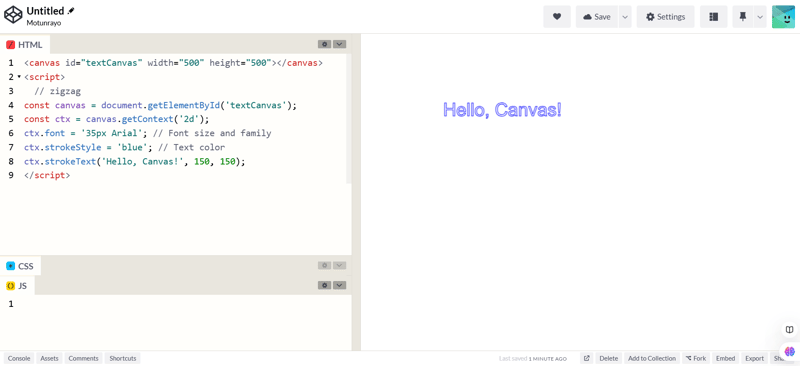
Um Text zu erstellen, werden die folgenden Methoden verwendet:
- Schriftart: um Schriftgröße und Schriftfamilie anzugeben.
- fillStyle: Dies dient dazu, dem Text Farbe hinzuzufügen.
- fillText: Dies zeichnet einen gefüllten Text.
- StrokeText: Dies zeichnet einen Umrisstext
- createLinearGradient oder createRadialGradient: um dem Text Farbverläufe hinzuzufügen
- textAlign: um den Text horizontal zu setzen

Fazit
Mit HTML
Verbinde dich mit mir
Weitere Artikel zur Webentwicklung. Folgen Sie mir auf LinkedIn und X
LinkedIn X
Das obige ist der detaillierte Inhalt vonHTML Canvas leicht gemacht: Ein Leitfaden für Anfänger.. Für weitere Informationen folgen Sie bitte anderen verwandten Artikeln auf der PHP chinesischen Website!
In Verbindung stehende Artikel
Mehr sehen- Eine eingehende Analyse der Bootstrap-Listengruppenkomponente
- Detaillierte Erläuterung des JavaScript-Funktions-Curryings
- Vollständiges Beispiel für die Generierung von JS-Passwörtern und die Erkennung der Stärke (mit Download des Demo-Quellcodes)
- Angularjs integriert WeChat UI (weui)
- Wie man mit JavaScript schnell zwischen traditionellem Chinesisch und vereinfachtem Chinesisch wechselt und wie Websites den Wechsel zwischen vereinfachtem und traditionellem Chinesisch unterstützen – Javascript-Kenntnisse

