选项卡案例的实现
一、选项卡案例的实现
一)html的关键代码块
<head> <meta charset="UTF-8" /> <meta http-equiv="X-UA-Compatible" content="IE=edge" /> <meta name="viewport" content="width=device-width, initial-scale=1.0" /> <title>经典选项卡</title> <style> .hidden { display: none; } .active { display: block; } .type > *.active { height: 30px; border-radius: 6px; color: red; background-color: lightgreen; } .content > *.active { height: auto; width: 350px; background-color: lightgreen; } .content > ul > li { list-style: none; } </style> </head> <body> <!-- 选项卡的功能 1.栏目: 2.内容: --> <div class="box"> <div class="type" style="display: flex"></div> <div class="content"></div> </div>
二)js的代码块
1.js文件块代码
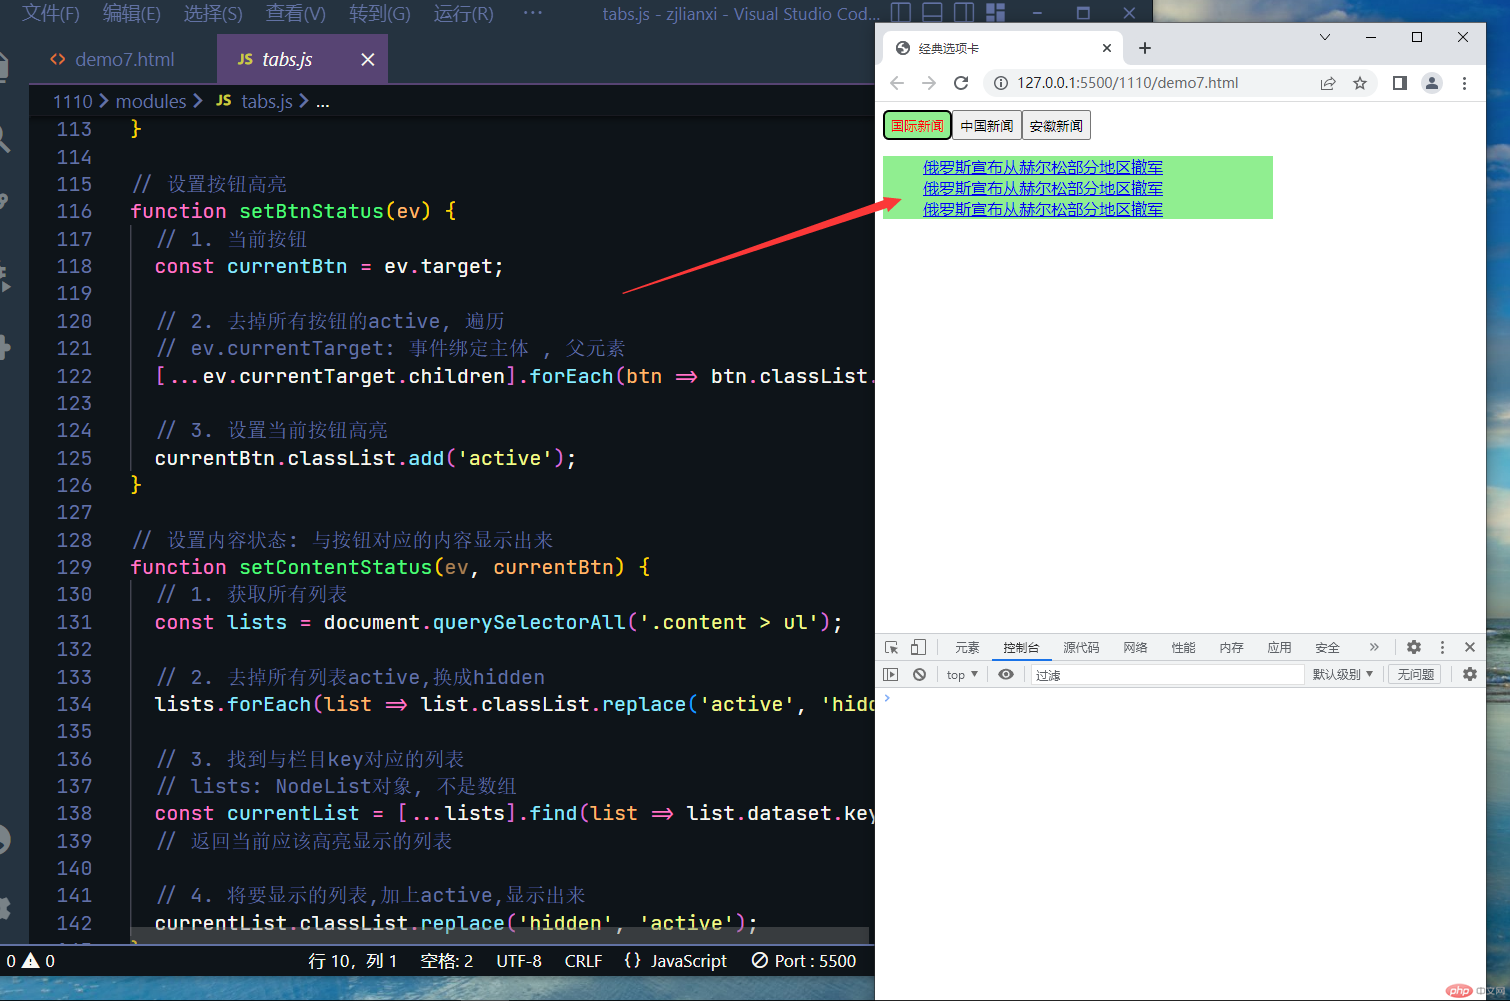
// todo 选项卡的数据以及方法// * 栏目数据const cates = [ { cid: 1, cname: '国际新闻' }, { cid: 2, cname: '中国新闻' }, { cid: 3, cname: '安徽新闻' },];// * 列表数据// 列表数据,必须与指定的栏目,一一对应const details = [ { key: 1, cid: 1, content: [ { title: '俄罗斯宣布从赫尔松部分地区撤军', url: 'https://news.ifeng.com/c/8KoK54urn1k', }, { title: '俄罗斯宣布从赫尔松部分地区撤军', url: 'https://news.ifeng.com/c/8KoK54urn1k', }, { title: '俄罗斯宣布从赫尔松部分地区撤军', url: 'https://news.ifeng.com/c/8KoK54urn1k', }, ], }, { key: 2, cid: 2, content: [ { title: '空战隐身无人僚机亮相!', url: 'https://news.ifeng.com/c/8KoeDFJXF1b', }, { title: '空战隐身无人僚机亮相!', url: 'https://news.ifeng.com/c/8KoeDFJXF1b', }, { title: '空战隐身无人僚机亮相!', url: 'https://news.ifeng.com/c/8KoeDFJXF1b', }, ], }, { key: 3, cid: 3, content: [ { title: '安康码”上新!家庭成员核酸情况查询更便捷', url: 'https://ah.ifeng.com/c/8KkGUDhAZNZ', }, { title: '安康码”上新!家庭成员核酸情况查询更便捷', url: 'https://ah.ifeng.com/c/8KkGUDhAZNZ', }, { title: '安康码”上新!家庭成员核酸情况查询更便捷', url: 'https://ah.ifeng.com/c/8KkGUDhAZNZ', }, ], },];// 创建样目和对应的内容区function createTab(type, content) { // 1. 生成样目 for (let i = 0; i < cates.length; i++) { // (1) 创建一个按钮 const btn = document.createElement('button'); // (2) 设置按钮的文本 btn.textContent = cates[i].cname; // (3) 给按钮添加一个自定义 data-key, 主要是为了一内容id绑定 btn.dataset.key = cates[i].cid; // (4) 默认高亮第1个,所以第一个加上class="active" if (i === 0) btn.classList.add('active'); // (5) 将新按钮, 添加到栏目容器元素中 type type.append(btn); } // 2. 生成内容 for (let i = 0; i < details.length; i++) { // (1) 创建列表 <ul> const ul = document.createElement('ul'); // (2) 添加列表索引<ul data-key> ul.dataset.key = details[i].cid; // (3) 默认显示第1个,其它隐藏 ul.classList.add(i === 0 ? 'active' : 'hidden'); // (4) 生成子元素<li><a>用于显示每一条数据 for (let k = 0; k < details[i].content.length; k++) { // 1. 生成 <li> const li = document.createElement('li'); // 2. 生成 <a> const a = document.createElement('a'); // 3. a.href a.href = details[i].content[k].url; // 4. a.textContent a.textContent = details[i].content[k].title; // 5. 将<a>添加到<li> li.append(a); // 6. <li>添加到<ul> ul.append(li); // 7. <ul>添加到内容容器中.content content.append(ul); } }}// 设置按钮高亮function setBtnStatus(ev) { // 1. 当前按钮 const currentBtn = ev.target; // 2. 去掉所有按钮的active, 遍历 // ev.currentTarget: 事件绑定主体 , 父元素 [...ev.currentTarget.children].forEach(btn => btn.classList.remove('active')); // 3. 设置当前按钮高亮 currentBtn.classList.add('active');}// 设置内容状态: 与按钮对应的内容显示出来function setContentStatus(ev, currentBtn) { // 1. 获取所有列表 const lists = document.querySelectorAll('.content > ul'); // 2. 去掉所有列表active,换成hidden lists.forEach(list => list.classList.replace('active', 'hidden')); // 3. 找到与栏目key对应的列表 // lists: NodeList对象, 不是数组 const currentList = [...lists].find(list => list.dataset.key == currentBtn.dataset.key); // 返回当前应该高亮显示的列表 // 4. 将要显示的列表,加上active,显示出来 currentList.classList.replace('hidden', 'active');}export { createTab, setBtnStatus, setContentStatus };
1.js文件块代码2
<script type="module"> // 导入模块 import { createTab, setBtnStatus, setContentStatus, } from "./modules/tabs.js"; const type = document.querySelector(".type"); const content = document.querySelector(".content"); window.onload = () => createTab(type, content); // 3.点击栏目时,设置按钮的状态,与按钮对应的内容 // 事件委托(事件冒泡) type.onclick = (ev) => { // ev.currentTarget // ev.target //1. 设置按钮高亮 setBtnStatus(ev); // 2与按钮对应的内容显示出来 setContentStatus(ev, ev.target); }; </script>
二、实现的效果图


