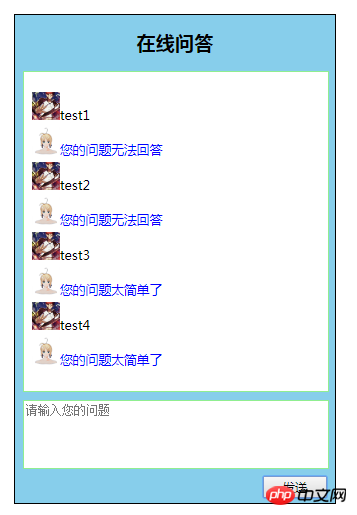
在编写客服自动应答程序过程中,发现源码在切换页面清空之前的信息时,未将用户最后发送的文字记录上去,只有客服的答复,在清空之后的页面重新输入最终将显示11条信息,因此在这基础上进行了修改,将增加最后的循环,由:
list.innerHTML = ''
sum = 0
变为:
list.innerHTML=''+li.innerHTML
sum = 1
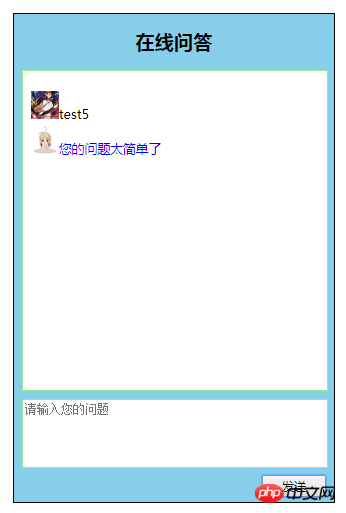
最终可显示用户最后发送的文字记录上去,以下是相关代码和展示,与大家分享。
选项卡代码:
实例
<!DOCTYPE html>
<html lang="en">
<head>
	<meta charset="UTF-8">
	<title>选项卡制作</title>
	<style type="text/css">
		h2 {
			text-align: center;
		}
		.box {
			width: 500px;
			height: 300px;
			background-color: white;
			border: 1px solid #ccc;
			margin: 50px auto;
			color: #363636;
		}
		.box > ul {
			margin: 0;
			padding: 0;
			background-color: #f8f8f8;
			overflow: hidden;
		}
		.box > ul li {
			list-style-type: none;
			width: 80px;
			height:36px;
			float:left;

			text-align: center;
			line-height: 36px;

			border-right: 1px solid #ccc;
			border-bottom: 1px solid #ccc;
		}
		.box ul + span {
			float:right;
			width:90px;
			height: 36px;
			line-height: 36px;
			margin-top: -36px;
		}
		.box ul + span a {
			color: #696969;
			text-decoration: none;
		}

		.box li.active {
			background-color: #fff;
			font-weight: bolder;
			border-bottom: none;

			border-top: 2px solid orange;
		}

		.box div {
			display: none;
		}

		.box div ul {
			margin: 0;
			padding: 20px;

			list-style-type: none;
		}

		.box div ul li {
			line-height: 2em;
		}

		.box div ul li a {
			color: #636363;
			text-decoration: none;
		}
		.box div ul li a:hover {
			color: blue;
		}

		.box div ul li span {
			float: right;
			color: red;

		}


	</style>
</head>
<body>
	<div class="box">
	 	<h2>jobing的选项卡</h2>
		<ul>
			<li class="active">动画</li>
			<li>游戏</li>
			<li>工作</li>
			<li>学习</li>
		</ul>
		<span><a href="">更多</a></span>

		<div style="display: block;">
			<ul>
				<li><a href="">圣斗士星矢</a><span>2018-4-1</span></li>
				<li><a href="">游戏王合集</a><span>2018-4-1</span></li>
				<li><a href="">火影忍者</a><span>2018-4-1</span></li>
				<li><a href="">死神</a><span>2018-4-1</span></li>
				<li><a href="">海贼王</a><span>2018-4-1</span></li>
			</ul>
	   	</div>

		<div>
			<ul>
				<li><a href="">超级马里奥</a><span>2018-4-1</span></li>
				<li><a href="">坦克大战</a><span>2018-4-1</span></li>
				<li><a href="">炉石传说</a><span>2018-4-1</span></li>
				<li><a href="">魔兽世界</a><span>2018-4-1</span></li>
				<li><a href="">阴阳师</a><span>2018-4-1</span></li>
			</ul>
		</div>

		<div>
			<ul>
				<li><a href="">应用测试</a><span>2018-4-1</span></li>
				<li><a href="">后台管理</a><span>2018-4-1</span></li>
				<li><a href="">服务器迁移</a><span>2018-4-1</span></li>
				<li><a href="">网络管理</a><span>2018-4-1</span></li>
				<li><a href="">电脑维修</a><span>2018-4-1</span></li>
			</ul>
		</div>

		<div>
			<ul>
				<li><a href="">HTML</a><span>2018-4-1</span></li>
				<li><a href="">CSS</a><span>2018-4-1</span></li>
				<li><a href="">JavaScript</a><span>2018-4-1</span></li>
				<li><a href="">MySQL</a><span>2018-4-1</span>/li>
				<li><a href="">PHP</a><span>2018-4-1</span></li>
			</ul>
		</div>
	</div>

	<script type="text/javascript">
		//1. 获取选项卡与对应显示的内容区块对象
		var box = document.getElementsByClassName('box')[0]

		var ul = box.getElementsByTagName('ul')[0]

		var tab = ul.getElementsByTagName('li')

		var list = box.getElementsByTagName('div')

		//给每一个选项卡添加事件
		for (var i=0;i<tab.length;i++) {

			tab[i].index =i

			tab[i].onmouseover = function(){

				for(var i=0;i<tab.length;i++){
					tab[i].className=''
				 	list[i].style.display='none'
				}

			this.className = 'active'
			list[this.index].style.display = 'block'
			}
		}

	</script>

</body>
</html>
运行实例 »
点击 "运行实例" 按钮查看在线实例
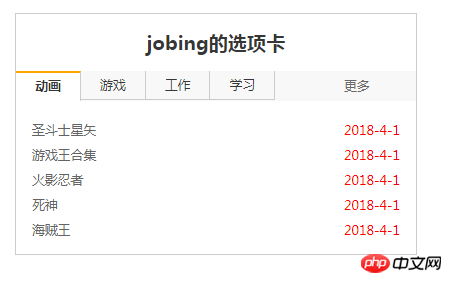
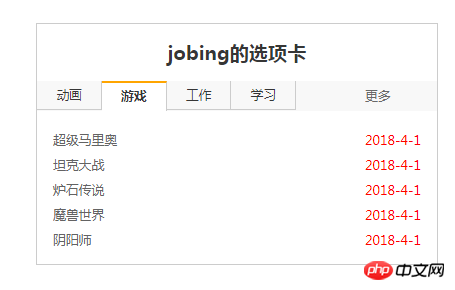
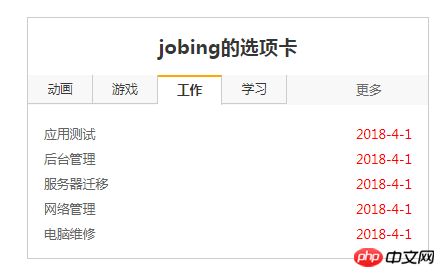
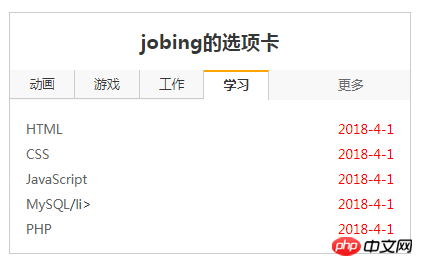
选项卡效果图:
仿真机器人代码:
实例
<!DOCTYPE html>
<html lang="en">
<head>
	<meta charset="UTF-8">
	<title>仿真自动回复</title>
	<style type="text/css">
		.box{
			width: 400px;
			height: 610px;
			background-color: skyblue;
			margin: 50px auto;

			border: 1px solid black;

		}

		.box h2{
			width: 100%;
			height: 30px;
			line-height:30px;
			text-align: center;

		}
		.box1{
			width: 95%;
			height: 400px;
			background-color: white;
			margin: 10px 10px 10px 10px;
			border: 1px solid lightgreen;
		}

		.box1 ul{
			list-style-type: none;
			line-height: 2em;
			padding: 10px;
		}
		.box2{
			width: 95%;
			height: 120px;
			margin: 10px 10px 10px 10px;


		}
		.box2 textarea{

			border: none;
			resize: none;

			width: 99%;
			height: 80px;

			border: 1px solid lightgreen;
		}
		.box2 button{
			float: right;
			width: 80px;
			height: 28px;
			margin-top: 5px;
		}
		.box2 button:hover{
			background-color: orange;
			cursor: pointer;
		}

	</style>
</head>
<body>
	<div class="box">
		<h2>在线问答</h2>
		<div contenteditable="true" class="box1">
			<ul>
				<li></li>
			</ul>
		</div>
		<div class="box2">
			<textarea placeholder="请输入您的问题"></textarea>
			<button type="button">发送</button>
		</div>
	</div>

	<script type="text/javascript">
		//获取到页面中的按钮,文本域,对话内容区
		var btn = document.getElementsByTagName('button')[0]
		var text = document.getElementsByTagName('textarea')[0]
		var list = document.getElementsByTagName('ul')[0]
		var sum = 0
		//  添加按钮点击事件
		btn.onclick = function ( ){
			// alert(text.value)
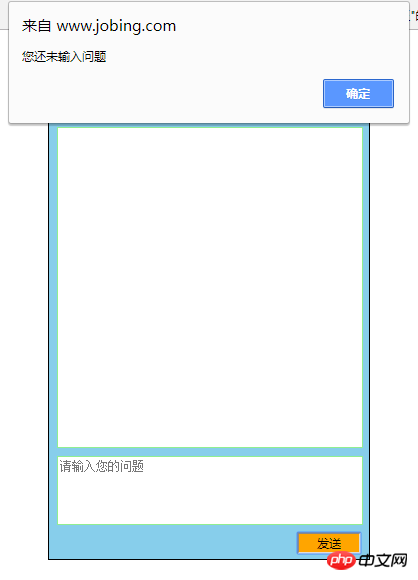
			if(text.value.length == 0){
				alert('您还未输入问题')
				return false
			}
			var content = text.value

			text.value = ''

			var li = document.createElement('li')
			li.innerHTML = content

			var userPic = '<img src="1.jpg" width="35" style="border-radiuo:50%">'
			li.innerHTML = userPic + content

			list.appendChild(li)
			sum += 1

			setTimeout(function(){
				var info = ['您的问题超出了服务范围','您的问题将会升级处理','您的问题无法回答','您的问题太简单了']
				var temp = info[Math.floor(Math.random()*4)]
				var replay = document.createElement('li')
				var kefuPic = '<img src="2.jpg" width="35" style="border-radiuo:50%">'

				replay.innerHTML = kefuPic + '<span style="color:blue">'+ temp + '</span>'

				list.appendChild(replay)
				sum +=1

			},2000)


			if(sum>8){
				list.innerHTML=''+li.innerHTML
				sum = 1
			}
		}

	</script>
</body>
</html>
运行实例 »
点击 "运行实例" 按钮查看在线实例
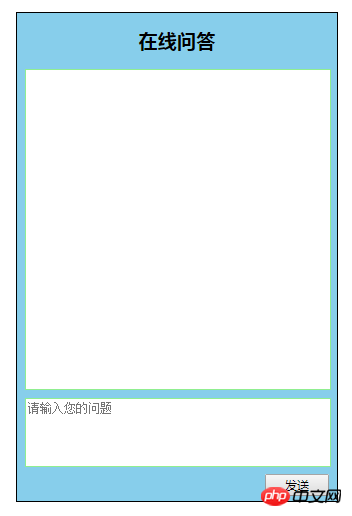
仿真机器人效果图:
总结:
1. 在选项卡编程过程中,首先需要获取选项卡与对应显示的内容区块对象
2.需要给每一个选项卡添加事件,因为有四个选项卡,所以要用到循环
3.在仿真自动回复编程过程中,首先需要获取到页面中的按钮,文本域,对话内容区
4.然后添加按钮点击事件,获取用户数据并推送到对话窗口中
5.中间还创建了一个新节点,并将新的节点插入到对话列表中
6.js的代码很不熟悉,很多东西需要看着源码才能打出来,还要多加练习争取以后可以不看源码自己打出来

