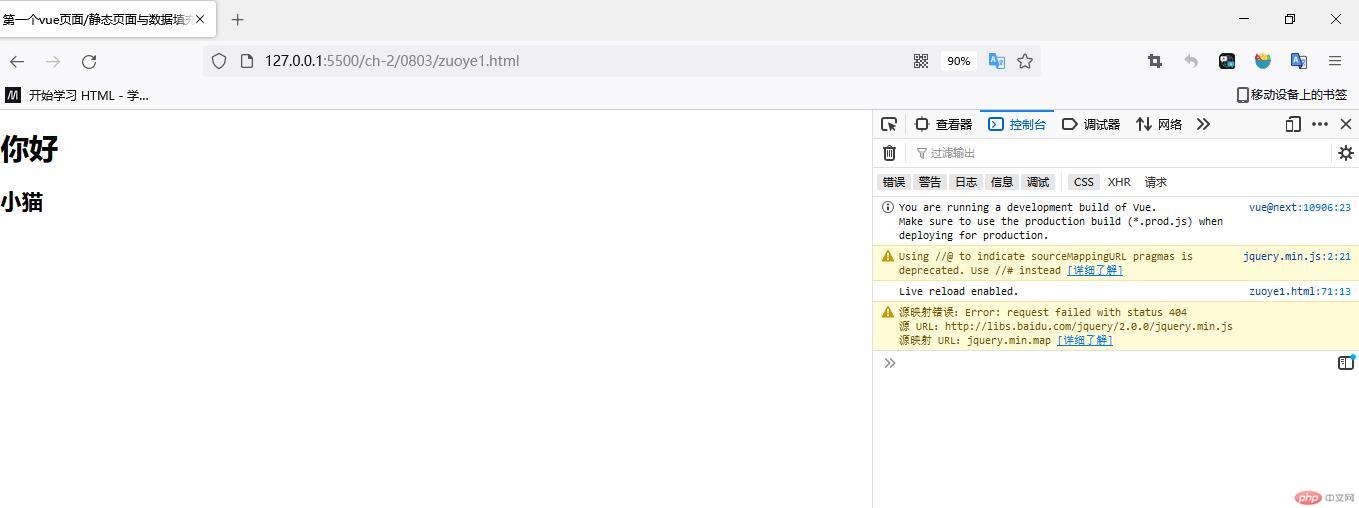
>第一个vue页面/静态页面与数据填充
<!DOCTYPE html><html lang="zh-CN"><head> <meta charset="UTF-8"> <meta http-equiv="X-UA-Compatible" content="IE=edge"> <meta name="viewport" content="width=device-width, initial-scale=1.0"> <title>第一个vue页面/静态页面与数据填充</title> <!-- 引入vue --> <script src="https://unpkg.com/vue@next"></script> <!-- 引入jquery --> <script src="http://libs.baidu.com/jquery/2.0.0/jquery.min.js"></script></head><body> <!-- 静态页面 --> <h1> 你好</h1> <!--页面模板化: 模板字面量 --> <!-- {{message}} 插值 数据占位符 --> <h2 class="title">{{message}}</h2> <script> // es6 // document.querySelector('.title').textContent = 'hello,朱老师'; // jquery// $('.title').text('小猪');// vue.js const app = Vue.createApp({ data () { return { message:'小猫', }; } , }); // 方法一// app.mount(document.querySelector('.title')); // 方法二 app.mount('.title'); </script></body></html>
效果
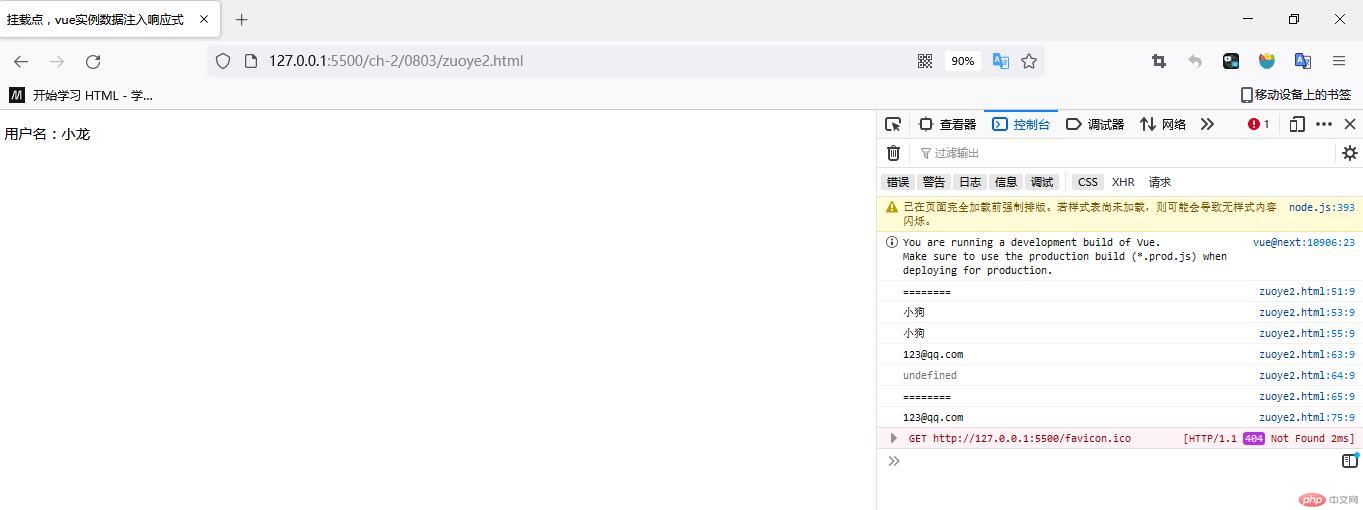
挂载点,vue实例数据注入响应式
<!DOCTYPE html><html lang="zh-CN"><head> <meta charset="UTF-8"> <meta http-equiv="X-UA-Compatible" content="IE=edge"> <meta name="viewport" content="width=device-width, initial-scale=1.0"> <title>挂载点,vue实例数据注入响应式</title> <script src="https://unpkg.com/vue@next"></script></head><body> <!-- 1、挂载点:vue实例的作用域 --> <div class="app"> <p>用户名:{{username}}</p> </div> <script> // // 2.vue实例 // // const app = Vue.createrAPP( 配置项 ); // // Vue.createrAPP() == new Vue // // function createrAPP (){ // // return new Vue(); // // } // // 2.1vue配置项 // const config = { // // vue 中的遍历全部写到 data()方法中 // // data : function(){ // // } // data () { // return { // // 需要返回的的数据 // username:'小猪', // }; // }, // }; // // 2.2创建VUE的实例 // const app = Vue.createApp(config); // // 2.3 将实例挂载到页面,挂载点上绑定 // // app.mount(document.querySelector('.app')); // // 2.3 简写 // app.mount('.app');// 代码简化const app1 = Vue.createApp({ data() { return { username:'小狗', }; },}).mount('.app');console.log('========');// 3、数据注入 数据自动注入到vue实例中console.log(app1.$data.username);// 简化 原因:数据已经被绑定到 vue实例上app1 对象上 app1.username = 'xxxx'console.log(app1.username);// 用学过的 访问器属性 模拟数据注入const obj ={ $data: { email : '123@qq.com', },};console.log(obj.$data.email);console.log(obj.email);console.log('========');const obj1 ={ $data: { email : '123@qq.com', }, get email(){ return this.$data.email; },};// 数据已经注入到obj中console.log(obj1.email);// 4、响应式、app1.username = '小龙'; </script></body></html>
效果
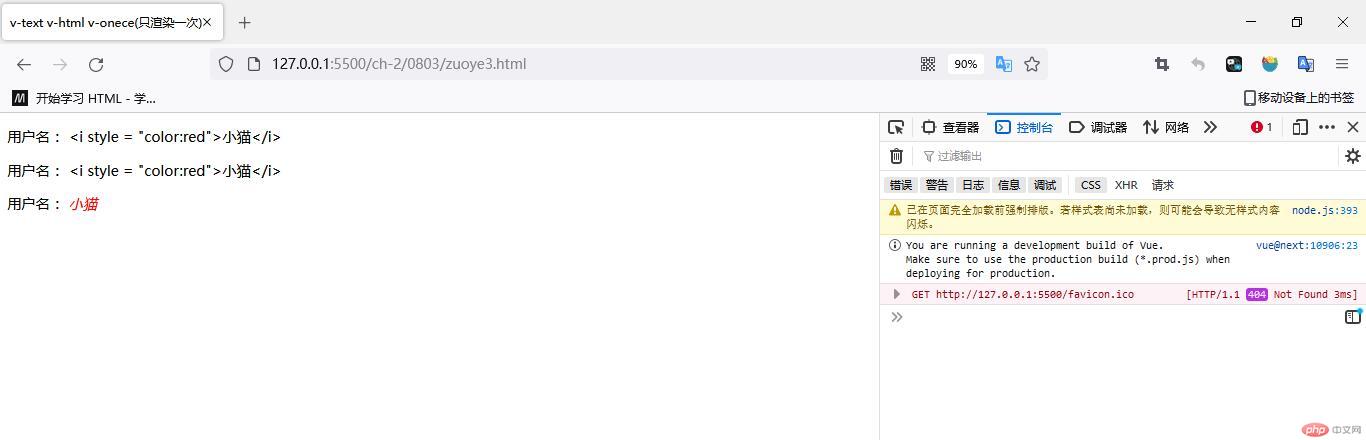
v-text v-html v-onece(只渲染一次)
<!DOCTYPE html><html lang="zh-CN"><head> <meta charset="UTF-8"> <meta http-equiv="X-UA-Compatible" content="IE=edge"> <meta name="viewport" content="width=device-width, initial-scale=1.0"> <title>v-text v-html v-onece(只渲染一次)</title> <script src="https://unpkg.com/vue@next"></script></head><body> <!-- vue 指令 :"v- ''前缀:本质上就是html 标签的自定义属性 --> <div class="app"> <!-- v-text -> textContent --> <p>用户名:<span >{{username}}</span></p> <p>用户名:<span v-text = "username"></span></p> <p>用户名:<span v-html = "username"></span></p> </div> <script> const app = Vue.createApp({ data(){ return { username:'小狗', }; }, }).mount('.app'); app.username = '<i style = "color:red">小猫</i>'; </script></body></html>
效果
样式绑定
<!DOCTYPE html><html lang="zh-CN"><head> <meta charset="UTF-8"> <meta http-equiv="X-UA-Compatible" content="IE=edge"> <meta name="viewport" content="width=device-width, initial-scale=1.0"> <title>样式绑定</title> <script src="https://unpkg.com/vue@next"></script> <style> .ctive { color:rebeccapurple; } .bgc { background-color: aqua; } </style></head><body> <div class="app"> <p style="color: yellow;">www.baidu.com</p> <!-- vue 动态属性设置指令 v-bind :属性名--> <p v-bind:style="style">www</p> <p v-bind:style="{color:textColor,backgroundColor:bgc}">www</p> <p v-bind:style="[base,custom]">cn</p> <!-- 类样式 class classList --> <p v-bind:class="'ctive'">bai</p> <p v-bind:class="ctive">du</p> <p v-bind:class="{ctive:false}">小猫</p> <p v-bind:class="{ctive:isActive}">小狗</p> <p v-bind:class="{ctive:isActive2}">小牛</p> <p v-bind:class="['ctive','bgc' ]">小龙</p> <p v-bind:class="[mycolor,mybgc]">小猪</p> <!-- 简化 v-bind 高频指令,可以简化为 : --> <p :class="[mycolor,mybgc]">小鸡</p> </div></body><script> const app = Vue.createApp({ data() { return { // style:'color:blue; background-color: aqua' // style:'color:blue', textColor :'red', // 注意不能用 background-color 不是字面量合法标识符。 要用驼峰式 bgc:'wheat', // 数组打包 base : { border: '1px solid', background:'green', }, custom : { color :'white', padding:'20px', }, ctive :'ctive', isActive: true, isActive2: false, mycolor:'ctive', mybgc:'bgc', }; },}).mount('.app');</script></html>
效果

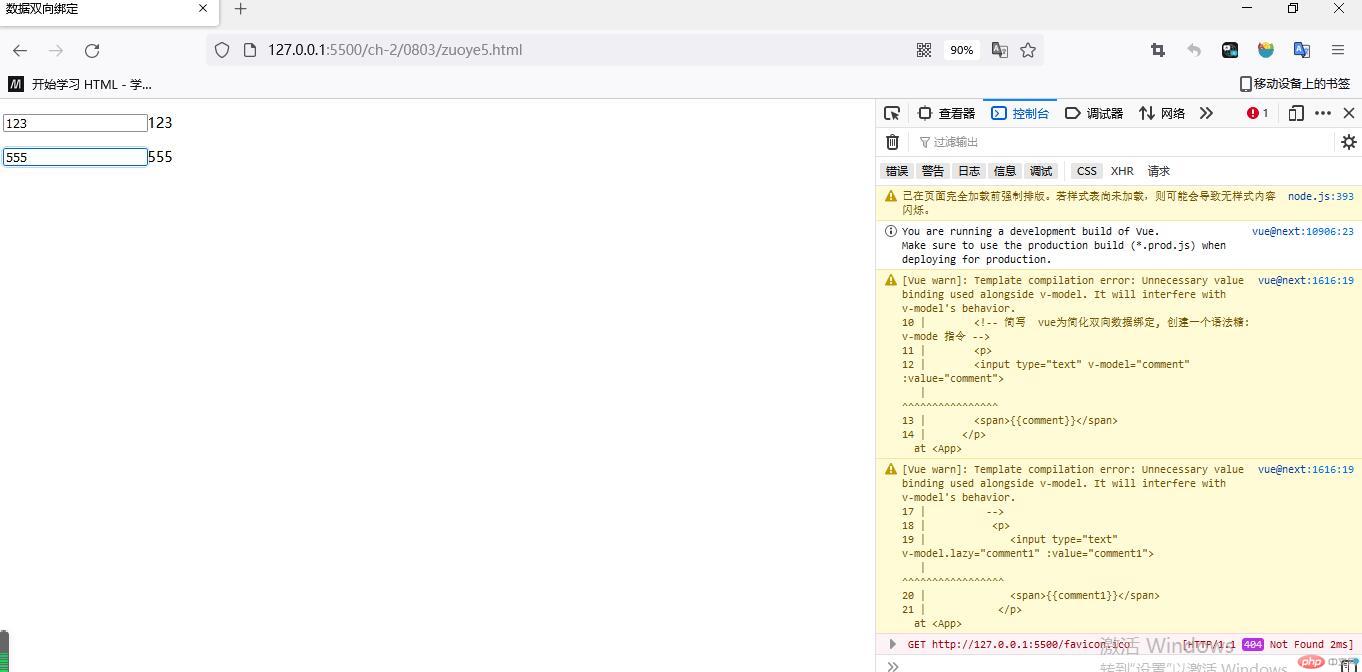
数据双向绑定
<!DOCTYPE html><html lang="zh-CN"><head> <meta charset="UTF-8"> <meta http-equiv="X-UA-Compatible" content="IE=edge"> <meta name="viewport" content="width=device-width, initial-scale=1.0"> <title>数据双向绑定</title> <script src="https://unpkg.com/vue@next"></script></head><body> <!-- <p> <div>ES6:</div> 下一个兄弟节点 <input type="text" value="" oninput="console.log(this.nextElementSibling.textContent=this.value)"><span></span> </p> --> <!-- vue --> <!-- <div class="app"> <p> vue 事件指令: v-on 可以简写为 @ $ event 必须要加$ 符号 target 事件对象 <input type="text" v-oninput="comment = $event.target.value" v-blind:value="comment" /> <span>{{comment}}</span> </p> </div> --> <div class="app"> <!-- <p> --> <!-- v-on: vue的事件指令 --> <!-- v-on: 高频指令, @表示 --> <!-- <input type="text" @input="comment = $event.target.value" :value="comment" /> <span>{{comment}}</span> </p> --> <!-- $event 事件对象, 在vue不能直接用event --> <!-- 简写 vue为简化双向数据绑定, 创建一个语法糖: v-mode 指令 --> <p> <input type="text" v-model="comment" :value="comment" /> <span>{{comment}}</span> </p> <!-- 延迟绑定:修饰符 v-model.lazy 跟blur 事件,失去焦点 change 事件类似,具体两者的的共性 --> <p> <input type="text" v-model.lazy="comment1" :value="comment1" /> <span>{{comment1}}</span> </p> </div> <script> const app = Vue.createApp({ data() { return { comment: null, comment1: null, }; }, }).mount('.app'); </script></body></html>
效果