
实例演示Ajax-post的三种方式
方式一:通常方式
<script>// 1. 创建请求对象: `new XMLHttpRequest()`const xhr = new XMLHttpRequest();// 2. 监听请求回调: `onreadystatechange`xhr.addEventListener("readystatechange", show, false);// 3. 初始化请求参数: `open(请求类型,请求地址,是否异步)`xhr.open("POST", "data/test1.php", true);// 4. 设置请求头: `setRequestHeader()`xhr.setRequestHeader("content-type", "application/x-www-form-urlencoded");// 用js对象来模拟表单数据const user = {email: "admin@php.cn",password: "123456",};// 格式转换let data = JSON.stringify(user);// 5. 发送请求: `send()`xhr.send(data);// 回调函数function show(ev) {if (xhr.readyState === 4) {// 返回的数据在xhr.responseTextconsole.log(xhr.responseText);}}</script>
data/test1.php
<?php$data = key($_POST);$user = json_decode($data);echo '邮箱:'.$user->email . '密码: ' . md5($user->password);
方式二:Ajax-POST请求,直接用json
<script>// 1. 创建请求对象: `new XMLHttpRequest()`const xhr = new XMLHttpRequest();// 2. 监听请求回调: `onreadystatechange`xhr.addEventListener("readystatechange", show, false);// 3. 初始化请求参数: `open(请求类型,请求地址,是否异步)`xhr.open("POST", "data/test1.php", true);// 4. 设置请求头: `setRequestHeader()`xhr.setRequestHeader("content-type", "application/json;charset=utf-8");// 用js对象来模拟表单数据const user = {email: "admin@php.cn",password: "123456",};// 格式转换let data = JSON.stringify(user);// 5. 发送请求: `send()`xhr.send(data);// 回调函数function show(ev) {if (xhr.readyState === 4) {// 返回的数据在xhr.responseTextconsole.log(xhr.responseText);}}</script>
data/test1.php
<?php$data = file_get_contents('php://input');//对象$user = json_decode($data);print_r($user);//数组$user = json_decode($data, true);print_r($user);
方式三:Ajax-POST请求-FormData
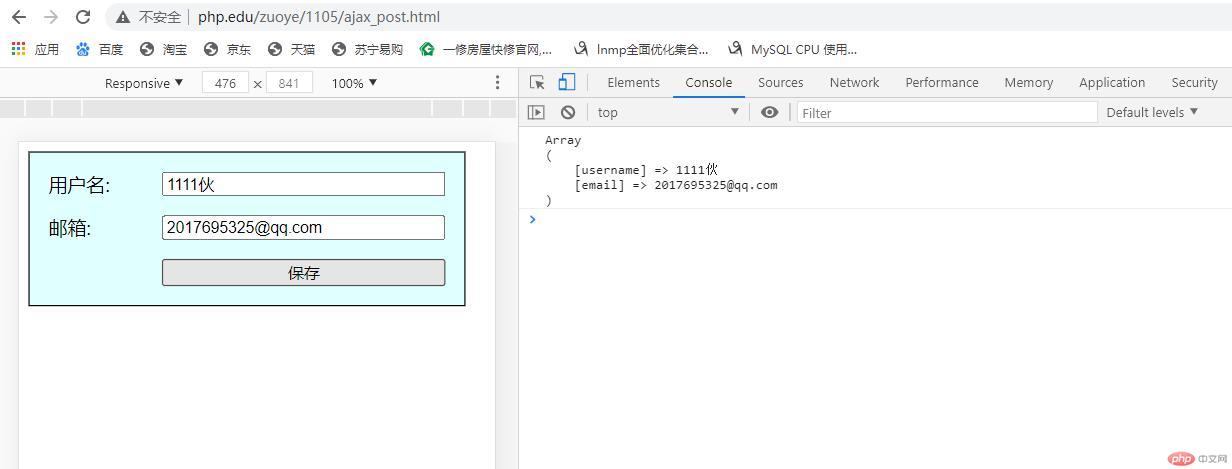
源码:
<body><form action="" onsubmit="return false;"><label for="username">用户名:</label><input type="text" id="username" name="username" /><label for="email">邮箱:</label><input type="email" id="email" name="email" /><button>保存</button></form><script>// FormData 对象: 将表单数据进行封装后统一提交const form = document.querySelector("form");const btn = document.querySelector("button");// 1. 创建请求对象: `new XMLHttpRequest()`const xhr = new XMLHttpRequest();// 监听事件btn.addEventListener("click", callback, false);function callback(ev) {// 2. 监听请求回调: `onreadystatechange`xhr.addEventListener("readystatechange", show, false);// 3. 初始化请求参数: `open(请求类型,请求地址,是否异步)`xhr.open("POST", "data/test1.php", true);// 4. 发送请求: `send()`// new FormData(form): 当前表单数据的封装xhr.send(new FormData(form));}// 请求的回调function show() {if (xhr.readyState === 4) {// 返回的数据在xhr.responseTextconsole.log(xhr.responseText);}}</script></body>
data/test1.php
<?phpprint_r($_POST);