1. 工厂函数$()的四种应用场景
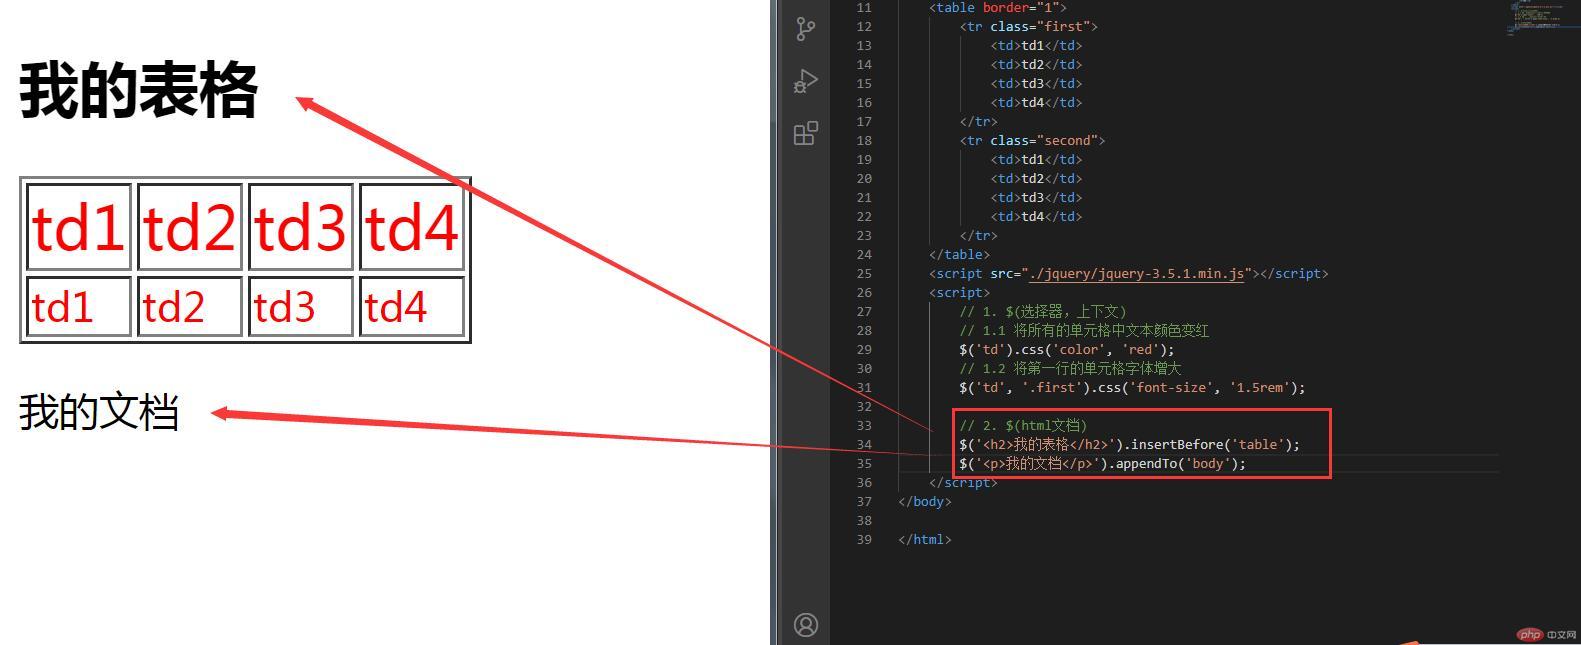
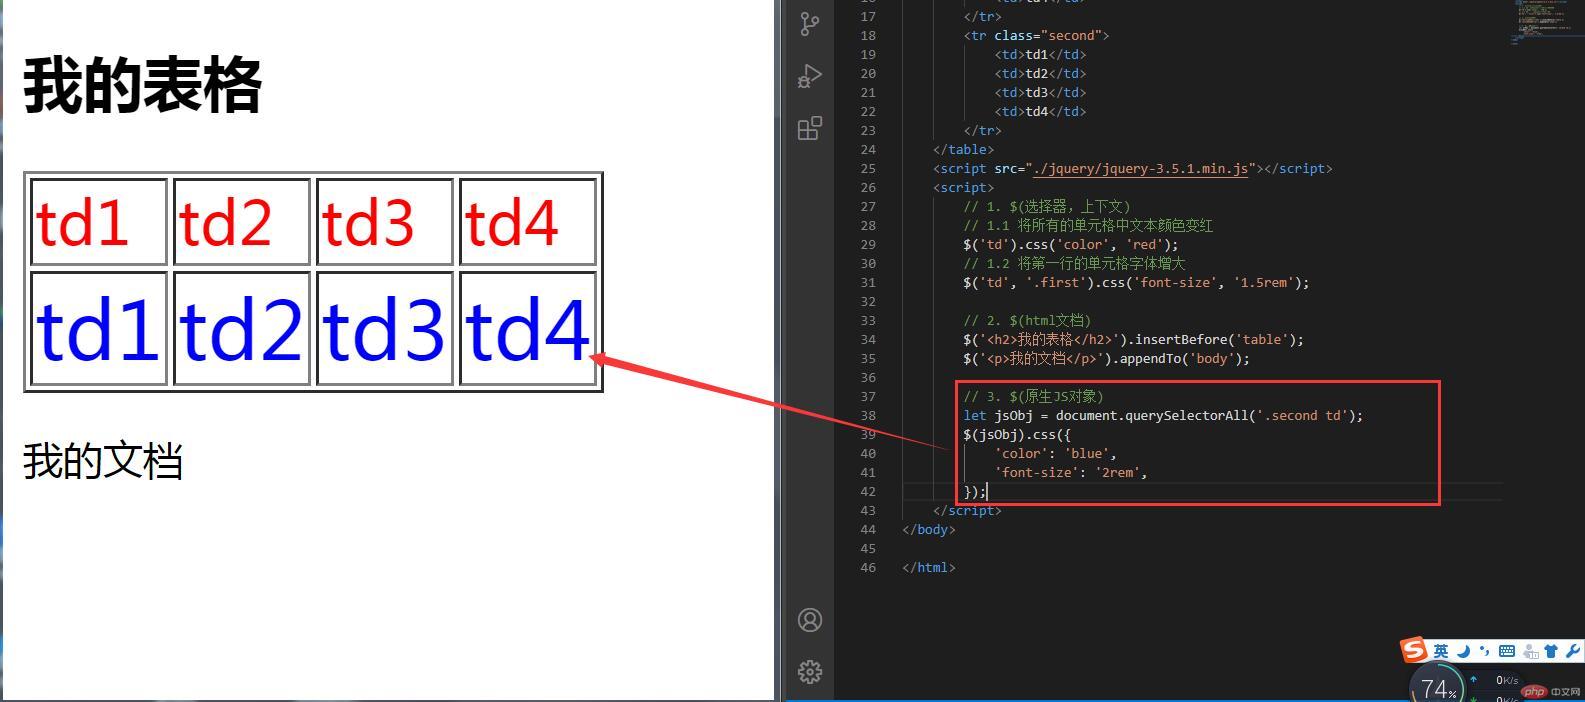
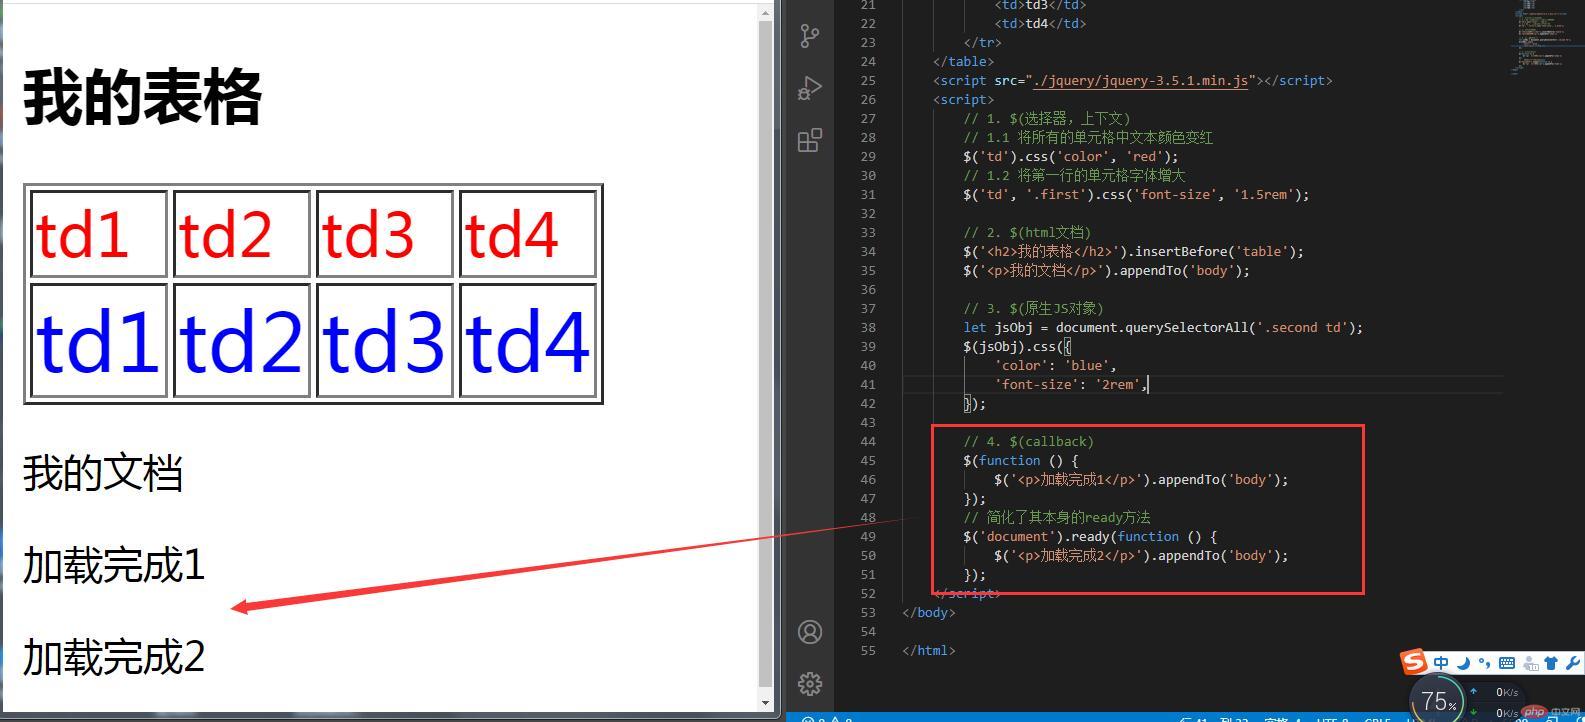
$(选择器,上下文):主要用于获取页面元素$(JS原生对象):将JS原生对象转换为JQ对象$(callback):当html文档加载完成后立即执行这个回调函数$(html文档):生成html文档,类似于创建节点
<!DOCTYPE html><html lang="en"><head><meta charset="UTF-8"><meta name="viewport" content="width=device-width, initial-scale=1.0"><title>$()应用场景</title></head><body><table border="1"><tr class="first"><td>td1</td><td>td2</td><td>td3</td><td>td4</td></tr><tr class="second"><td>td1</td><td>td2</td><td>td3</td><td>td4</td></tr></table><script src="./jquery/jquery-3.5.1.min.js"></script><script>// 1. $(选择器,上下文)// 1.1 将所有的单元格中文本颜色变红$('td').css('color', 'red');// 1.2 将第一行的单元格字体增大$('td', '.first').css('font-size', '1.5rem');// 2. $(html文档)$('<h2>我的表格</h2>').insertBefore('table');$('<p>我的文档</p>').appendTo('body');// 3. $(原生JS对象)let jsObj = document.querySelectorAll('.second td');$(jsObj).css({'color': 'blue','font-size': '2rem',});// 4. $(callback)$(function () {$('<p>加载完成1</p>').appendTo('body');});// 简化了其本身的ready方法$('document').ready(function () {$('<p>加载完成2</p>').appendTo('body');});</script></body></html>

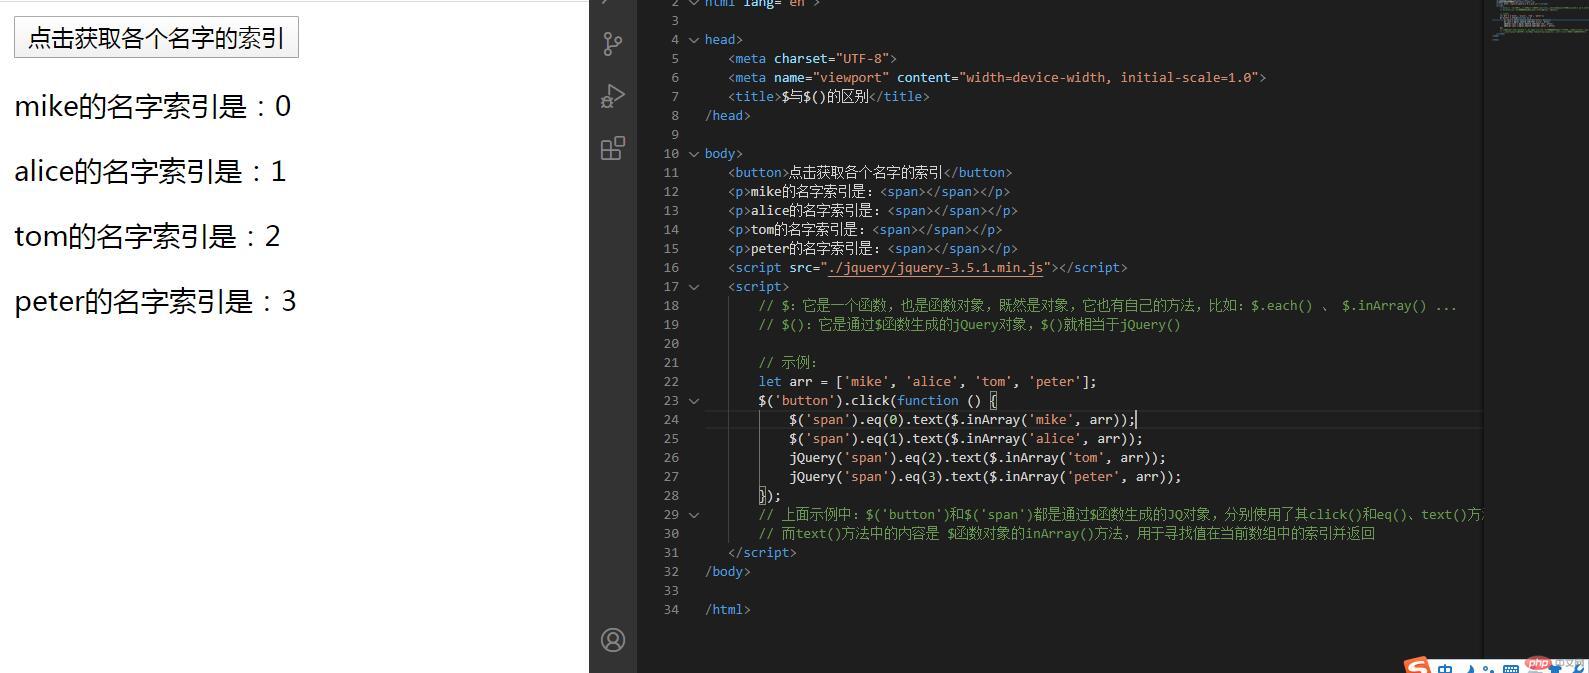
2. $与$()的区别
<!DOCTYPE html><html lang="en"><head><meta charset="UTF-8"><meta name="viewport" content="width=device-width, initial-scale=1.0"><title>$与$()的区别</title></head><body><button>点击获取各个名字的索引</button><p>mike的名字索引是:<span></span></p><p>alice的名字索引是:<span></span></p><p>tom的名字索引是:<span></span></p><p>peter的名字索引是:<span></span></p><script src="./jquery/jquery-3.5.1.min.js"></script><script>// $:它是一个函数,也是函数对象,既然是对象,它也有自己的方法,比如:$.each() 、 $.inArray() ...// $():它是通过$函数生成的jQuery对象,$()就相当于jQuery()// 示例:let arr = ['mike', 'alice', 'tom', 'peter'];$('button').click(function () {$('span').eq(0).text($.inArray('mike', arr));$('span').eq(1).text($.inArray('alice', arr));jQuery('span').eq(2).text($.inArray('tom', arr));jQuery('span').eq(3).text($.inArray('peter', arr));});// 上面示例中:$('button')和$('span')都是通过$函数生成的JQ对象,分别使用了其click()和eq()、text()方法// 而text()方法中的内容是 $函数对象的inArray()方法,用于寻找值在当前数组中的索引并返回</script></body></html>
3. attr()的常用操作
attr(属性名):查看属性名attr(属性名,属性值):设置属性值attr(属性名,callback):第二个参数支持回调
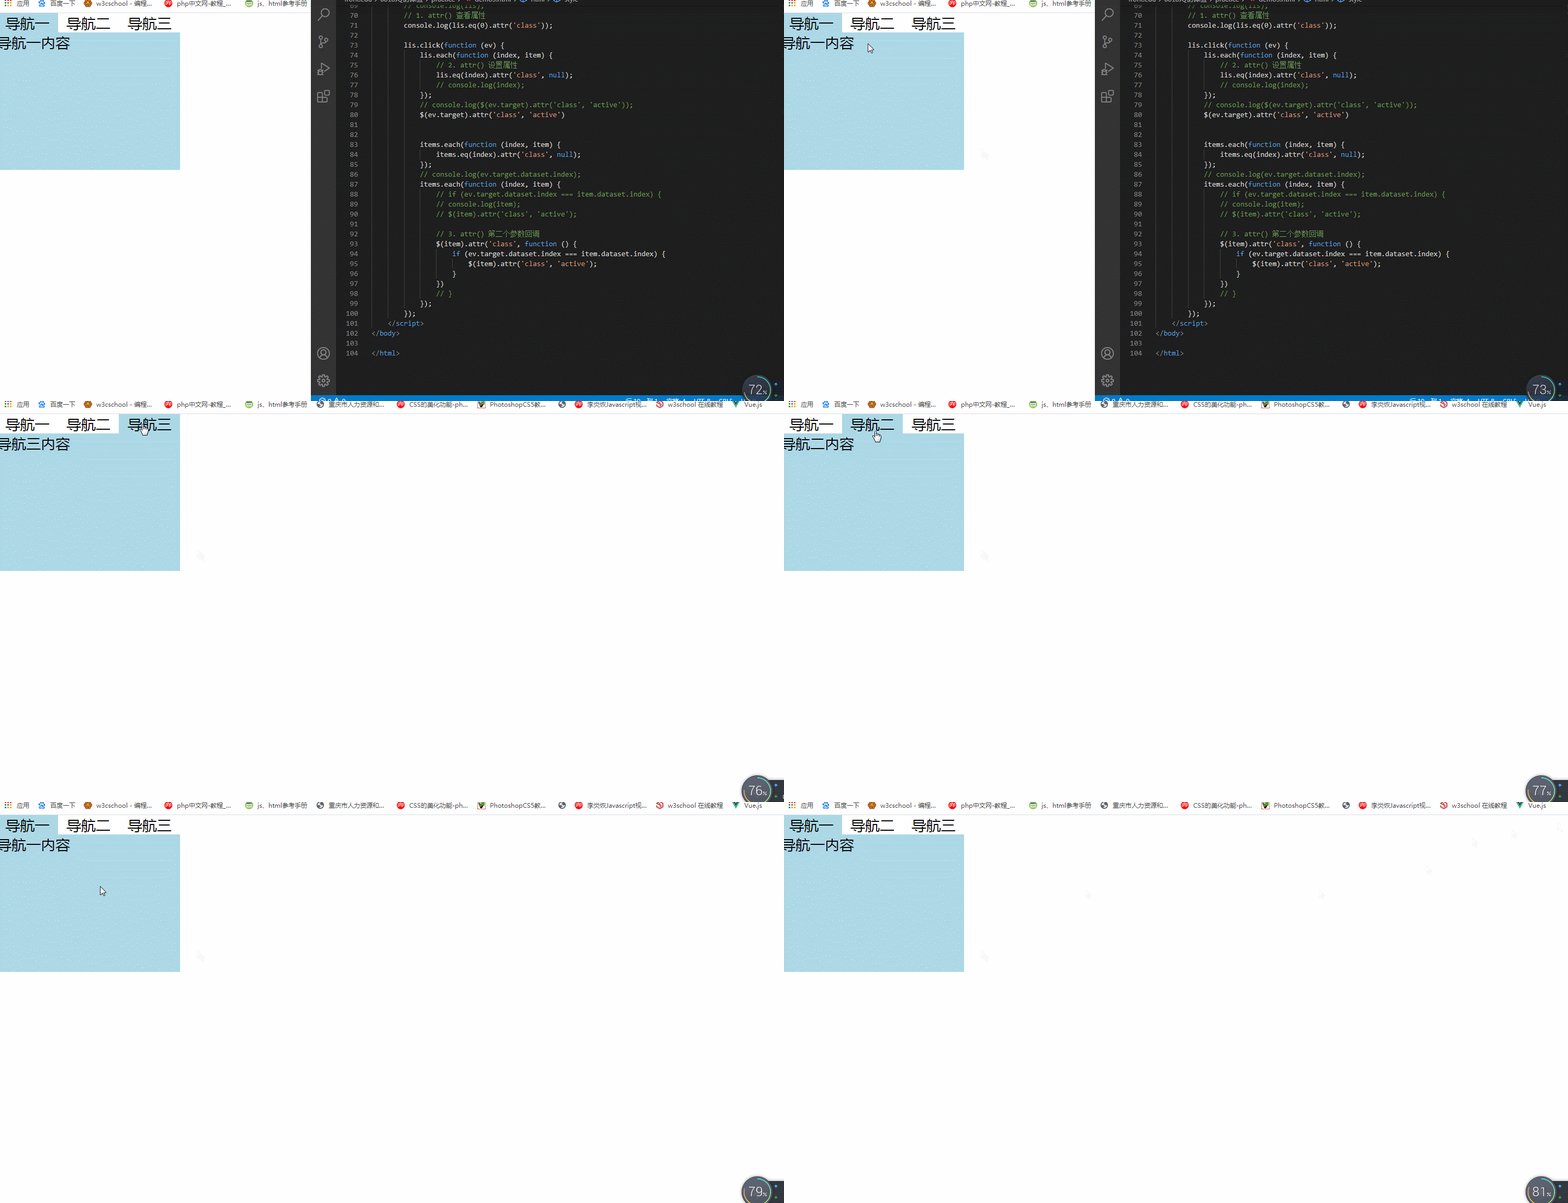
实例演示:使用attr()制作选项卡:
<!DOCTYPE html><html lang="en"><head><meta charset="UTF-8"><meta name="viewport" content="width=device-width, initial-scale=1.0"><title>attr()操作实例之选项卡</title></head><style>* {margin: 0;padding: 0;box-sizing: border-box;}.container {width: 200px;}.container .nav {display: flex;}.container .nav li {list-style: none;flex: auto;text-align: center;}.container .nav li:hover {cursor: pointer;}.nav .active {background-color: lightblue;}.container .items div {display: none;width: 200px;height: 150px;background-color: lightblue;}.container .items .active {display: block;}</style><body><div class="container"><ul class="nav"><li class="active" data-index="1">导航一</li><li data-index="2">导航二</li><li data-index="3">导航三</li></ul><div class="items"><div class="active" data-index="1">导航一内容</div><div data-index="2">导航二内容</div><div data-index="3">导航三内容</div></div></div><script src="./jquery/jquery-3.5.1.min.js"></script><script>let lis = $('li', '.nav');let items = $('div', '.items');console.log(items);// console.log(lis);// 1. attr() 查看属性console.log(lis.eq(0).attr('class'));lis.click(function (ev) {lis.each(function (index, item) {// 2. attr() 设置属性lis.eq(index).attr('class', null);// console.log(index);});// console.log($(ev.target).attr('class', 'active'));$(ev.target).attr('class', 'active')items.each(function (index, item) {items.eq(index).attr('class', null);});// console.log(ev.target.dataset.index);items.each(function (index, item) {// if (ev.target.dataset.index === item.dataset.index) {// console.log(item);// $(item).attr('class', 'active');// 3. attr() 第二个参数回调$(item).attr('class', function () {if (ev.target.dataset.index === item.dataset.index) {$(item).attr('class', 'active');}})// }});});</script></body></html>
