背景控制的常用属性
背景控制的常用属性有
- 控制背景颜色:background-color
- 控制背景的覆盖范围:background-clip
- 渐变:background:linear-gradient(red, yellow);
- 背景图片:background-image:url(“”)
- 控制背景图片是否平铺重复:background-repeat
- 背景定位:background-position
- 背景尺寸:background-size
需要注意背景色和背景图片是互斥的。
<!DOCTYPE html><html lang="en"><head><meta charset="UTF-8"><meta name="viewport" content="width=device-width, initial-scale=1.0"><title>背景控制的常用属性举例</title><style>.box {width: 200px;height: 200px;border: 1px solid #000;padding:10px;margin:10px;}.box1{float:left;/* 设置背景色 */background-color:blue;/* 控制背景的覆盖范围在内容区,背景裁切 */background-clip: content-box;}.box2{float:left;/* 渐变添加 background: linear-gradient(角度,颜色, 颜色); 前后两个颜色值默认从上到下渐变,可设置角度、从左到右等方向,可添加多个颜色*/background: linear-gradient(30deg, red, yellow);/* background: linear-gradient(to right, red, yellow); 可用regba(255,0,0,0.5)*/}.box3{float:left;/* 背景图片,默认图片重复 */background-image:url("flower.png");}.box4{float:left;/* 背景图片,取消图片重复 */background-image:url("flower.png");background-repeat: no-repeat;/* 向某个方向重复,x水平方向,y垂直方向等 */background-repeat: repeat-x;}.box5{float:left;background-image:url("flower.png");/* 背景图片,取消图片重复 */background-repeat: no-repeat;/* 背景定位,可用数值、也可用关键字,使用关键字时不分先后顺序,如果只写一个,其它默认center*/background-position:50px 50px ;/* 下面三个属性效果一致 */background-position:right center ;background-position:center right ;background-position:right;/* 百分比形式,只写一个,默认第二个为50% */background-position:50% 20%;}.box6{float:left;background-image:url("flower.png");/* 背景大小 等比缩放*/background-size:contain;/* 根据盒子拉伸 */background-size:cover;}.box7{float:left;/* 简写 */background:url("flower.png") no-repeat right;}.box8{float:left;background:url("flower.png") no-repeat center;/* 设置盒子阴影 */box-shadow: 5px 5px 6px red;}.box9{float:left;/* 设置圆角,值为50%时为圆形 */border-radius:30px;background:url("flower.png") no-repeat center;/* 设置盒子阴影 */box-shadow: 5px 5px 6px red;}/* 鼠标悬停 */.box9:hover{/* 设置圆角,值为50%时为圆形 */border-radius:50%;box-shadow: 0px 0px 10px red;cursor: pointer;}</style></head><body><div class="box box1"></div><div class="box box2"></div><div class="box box3"></div><div class="box box4"></div><div class="box box5"></div><div class="box box6"></div><div class="box box7"></div><div class="box box8"></div><div class="box box9"></div></body></html>
代码运行结果:
精灵图的原理与实现
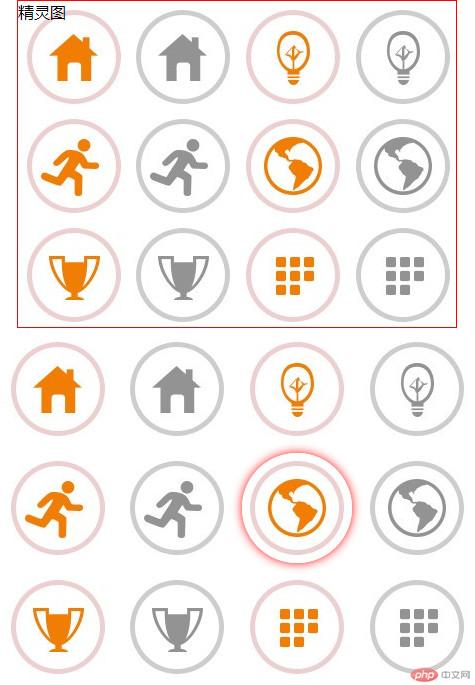
精灵图是字体图标的前身,可以减少网站加载图片的次数,从而减少资源的占用。精灵图是许多小图片集合在一张大图片上,实现的原理主要是依靠css背景定位的知识,用css代码将图片上的每个小图片切出来从而取到每个图标。通过编程的方式来拿到每个图标,减少http的请求次数。具体原理主要是根据所选图标的大小写一个相应大小的盒子,盒子的初始位置不变,通过图片的定位使图片移动,将所需图标显示在盒子中,达到了裁剪的效果。
举例演示精灵图的实现原理
<!DOCTYPE html><html lang="en"><head><meta charset="UTF-8"><meta name="viewport" content="width=device-width, initial-scale=1.0"><title>精灵图的实现</title><style>*{margin: 0;padding:0;box-sizing: border-box;}.box{width:440px;height:328px;background-color:aliceblue;background:url("1.png");background-repeat:no-repeat;border:1px solid red;}.box1{width: 110px;height:110px;background:url("1.png");}.box2{/* 盒子大小等同于你测量好的每个图标的大小*/width: 110px;height:110px;/* 利用css背景定位属性裁切需要图标 */background:url("1.png");background-repeat:no-repeat;background-position:-110px 0 ;}.box3{/* 盒子大小等同于你测量好的每个图标的大小*/width: 110px;height:110px;/* 利用css背景定位属性裁切需要图标 */background:url("1.png");background-repeat:no-repeat;background-position:-220px 0 ;}.box4{/* 盒子大小等同于你测量好的每个图标的大小*/width: 110px;height:110px;/* 利用css背景定位属性裁切需要图标 */background:url("1.png");background-repeat:no-repeat;background-position:-330px 0 ;}.box5{/* 盒子大小等同于你测量好的每个图标的大小*/width: 110px;height:110px;/* 利用css背景定位属性裁切需要图标 */background:url("1.png");background-repeat:no-repeat;background-position:0 -110px ;}.box6{/* 盒子大小等同于你测量好的每个图标的大小*/width: 110px;height:110px;/* 利用css背景定位属性裁切需要图标 */background:url("1.png");background-repeat:no-repeat;background-position:-110px -110px ;}.box7{/* 盒子大小等同于你测量好的每个图标的大小*/width: 110px;height:110px;/* 利用css背景定位属性裁切需要图标 */background:url("1.png");background-repeat:no-repeat;background-position:-220px -110px ;}.box8{/* 盒子大小等同于你测量好的每个图标的大小*/width: 110px;height:110px;/* 利用css背景定位属性裁切需要图标 */background:url("1.png");background-repeat:no-repeat;background-position:-330px -110px ;}.box9{/* 盒子大小等同于你测量好的每个图标的大小*/width: 110px;height:110px;/* 利用css背景定位属性裁切需要图标 */background:url("1.png");background-repeat:no-repeat;background-position:0 -220px ;}.box10{/* 盒子大小等同于你测量好的每个图标的大小*/width: 110px;height:110px;/* 利用css背景定位属性裁切需要图标 */background:url("1.png");background-repeat:no-repeat;background-position:-110px -220px ;}.box11{/* 盒子大小等同于你测量好的每个图标的大小*/width: 110px;height:110px;/* 利用css背景定位属性裁切需要图标 */background:url("1.png");background-repeat:no-repeat;background-position:-220px -220px ;}.box12{/* 盒子大小等同于你测量好的每个图标的大小*/width: 110px;height:110px;/* 利用css背景定位属性裁切需要图标 */background:url("1.png");background-repeat:no-repeat;background-position:-330px -220px ;}/* 浮动使每个图标横向排列 */.continer>div{float:left;margin:5px;}/* 为每个图标添加鼠标悬停效果 */.continer>div:hover{cursor: pointer;border:2px;border-radius: 50%;box-shadow: 0 0 10px red;}</style></head><body><div class="box">精灵图</div><div class="continer"><div class="box1"></div><div class="box2"></div><div class="box3"></div><div class="box4"></div><div class="box5"></div><div class="box6"></div><div class="box7"></div><div class="box8"></div><div class="box9"></div><div class="box10"></div><div class="box11"></div><div class="box12"></div></div></body></html>

阿里字体图标的完整引用流程
1、https://www.iconfont.cn/ 登录阿里图标官网,用Github账号或新浪微博注册登录。
2、找到喜欢的要用的图标,点击购物车按钮放入自己的购物车。然后加入自己的项目(没有项目网站会提示你创建自己的项目,根据网站提示就好)。

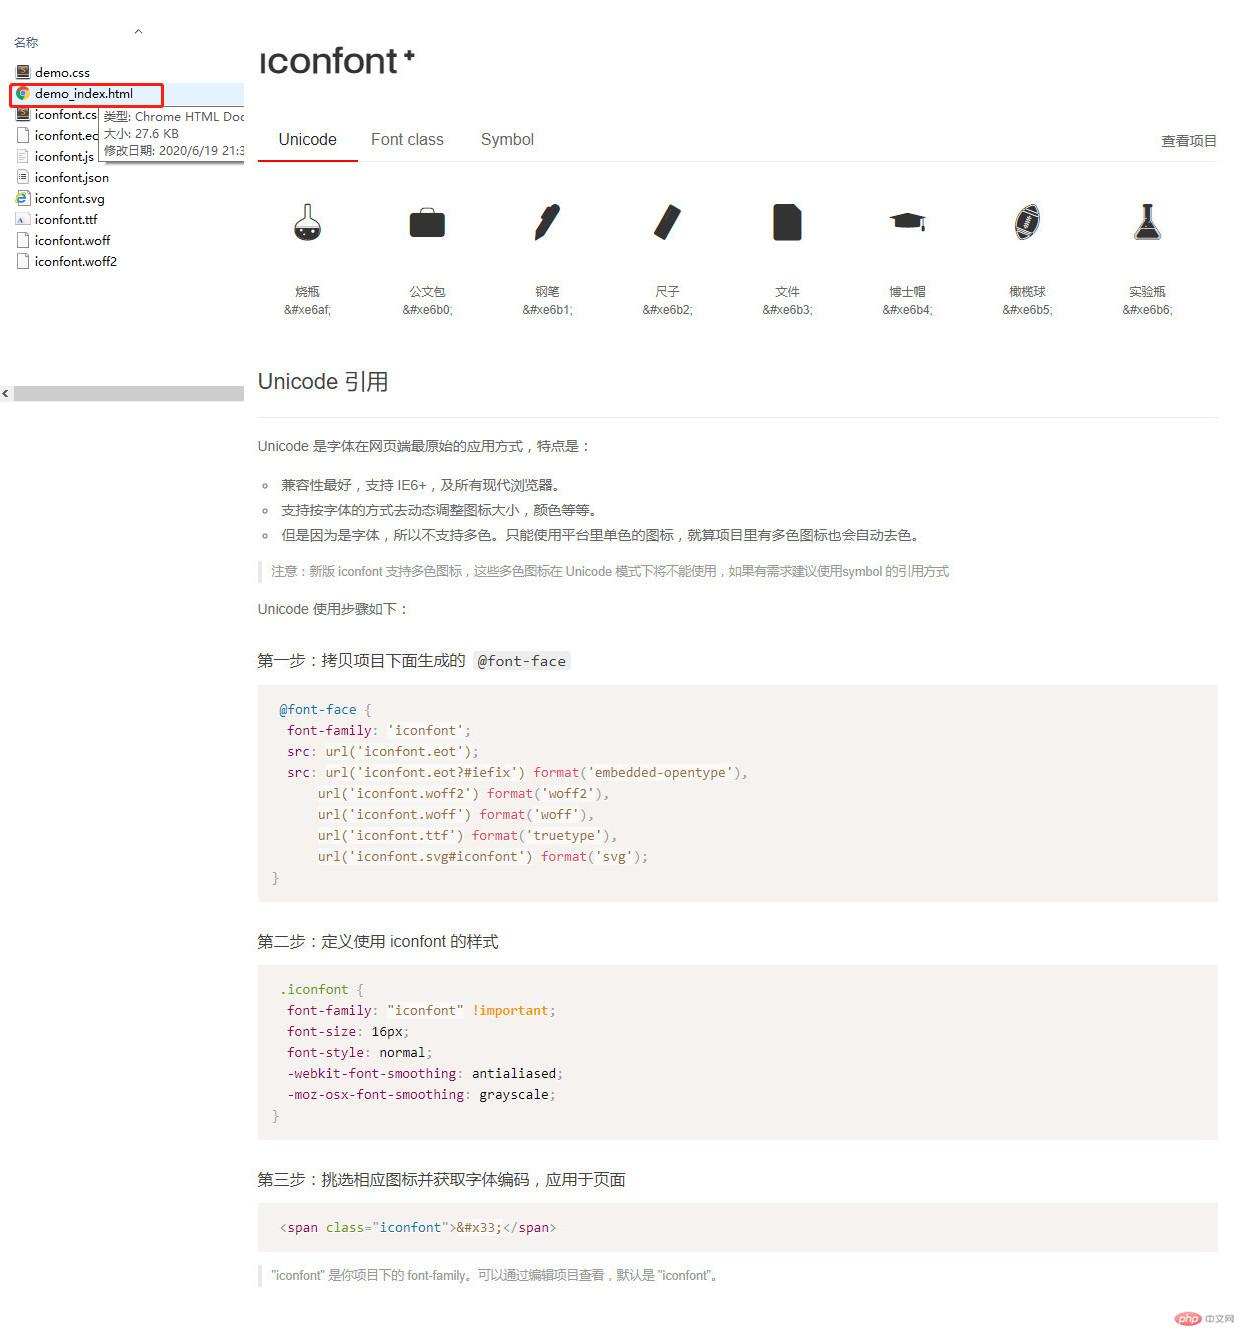
3、在图标管理中查看各种应用方式,Unicode(字符编码)、Font class(类样式)、Symnol(样式表)三种方式,点击下载素材,并解压至你的网站运行目录。这里举例Unicode方式。这种方式的兼容性很好。
4、安装到网站运行环境后,开始引入图标。
- 在下载的文件夹中有个demo_index.html文件,详细说明了引入过程。

首先在你的网站目录下创建一个css文件(这里我创建名为font.css的文件),并放入如下代码(项目下生成字体族,说明文件中的第一步)更改文件代码中的引用目录。
同时放入定义使用 iconfont 的样式代码(说明文件中的第二步。不加入会导致图标不显示)。这样做可以使多个文件复用样式,提高代码的复用率,简化代码书写。
@font-face {font-family: 'iconfont';src: url('font/iconfont.eot');src: url('font/iconfont.eot?#iefix') format('embedded-opentype'),url('font/iconfont.woff2') format('woff2'),url('font/iconfont.woff') format('woff'),url('font/iconfont.ttf') format('truetype'),url('font/iconfont.svg#iconfont') format('svg');}.iconfont {font-family: "iconfont" !important;font-size: 16px;font-style: normal;-webkit-font-smoothing: antialiased;-moz-osx-font-smoothing: grayscale;}
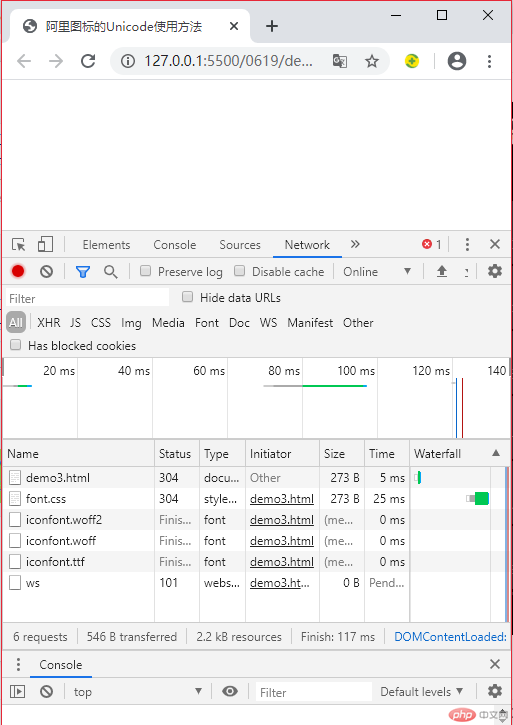
页面引入刚创建的css文件,- 浏览器检查器检查字体文件是否引入成功。
<!DOCTYPE html><html lang="en"><head><meta charset="UTF-8"><meta name="viewport" content="width=device-width, initial-scale=1.0"><title>阿里图标的Unicode使用方法</title><link rel="stylesheet" href="font.css" /><style></style></head><body></body></html>

-开始使用代码,这里用实例来演示
<!DOCTYPE html><html lang="en"><head><meta charset="UTF-8"><meta name="viewport" content="width=device-width, initial-scale=1.0"><title>阿里图标的Unicode使用方法</title><link rel="stylesheet" href="font.css" /><style>/* 通过自定义样式的方式来进行设置 */.icon{font-size:3rem;color:red;}</style></head><body><!-- 引入第二步图标的定义样式,否则图标不会显示,标签中间添加样式代码 ,每个图标一个代码,可以从官网中你的项目中收藏的样式进行查看 --><span class="iconfont icon"></span><span class="iconfont icon"></span><span class="iconfont icon"></span></body></html>


阿里图标将图标变成纯编码的方式,非常省资源。

