盒模型(Box Model)常用属性
| 属性 | 释义 | 注意 |
|---|---|---|
| content | 元素内容 | |
| margin | 外边距 | 有四个值按照上右下左的顺序 |
| padding | 内边距 | 有四个值按照上右下左的顺序 |
| border | 边框 |
- 写一个盒子添加样式
<style>.box {width: 200px;height: 200px;/* 显示内边距 */background-color: teal;background-clip: content-box;margin: 10px;padding: 10px;border: 3px solid tomato;}</style></head><body><div class="box"></div></body>
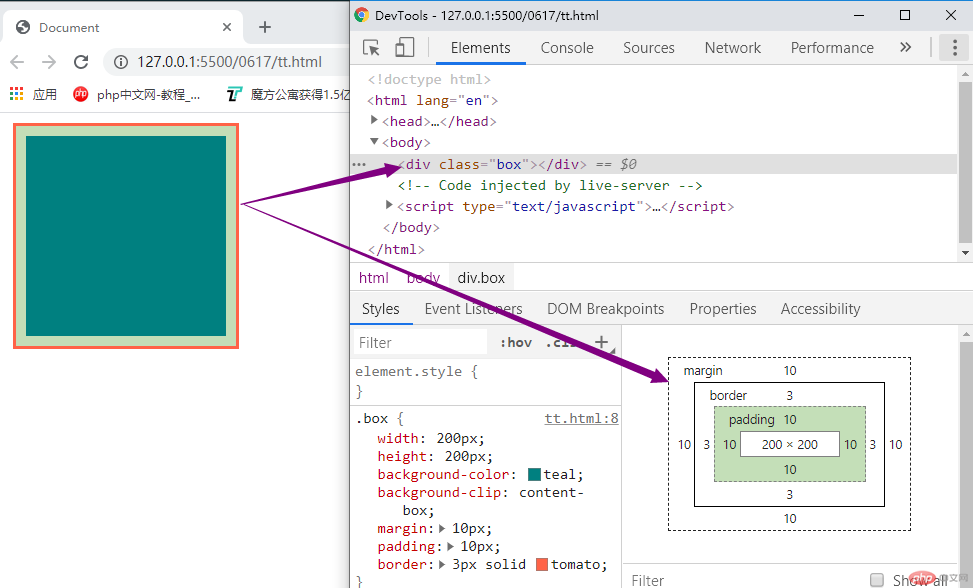
- 看下盒子模型简图
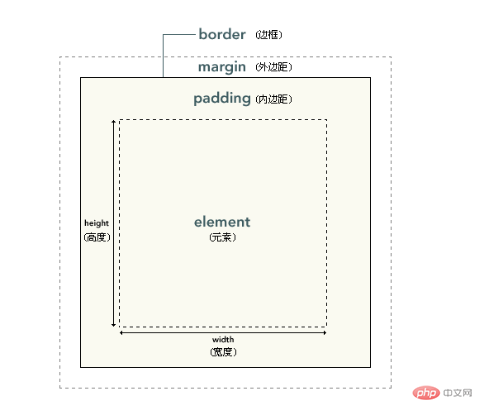
- 盒子模型 包含内容 内/外边距以及边框
- 元素框的总宽度 = 元素(element)的width + padding的左边距和右边距的值 + margin的左边距和右边距的值 + border的左右宽度;也就是宽246
- 元素框的总高度 = 元素(element)的height + padding的上下边距的值 + margin的上下边距的值 + border的上下宽度。也就是高246
注意一个问题:
在html文档中,内容区的大小实际上是覆盖到了padding,也就是显示的时候是到了边框<script>const box = document.querySelector(".box");// 1. 内容区大小// 大小 = width / height + paddingconsole.log(box.clientWidth);console.log(box.clientHeight);</script>
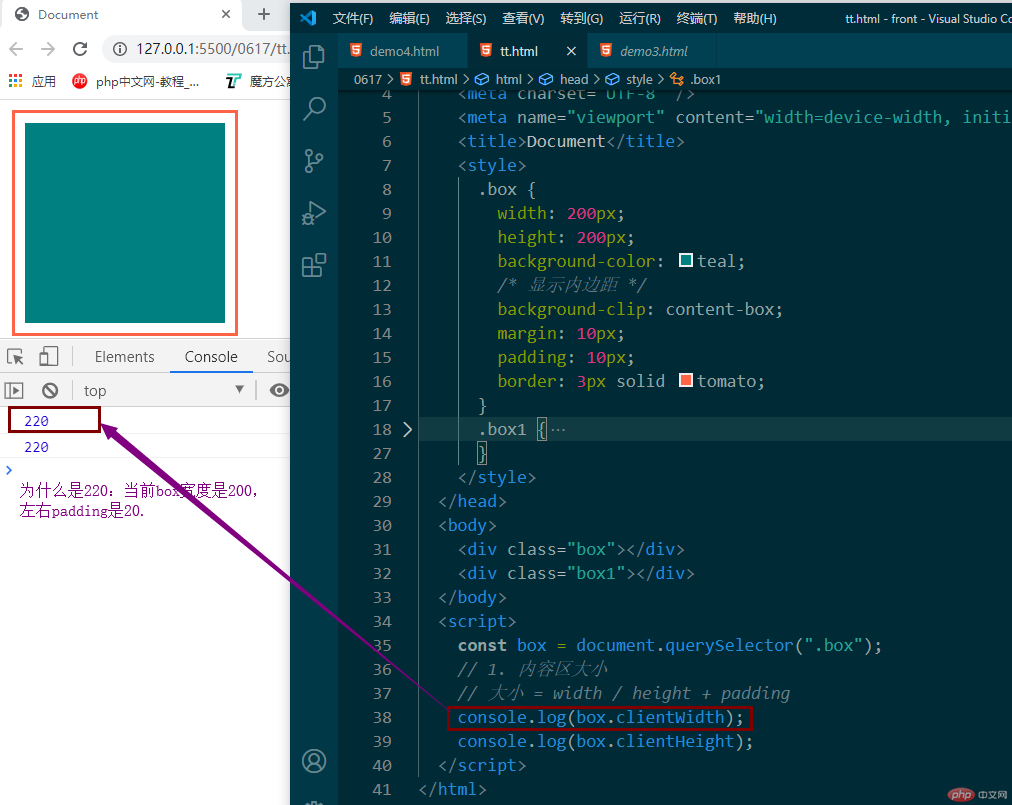
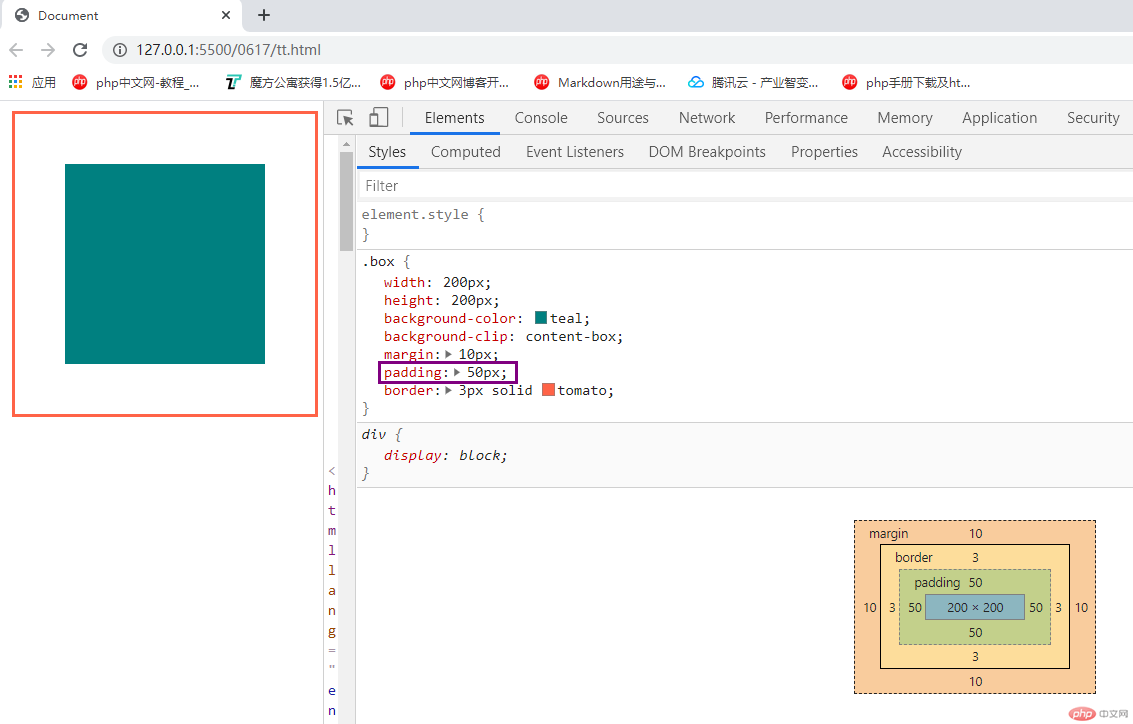
看下图紫色框
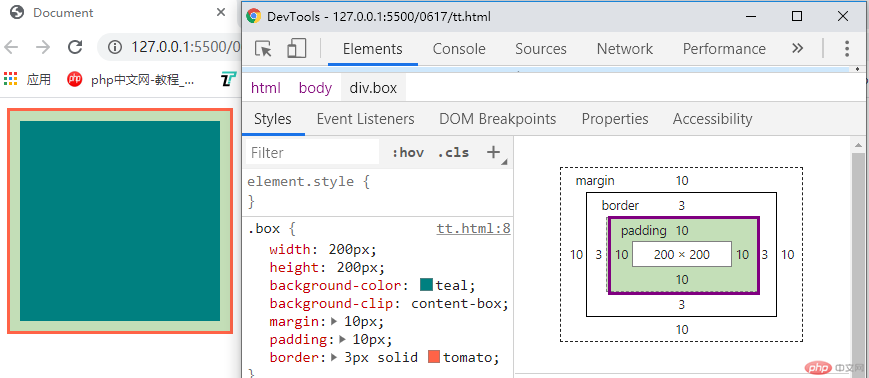
当我们把padding的值修改到50 会发生什么变化呢? 看图
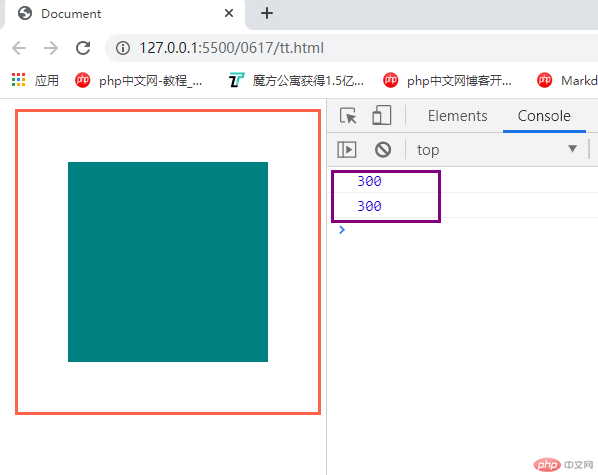
- 显而易见—-显示的内容占据的空间变大了(由原来的220X220变成了300X300)也就是把盒子撑开了。
如果有多个会导致布局计算困难,所以要用box-sizing 来重新计算盒子大小,就是告诉浏览器你设置宽度要包含padding+border的值
| box-sizing | content-box | 默认值,以内容区为准 |
|---|---|---|
| box-sizing | border-box | 元素大小以边框为准(包含padding和border) |
<style>.box {width: 200px;height: 200px;background-color: teal;/* 显示内边距 */background-clip: content-box;margin: 10px;padding: 50px;border: 3px solid tomato;/* 告诉浏览器这个盒子的宽/高要包含padding和border(宽度200=内容区宽度+左右padding宽度+左右border宽度) */box-sizing: border-box;}</style></head><body><div class="box"></div><!-- <div class="box1"></div> --></body><script>const box = document.querySelector(".box");// 1. 内容区大小// 大小 = width / height + paddingconsole.log(box.clientWidth);console.log(box.clientHeight);</script>
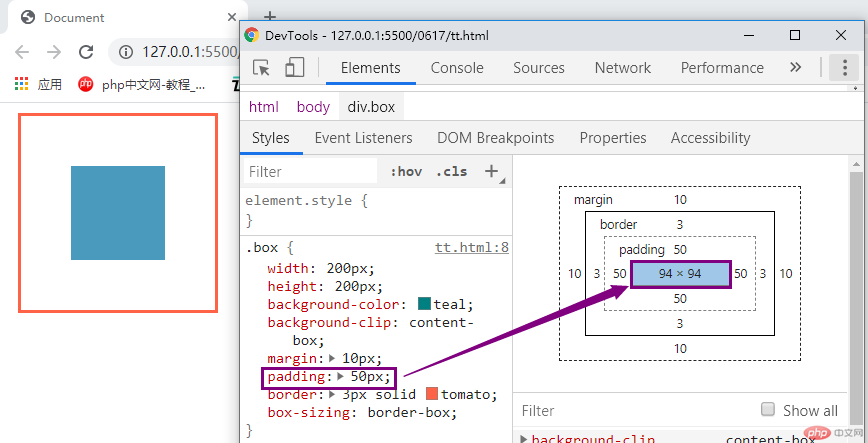
- 此时我们的盒子的宽度:94+100+6+20=220(内容区+内边距+边框+外边距),符合开始给他设定的样式宽度200,就不会影响布局。
css 外边距合并(叠加)
- 两个上下方向相邻的元素框垂直相遇,边距会合并,合并后的外边距的高度等于两个发生合并的外边距中较高的那个边距值,
<style>.box {width: 200px;height: 200px;background-color: teal;/* 显示内边距 *//* background-clip: content-box; */margin-bottom: 10px;padding: 10px;border: 3px solid tomato;/* 告诉浏览器这个盒子的宽/高要包含padding和border(宽度200=内容区宽度+左右padding宽度+左右border宽度) *//* box-sizing: border-box; */}.box1 {width: 200px;height: 200px;background-color: teal;/* background-clip: content-box; */margin-top: 50px;padding: 10px;border: 3px solid tomato;}</style></head><body><div class="box"></div><div class="box1"></div></body>
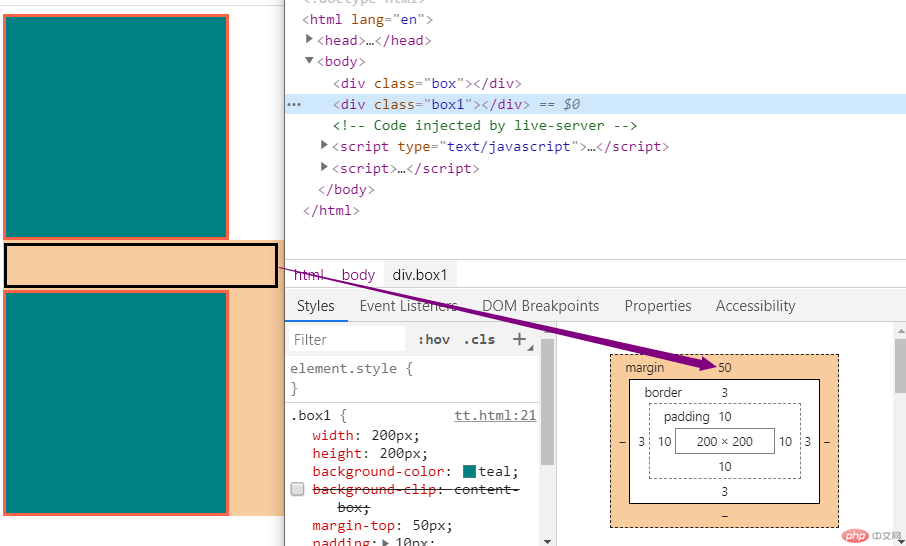
- 第二种情况
.box.parent {width: 200px;height: 200px;background-color: tomato;margin-top: 20px;}.son {width: 100px;height: 100px;background-color: yellowgreen;margin-top: 10px;}

-总结: 用一个图来表示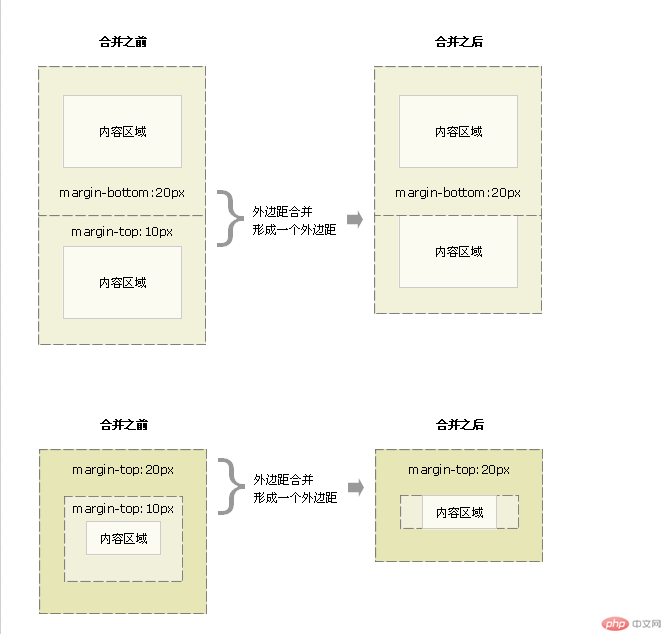
元素居中(margin:auto)
- 垂直居中通过绝对定位来实现,让当前元素绝对定位的上下文充满整个父级容器,从左上角开始到右下角结束。
- 实现在页面中居中
<style>body {background-color: lightgrey;}div {width: 400px;height: 350px;box-sizing: border-box;text-align: center;background-color: #ccc;border: 2px solid bisque;border-radius: 10px;position: absolute;left: 0;top: 0;right: 0;bottom: 0;margin: auto;}form input {width: 260px;height: 30px;margin-top: 10px;margin-left: 10px;padding-left: 10px;border-radius: 5px;border: none;}form input:focus {background-color: coral;}img {width: 90px;height: 90px;margin-top: 50px;}button {width: 100px;height: 40px;border: none;border-radius: 5px;margin-top: 15px;}button:hover {font-size: 1.2rem;cursor: pointer;color: lime;background-color: mediumorchid;}</style></head><body><div><img src="a.jpg" alt="" /><form action=""><p><label>账号:<input type="text" placeholder="请输入" /></label></p><p><label>密码:<input type="password" placeholder="******" /></label></p><button>登陆</button></form></div></body>
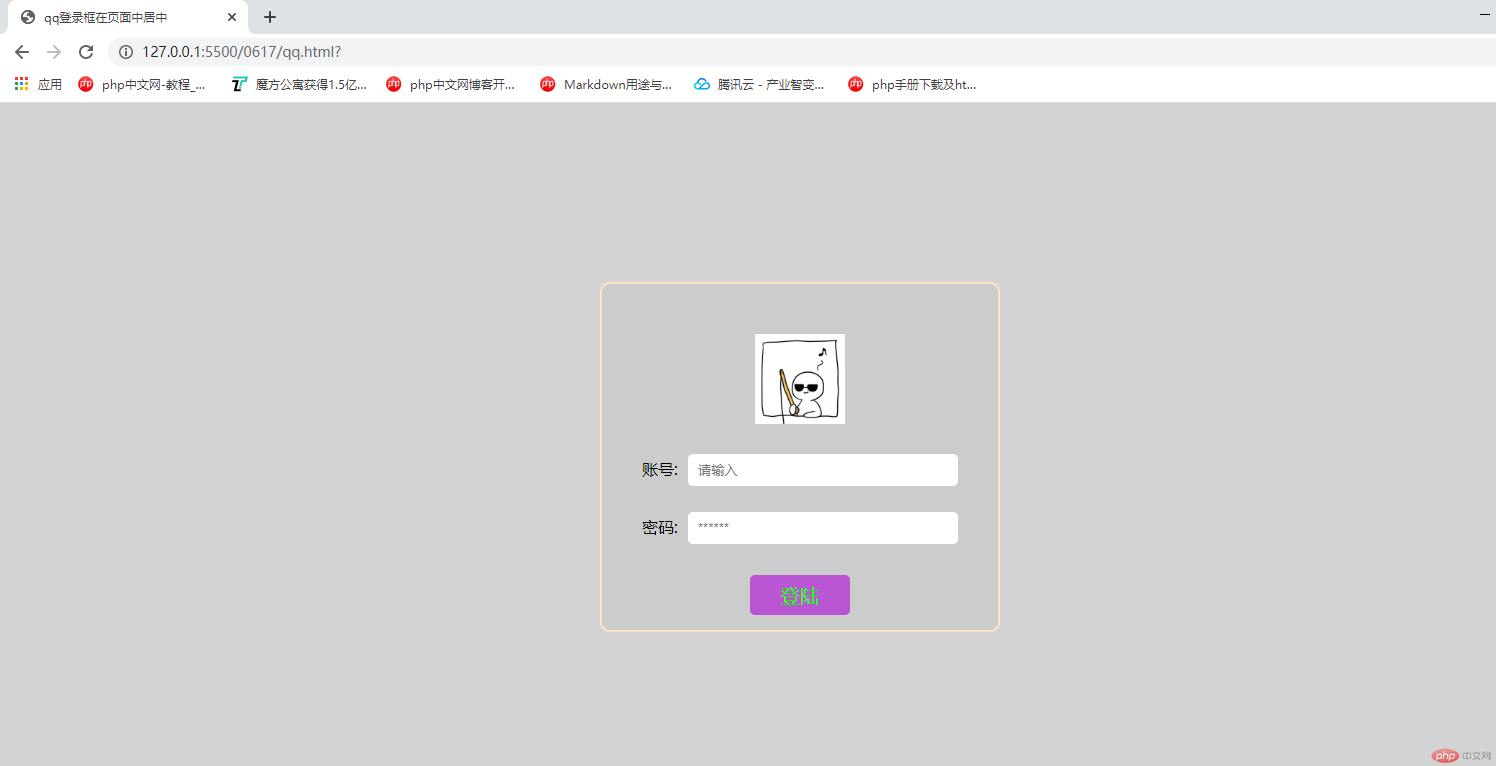
总结:
- 了解了盒子的基本知识
- 尝试了一下做一个小布局,发现很多东西实际用起来跟想的不一样,没有一个明确的思维。

