弹性元素:
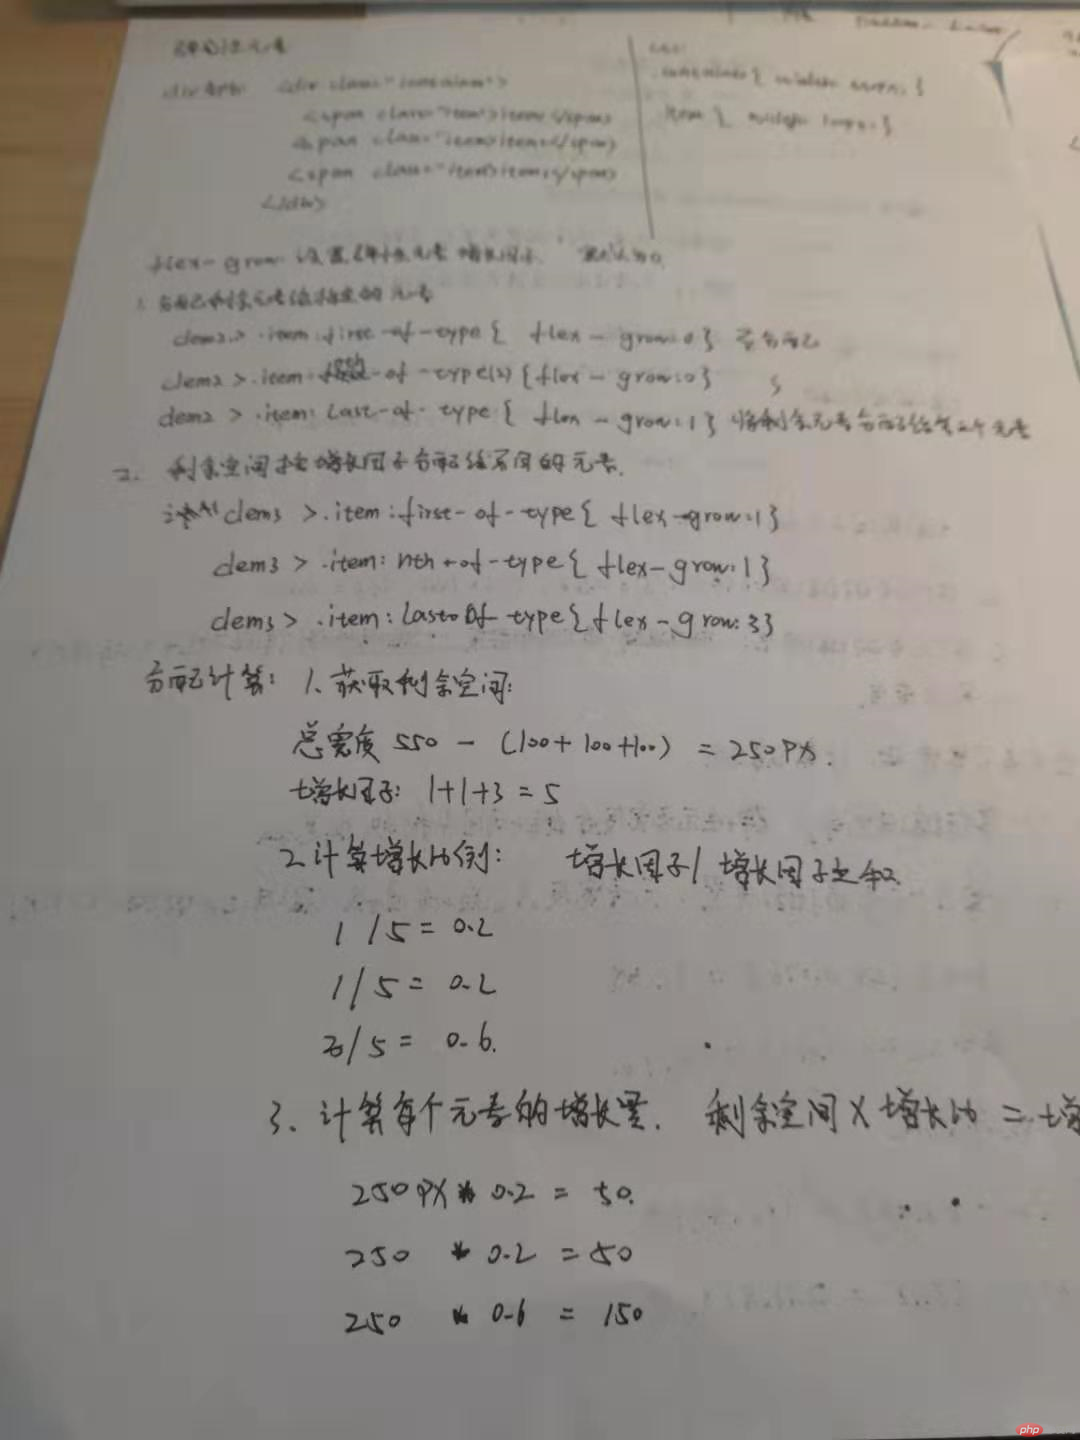
1,设置增长因子
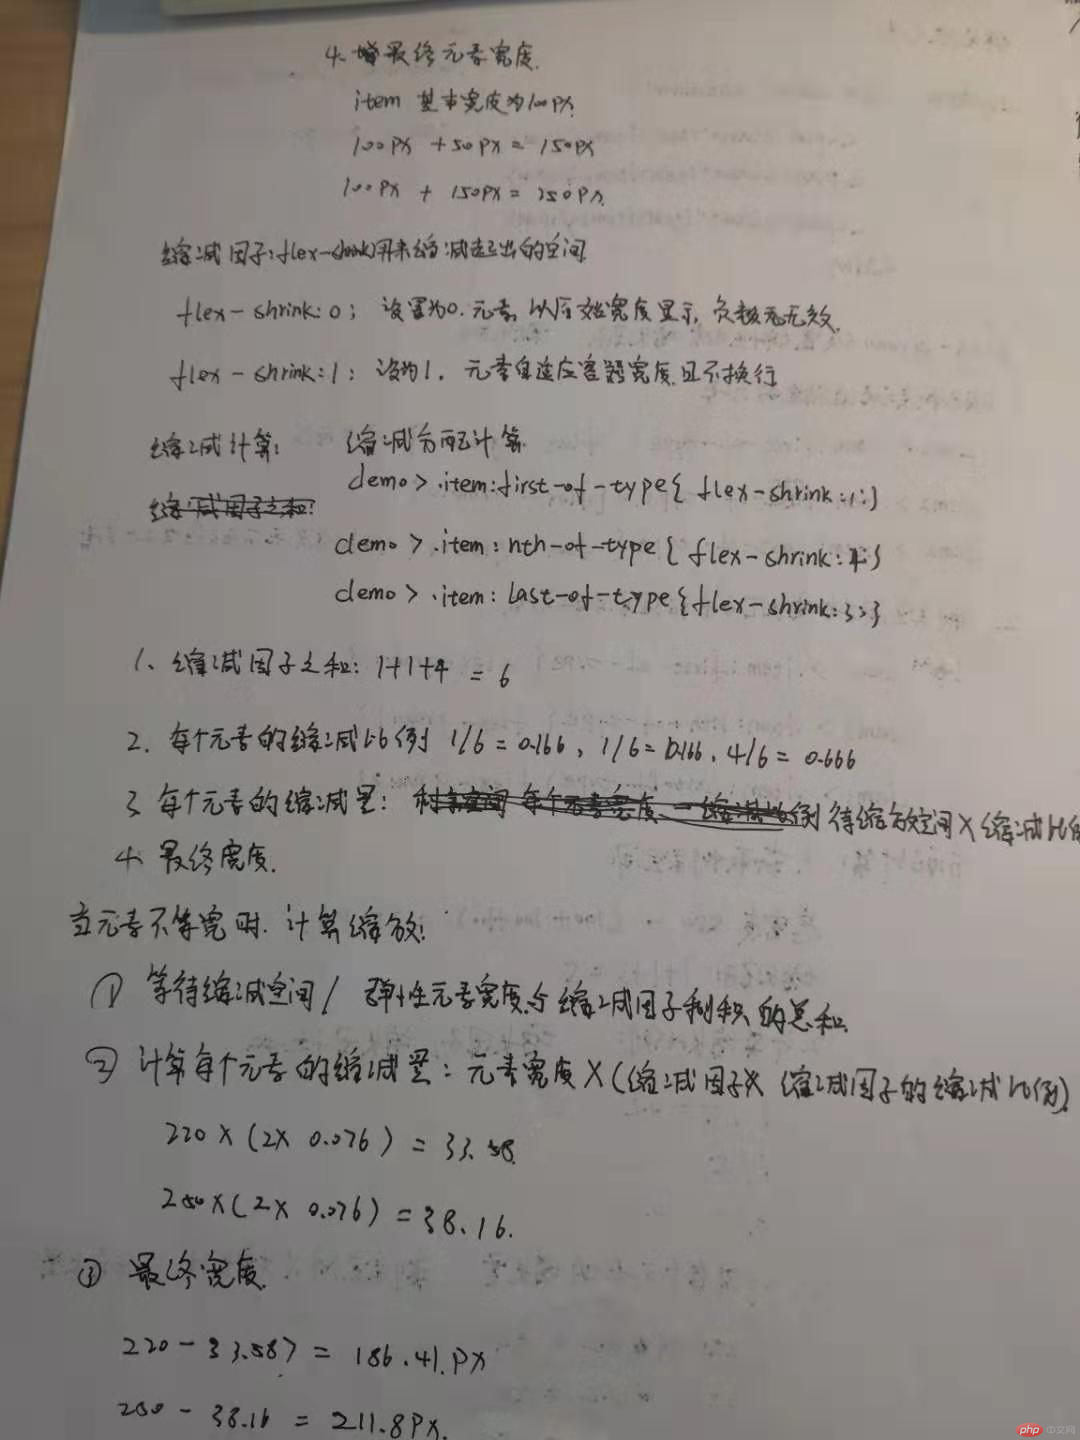
2,缩减因子
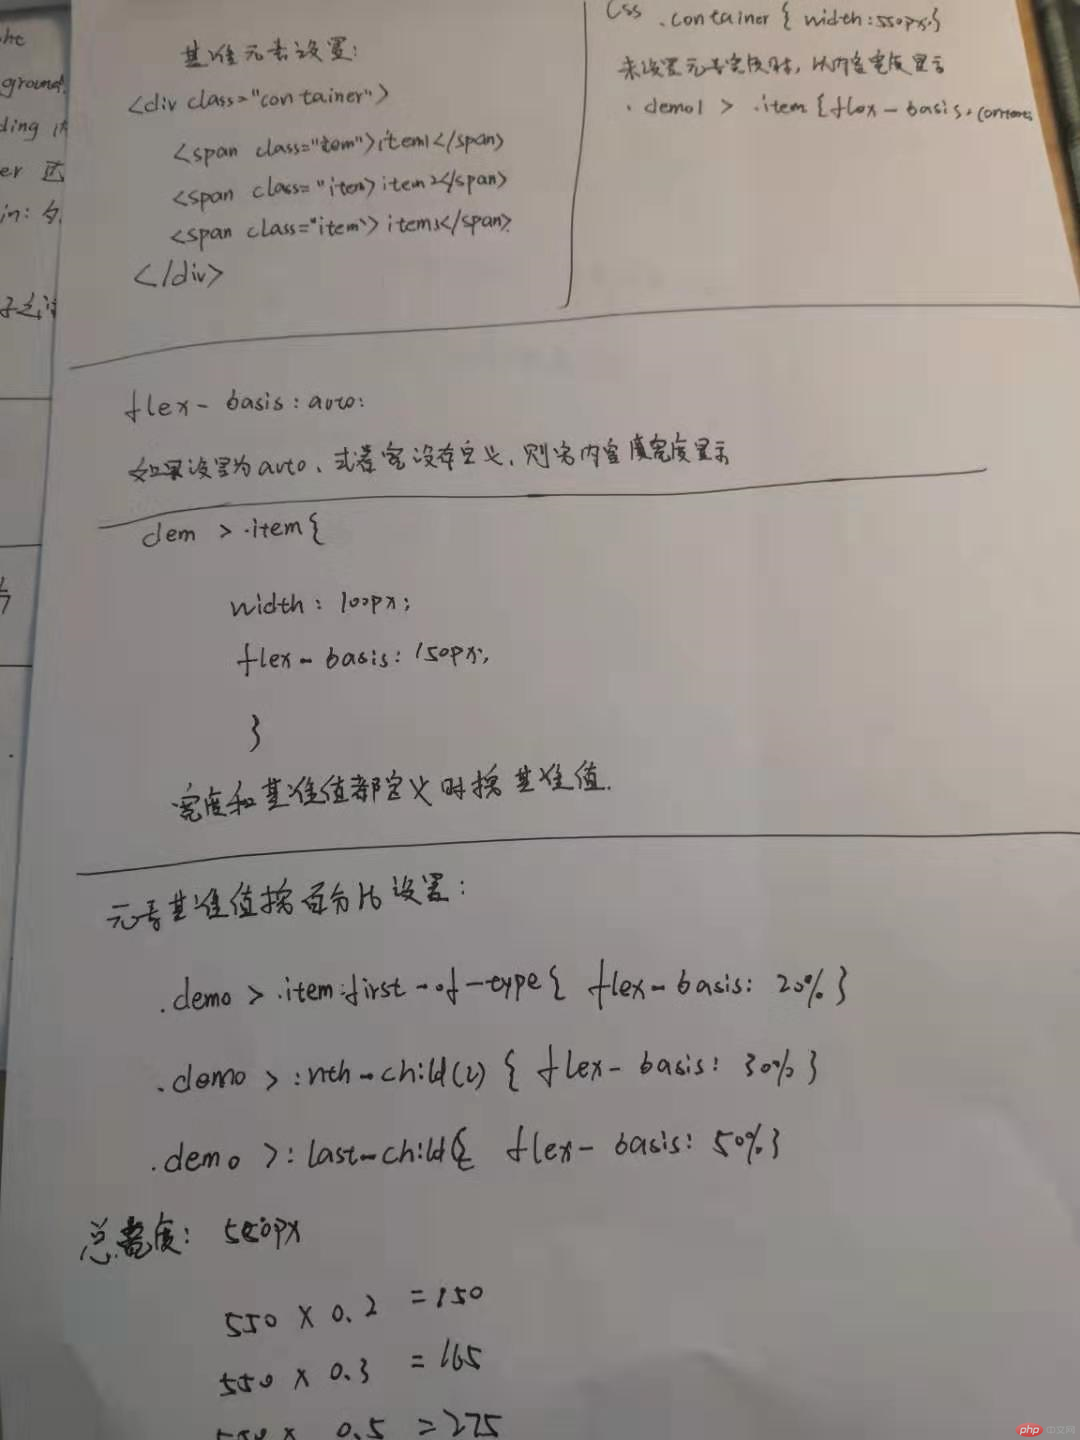
3,基准值
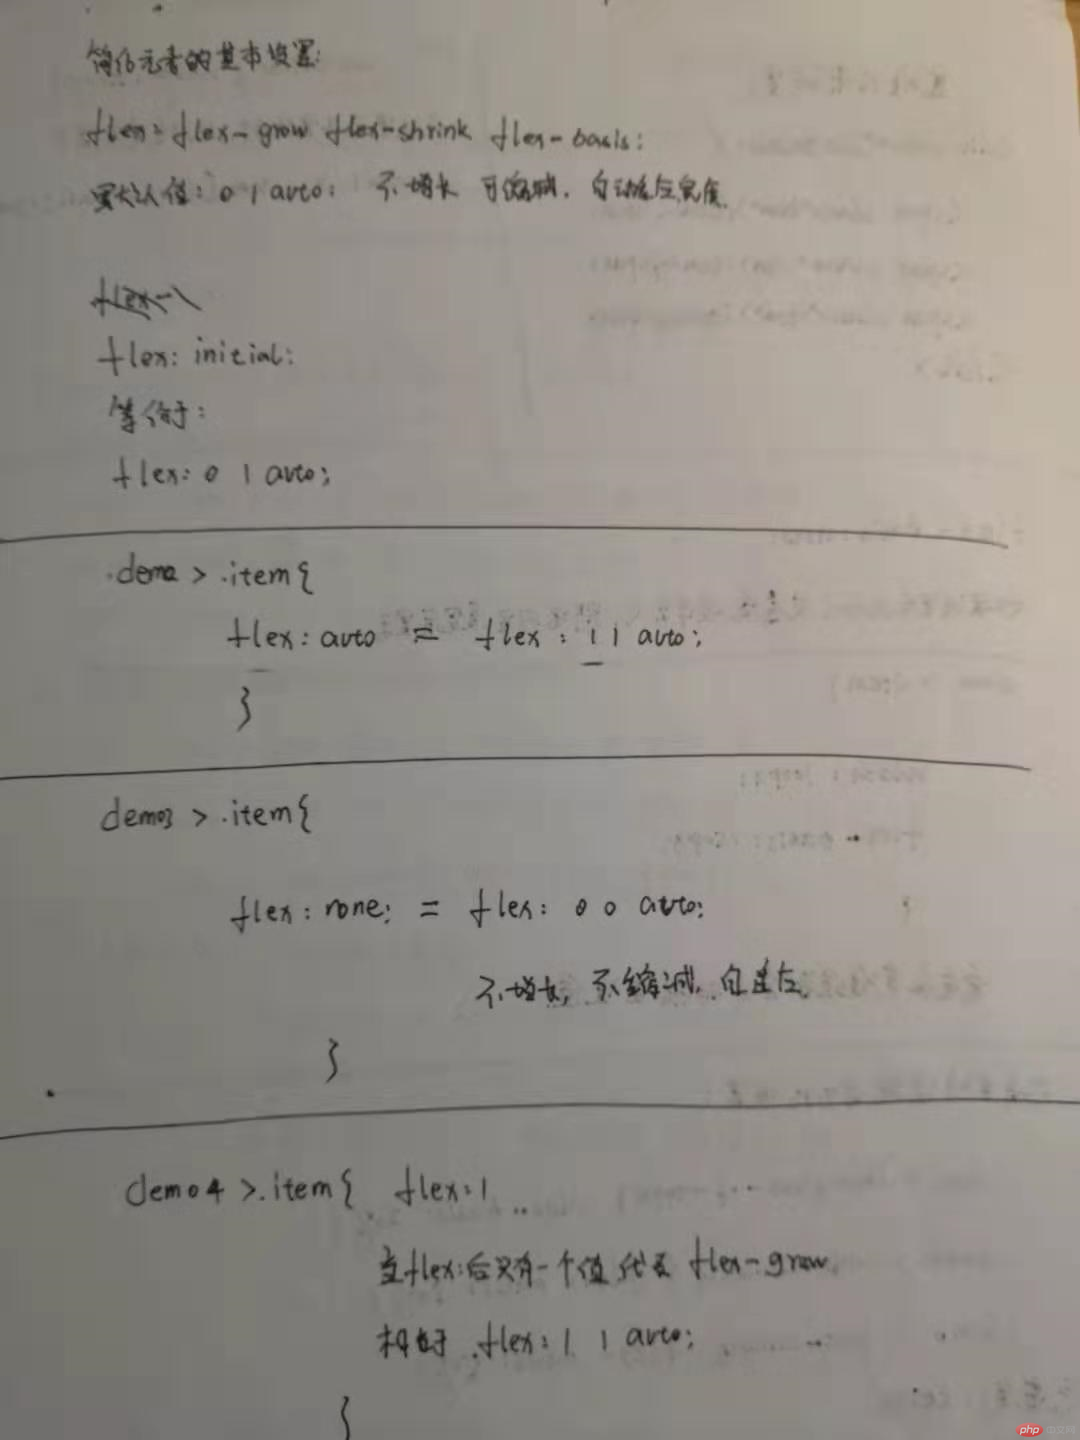
4,简化弹性元素的设置
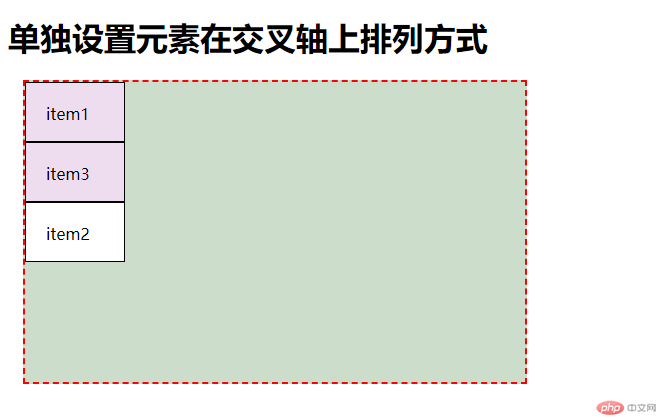
5,单独设置元素在交叉轴上排列方式
实例
/*将第一个单独调整, 紧贴起始线排列*/
.item:first-of-type {
    align-self: flex-start;
    order: 1;
}

/*将最后一个单独调整到中间位置排列*/
.item:last-of-type {
    align-self: flex-start;
    order: 2;
}

/*将第二个元素,使它自动扩展*/
.item:nth-last-of-type(2) {
    /*设置不一定背景方便观察*/
    background-color: #fff;
    /*为了自动扩展,需要还原元素的宽度到初始大小*/
    /* width: auto; */
    align-self: flex-start;
    order: 3;
    /* align-self: stretch; */
}
运行实例 »
点击 "运行实例" 按钮查看在线实例
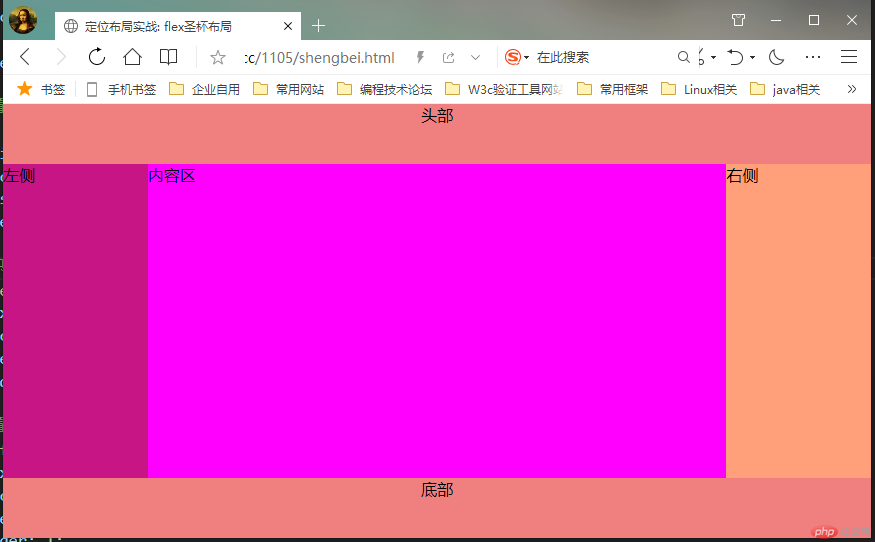
6,使用flex方法布局圣杯布局
实例
<!DOCTYPE html>
<html lang="en">
<head>
    <meta charset="UTF-8">
    <title>定位布局实战: flex圣杯布局</title>
    <style>
        /* 内外边距清零 */
        * {
            margin: 0;
            padding: 0;
        }
        /* 设定body */
        body{
            height: 100vh;
            display: flex;
            /* 垂直不换行 */
            flex-flow: column nowrap;
        }
        /* 设置页面头部和底部 */
        header,footer {
            min-height: 60px;
            text-align: center;
            background-color: lightcoral;
            /* flex: 0 0 auto; */
            flex: none
        }
        /* 设置中间部分 */
        main {
            height: 90vh;
            background-color: lightskyblue;
            display: flex;
            flex: auto;
        }
        /* 这只主内容区 */
        article {
            box-sizing: border-box;
            background-color: magenta;
            flex: 4;
            order: 2;
        }
        /* 设置中间内容区两侧 */
        aside:first-of-type {
            box-sizing: border-box;
            background-color: mediumvioletred;
            flex: 1;
            order: 1;
        }
        aside:last-of-type {
            box-sizing: border-box;
            background-color: lightsalmon;
            flex: 1;
            order: 3;
        }
    </style>
</head>
<body>
<header class="header">头部</header>
<main class="main">
    <article class="article">内容区</article>
    <aside class="left">左侧</aside>
    <aside class="right">右侧</aside>
</main>
<footer class="tfoot">底部</footer>
</body>
</html>
