一:浅析事件代理机制
事件代理夜间事件委托,当我们需要为父元素下面的很多子元素添加事件的时候,可以通过把事件添加到父元素身上并把事件委托给父元素来触发事件处理函数
在实际应用场景中,如给ul元素下很多的li元素添加事件,虽然我们可以用遍历来操作,但是如果这个ul元素下面li过多时,就要消耗大量的性能,并且当子元素要增加的时候,每增加一个子元素就需要便利一次,这种方法不可取,针对这种场景我们可以用事件代理来操作,不仅实现了和上述方法相同的功能,还大量减少了DOM操作
事件委托利用事件的冒泡原理来实现,如HTML文档中有这样一种结构 div>ul>li>a,如果给里面的a加一个事件,这个事件会一层一层向外执行a>li>ul>div,有这样的一个机制,如果我们给最外面的div加一个事件,那么里面的ul li a触发事件的时候都会冒泡到最外层的div上,所以都会触发.
1)下面是用遍历来实现:
实例
<!DOCTYPE html>
<html lang="en">
<head>
    <meta charset="UTF-8">
    <title>Title</title>
    <link rel="stylesheet" href="2.css">
    <style>
        ul li{
            width:80px;
            height:30px;
            margin:5px;
            border:1px solid black;
            background-color:black;
            color:white;
            text-align:center;
            line-height:30px;
        }
    </style>
</head>
<body>
<ul id="box1">
    <li>111</li>
    <li>222</li>
    <li>333</li>
    <li>444</li>
    <li>555</li>
</ul>
<script>

    var box1=document.getElementById("box1");
    var box2=box1.getElementsByTagName("li");
    for(var i=0;i<box2.length;i++){
        box2[i].onclick=function(){
            alert("Hello World");
        }
    }
</script>
</body>
</html>
运行实例 »
点击 "运行实例" 按钮查看在线实例
2)下面是用事件委托来实现
实例
<!DOCTYPE html>
<html lang="en">
<head>
    <meta charset="UTF-8">
    <title>Title</title>
    <link rel="stylesheet" href="2.css">
    <style>
        ul li{
            width:80px;
            height:30px;
            margin:5px;
            border:1px solid black;
            background-color:black;
            color:white;
            text-align:center;
            line-height:30px;
        }
    </style>
</head>
<body>
<ul id="box1">
    <li>111</li>
    <li>222</li>
    <li>333</li>
    <li>444</li>
    <li>555</li>
</ul>
<script>

    var box1=document.getElementById("box1");
    box1.addEventListener('click',tan,false);
    function tan(event){
        alert("Hello World");
    }
</script>
</body>
</html>
运行实例 »
点击 "运行实例" 按钮查看在线实例
结果相同

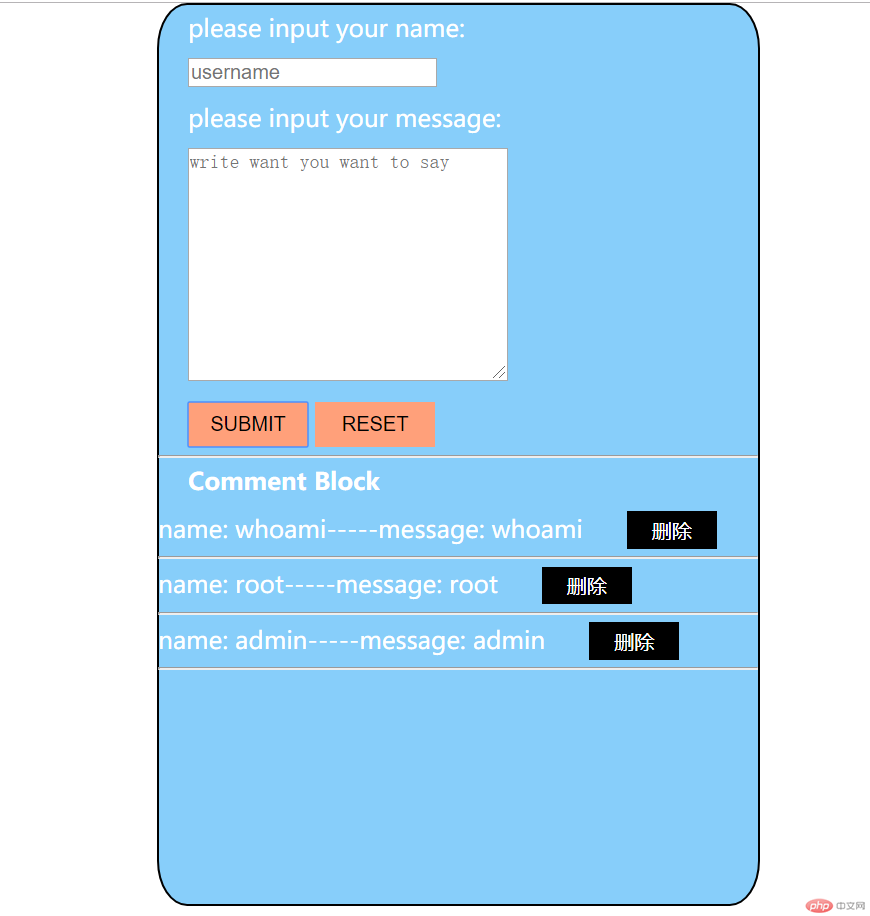
二:实例:留言板(javascript版本)
实例
<!DOCTYPE html>
<html lang="en">
<head>
    <meta charset="UTF-8">
    <title>message board</title>
    <link rel="stylesheet" href="work2.css">
    <style type="text/css">
        *{
            margin:0px;
            padding:0px;
        }
        .container{
            border-radius:5%;
            border:1px solid black;
            min-height:600px;
            width:400px;
            margin:0 auto;
            background:lightskyblue;
            color:white;
            position:relative;
        }
        .container p,input,textarea,h4,button{
            position:relative;
            left:20px;
            margin:5px 0px;
        }
        .container #submit,#reset{
            width:80px;
            height:30px;
            background-color:lightsalmon;
            border:none;
        }
    </style>
</head>
<body>
<div class="container">
    <p>please input your name:</p>
    <input type="text" id="username" placeholder="username">
    <p>please input your message:</p>
    <textarea id="comment" cols="30" rows="10" placeholder="write want you want to say"></textarea>
    <br>
    <button id="submit">SUBMIT</button>
    <input type="reset" value="RESET" id="reset">
    <hr>
    <h4>Comment Block</h4>
    <ul id="list">

    </ul>
    <script>
        var submit=document.getElementById("submit");
        var username=document.getElementById("username");
        var comment=document.getElementById("comment");
        var list=document.getElementById("list");
        //添加
        submit.addEventListener('click',addComment,false);
        function addComment(event){
            var item=document.createElement("li");
            item.innerHTML="name: "+username.value+"-----"+"message: "+comment.value+"  <button style='border:none;background-color:black;color:white;width:60px;height:25px;'>删除</button>"+"<hr>";
            if(list.childElementCount===0){
                list.appendChild(item);
            }else{
                list.insertBefore(item,list.firstElementChild);
            }
            comment.value=null;
            username.value=null;
        }
        list.addEventListener('click',del,false);
        //删除 事件代理
        function  del(event){
            if(confirm("确定删除此条记录,删除操作无法恢复!")){
                var ul=event.currentTarget;
                var btn=event.target;
                var li=btn.parentElement;
                ul.removeChild(li);
            }
            return false;
        }
        //reset事件
        var reset=document.getElementById("reset");
        reset.addEventListener('click',rst,false);
        function rst(event){
            comment.value=null;
            username.value=null;
        }
    </script>
</div>
</body>
</html>
运行实例 »
点击 "运行实例" 按钮查看在线实例

上述代码中涉及知识点注释总结及问题反思:
写完发现没写form表单...只能javascript做了个假reset按钮
前端布局写的时候思想一片空白

