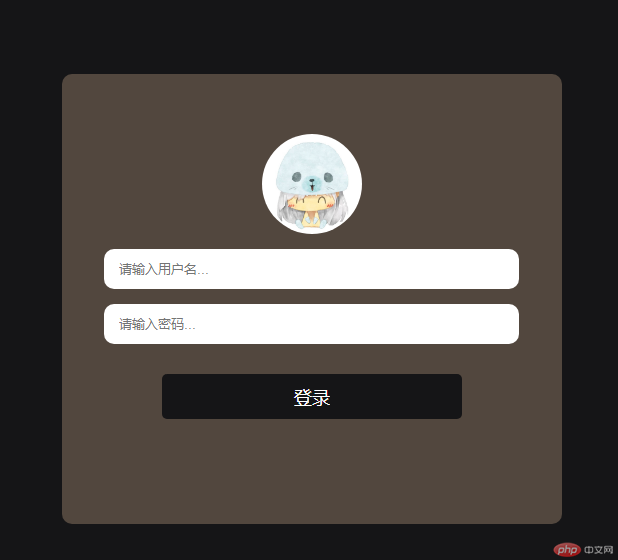
通过本节课的学习,让我懂得了如何在html页面中布局一个登录框,以及他的各种参数,外部的图片引入,以及背景精灵,背景图的效果。
实例
<!DOCTYPE html PUBLIC "-//W3C//DTD XHTML 1.0 Transitional//EN" "http://www.w3.org/TR/xhtml1/DTD/xhtml1-transitional.dtd">
<html xmlns="http://www.w3.org/1999/xhtml">
<head>
<meta http-equiv="Content-Type" content="text/html; charset=gb2312" />
<title>背景</title>
<link rel="icon"  type="image/x-icon"href="../3.11/image/favicon (1).ico" />
<style type="text/css">
*{
    margin: 0;
    padding: 0;
}
  body{
     /*背景色*/
    /*background: red;*/

    /*背景色透明度  */
   /* background:rgba(122,44,55,0.2);*/

   /*背景图*/
   /*no-repeat  不平铺*/
   /*  background-image:url(图片地址)*/
   /*background: url(http://i1.umei.cc/uploads/tu/201608/80/1dze00mdt03.jpg) no-repeat;*/
   /*background-size: 100%;*/    /*背景图大小*/
  }
  /*背景色的线性渐变:
    background: linear-gradient(方向,起始颜色,终止颜色)
    */
    hr{
       height: 10px;background:linear-gradient(to right,yellow,green);
    }
    /* 背景精灵*/
      /*(background-position:背景图片定位 x y坐标)*/

    div{
      width: 80px;
      height: 80px;
      background: url(static/images/p2.jpg) -317px -243px;
    }
    p{
      width: 20px;
      height: 17px;
      background: url(static/images/p1.jpg) -29px -156px;
    }
</style>

</head>

<body>
  <hr />
  <div></div>
  <p></p>
</body>
</html>
运行实例 »
点击 "运行实例" 按钮查看在线实例
实例
<!DOCTYPE html PUBLIC "-//W3C//DTD XHTML 1.0 Transitional//EN" "http://www.w3.org/TR/xhtml1/DTD/xhtml1-transitional.dtd">
<html xmlns="http://www.w3.org/1999/xhtml">
<head>
<meta http-equiv="Content-Type" content="text/html; charset=gb2312" />
<title>登录页面</title>
<link rel="icon" type="image/icon "href="static/images/favicon (1).ico" />
<style type="text/css">
    *{
        margin: 0;
        padding: 0;
    }
body{
    background: #151517;
}
div{
    width: 500px;
    height: 450px;
    background: rgba(144,122,102,0.5);   /*背景图透明度*/
    margin: 100px auto;
    border-radius: 10px;    /*边框圆角*/
    text-align: center;
}
img{
    width: 100px;
    border-radius: 50%;
    margin-top: 60px;
}
input{
    width: 400px;
    height: 40px;
    margin-top: 15px;
    border-radius: 10px;
    border: none;
    padding-left: 15px;
}
button{
    width: 300px;
    height: 45px;
    margin-top: 30px;
    border: none;      /*取消自带边框*/
    border-radius: 5px;
    background: #151517;
    color: #fff;
    font-size: 18px;      /*字体大小*/
}

</style>

</head>

<body>
    <div>
       <img src="http://img4q.duitang.com/uploads/item/201408/27/20140827154904_NRkaa.thumb.700_0.jpeg" alt="" />
       <input type="text" name=""  placeholder="请输入用户名..." /><br>
       <input type="password" name=""  placeholder="请输入密码..." /><br>
       <button>登录</button>
    </div>
</body>
</html>课后总结:
1.通过本次的学习,让我们对登录框有所了解。
2.了解了表单,表格如何运用。
3.熟记常用的表单,表格属性。
4.点击 "运行实例" 按钮查看在线实例
