实例
下面是常用的css选择器及其使用方法和效果
<!DOCTYPE html>
<html lang="en">
<head>
    <meta charset="UTF-8">
    <title>css常用选择器</title>
    <link rel="stylesheet" href="static/css/style01.css">
    <style>
        /* 标签选择器 */
            ul {
                border: 1px dashed #beff7f;
                margin-top: 0;
                margin-bottom: 0;
                overflow: hidden;
                padding: 10px;
            }

            /* 层级选择器 */
            ul li {
                list-style-type:none;
                width: 40px;
                height: 40px;
                background-color: #d1f5b9;
                border-radius: 50%;
                text-align: center;
                line-height: 40px;
                float:left;
                margin-left: 10px;
                box-shadow: 2px 2px 1px #856b88;
            }

            /* id选择器 */
            #bg-blue {
                background-color: lightblue;
            }

            /* 类选择器 */
            .bg-green {
                background-color: lightgreen;
            }

            /* 属性选择器 */
            li[id="bg-blue"] {
                border: 2px solid #ff8dc8;
            }

            /* 群组选择器 */
            #bg-blue, .bg-green {
                border: 2px solid #c728ff;
            }

            /* 相邻选择器 */
            /* 第2个小球相邻的是第3个小球,可以用li,也可以用* */
            #bg-blue + * {
                background-color: yellow;
            }

            /* 兄弟选择器 */
            /* 第2个小球后面的所有同级兄弟元素全部选中 */
            #bg-blue ~ * {
                background-color: yellow;
            }

            /* 伪类: 子元素选择器 */
            ul :first-child {
                background-color: #f462ff;
            }

            ul :last-child {       /* 最后一个子元素 */
                background-color: coral;
            }

            ul :nth-child(6) {     /* 第6个子元素 */
                background-color: #ff4e12;
            }

            ul :nth-last-child(3) {    /* 倒数第3个子元素 */
                background-color: #237fff;
            }

            /* 伪类: 类型选择器 */
            ul li:first-of-type {    /* 第一个li */
                background-color: #c9cca7;
            }

            ul li:last-of-type {    /* 最后一个li */
                background-color: #69cc96;
            }

            ul li:nth-of-type(6) { /* 选择第6个li */
                background-color: #aeccc1;
            }

            li :after{
                clear: both;
            }
            /* 选中每个div中的第二个子元素 */
            div :nth-child(2) {
                background-color: #ee9590;
            }


            div:first-of-type  :nth-child(3){
                background-color: lightblue;
            }


            /* 选择页面中的第二个p元素 */
            p:nth-of-type(2) {
                background-color: #ff706d;
            }

            p:only-of-type {
                background-color: #04ff48;
            }

            /* 伪类: 表单控件 */
            form :enabled {
                background-color: #c15ef5;
            }

            /* 将单选按钮中的文本前景色设置为红色,使用了伪类和相邻选择器 */
            form :checked + * {
                color: red;
            }

            /* 当在控件中输入无效值文本自动变成红色 */
            form :invalid {
                color: #356bff;
            }

            /* 设置控件获取到焦点时的样式 */
            form :focus {
                background-color: #77eee4;
            }

            /* 设置鼠标悬停时的样式 */
            button:hover {
                width: 56px;
                height: 28px;
                background-color: #f6f6f6;
                color: #92b1ff;
            }
    </style>
</head>
<body>
    <!--基本选择器-->
    <ul>
        <li class="bg-green">1月</li>
        <li id="bg-blue">2月</li>
        <li class="bg-green">3月</li>
        <li class="bg-green">4月</li>
        <li>5月</li>
        <li>6月</li>
        <li>7月</li>
        <li>8月</li>
        <li>9月</li>
        <li>10月</li>
    </ul>


    <div>
        <p>德玛西亚</p>
        <li>诺克萨斯</li>
        <p>艾欧尼亚</p>
    </div>

    <div>
        <p>巨神峰</p>
        <li>暗影岛</li>
    </div>

    <!-- 表单选择器 -->
    <form action="" method="post">
        <span>用户名:</span>
        <input type="text" placeholder="用户名">

        <span>密码:</span>
        <input type="password" placeholder="*******">

        <input name="time[]" type="radio" id="week" value="1" checked><span>一星期</span>
        <input name="time[]" type="radio" id="month" value="2"><span>一个月</span>

        <button>登录</button>
    </form>
</body>
</html>点击 "运行实例" 按钮查看在线实例
实例
下面是双飞翼布局,许多大型网站使用的布局
<!DOCTYPE html>
<html lang="en">
<head>
    <meta charset="UTF-8">
    <title>双飞翼布局</title>
    <link rel="stylesheet" href="static/css/demo02.css">
    <style>
        .header {
                width: 100%;
                background-color: #f3f1f4;
            }

            .header .content {
                width: 1000px;
                height: 60px;
                background-color: #5cd7ee;
                /* 上下外边距为0,左右自动居中 */
                margin: 0 auto;
            }

            .header .content .nav {
                margin: 0;
                padding: 0;
            }

            .header .content .nav .item {
                list-style-type: none;
            }

            .header .content .nav .item a {
                /* 一定要将浮动设置到链接标签<a>上面,否则无法实现导航区的点击与高亮 */
                float: left;
                /* 设置最小宽度与最小高宽,以适应导航文本的变化 */
                min-width: 80px;
                min-height: 60px;
                /* 设置行高与头部区块等高,使导航文本可以垂直居中显示 */
                line-height: 60px;
                color: #856b88;
                font-size: 16px;
                padding: 0 20px;
                text-decoration: none;
                text-align: center;
            }

            .header .content .nav .item a:hover {
                background-color: #dbffc2;
                color: #ff4e12;
            }


            /* 使用双飞翼布局实现主体部分 */

            /* 第一步: 主体容器设置总宽度,并水平居中 */
            .container {
                width: 1000px;
                min-height: 600px;
                margin: 5px auto;
                background-color: lightgray;
            }

            /* 第二步: 左,右二侧固定宽度,中间区块自适应*/
            /* 中间区块宽度设置在它的容器wrap中 */
            .wrap {
                width: inherit;  /* 继承父级区块container宽度 */
                min-height: inherit;
                background-color: #feff57;
            }
            /* 设置左,右区块的宽度和高度 */
            .left {
                width: 200px;
                min-height: 600px;
                background-color: #5cf05f;
            }

            .right {
                width: 200px;
                min-height: 600px;
                background-color: #237fff
            }

            /* 第三步:将中间,左,右区块全部左浮动 */
            /* 因中间区块宽度100%,所以左右会被挤压到下面 */
            .wrap, .left, .right {
                float: left;
            }

            /* 第四步: 将left和right拉回到他们正确的位置上 */
            /* 通过设置区块的负外边距的方式,实现向反方向移动区块 */
            .left {
                margin-left: -100%;   /* -100%等价于-1000px,将左区块拉回到中间的起点处*/
            }
            .right {
                margin-left: -200px; /* -200px就正好将右区块上移到中间区块右侧显示 */
            }


            /* 第五步: 将中间的内容区块 main 显示出来 */
            .main {
                padding-left: 200px;
                padding-right: 200px;
            }


            /* 底部与头部的基本样式类似 */
            .footer {
                width: 100%;
                background-color: lightgray;
            }

            .footer .content {
                width: 1000px;
                height: 60px;
                background-color: lightblue;
                margin: 0 auto;
            }
            .footer .content ul li {
                list-style: none;
                padding: 0 30px;
                line-height: 60px;
                float: left;
            }

            .footer .content ul li a {
                text-decoration: none;
                color: #777;
            }

            /* 鼠标移入时显示下划线并加深字体前景色 */
            .footer .content ul li a:hover {
                text-decoration: underline;
                color: #444;
            }
    </style>
</head>
<body>
<!-- 头部 -->
<div class="header">
    <div class="content">
        <ul class="nav">
            <li class="item"><a href="">我是</a></li>
            <li class="item"><a href="">导航</a></li>
            <li class="item"><a href="">作业</a></li>
            <li class="item"><a href="">联系</a></li>
        </ul>
    </div>
</div>

<!-- 中间主体 -->
<div class="container">

    <div class="wrap">
        <div class="main">主体内容区</div>
    </div>

    <!-- 创建左侧边栏区块 -->
    <div class="left">左侧</div>

    <!-- 创建右侧边栏区块 -->
    <div class="right">右侧</div>

</div>

<!-- 底部 -->
<div class="footer">
    <div class="content">
        <ul>
            <li><a href="">我是</a></li>
            <li><a href="">足部</a></li>
            <li><a href="">foot</a></li>
        </ul>
    </div>
</div>
</body>
</html>点击 "运行实例" 按钮查看在线实例
实例
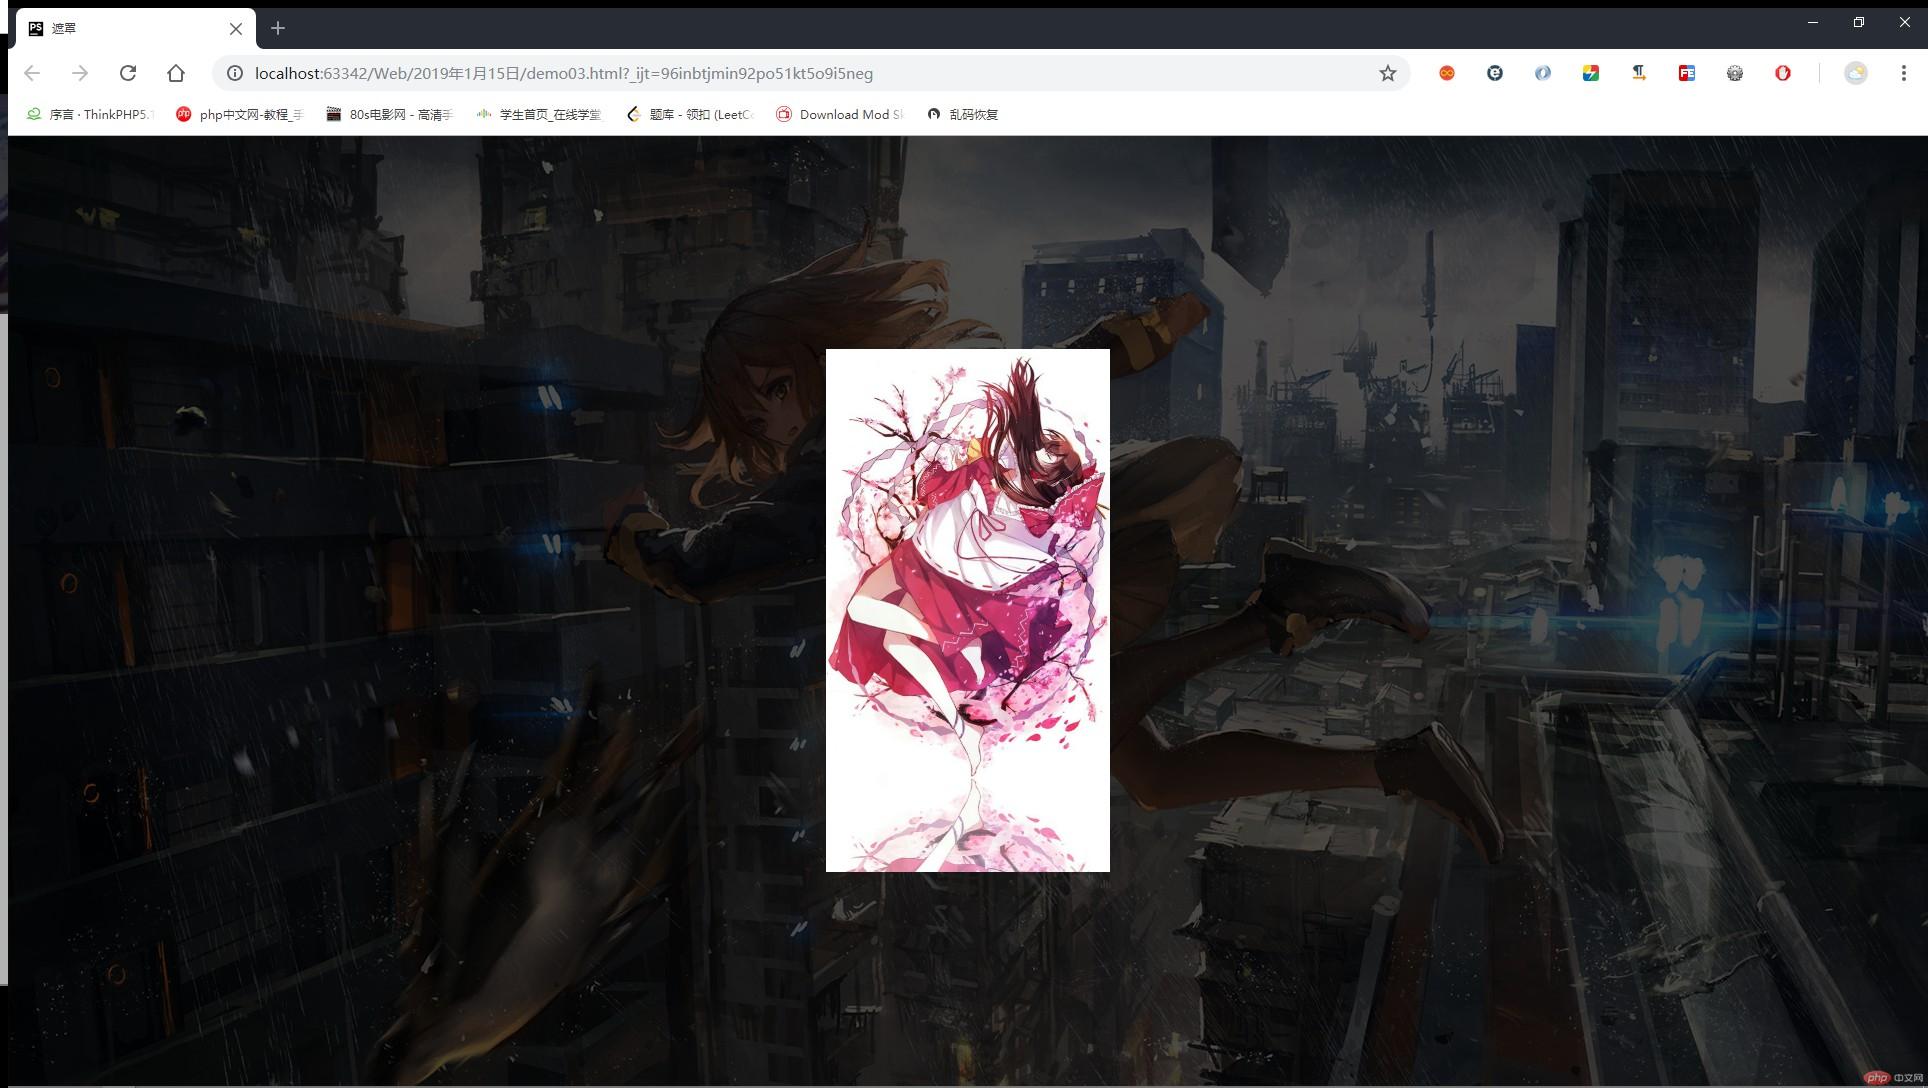
css实现遮罩效果,制作简单的图片遮罩效果
<!DOCTYPE html>
<html lang="en">
<head>
    <meta charset="UTF-8">
    <title>遮罩</title>
    <link rel="stylesheet" href="static/css/demo03.css">
    <style>
        *{
                margin: 0;
                padding: 0;
            }
            body{
                background-image:url(../images/1.jpg);
                background-size: cover;
            }
            /* 设置遮罩 */
            .shade {
                /* 遮罩绝对定位,并自动伸展到整个窗口 */
                position: absolute;
                left: 0;
                top: 0;
                width: 100%;
                height: 100%;

                /* 将背景设置为纯黑, 设置透明度*/
                background-color: black;
                opacity: 0.7;

            }


            .images {

                position: absolute;
                /*使图片左上角在文档的中心点 */
                left: 50%;
                top: 50%;

                /*设置居中*/
                margin-left: -142px;
                margin-top: -262px;

            }

            .images img {
                width: 284px;
            }

    </style>
</head>
<body>
<!--设置遮罩层-->
<div class="shade"></div>
<!--设置居中图片-->
<div class="images"><img src="static/images/2.jpg" alt="" ></div>
</body>
</html>
运行实例 »
点击 "运行实例" 按钮查看在线实例

实例
css的固定定位实现广告位的案例
<!DOCTYPE html>
<html lang="en">
<head>
    <meta charset="UTF-8">
    <title>广告</title>
    <link rel="stylesheet" href="static/css/demo04.css">
    <style>
        *{
                margin: 0;
                padding: 0;
            }

            body{
                background-image:url(../images/1.jpg);
                background-size: cover;
                height: 1200px;
            }

            .ads {
                width: 120px;
                margin:  0 10px 0;
                /*设置固定定位*/
                position: fixed;
                right: 0;
                bottom: 0;
            }

            .btn{
                /*设置绝对定位使关闭按钮出现在右上角*/
                position: absolute;
                top: 0;
                right: 0;
            }
    </style>
</head>
<body>
<div class="ads">
    <img src="static/images/2.jpg" alt="" width="120">
    <button class="btn" onclick="this.parentNode.style.display = 'none'">关闭</button>
</div>
</body>
</html>
运行实例 »
点击 "运行实例" 按钮查看在线实例
![1547627177859645.jpg M1]Y$[W[A0TM5IV]66BGR@6.jpg](https://img.php.cn//upload/image/264/496/941/1547627177859645.jpg)

