C程序以PGM格式写入图像
- WBOY转载
- 2023-09-16 22:01:01852浏览
PGM 是便携式灰度地图。如果我们想在 C 中将二维数组存储为 PNG、JPEG 或任何其他图像格式的图像,则在写入文件之前,我们必须做大量工作以某种指定的格式对数据进行编码。
Netpbm 格式提供了一种简单且便携的解决方案。 Netpbm是一个开源的图形程序包,基本上使用在linux或Unix平台上。它也可以在 Microsoft Windows 系统下运行。
每个文件都以两个字节的幻数开头。这个幻数用于识别文件的类型。类型有 PBM、PGM、PPM 等。它还标识编码(ASCII 或二进制)。幻数是大写的 P 后跟一个数字。
ASCII 编码允许人类可读并轻松传输到其他平台;二进制格式在文件大小方面更有效,但可能存在本机字节顺序问题。
如何编写 PGM 文件?
- 设置幻数 P2
- 添加空格(空格、制表符、CR、LF)
- 添加宽度,格式为十进制 ASCII 字符
- 添加空白
- 添加高度,格式为十进制 ASCII 字符
- 添加空白
- 输入最大灰度值,同样采用 ASCII 十进制格式
- 添加空格
- 宽度 x 高度灰度值,每个值均采用 ASCII 十进制(范围在 0 到最大值之间),从上到下用空格分隔。
示例代码
#include <stdio.h>
main() {
   int i, j;
   int w = 13, h = 13;
   // This 2D array will be converted into an image The size is 13 x 13
   int image[13][13] = {
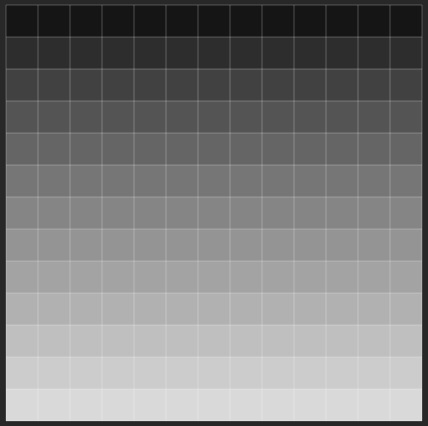
      { 15, 15, 15, 15, 15, 15, 15, 15, 15, 15, 15, 15, 15 },
      { 31, 31, 31, 31, 31, 31, 31, 31, 31, 31, 31, 31, 31},
      { 47, 47, 47, 47, 47, 47, 47, 47, 47, 47, 47, 47, 47},
      { 63, 63, 63, 63, 63, 63, 63, 63, 63, 63, 63, 63, 63},
      { 79, 79, 79, 79, 79, 79, 79, 79, 79, 79, 79, 79, 79},
      { 95, 95, 95, 95, 95, 95, 95, 95, 95, 95, 95, 95, 95 },
      { 111, 111, 111, 111, 111, 111, 111, 111, 111, 111, 111, 111, 111},
      { 127, 127, 127, 127, 127, 127, 127, 127, 127, 127, 127, 127, 127},
      { 143, 143, 143, 143, 143, 143, 143, 143, 143, 143, 143, 143, 143},
      { 159, 159, 159, 159, 159, 159, 159, 159, 159, 159, 159, 159, 159},
      { 175, 175, 175, 175, 175, 175, 175, 175, 175, 175, 175, 175, 175},
      { 191, 191, 191, 191, 191, 191, 191, 191, 191, 191, 191, 191, 191},
      { 207, 207, 207, 207, 207, 207, 207, 207, 207, 207, 207, 207, 207}
   };
   FILE* pgmimg;
   pgmimg = fopen("my_pgmimg.pgm", "wb"); //write the file in binary mode
   fprintf(pgmimg, "P2</p><p>"); // Writing Magic Number to the File
   fprintf(pgmimg, "%d %d</p><p>", w, h); // Writing Width and Height into the
   file
   fprintf(pgmimg, "255</p><p>"); // Writing the maximum gray value
   int count = 0;
   for (i = 0; i < h; i++) {
      for (j = 0; j < w; j++) {
         fprintf(pgmimg, "%d ", image[i][j]); //Copy gray value from
         array to file
      }
      fprintf(pgmimg, "</p><p>");
   }
   fclose(pgmimg);
}
PGM 图像如下所示
输出

以上是C程序以PGM格式写入图像的详细内容。更多信息请关注PHP中文网其他相关文章!
声明:
本文转载于:tutorialspoint.com。如有侵权,请联系admin@php.cn删除
上一篇:广度优先搜索不使用队列下一篇:在C/C++中的strstr()函数

