


一、linux下安装配置nginx
第一次安装nginx,中间出现的问题一步步解决。
用到的工具securecrt,连接并登录服务器。
1.1 rz命令,会弹出会话框,选择要上传的nginx压缩包。
#rz
1.2 解压
[root@vw010001135067 ~]# cd /usr/local/
[root@vw010001135067 local]# tar -zvxf nginx-1.10.2.tar.gz
1.3 进入nginx文件夹,执行./configure命令
[root@vw010001135067 local]# cd nginx-1.10.2
[root@vw010001135067 nginx-1.10.2]# ./configure
报错如下:
checking for os
 + linux 2.6.32-431.el6.x86_64 x86_64
checking for c compiler ... not found

./configure: error: c compiler cc is not found
出现这个错误。那么就是gcc 包没有安装。
1.3.1 安装gcc
查看gcc
[root@vw010001135067 nginx-1.10.2]# whereis gcc
gcc:
安装gcc
[root@vw010001135067 nginx-1.10.2]# yum -y install gcc
安装成功后再次查看
[root@vw010001135067 nginx-1.10.2]# whereis gcc
gcc: /usr/bin/gcc /usr/lib/gcc /usr/libexec/gcc /usr/share/man/man1/gcc.1.gz
gcc安装好了。
1.3.2 继续执行./configure
[root@vw010001135067 nginx-1.10.2]# ./configure
checking for os
 + linux 2.6.32-431.el6.x86_64 x86_64
checking for c compiler ... found
......
checking for pcre library ... not found
checking for pcre library in /usr/local/ ... not found
checking for pcre library in /usr/include/pcre/ ... not found
checking for pcre library in /usr/pkg/ ... not found
checking for pcre library in /opt/local/ ... not found

./configure: error: the http rewrite module requires the pcre library.
you can either disable the module by using --without-http_rewrite_module
option, or install the pcre library into the system, or build the pcre library
statically from the source with nginx by using --with-pcre=<path> option.
出现如上错误。安装pcre-devel
[root@vw010001135067 nginx-1.10.2]# yum install pcre-devel
1.3.3 再次执行./configure
error: the http gzip module requires the zlib library.
you can either disable the module by using --without-http_gzip_module
option, or install the zlib library into the system, or build the zlib library
statically from the source with nginx by using --with-zlib=<path> option.
如果有这个错误 那么执行
yum install zlib-devel
1.3.4 执行./configure后没有报错
[root@vw010001135067 nginx-1.10.2]# ./configure
checking for os
 + linux 2.6.32-431.el6.x86_64 x86_64
checking for c compiler ... found
 + using gnu c compiler
 + gcc version: 4.4.7 20120313 (red hat 4.4.7-17) (gcc)
.......
configuration summary
 + using system pcre library
 + openssl library is not used
 + md5: using system crypto library
 + sha1: using system crypto library
 + using system zlib library

 nginx path prefix: "/usr/local/nginx"
 nginx binary file: "/usr/local/nginx/sbin/nginx"
 nginx modules path: "/usr/local/nginx/modules"
 nginx configuration prefix: "/usr/local/nginx/conf"
 nginx configuration file: "/usr/local/nginx/conf/nginx.conf"
 nginx pid file: "/usr/local/nginx/logs/nginx.pid"
 nginx error log file: "/usr/local/nginx/logs/error.log"
 nginx http access log file: "/usr/local/nginx/logs/access.log"
 nginx http client request body temporary files: "client_body_temp"
 nginx http proxy temporary files: "proxy_temp"
 nginx http fastcgi temporary files: "fastcgi_temp"
 nginx http uwsgi temporary files: "uwsgi_temp"
 nginx http scgi temporary files: "scgi_temp"
1.4 如果你想使用openssl 功能,sha1 功能。 那么安装openssl ,sha1 吧
[root@vw010001135067 nginx-1.10.2]# yum install openssl openssl-devel
[root@vw010001135067 nginx-1.10.2]# install perl-digest-sha1.x86_64
1.4.1 开启ssl 模块 执行./configure –with-http_ssl_module
[root@vw010001135067 nginx-1.10.2]# ./configure --with-http_ssl_module
1.4.2 启用“server+status”页,执行./configure –with-http_stub_status_module
[root@vw010001135067 nginx-1.10.2]# ./configure --with-http_stub_status_module
上面两个命令同时启动可以
复制代码 代码如下:
[root@vw010001135067 nginx-1.10.2]# ./configure --with-http_stub_status_module --with-http_ssl_module
1.5 上面configure就通过了
执行make 命令,执行make install 命令
[root@vw010001135067 nginx-1.10.2]# make
[root@vw010001135067 nginx-1.10.2]# make install
至此,nginx 执行成功了
1.6 配置环境变量
在/etc/profile 中加入配置
打开配置文件
[root@vw010001135067 nginx-1.10.2]# vi /etc/profile
在配置文件中加入
#nginx configure
export nginx_home=/usr/local/nginx-1.10.2
export path=$path:$nginx_home/sbin
我开始像上面填写,结果nginx -v的时候查找不到。注意到上面我的nginx_home配置的地址不对。先找到nginx的安装地址
[root@vw010001135067 nginx-1.10.2]# whereis nginx
nginx: /usr/local/nginx
还真是地址写错了,把上面的改成
#nginx configure
export nginx_home=/usr/local/nginx
export path=$path:$nginx_home/sbin
编译完保存退出并执行
[root@vw010001135067 nginx-1.10.2]# source /etc/profile
使配置生效。
1.7 查看nginx版本
[root@vw010001135067 nginx]# nginx -v
nginx version: nginx/1.10.2
整个过程成功了!
二、修改nginx.conf
2.1 启动nginx
我的nginx服务在http://10.1.135.67/,配置成功后,现在启动nginx
[root@vw010001135067 nginx]# cd /usr/local/nginx
[root@vw010001135067 nginx]# nginx -c conf/nginx.conf
启动成功,在浏览器打开http://10.1.135.67/,默认端口号80.
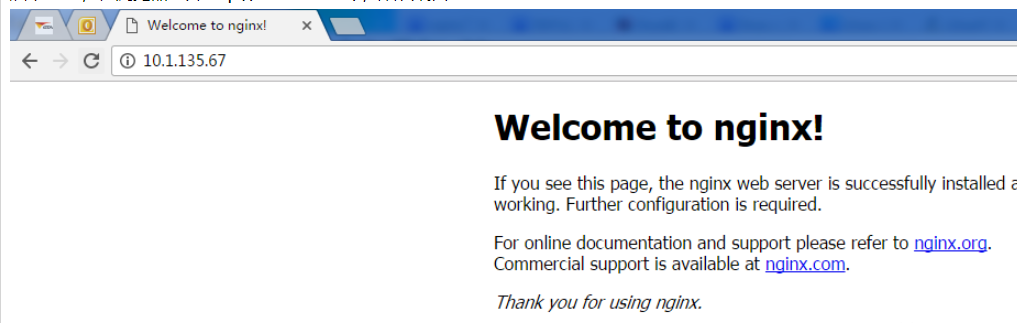
如上图,nginx已经正常工作了。
2.2 配置tomcat服务
现在我的tomcat服务在10.1.29.15,需要通过nginx转发。那么打开nginx.conf,修改配置文件。如下,添加:
#user nobody;
worker_processes 1;

#error_log logs/error.log;
#error_log logs/error.log notice;
#error_log logs/error.log info;

#pid  logs/nginx.pid;


events {
 worker_connections 1024;#最大连接数,默认为512
 accept_mutex on; #设置网路连接序列化,防止惊群现象发生,默认为on
 multi_accept on; #设置一个进程是否同时接受多个网络连接,默认为off
 #use epoll;  #事件驱动模型,select|poll|kqueue|epoll|resig|/dev/poll|eventport
}


http {
 #文件扩展名与文件类型映射表
 include  mime.types;

 #默认文件类型,默认为text/plain
 default_type application/octet-stream;

 #自定义格式
 log_format main '$remote_addr - $remote_user [$time_local] "$request" '
      '$status $body_bytes_sent "$http_referer" '
      '"$http_user_agent" "$http_x_forwarded_for"';

 #combined为日志格式的默认值
 access_log logs/access.log main;

 #允许sendfile方式传输文件,默认为off,可以在http块,server块,location块
 sendfile  on;
 sendfile_max_chunk 100k; #每个进程每次调用传输数量不能大于设定的值,默认为0,即不设上限。

 #tcp_nopush  on;

 #连接超时时间,默认为75s,可以在http,server,location块。
 keepalive_timeout 65;

 #gzip on;

 upstream upload {
  server 10.1.29.15:8080;
 }

 error_page 404 https://www.baidu.com; #错误页

 server {
  keepalive_requests 120; #单连接请求上限次数。
  listen  80; #监听端口
  server_name localhost; #监听地址

  #charset koi8-r;

  #access_log logs/host.access.log main;

  location ~ ^.*?/upload/[^/]*?$ {
   proxy_connect_timeout 15;
   proxy_send_timeout 15;
   proxy_read_timeout 15;
   proxy_set_header host $host;
   proxy_set_header x-real-ip $remote_addr;
   proxy_set_header x-forwarded-for $proxy_add_x_forwarded_for;
   proxy_set_header connection "";
   proxy_pass http://upload; #请求转向upload 定义的服务器列表
   client_max_body_size 1024m;
}
 }
}
配置好后,保存配置文件,并且重启nginx
[root@vw010001135067 nginx]# nginx -s reload
在浏览器调用upload项目是否成功

如图能正确访问项目,配置成功!
以上是Linux下安装配置nginx的方法的详细内容。更多信息请关注PHP中文网其他相关文章!

 NGINX单元与其他应用程序服务器Apr 24, 2025 am 12:14 AM
NGINXUnit优于ApacheTomcat、Gunicorn和Node.js内置HTTP服务器,适用于多语言项目和动态配置需求。1)支持多种编程语言,2)提供动态配置重载,3)内置负载均衡功能,适合需要高扩展性和可靠性的项目。
 NGINX单元:架构及其工作原理Apr 23, 2025 am 12:18 AM
NGINXUnit通过其模块化架构和动态重配置功能提高了应用的性能和可管理性。1)模块化设计包括主控进程、路由器和应用进程,支持高效管理和扩展。2)动态重配置允许在运行时无缝更新配置,适用于CI/CD环境。3)多语言支持通过动态加载语言运行时实现,提升了开发灵活性。4)高性能通过事件驱动模型和异步I/O实现,即使在高并发下也保持高效。5)安全性通过隔离应用进程提高,减少应用间相互影响。
 使用NGINX单元:部署和管理应用程序Apr 22, 2025 am 12:06 AM
NGINXUnit可用于部署和管理多种语言的应用。1)安装NGINXUnit。2)配置它以运行不同类型的应用,如Python和PHP。3)利用其动态配置功能进行应用管理。通过这些步骤,你可以高效地部署和管理应用,提升项目效率。
 NGINX与Apache:Web服务器的比较分析Apr 21, 2025 am 12:08 AM
NGINX更适合处理高并发连接,而Apache更适合需要复杂配置和模块扩展的场景。 1.NGINX以高性能和低资源消耗着称,适合高并发。 2.Apache以稳定性和丰富的模块扩展闻名,适合复杂配置需求。
 NGINX单元的优势:灵活性和性能Apr 20, 2025 am 12:07 AM
NGINXUnit通过其动态配置和高性能架构提升应用的灵活性和性能。1.动态配置允许在不重启服务器的情况下调整应用配置。2.高性能体现在事件驱动和非阻塞架构以及多进程模型上,能够高效处理并发连接和利用多核CPU。
 NGINX与Apache:性能,可伸缩性和效率Apr 19, 2025 am 12:05 AM
NGINX和Apache都是强大的Web服务器,各自在性能、可扩展性和效率上有独特的优势和不足。1)NGINX在处理静态内容和反向代理时表现出色,适合高并发场景。2)Apache在处理动态内容时表现更好,适合需要丰富模块支持的项目。选择服务器应根据项目需求和场景来决定。
 终极摊牌:nginx vs. apacheApr 18, 2025 am 12:02 AM
NGINX适合处理高并发请求,Apache适合需要复杂配置和功能扩展的场景。1.NGINX采用事件驱动、非阻塞架构,适用于高并发环境。2.Apache采用进程或线程模型,提供丰富的模块生态系统,适合复杂配置需求。
 nginx行动:示例和现实应用程序Apr 17, 2025 am 12:18 AM
NGINX可用于提升网站性能、安全性和可扩展性。1)作为反向代理和负载均衡器,NGINX可优化后端服务和分担流量。2)通过事件驱动和异步架构,NGINX高效处理高并发连接。3)配置文件允许灵活定义规则,如静态文件服务和负载均衡。4)优化建议包括启用Gzip压缩、使用缓存和调整worker进程。


热AI工具

Undresser.AI Undress
人工智能驱动的应用程序,用于创建逼真的裸体照片

AI Clothes Remover
用于从照片中去除衣服的在线人工智能工具。

Undress AI Tool
免费脱衣服图片

Clothoff.io
AI脱衣机

Video Face Swap
使用我们完全免费的人工智能换脸工具轻松在任何视频中换脸!

热门文章
热工具

WebStorm Mac版
好用的JavaScript开发工具

SublimeText3 Linux新版
SublimeText3 Linux最新版

VSCode Windows 64位 下载
微软推出的免费、功能强大的一款IDE编辑器

MinGW - 适用于 Windows 的极简 GNU
这个项目正在迁移到osdn.net/projects/mingw的过程中,你可以继续在那里关注我们。MinGW:GNU编译器集合(GCC)的本地Windows移植版本,可自由分发的导入库和用于构建本地Windows应用程序的头文件;包括对MSVC运行时的扩展,以支持C99功能。MinGW的所有软件都可以在64位Windows平台上运行。

记事本++7.3.1
好用且免费的代码编辑器

