Python爬虫Requests库怎么使用
- 王林转载
- 2023-05-16 11:46:051581浏览
1、安装 requests 库
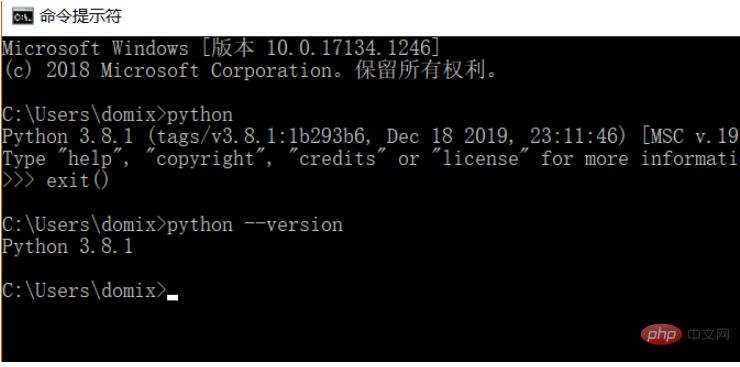
因为学习过程使用的是 Python 语言,需要提前安装 Python ,我安装的是 Python 3.8,可以通过命令 python --version 查看自己安装的 Python 版本,建议安装 Python 3.X 以上的版本。

安装好 Python 以后可以 直接通过以下命令安装 requests 库。
pip install requests
Ps:可以切换到国内的pip源,例如阿里、豆瓣,速度快
为了演示功能,我这里使用nginx模拟了一个简单网站。
下载好了以后,直接运行根目录下的 nginx.exe 程序就可以了(备注:windows环境下)。
这时本机访问 :http://127.0.0.1 ,会进入 nginx 的一个默认页面。

2、获取网页
下面我们开始用 requests 模拟一个请求,获取页面源代码。
import requestsr = requests.get('http://127.0.0.1')print(r.text)
执行以后得到的结果如下:
<!DOCTYPE html><html><head><title>Welcome to nginx!</title><style>    body {        width: 35em;        margin: 0 auto;        font-family: Tahoma, Verdana, Arial, sans-serif;    }</style></head><body><h2>Welcome to nginx!</h2><p>If you see this page, the nginx web server is successfully installed andworking. Further configuration is required.</p>
<p>For online documentation and support please refer to<a href="http://nginx.org/">nginx.org</a>.<br/>Commercial support is available at<a href="http://nginx.com/">nginx.com</a>.</p>
<p><em>Thank you for using nginx.</em></p></body></html>
3、关于请求
常见的请求有很多种,比如上面的示例使用的就是 GET 请求,这里详细介绍一下这些常见的请求方法。
4、GET 请求
4.1、发起请求
我们使用相同的方法,发起一个 GET 请求:
import requests r = requests.get('http://httpbin.org/get') print(r.text)
返回结果如下:
{"args": {}, "headers": {"Accept": "*/*", "Accept-Encoding": "gzip, deflate", "Host": "httpbin.org", "User-Agent": "python-requests/2.23.0", "X-Amzn-Trace-Id": "Root=1-5f846520-19f215aa46213a2b4241c18a" }, "origin": "xxxx", "url": "http://httpbin.org/get"}
通过返回结果,我们可以看到返回结果所包括的信息有:Headers、URL、IP等。
4.2、添加参数
平时我们访问的 URL 会包含一些参数,比如:id是100,name是YOOAO。正常的访问,我们会编写如下 URL 进行访问:
http://httpbin.org/get?id=100&name=YOOAO
显然很不方便,而且参数多的情况下会容易出错,这时我们可以通过 params 参数优化输入内容。
import requests data = { 'id': '100', 'name': 'YOOAO'} r = requests.get('http://httpbin.org/get', params=data) print(r.text)
这是执行代码返回的结果如下:
{"args": {"id": "100", "name": "YOOAO" }, "headers": {"Accept": "*/*", "Accept-Encoding": "gzip, deflate", "Host": "httpbin.org", "User-Agent": "python-requests/2.23.0", "X-Amzn-Trace-Id": "Root=1-5f84658a-1cd0437b4cf34835410d7161" }, "origin": "xxx.xxxx.xxx.xxx", "url": "http://httpbin.org/get?id=100&name=YOOAO"}
通过返回结果,我们可以看到,通过字典方式传输的参数被自动构造成了完整的 URL ,不需要我们自己手动完成构造。
4.3、返回结果处理
返回结果是 json 格式,因此我们可以使用调用 json 的方法来解析。如果返回内容不是 json 格式,这种调用会报错。
import requests
r = requests.get('http://httpbin.org/get')  print(type(r.text))   print(type(r.json()))
返回结果:
<class 'str'><class 'dict'>
4.4、内容抓取
这里我们使用简单的正则表达式,来抓取nginx示例页面种所有< a >标签的内容,代码如下:
import requestsimport re
r = requests.get('http://127.0.0.1')pattern = re.compile('<a.*?>(.*?)</a>', re.S)a_content = re.findall(pattern, r.text)print(a_content)
抓取结果:
['nginx.org', 'nginx.com']
这里一次简单的页面获取和内容抓取就完成了,
4.5、数据文件下载
上面的示例,返回的都是页面信息,如果我们想获取网页上的图片、音频和视频文件,我们就需要学会抓取页面的二进制数据。我们可以使用 open 方法来完成图片等二进制文件的下载,示例代码:
import requests
r = requests.get('http://tu.ossfiles.cn:9186/group3/M00/09/FB/rBpVfl8QFLOAYhhcAAC-pTdNj7g471.jpg')with open('image.jpg', 'wb') as f:    f.write(r.content)print('下载完成')
open 方法中,它的第一个参数是文件名称,第二个参数代表以二进制的形式打开,可以向文件里写入二进制数据。
运行结束以后,会在运行文件的同级文件夹下保存下载下来的图片。运用同样原理,我们可以处理视频和音频文件。
4.6、添加headers
在上面的示例中,我们直接发起的请求,没有添加 headers ,某些网站为因为请求不携带请求头而造成访问异常,这里我们可以手动添加 headers 内容,模拟添加 headers 中的 Uer-Agent 内容代码:
import requests
headers = {'User-Agent':'Mozilla/5.0 (Macintosh; Intel Mac OS X 10_8_3) AppleWebKit/537.36 (KHTML, like Gecko) Chrome/27.0.1453.93 Safari/537.36'}r = requests.get('http://httpbin.org/get', headers=headers)print(r.text)
执行结果:
{"args": {}, "headers": {"Accept": "*/*", "Accept-Encoding": "gzip, deflate", "Host": "httpbin.org", "User-Agent": "Mozilla/5.0 (Macintosh; Intel Mac OS X 10_8_3) AppleWebKit/537.36 (KHTML, like Gecko) Chrome/27.0.1453.93 Safari/537.36", "X-Amzn-Trace-Id": "Root=1-5ec8f342-8a9f986011eac8f07be8b450" }, "origin": "xxx3.xx.xxx.xxx", "url": "http://httpbin.org/get"}
结果可见,User-Agent 的值变了。不是之前的:python-requests/2.23.0。
5、POST 请求
GET请求相关的知识都讲完了,下面讲讲另一个常见的请求方式:POST请求。
使用 requests 实现 POST 请求的代码如下:
import requestsdata = {      'id': '100',      'name': 'YOOAO'}
r = requests.post("http://httpbin.org/post", data=data)print(r.text)
结果如下
{"args": {}, "data": "", "files": {}, "form": {"id": "100", "name": "YOOAO" }, "headers": {"Accept": "*/*", "Accept-Encoding": "gzip, deflate", "Content-Length": "17", "Content-Type": "application/x-www-form-urlencoded", "Host": "httpbin.org", "User-Agent": "python-requests/2.23.0", "X-Amzn-Trace-Id": "Root=1-5ec8f4a0-affca27a05e320a84ca6535a" }, "json": null, "origin": "xxxx", "url": "http://httpbin.org/post"}
从 form 中我们看到了自己提交的数据,可见我们的 POST 请求访问成功。
6、响应
访问URL时,有请求就会有响应,上面的示例使用 text 和 content 获取了响应的内容。除此以外,还有很多属性和方法可以用来获取其他信息,比如状态码、响应头、Cookies 等。
import requests
r = requests.get('http://127.0.0.1/')print(type(r.status_code), r.status_code)print(type(r.headers), r.headers)print(type(r.cookies), r.cookies)print(type(r.url), r.url)print(type(r.history), r.history)
关于状态码,requests 还提供了一个内置的状态码查询对象 requests.codes,用法示例如下:
import requestsr = requests.get('http://127.0.0.1/')exit() if not r.status_code == requests.codes.ok else print('Request Successfully')==========执行结果==========Request Successfully
这里通过比较返回码和内置的成功的返回码,来保证请求得到了正常响应,输出成功请求的消息,否则程序终止。
这里我们用 requests.codes.ok 得到的是成功的状态码 200。
这样的话,我们就不用再在程序里面写状态码对应的数字了,用字符串表示状态码会显得更加直观。
下面是响应码和查询条件对照信息:
# 信息性状态码  100: ('continue',),  101: ('switching_protocols',),  102: ('processing',),  103: ('checkpoint',),  122: ('uri_too_long', 'request_uri_too_long'),
# 成功状态码  200: ('ok', 'okay', 'all_ok', 'all_okay', 'all_good', '\\o/', '✓'),  201: ('created',),  202: ('accepted',),  203: ('non_authoritative_info', 'non_authoritative_information'),  204: ('no_content',),  205: ('reset_content', 'reset'),  206: ('partial_content', 'partial'),  207: ('multi_status', 'multiple_status', 'multi_stati', 'multiple_stati'),  208: ('already_reported',),  226: ('im_used',),
# 重定向状态码  300: ('multiple_choices',),  301: ('moved_permanently', 'moved', '\\o-'),  302: ('found',),  303: ('see_other', 'other'),  304: ('not_modified',),  305: ('use_proxy',),  306: ('switch_proxy',),  307: ('temporary_redirect', 'temporary_moved', 'temporary'),  308: ('permanent_redirect',        'resume_incomplete', 'resume',), # These 2 to be removed in 3.0
# 客户端错误状态码  400: ('bad_request', 'bad'),  401: ('unauthorized',),  402: ('payment_required', 'payment'),  403: ('forbidden',),  404: ('not_found', '-o-'),  405: ('method_not_allowed', 'not_allowed'),  406: ('not_acceptable',),  407: ('proxy_authentication_required', 'proxy_auth', 'proxy_authentication'),  408: ('request_timeout', 'timeout'),  409: ('conflict',),  410: ('gone',),  411: ('length_required',),  412: ('precondition_failed', 'precondition'),  413: ('request_entity_too_large',),  414: ('request_uri_too_large',),  415: ('unsupported_media_type', 'unsupported_media', 'media_type'),  416: ('requested_range_not_satisfiable', 'requested_range', 'range_not_satisfiable'),  417: ('expectation_failed',),  418: ('im_a_teapot', 'teapot', 'i_am_a_teapot'),  421: ('misdirected_request',),  422: ('unprocessable_entity', 'unprocessable'),  423: ('locked',),  424: ('failed_dependency', 'dependency'),  425: ('unordered_collection', 'unordered'),  426: ('upgrade_required', 'upgrade'),  428: ('precondition_required', 'precondition'),  429: ('too_many_requests', 'too_many'),  431: ('header_fields_too_large', 'fields_too_large'),  444: ('no_response', 'none'),  449: ('retry_with', 'retry'),  450: ('blocked_by_windows_parental_controls', 'parental_controls'),  451: ('unavailable_for_legal_reasons', 'legal_reasons'),  499: ('client_closed_request',),
# 服务端错误状态码  500: ('internal_server_error', 'server_error', '/o\\', '✗'),  501: ('not_implemented',),  502: ('bad_gateway',),  503: ('service_unavailable', 'unavailable'),  504: ('gateway_timeout',),  505: ('http_version_not_supported', 'http_version'),  506: ('variant_also_negotiates',),  507: ('insufficient_storage',),  509: ('bandwidth_limit_exceeded', 'bandwidth'),  510: ('not_extended',),  511: ('network_authentication_required', 'network_auth', 'network_authentication')
7、SSL 证书验证
现在很多网站都会验证证书,我们可以设置参数来忽略证书的验证。
import requests
response = requests.get('https://XXXXXXXX', verify=False)print(response.status_code)
或者制定本地证书作为客户端证书:
import requests
response = requests.get('https://xxxxxx', cert=('/path/server.crt', '/path/server.key'))print(response.status_code)
注意:本地私有证书的 key 必须是解密状态,加密状态的 key 是不支持的。
8、设置超时
很多时候我们需要设置超时时间来控制访问的效率,遇到访问慢的链接直接跳过。
示例代码:
import requests# 设置超时时间为 10 秒r = requests.get('https://httpbin.org/get', timeout=10)print(r.status_code)
将连接时间和读取时间分开计算:
r = requests.get('https://httpbin.org/get', timeout=(3, 10))
不添加参数,默认不设置超时时间,等同于:
r = requests.get('https://httpbin.org/get', timeout=None)
9、身份认证
遇到一些网站需要输入用户名和密码,我们可以通过 auth 参数进行设置。
import requests from requests.auth import HTTPBasicAuth # 用户名为 admin ,密码为 admin r = requests.get('https://xxxxxx/', auth=HTTPBasicAuth('admin', 'admin')) print(r.status_code)
简化写法:
import requests
r = requests.get('https://xxxxxx', auth=('admin', 'admin'))print(r.status_code)
10、设置代理
如果频繁的访问某个网站时,后期会被一些反爬程序识别,要求输入验证信息,或者其他信息,甚至IP被封无法再次访问,这时候,我们可以通过设置代理来避免这样的问题。
import requests
proxies = {  "http": "http://10.10.1.10:3128",  "https": "http://10.10.1.10:1080",}
requests.get("http://example.org", proxies=proxies)
若你的代理需要使用HTTP Basic Auth,可以使用
http://user:password@host/ 语法:
proxies = { "http": "http://user:pass@10.10.1.10:3128/",}
要为某个特定的连接方式或者主机设置代理,使用 scheme://hostname 作为 key, 它会针对指定的主机和连接方式进行匹配。
proxies = {'http://10.20.1.128': 'http://10.10.1.10:5323'}以上是Python爬虫Requests库怎么使用的详细内容。更多信息请关注PHP中文网其他相关文章!

