


本篇文章带大家继续angular的学习,简单了解一下angular中的自定义服务 notification,希望对大家有所帮助!

在之前的文章中,我们有提到:
service 不仅可以用来处理 API 请求,还有其他的用处
比如,我们这篇文章要讲到的 notification 的实现。【相关教程推荐:《angular教程》】
效果图如下:
UI 这个可以后期调整
So,我们一步步来分解。
添加服务
我们在 app/services 中添加 notification.service.ts 服务文件(请使用命令行生成),添加相关的内容:
// notification.service.ts
import { Injectable } from '@angular/core';
import { Observable, Subject } from 'rxjs';
// 通知状态的枚举
export enum NotificationStatus {
Process = "progress",
Success = "success",
Failure = "failure",
Ended = "ended"
}
@Injectable({
providedIn: 'root'
})
export class NotificationService {
private notify: Subject<NotificationStatus> = new Subject();
public messageObj: any = {
primary: '',
secondary: ''
}
// 转换成可观察体
public getNotification(): Observable<NotificationStatus> {
return this.notify.asObservable();
}
// 进行中通知
public showProcessNotification() {
this.notify.next(NotificationStatus.Process)
}
// 成功通知
public showSuccessNotification() {
this.notify.next(NotificationStatus.Success)
}
// 结束通知
public showEndedNotification() {
this.notify.next(NotificationStatus.Ended)
}
// 更改信息
public changePrimarySecondary(primary?: string, secondary?: string) {
this.messageObj.primary = primary;
this.messageObj.secondary = secondary
}
constructor() { }
}是不是很容易理解...
我们将 notify 变成可观察物体,之后发布各种状态的信息。
创建组件
我们在 app/components 这个存放公共组件的地方新建 notification 组件。所以你会得到下面的结构:
notification
├── notification.component.html                     // 页面骨架
├── notification.component.scss                     // 页面独有样式
├── notification.component.spec.ts                  // 测试文件
└── notification.component.ts                       // javascript 文件
我们定义 notification 的骨架:
<!-- notification.component.html -->

<!-- 支持手动关闭通知 -->
<button (click)="closeNotification()">关闭</button>
<h1>提醒的内容: {{ message }}</h1>
<!-- 自定义重点通知信息 -->
<p>{{ primaryMessage }}</p>
<!-- 自定义次要通知信息 -->
<p>{{ secondaryMessage }}</p>
接着,我们简单修饰下骨架,添加下面的样式:
// notification.component.scss

:host {
  position: fixed;
  top: -100%;
  right: 20px;
  background-color: #999;
  border: 1px solid #333;
  border-radius: 10px;
  width: 400px;
  height: 180px;
  padding: 10px;
  // 注意这里的 active 的内容,在出现通知的时候才有
  &.active {
    top: 10px;
  }
  &.success {}
  &.progress {}
  &.failure {}
  &.ended {}
}
success, progress, failure, ended 这四个类名对应 notification service 定义的枚举,可以按照自己的喜好添加相关的样式。
最后,我们添加行为 javascript 代码。
// notification.component.ts

import { Component, OnInit, HostBinding, OnDestroy } from '@angular/core';
// 新的知识点 rxjs
import { Subscription } from 'rxjs';
import {debounceTime} from 'rxjs/operators';
// 引入相关的服务
import { NotificationStatus, NotificationService } from 'src/app/services/notification.service';

@Component({
  selector: 'app-notification',
  templateUrl: './notification.component.html',
  styleUrls: ['./notification.component.scss']
})
export class NotificationComponent implements OnInit, OnDestroy {

  // 防抖时间,只读
  private readonly NOTIFICATION_DEBOUNCE_TIME_MS = 200;

  protected notificationSubscription!: Subscription;
  private timer: any = null;
  public message: string = ''

  // notification service 枚举信息的映射
  private reflectObj: any = {
    progress: "进行中",
    success: "成功",
    failure: "失败",
    ended: "结束"
  }

  @HostBinding('class') notificationCssClass = '';

  public primaryMessage!: string;
  public secondaryMessage!: string;

  constructor(
    private notificationService: NotificationService
  ) { }

  ngOnInit(): void {
    this.init()
  }

  public init() {
    // 添加相关的订阅信息
    this.notificationSubscription = this.notificationService.getNotification()
      .pipe(
        debounceTime(this.NOTIFICATION_DEBOUNCE_TIME_MS)
      )
      .subscribe((notificationStatus: NotificationStatus) => {
        if(notificationStatus) {
          this.resetTimeout();
          // 添加相关的样式
          this.notificationCssClass = `active ${ notificationStatus }`
          this.message = this.reflectObj[notificationStatus]
          // 获取自定义首要信息
          this.primaryMessage = this.notificationService.messageObj.primary;
          // 获取自定义次要信息
          this.secondaryMessage = this.notificationService.messageObj.secondary;
          if(notificationStatus === NotificationStatus.Process) {
            this.resetTimeout()
            this.timer = setTimeout(() => {
              this.resetView()
            }, 1000)
          } else {
            this.resetTimeout();
            this.timer = setTimeout(() => {
              this.notificationCssClass = ''
              this.resetView()
            }, 2000)
          }
        }
      })
  }

  private resetView(): void {
    this.message = ''
  }

  // 关闭定时器
  private resetTimeout(): void {
    if(this.timer) {
      clearTimeout(this.timer)
    }
  }

  // 关闭通知
  public closeNotification() {
    this.notificationCssClass = ''
    this.resetTimeout()
  }

  // 组件销毁
  ngOnDestroy(): void {
    this.resetTimeout();
    // 取消所有的订阅消息
    this.notificationSubscription.unsubscribe()
  }

}
在这里,我们引入了 rxjs 这个知识点,RxJS 是使用 Observables 的响应式编程的库,它使编写异步或基于回调的代码更容易。这是一个很棒的库,接下来的很多文章你会接触到它更多的内容。
这里我们使用了 debounce 防抖函数,函数防抖,就是指触发事件后,在 n 秒后只能执行一次,如果在 n 秒内又触发了事件,则会重新计算函数的执行时间。简单来说:当一个动作连续触发,只执行最后一次。
ps:
throttle节流函数:限制一个函数在一定时间内只能执行一次。
在面试的时候,面试官很喜欢问...
调用
因为这个一个全局的服务,我们在 app.component.html 中调用此组件:
// app.component.html

<router-outlet></router-outlet>
<app-notification></app-notification>
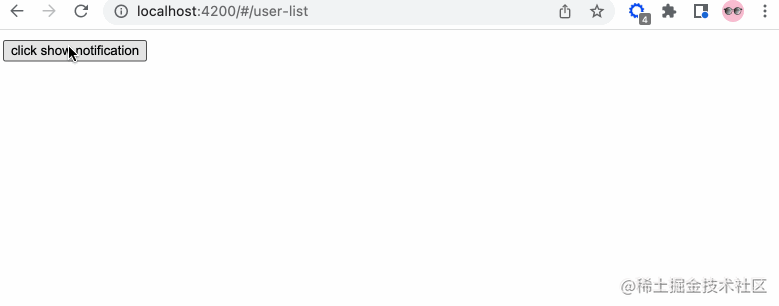
为了方便演示,我们在 user-list.component.html 中添加按钮,方便触发演示:
// user-list.component.html

<button (click)="showNotification()">click show notification</button>
触发相关的代码:
// user-list.component.ts

import { NotificationService } from 'src/app/services/notification.service';

// ...
constructor(
  private notificationService: NotificationService
) { }

// 展示通知
showNotification(): void {
  this.notificationService.changePrimarySecondary('主要信息 1');
  this.notificationService.showProcessNotification();
  setTimeout(() => {
    this.notificationService.changePrimarySecondary('主要信息 2', '次要信息 2');
    this.notificationService.showSuccessNotification();
  }, 1000)
}
至此,大功告成,我们成功模拟了 notification 的功能。相关的服务组件我们可以按照实际的需求进行修改,满足业务需求自定义。如果我们是开发内部使用的系统的话,建议使用成熟的 UI 库,它们已经帮我们封装好各种组件和服务,大量节省我们的开发时间。
【完】✅
更多编程相关知识,请访问:编程教学!!
以上是Angular学习之聊聊notification(自定义服务)的详细内容。更多信息请关注PHP中文网其他相关文章!

 JavaScript数据类型:浏览器和nodejs之间是否有区别?May 14, 2025 am 12:15 AM
JavaScript核心数据类型在浏览器和Node.js中一致,但处理方式和额外类型有所不同。1)全局对象在浏览器中为window,在Node.js中为global。2)Node.js独有Buffer对象,用于处理二进制数据。3)性能和时间处理在两者间也有差异,需根据环境调整代码。
 JavaScript评论:使用//和 / * * / * / * /May 13, 2025 pm 03:49 PM
JavaScriptusestwotypesofcomments:single-line(//)andmulti-line(//).1)Use//forquicknotesorsingle-lineexplanations.2)Use//forlongerexplanationsorcommentingoutblocksofcode.Commentsshouldexplainthe'why',notthe'what',andbeplacedabovetherelevantcodeforclari
 Python vs. JavaScript:开发人员的比较分析May 09, 2025 am 12:22 AM
Python和JavaScript的主要区别在于类型系统和应用场景。1.Python使用动态类型,适合科学计算和数据分析。2.JavaScript采用弱类型,广泛用于前端和全栈开发。两者在异步编程和性能优化上各有优势,选择时应根据项目需求决定。
 Python vs. JavaScript:选择合适的工具May 08, 2025 am 12:10 AM
选择Python还是JavaScript取决于项目类型:1)数据科学和自动化任务选择Python;2)前端和全栈开发选择JavaScript。Python因其在数据处理和自动化方面的强大库而备受青睐,而JavaScript则因其在网页交互和全栈开发中的优势而不可或缺。
 Python和JavaScript:了解每个的优势May 06, 2025 am 12:15 AM
Python和JavaScript各有优势,选择取决于项目需求和个人偏好。1.Python易学,语法简洁,适用于数据科学和后端开发,但执行速度较慢。2.JavaScript在前端开发中无处不在,异步编程能力强,Node.js使其适用于全栈开发,但语法可能复杂且易出错。
 JavaScript的核心:它是在C还是C上构建的?May 05, 2025 am 12:07 AM
javascriptisnotbuiltoncorc; saninterpretedlanguagethatrunsonenginesoftenwritteninc.1)javascriptwasdesignedAsalightweight,解释edganguageforwebbrowsers.2)Enginesevolvedfromsimpleterterterpretpreterterterpretertestojitcompilerers,典型地提示。
 JavaScript应用程序:从前端到后端May 04, 2025 am 12:12 AM
JavaScript可用于前端和后端开发。前端通过DOM操作增强用户体验,后端通过Node.js处理服务器任务。1.前端示例:改变网页文本内容。2.后端示例:创建Node.js服务器。
 Python vs. JavaScript:您应该学到哪种语言?May 03, 2025 am 12:10 AM
选择Python还是JavaScript应基于职业发展、学习曲线和生态系统:1)职业发展:Python适合数据科学和后端开发,JavaScript适合前端和全栈开发。2)学习曲线:Python语法简洁,适合初学者;JavaScript语法灵活。3)生态系统:Python有丰富的科学计算库,JavaScript有强大的前端框架。


热AI工具

Undresser.AI Undress
人工智能驱动的应用程序,用于创建逼真的裸体照片

AI Clothes Remover
用于从照片中去除衣服的在线人工智能工具。

Undress AI Tool
免费脱衣服图片

Clothoff.io
AI脱衣机

Video Face Swap
使用我们完全免费的人工智能换脸工具轻松在任何视频中换脸!

热门文章
热工具

MinGW - 适用于 Windows 的极简 GNU
这个项目正在迁移到osdn.net/projects/mingw的过程中,你可以继续在那里关注我们。MinGW:GNU编译器集合(GCC)的本地Windows移植版本,可自由分发的导入库和用于构建本地Windows应用程序的头文件;包括对MSVC运行时的扩展,以支持C99功能。MinGW的所有软件都可以在64位Windows平台上运行。

禅工作室 13.0.1
功能强大的PHP集成开发环境

Dreamweaver Mac版
视觉化网页开发工具

DVWA
Damn Vulnerable Web App (DVWA) 是一个PHP/MySQL的Web应用程序,非常容易受到攻击。它的主要目标是成为安全专业人员在合法环境中测试自己的技能和工具的辅助工具,帮助Web开发人员更好地理解保护Web应用程序的过程,并帮助教师/学生在课堂环境中教授/学习Web应用程序安全。DVWA的目标是通过简单直接的界面练习一些最常见的Web漏洞,难度各不相同。请注意,该软件中

Dreamweaver CS6
视觉化网页开发工具

