浅析Vue项目中怎么用Pinia状态管理工具
- 青灯夜游转载
- 2022-11-07 20:09:511701浏览
Vue项目中怎么用Pinia状态管理工具?下面本篇文章带大家聊聊Vue项目中Pinia状态管理工具的使用,希望对大家有所帮助!

Pinia官网介绍说:Pinia 是 Vue 的存储库,它允许您跨组件/页面共享状态。Vuex同样可以作为状态管理工具,那么两者有什么区别呢?
Pinia与Vuex的区别
- pinia只有store、getter、actions,么有mutations,简化了状态管理的操作。【相关推荐:vuejs视频教程、web前端开发】
- pinia模块划分不需要modules,
- pinia自动化代码拆分
- pinia对ts支持很好以及vue3的composition API
- pinia体积更小,性能更好
使用Pinia
defineStore( )方法的第一个参数:容器的名字,名字必须唯一,不能重复defineStore( )方法的第二个参数:配置对象,放置state,getters,actionsstate属性: 用来存储全局的状态getters属性: 用来监视或者说是计算状态的变化的,有缓存的功能actions属性: 修改state全局状态数据,可以是异步也可以是同步Pinia可以用于vue2.x也可以用于vue3.x中
- 安装
yarn add pinia -S
-
main.js引入
import {createApp} from "vue"
import App from "./app.vue"
import store from "./store/index.js"
const app = createApp(App);
const store = createPinia();
app.use(store).mount("#app")- 在store文件夹下新建test.js
import {definePinia} from "pinia"
export default testStore = definePinia('testId',{
    state:()=>{
         tname:"test",
         tnum:0,
    },
    getters:{
       changeTnum(){
           console.log("getters")
           this.tnum++;
       }
    },
    actions:{
       addNum(val){
          this.tnum += val
       }
    },
    //持久化存储配置
    presist:{
         enable:true,//
         strategies:[
            {
            key:"testId",
            storage:localStorage,
            paths:['tnum']
            }
         ]
    }
})
在用actions的时候,不能使用箭头函数,因为箭头函数绑定是外部的this。actions里的this指向当前store
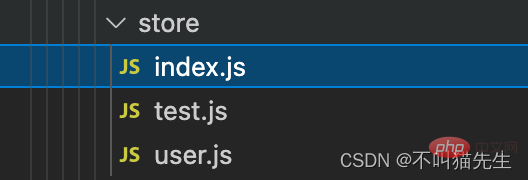
- 在store文件夹下新建index.js,便于管理
import {createPinia} from "pinia"
const store = createPinia();
export default store- 新建
A.vue组件,引入store模块和storeToRefs方法storeToRefs:解构store中的数据,使之成为响应式数据
<template>
    <div>
        <div> {{tname}}</div>
        <div> {{tid}}</div>
        <div> tnum: {{tnum}}</div>
        <div> {{tchangeNum}}</div>
        <div><button @click="tchangeName">修改</button></div>
        <div> <button @click="treset">重置</button></div>
        <div @click="actionsBtn">actionsBtn</div>
    </div>
</template>
<script setup>
import { storeToRefs } from 'pinia'
import { useStore } from '../store/user'
import { useTest } from '../store/test.js'
const testStore = useTest();
let { tname, tchangeNum, tnum } = storeToRefs(testStore)
</script>直接修改数据的两种方式
直接修改数据与使用$path修改数据相比,官方已经明确表示$patch的方式是经过优化的,会加快修改速度,对程序的性能有很大的好处。所以如果你是多条数据同时更新状态数据,推荐使用$patch方式更新。
虽然可以直接修改,但是出于代码结构来说, 全局的状态管理还是不要直接在各个组件处随意修改状态,应放于actions中统一方法修改(piain没有mutation)。
//直接修改数据
tchangeName(){
     tname.value = "测试数据";
     tnum.value++;
}
//当然也可以使用`$path`批量修改
tchangeName(){
     testStore.$path(state=>{
          state.tname = "测试数据";
          state.value = 7;
     })
}
使用actions修改数据
直接调用actions中的方法,可传参数
const actionsBtn = (){
      testStore.addNum(5)
}
重置state中数据
store中有$reset方法,可以直接对store中数据重置
const treset = (){
    testStore.$reset()
}
Pinia持久化存储
- 实现持久化存储,需要配合以下插件使用
yarn add pinia-plugin-persist
- 配置
store文件夹下的index.js文件,引入pinia-plugin-presist插件
import {createPinia} from "pinia"
import piniaPluginPresist from "pinia-plugin-presist"
const store = createPinia();
store.use(piniaPluginPresist)
export default store- 配置stroe文件夹下的test.js文件,使用
presist属性进行配置
import {definePinia} from "pinia"
export default testStore = definePinia('testId',{
    state:()=>{
         tname:"test",
         tnum:0,
    },
    getters:{
       changeTnum(){
           console.log("getters")
           this.tnum++;
       }
    },
    actions:{
       addNum(val){
          this.tnum += val
       }
    },
    //持久化存储配置
    presist:{
         enable:true,//
         strategies:[
            {
            key:"testId",
            storage:localStorage,
            paths:['tnum']
            }
         ]
    }
})-
enable:true,开启持久化存储,默认为使用sessionStorage存储
-strategies,进行更多配置
-key,不设置key时,storage的key为definePinia的第一个属性,设置key值,则自定义storage的属性名 -
storage:localStorage,设置缓存模式为本地存储 -
paths,不设置时对state中的所用数据进行持久化存执,设置时只针对设置的属性进行持久化存储
Pinia模块化实现
模块化实现即在store对要使用的模块新建一个js文件,比如user.js文件。然后配置内容跟其他模块一样,根据自己需求进行设置,然后在对应页面引入。
Pinia中store之间互相调用
比如:test.js获取user.js中state的name属性值,在test.js引入user.js
import { defineStore } from 'pinia'
import { userStore } from "./user.js"
export const useTest = defineStore("testId", {
	state: () => {
		return {
			tid: "111",
			tname: "pinia",
			tnum: 0
		}
	},
	getters: {
		tchangeNum() {
			console.log('getters')
			return this.tnum + 100
		}
	},
	actions: {
		tupNum(val) {
			console.log('actions')
			this.tnum += val;
		},
		getUserData() {
			console.log(useStore().name);
			return useStore().name;
		},
	},
	persist: {
		//走的session
		enabled: true,
		strategies: [
			{
				key: "my_testId",
				storage: localStorage,
				paths: ['tnum']
			}
		]
	}
})user.js中
import { defineStore } from 'pinia'
export const useStore = defineStore('storeId', {
  state: () => {
    return {
      num: 0,
      name: '张三'
    }
  }
})A.vue组件中,调用test.js中getUserData方法就可以得到uesr.js中的name值
const actionBtn = () => {
    testStore.getUserData()
};(学习视频分享:编程基础视频)
以上是浅析Vue项目中怎么用Pinia状态管理工具的详细内容。更多信息请关注PHP中文网其他相关文章!

