怎么进行微博第三方登录?下面本篇文章给大家介绍一下使用node实现微博第三方登录的方法,希望对大家有所帮助!

接入微博第三方登录可以免注册,对用户的体验更好,今天我们就用nodejs实现微博第三方登录(用其它语言也可以)。【相关教程推荐:nodejs视频教程】
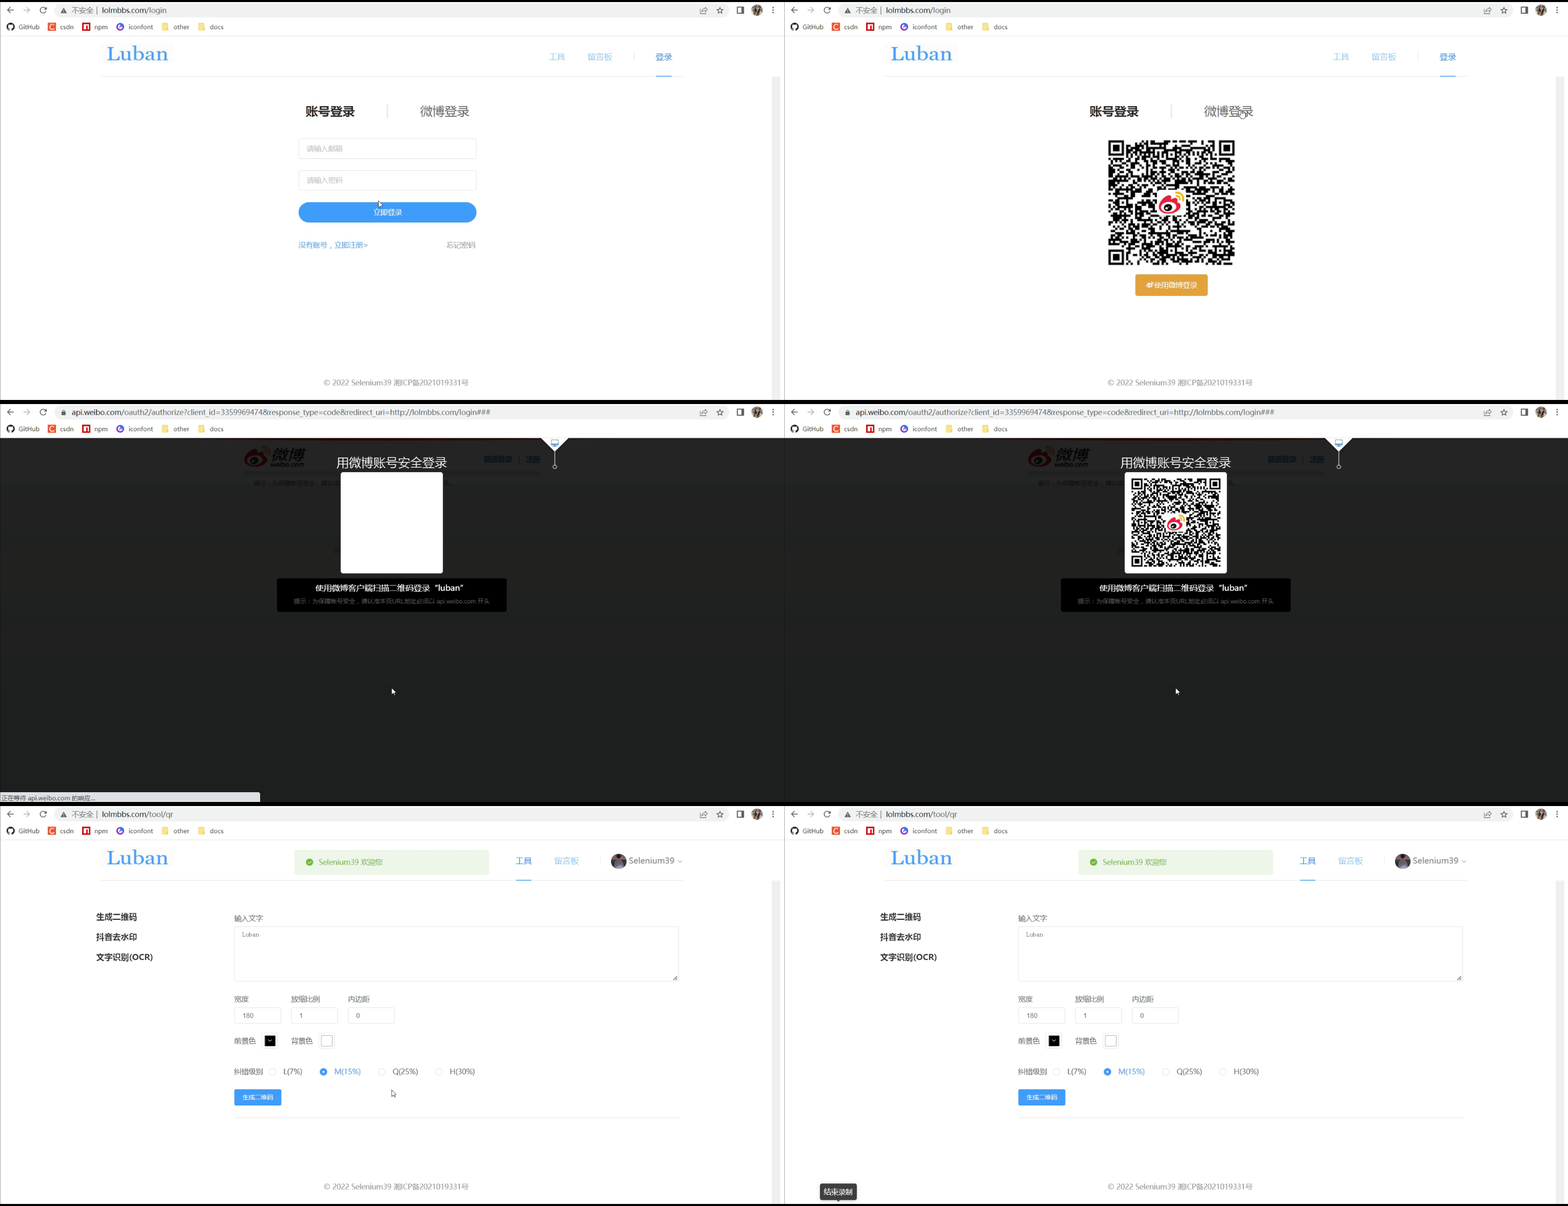
实现效果
在线实例: http://www.lolmbbs.com/login
1、点击微博登录按钮登录

2、直接扫码登录
具体实现
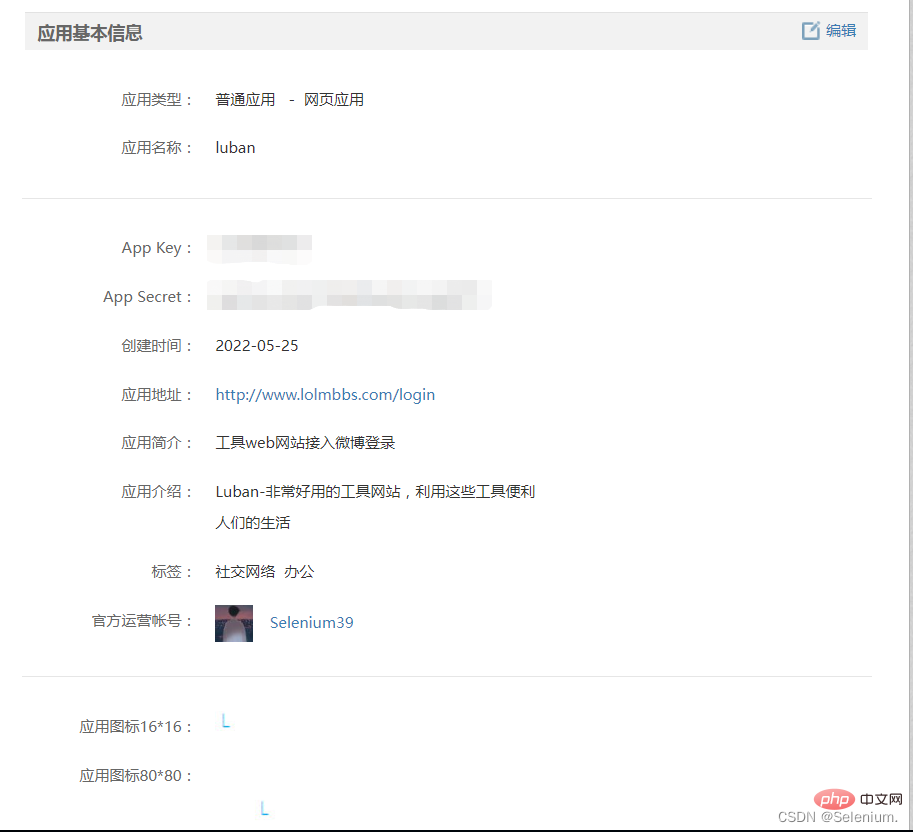
一、申请weibo网站接入
登录https://open.weibo.com/connect申请web网站接入
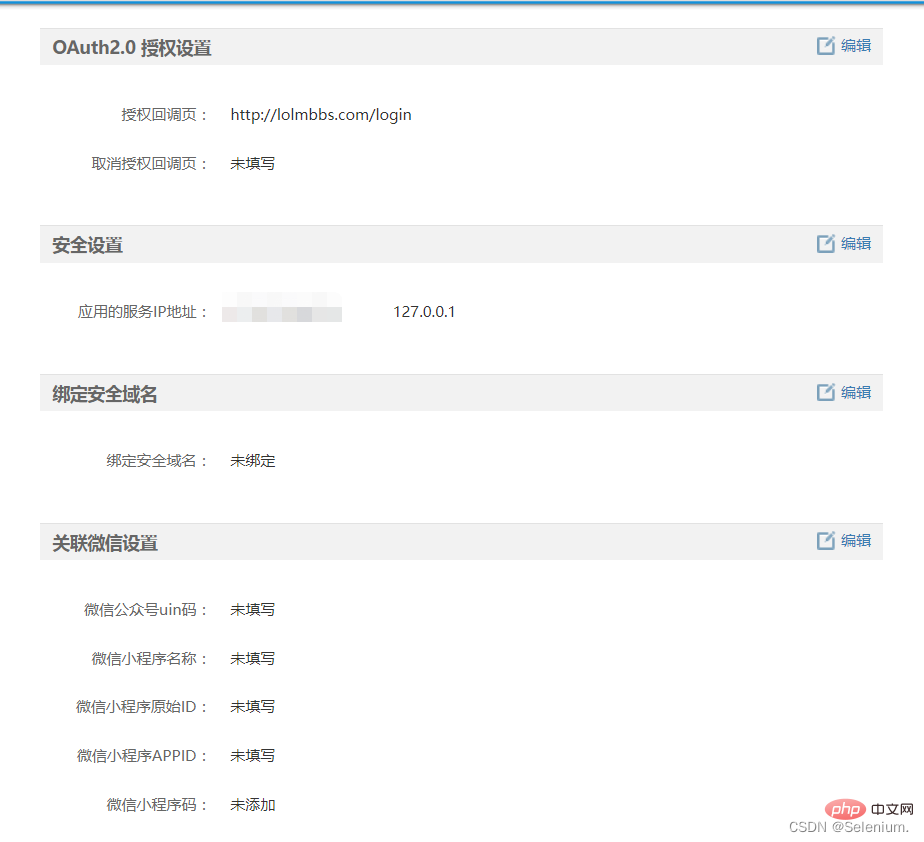
本地开发的时候应用地址写:127.0.0.1


二、点击按钮微博登录
采用OAuth2.0授权,详细可参考文档https://open.weibo.com/wiki/Connect/login
1. 生成微博登录授权验证码
const weiboUrl = `https://api.weibo.com/oauth2/authorize?client_id=${weiboConfig.appKey}&response_type=code&redirect_uri=${weiboConfig.redirectUrl}`appKey: 创建应用成功后weibo给你的appKey
redirectUrl: 用户授权成功后跳转的你的前端页面,我这里写的是http://127.0.0.1:8080/login
2. 授权页面跳转,获取用户code
用户授权登录后,会跳转到你上一步写的redirectUrl,并带上用户code,url类似于http://127.0.0.1:8080/login?code=abcdef
vue监听路由url,如果url上有code就去请求后端的登录回调接口
created() {
    const { code } = this.$route.query;
    if (code) {
      loginCallback({ code }).then((res) => {
        this.$message({
          message: `${res.nickname} 欢迎您`,
          type: "success",
        });
        this.setUser(res);
        this.$router.push("/tool/qr");
      });
    }
  }
3. 后端登录回调接口,通过用户code获取accessToken,再通过accessToken获取用户信息,完成登录
   async loginCallback(ctx) {
      let { code } = ctx.request.body
      if (!code) {
         return ctx.error(errCode.PARAMS_ERROR, '参数错误')
      }
      // 获取accessToken
      const { access_token, uid } = await got.post('https://api.weibo.com/oauth2/access_token', {
         form: {
            client_id: weiboConfig.appKey,
            client_secret: weiboConfig.appSecret,
            grant_type: 'authorization_code',
            redirect_uri: weiboConfig.redirectUrl,
            code
         }
      }).json()
      // 通过accessToken获取UserInfo
      const { id, name: nickname, avatar_hd: avatar } = await got.get(`https://api.weibo.com/2/users/show.json?access_token=${access_token}&uid=${uid}`).json()
      // 在自己的系统内创建User
      let [user, isCreate] = await WeiboUser.upsert({ id, nickname, avatar })
      // 生成登录Token,通过userType区分是微博登录用户还是系统账号登录用户
      const token = await jwt.createToken({ ...user.toJSON(), userType: 'weiboUser' })
      return ctx.success({ nickname, avatar, token })
   }
三、微博扫码登录
1. 生成微博扫码登录二维码
 async getWeiboLoginQr(ctx) {
      const qrApi = `https://api.weibo.com/oauth2/qrcode_authorize/generate?client_id=${weiboConfig.appKey}&redirect_uri=${weiboConfig.redirectUrl}&scope=&response_type=code&state=&__rnd=${Date.now()}`
      const { url, vcode } = await got.get(qrApi).json()
      return ctx.success({ weiboQrUrl: url, vcode })
}
返回的url就是微博登录二维码url,vcode相当于此二维码唯一标识,用来查询用户是否扫码
2. 前端不停轮询,查询此二维码是否被扫码授权
前端:
 const id = setInterval(() => {
          getWeiboLoginQrStatus({ vcode }).then((res) => {
            const { status, url } = res;
            if (status === "3") {
              window.location = url;
              clearInterval(id);
            }
          });
}, 3000);
后端:
   async getWeiboLoginQrStatus(ctx) {
      const { vcode } = ctx.request.query
      if (!vcode) {
         return ctx.error(errCode.PARAMS_ERROR, '参数错误')
      }
      const queryQrApi = `https://api.weibo.com/oauth2/qrcode_authorize/query?vcode=${vcode}&__rnd=${Date.now()}`
      const { status, url } = await got(queryQrApi).json()
      return ctx.success({ status, url })
   }
如果status为3,代码用户已经扫码授权了,同时返回的url即点击按钮登录后的前端回调url。之后的步骤就跟2. 授权页面跳转,获取用户code一模一样了.
更多node相关知识,请访问:nodejs 教程!
以上是浅析node怎么进行微博第三方登录的详细内容。更多信息请关注PHP中文网其他相关文章!
 JavaScript引擎:比较实施Apr 13, 2025 am 12:05 AM
不同JavaScript引擎在解析和执行JavaScript代码时,效果会有所不同,因为每个引擎的实现原理和优化策略各有差异。1.词法分析:将源码转换为词法单元。2.语法分析:生成抽象语法树。3.优化和编译:通过JIT编译器生成机器码。4.执行:运行机器码。V8引擎通过即时编译和隐藏类优化,SpiderMonkey使用类型推断系统,导致在相同代码上的性能表现不同。
 超越浏览器:现实世界中的JavaScriptApr 12, 2025 am 12:06 AM
JavaScript在现实世界中的应用包括服务器端编程、移动应用开发和物联网控制:1.通过Node.js实现服务器端编程,适用于高并发请求处理。2.通过ReactNative进行移动应用开发,支持跨平台部署。3.通过Johnny-Five库用于物联网设备控制,适用于硬件交互。
 使用Next.js(后端集成)构建多租户SaaS应用程序Apr 11, 2025 am 08:23 AM
我使用您的日常技术工具构建了功能性的多租户SaaS应用程序(一个Edtech应用程序),您可以做同样的事情。 首先,什么是多租户SaaS应用程序? 多租户SaaS应用程序可让您从唱歌中为多个客户提供服务
 如何使用Next.js(前端集成)构建多租户SaaS应用程序Apr 11, 2025 am 08:22 AM
本文展示了与许可证确保的后端的前端集成,并使用Next.js构建功能性Edtech SaaS应用程序。 前端获取用户权限以控制UI的可见性并确保API要求遵守角色库
 JavaScript:探索网络语言的多功能性Apr 11, 2025 am 12:01 AM
JavaScript是现代Web开发的核心语言,因其多样性和灵活性而广泛应用。1)前端开发:通过DOM操作和现代框架(如React、Vue.js、Angular)构建动态网页和单页面应用。2)服务器端开发:Node.js利用非阻塞I/O模型处理高并发和实时应用。3)移动和桌面应用开发:通过ReactNative和Electron实现跨平台开发,提高开发效率。
 JavaScript的演变:当前的趋势和未来前景Apr 10, 2025 am 09:33 AM
JavaScript的最新趋势包括TypeScript的崛起、现代框架和库的流行以及WebAssembly的应用。未来前景涵盖更强大的类型系统、服务器端JavaScript的发展、人工智能和机器学习的扩展以及物联网和边缘计算的潜力。
 神秘的JavaScript:它的作用以及为什么重要Apr 09, 2025 am 12:07 AM
JavaScript是现代Web开发的基石,它的主要功能包括事件驱动编程、动态内容生成和异步编程。1)事件驱动编程允许网页根据用户操作动态变化。2)动态内容生成使得页面内容可以根据条件调整。3)异步编程确保用户界面不被阻塞。JavaScript广泛应用于网页交互、单页面应用和服务器端开发,极大地提升了用户体验和跨平台开发的灵活性。
 Python还是JavaScript更好?Apr 06, 2025 am 12:14 AM
Python更适合数据科学和机器学习,JavaScript更适合前端和全栈开发。 1.Python以简洁语法和丰富库生态着称,适用于数据分析和Web开发。 2.JavaScript是前端开发核心,Node.js支持服务器端编程,适用于全栈开发。


热AI工具

Undresser.AI Undress
人工智能驱动的应用程序,用于创建逼真的裸体照片

AI Clothes Remover
用于从照片中去除衣服的在线人工智能工具。

Undress AI Tool
免费脱衣服图片

Clothoff.io
AI脱衣机

AI Hentai Generator
免费生成ai无尽的。

热门文章

热工具

Dreamweaver Mac版
视觉化网页开发工具

SublimeText3 Mac版
神级代码编辑软件(SublimeText3)

SublimeText3 Linux新版
SublimeText3 Linux最新版

WebStorm Mac版
好用的JavaScript开发工具

SecLists
SecLists是最终安全测试人员的伙伴。它是一个包含各种类型列表的集合,这些列表在安全评估过程中经常使用,都在一个地方。SecLists通过方便地提供安全测试人员可能需要的所有列表,帮助提高安全测试的效率和生产力。列表类型包括用户名、密码、URL、模糊测试有效载荷、敏感数据模式、Web shell等等。测试人员只需将此存储库拉到新的测试机上,他就可以访问到所需的每种类型的列表。


