
推荐(免费):uni-app教程
文章目录
- 前言
- 一、设备相关
- 1.系统信息
- 2.网络状态
- 3.加速度计
- 4.拨打电话
- 5.扫码
- 6.剪贴板
- 7.屏幕
- 7.振动
- 8.手机联系人
- 二、导航设置
- 三、下拉和上拉
- 1.下拉刷新
- 2.案例--上拉加载更多
- 四、跨端兼容
- 五、交互反馈
- 1.uni.showToast(OBJECT)和uni.hideToast()
- 2.uni.showLoading(OBJECT)和uni.hideLoading()
- 3.uni.showModal(OBJECT)
- 4.uni.showActionSheet(OBJECT)
- 总结
前言
本文主要介绍了接口的扩展应用:设备相关的接口包括获取系统信息、网络状态、拨打电话、扫码等;导航栏的动态设置;下拉刷新和上拉加载更多的实现;用条件编译实现小程序、APP等多端兼容;提示框、Loading、模态弹窗等的交互反馈。
一、设备相关
1.系统信息
uni.getSystemInfo(OBJECT)接口用来异步获取系统信息。
OBJECT常见参数和含义如下:
| 参数名 | 类型 | 是否必填 | 说明 |
|---|---|---|---|
| success | Function | 是 | 接口调用成功的回调 |
| fail | Function | 否 | 接口调用失败的回调函数 |
| complete | Function | 否 | 接口调用结束的回调函数(调用成功、失败都会执行) |
success返回的常见参数和含义如下:
| 参数 | 说明 |
|---|---|
| brand | 手机品牌 |
| model | 手机型号 |
| pixelRatio | 设备像素比 |
| screenWidth | 屏幕宽度 |
| screenHeight | 屏幕高度 |
| windowWidth | 可使用窗口宽度 |
| windowHeight | 可使用窗口高度 |
| windowTop | 可使用窗口的顶部位置 |
| windowBottom | 可使用窗口的底部位置 |
| version | 引擎版本号 |
hello uniapp项目中,index.vue如下:
<template>
	<view>
		<button type="primary" @click="getinfo">获取系统信息</button>
	</view></template><script>
	export default {
		data() {
			return {
			}
		},
		onLoad() {
		},
		onShow() {
			console.log('index onshow')
		},
		onHide() {
			console.log('index onhide')
		},
		methods: {
			getinfo: function(){
				uni.getSystemInfo({
					success:function(res){
						console.log(res)
					}
				})
			}
		}
	}</script><style></style>
显示: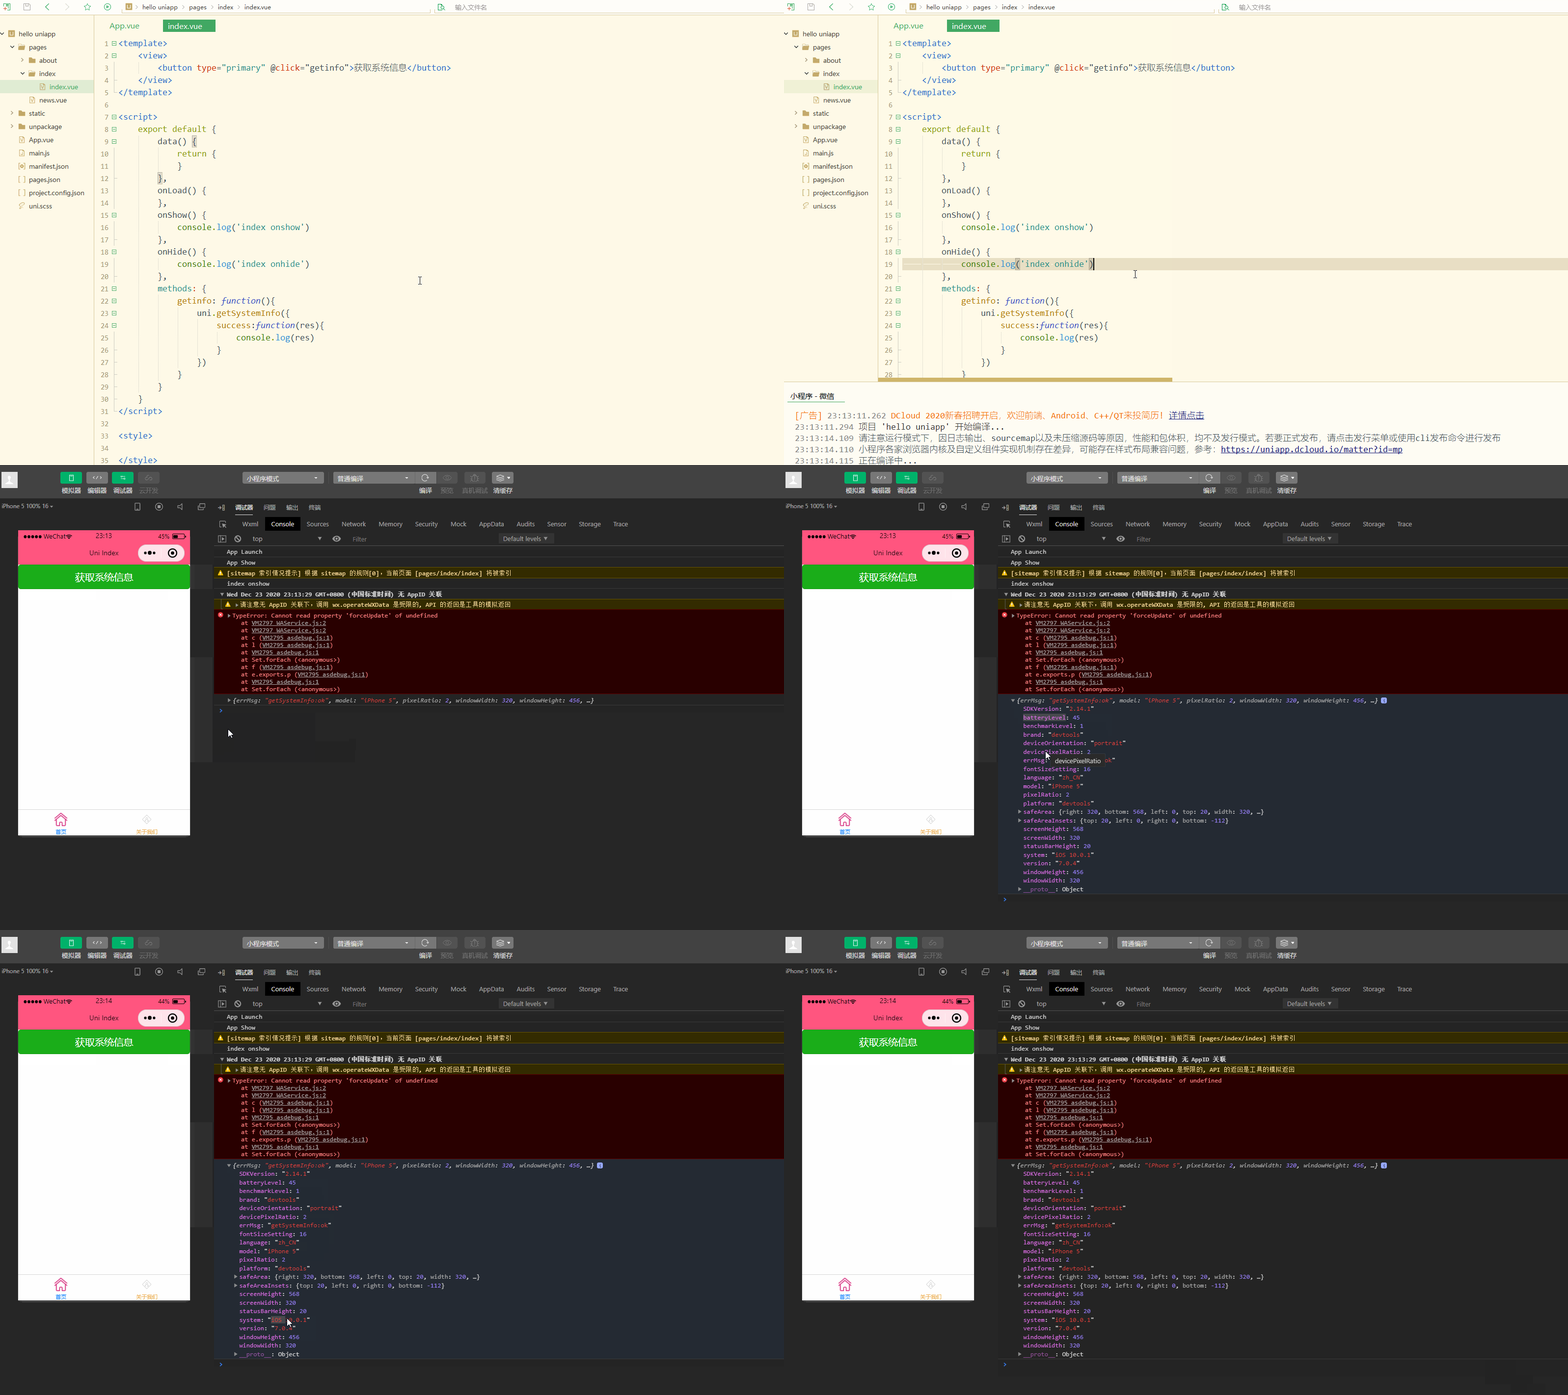
可以获取到当前设备比较全面的信息。
除了使用uni.getSystemInfo(OBJECT)异步获取设备信息,还可以使用uni.getSystemInfoSync()同步获取系统信息;uni.canIUse(String)可用于判断应用的 API、回调、参数、组件等是否在当前版本可用。
2.网络状态
uni.getNetworkType(OBJECT)用来获取网络类型。
OBJECT常见参数如下:
| 参数名 | 类型 | 必填 | 说明 |
|---|---|---|---|
| success | Function | 是 | 接口调用成功,返回网络类型 networkType |
| fail | Function | 否 | 接口调用失败的回调函数 |
| complete | Function | 否 | 接口调用结束的回调函数(调用成功、失败都会执行) |
uni.onNetworkStatusChange(CALLBACK)用于监听网络状态变化。
CALLBACK返回参数及含义如下:
| 参数 | 类型 | 说明 |
|---|---|---|
| isConnected | Boolean | 当前是否有网络连接 |
| networkType | String | 网络类型 |
如下:
<template>
	<view>
		<button type="primary" @click="getNetworkType">获取网络类型</button>
	</view></template><script>
	export default {
		data() {
			return {}
		},
		onLoad() {
		},
		onShow() {
			console.log('index onshow')
		},
		onHide() {
			console.log('index onhide')
		},
		methods: {
			getNetworkType: function(){
				uni.getNetworkType({
					success:function(res){
						console.log(res.networkType);
					}
				});
				uni.onNetworkStatusChange(function(res){
					console.log(res)
				})
			},
		}
	}</script><style></style>
显示: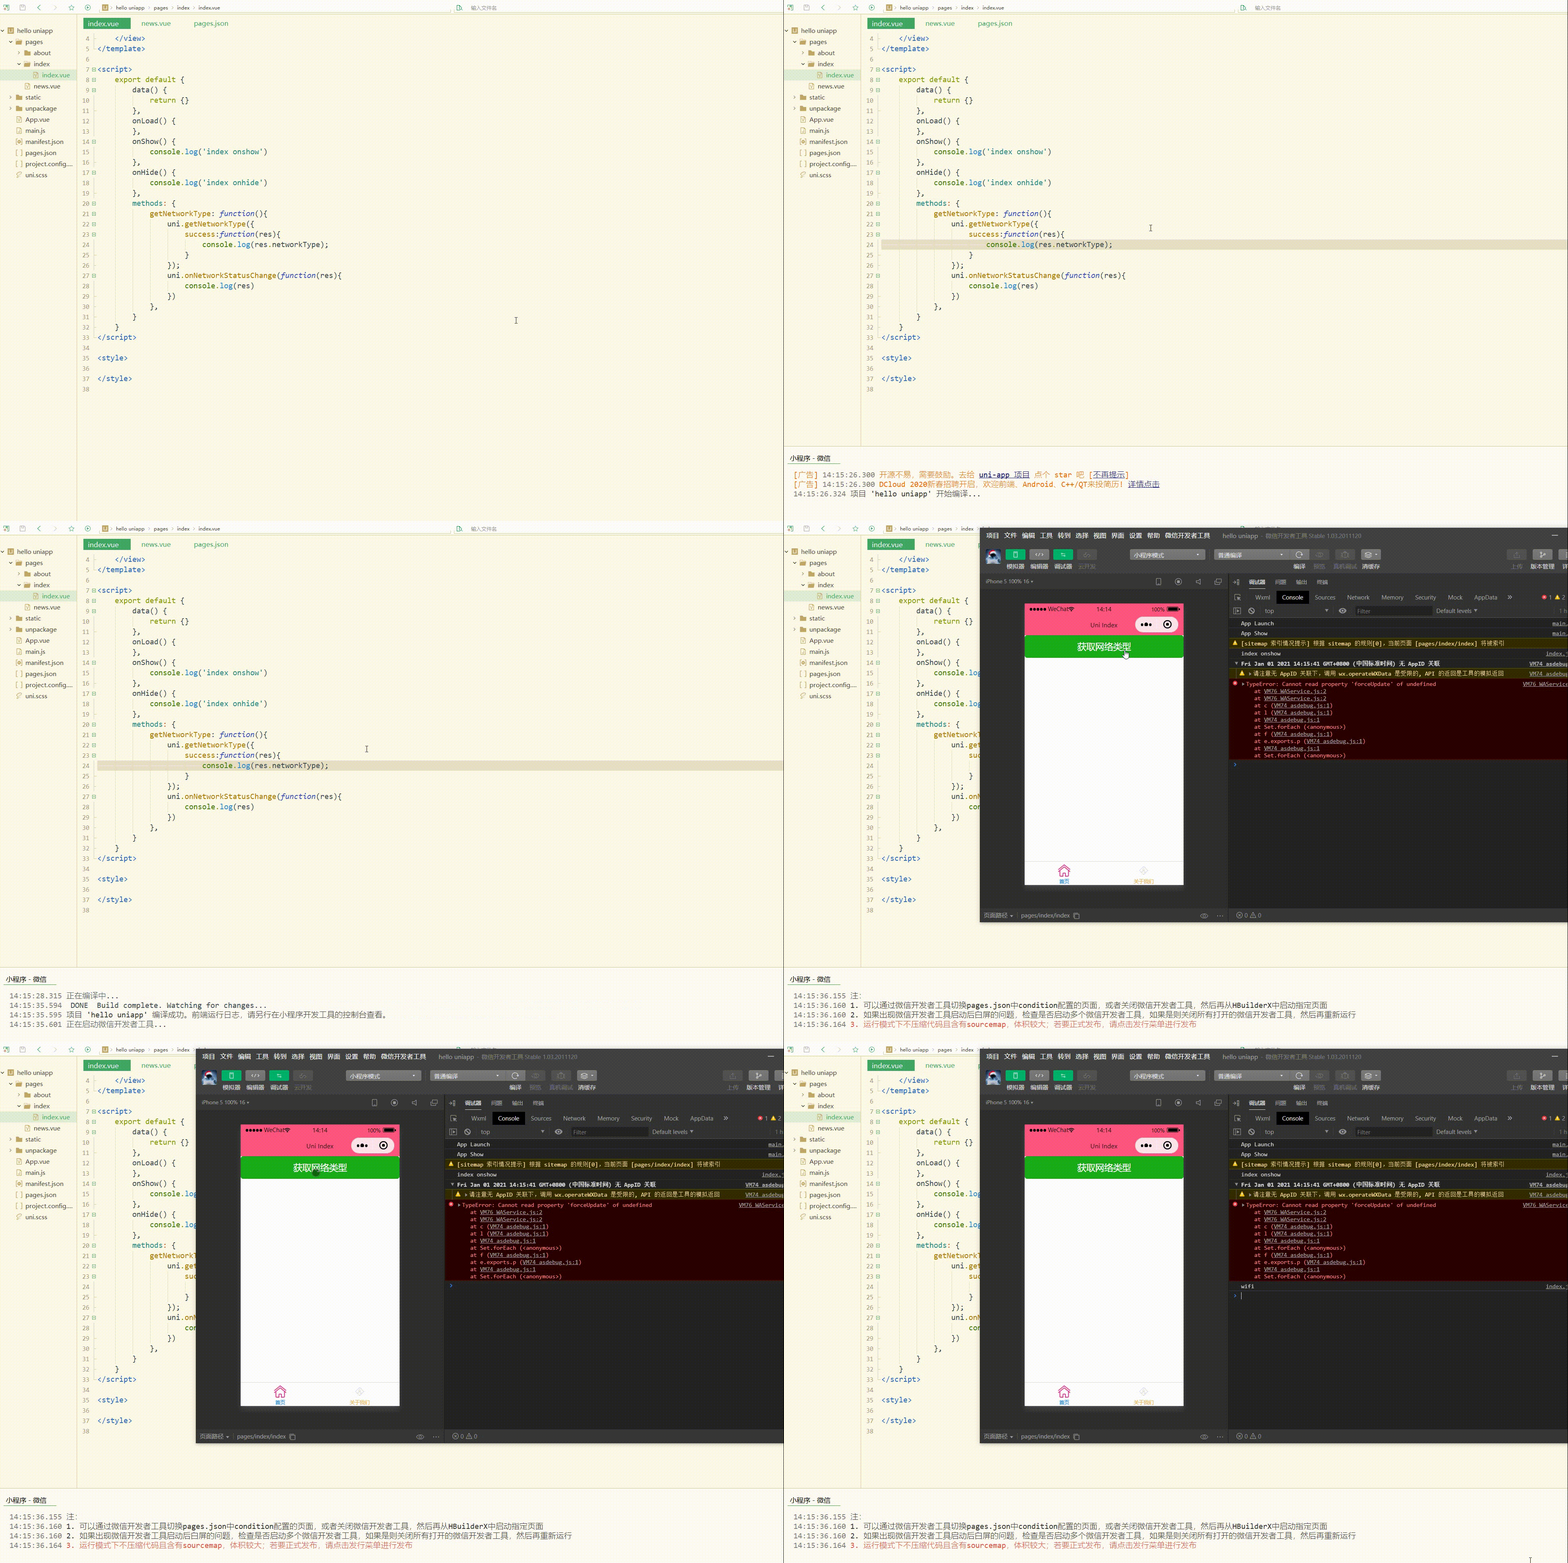
可以看到,获取到了当前的网络类型。
3.加速度计
uni.onAccelerometerChange(CALLBACK)用于监听加速度数据,频率为5次/秒,接口调用后会自动开始监听,可使用uni.offAccelerometer取消监听。
CALLBACK 返回参数和含义如下:
| 参数 | 类型 | 说明 |
|---|---|---|
| x | Number | X 轴 |
| y | Number | Y 轴 |
| z | Number | Z 轴 |
uni.startAccelerometer(OBJECT)用于开始监听加速度数据。
OBJECT参数和含义如下:
| 参数名 | 类型 | 默认 | 必填 | 说明 |
|---|---|---|---|---|
| interval | String | normal | 否 | 接口调用成功的回调 |
| success | Function | 无 | 否 | 接口调用成功的回调 |
| fail | Function | 无 | 否 | 接口调用失败的回调函数 |
| complete | Function | 无 | 否 | 接口调用结束的回调函数(调用成功、失败都会执行) |
uni.stopAccelerometer(OBJECT)用于停止监听加速度数据。
OBJECT 参数和含义如下:
| 参数名 | 类型 | 必填 | 说明 |
|---|---|---|---|
| success | Function | 否 | 接口调用成功的回调 |
| fail | Function | 否 | 接口调用失败的回调函数 |
| complete | Function | 否 | 接口调用结束的回调函数(调用成功、失败都会执行) |
4.拨打电话
uni.makePhoneCall(OBJECT)用于拨打电话。
OBJECT 参数如下:
| 参数名 | 类型 | 必填 | 说明 |
|---|---|---|---|
| phoneNumber | String | 是 | 需要拨打的电话号码 |
| success | Function | 否 | 接口调用成功的回调 |
| fail | Function | 否 | 接口调用失败的回调函数 |
| complete | Function | 否 | 接口调用结束的回调函数(调用成功、失败都会执行) |
如下:
<template>
	<view>
		<button type="primary" @click="tel">拨打电话</button>
	</view></template><script>
	export default {
		data() {
			return {}
		},
		onLoad() {
		},
		onShow() {
			console.log('index onshow')
		},
		onHide() {
			console.log('index onhide')
		},
		methods: {
			tel: function(){
				uni.makePhoneCall({
					phoneNumber: '10086'
				})
			},
		}
	}</script><style></style>
显示: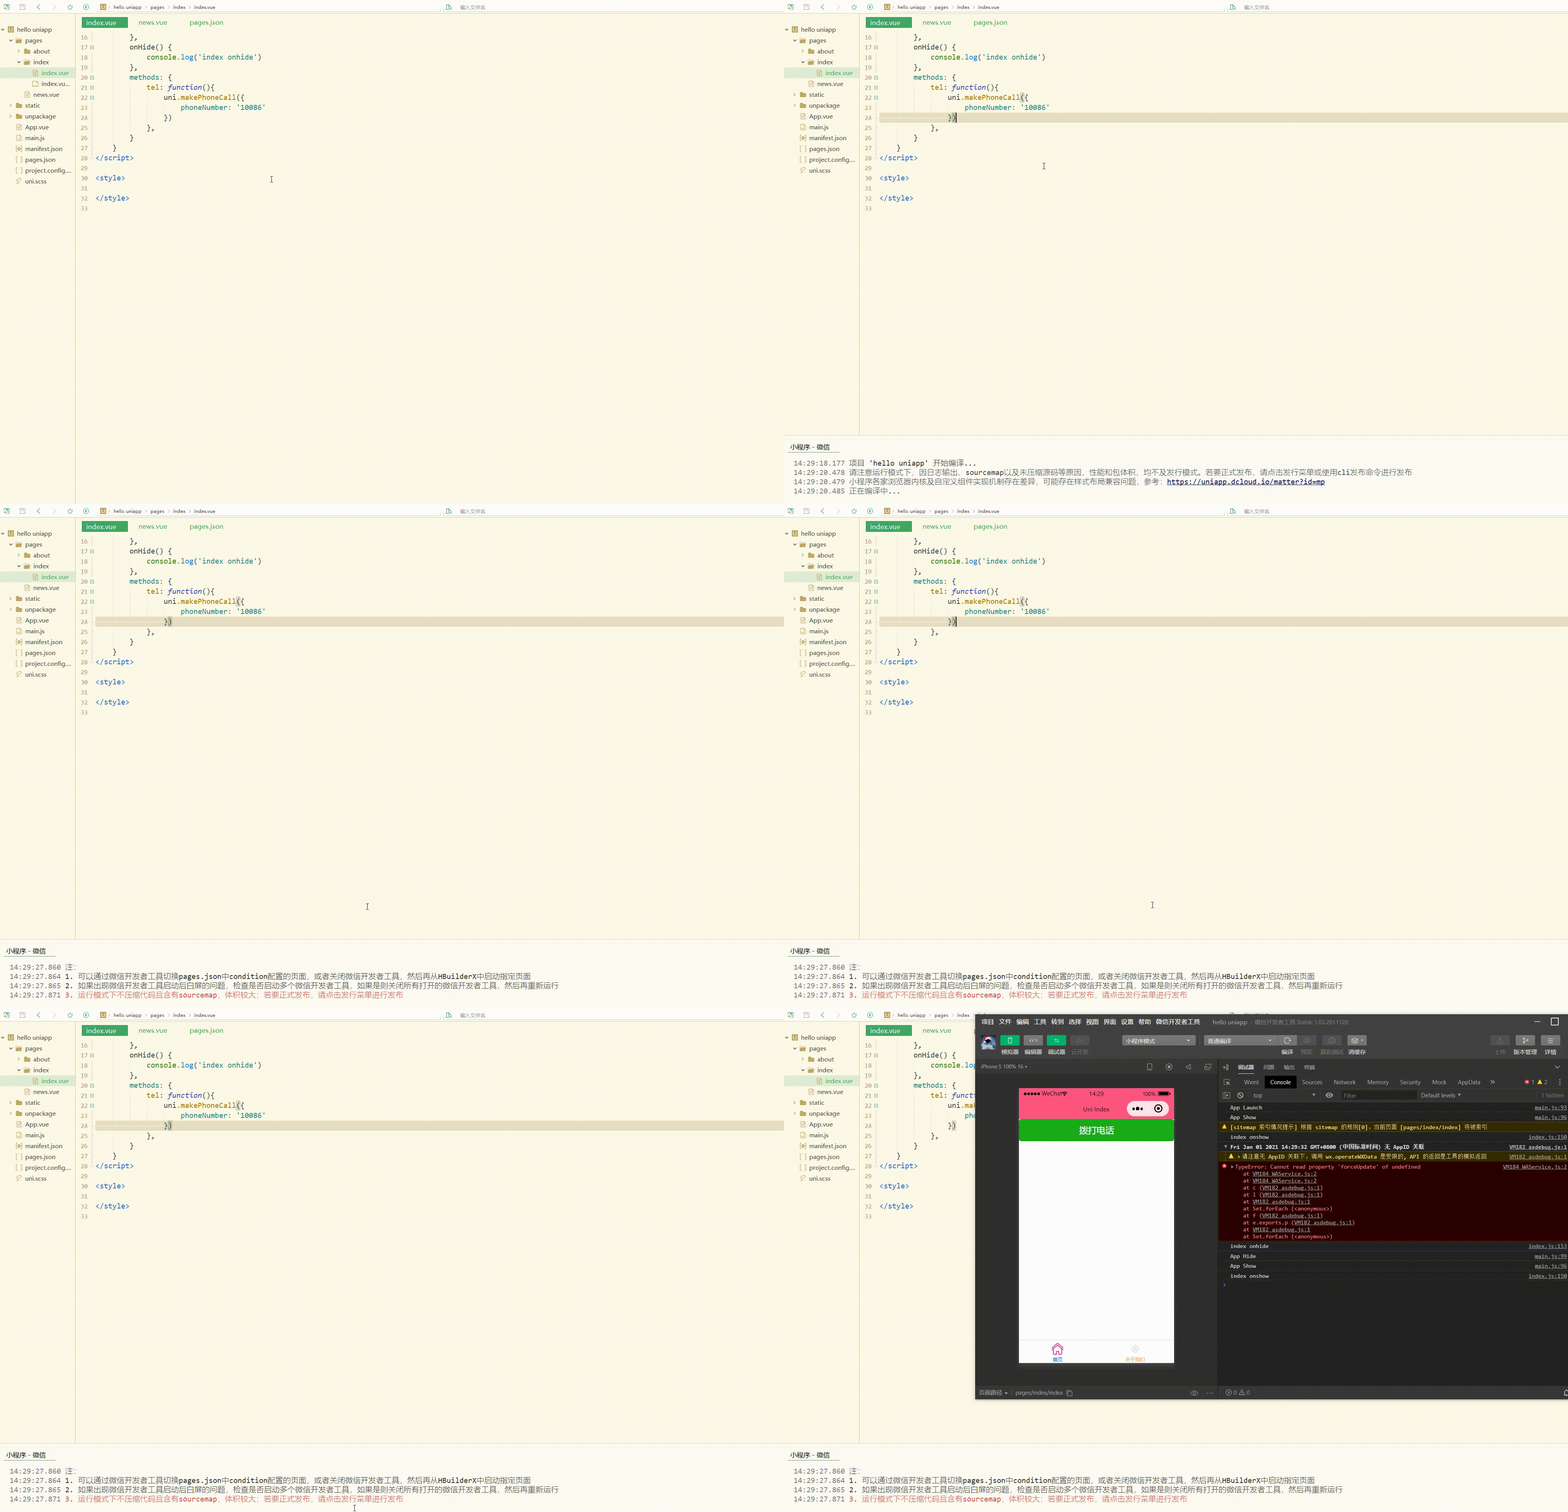
可以看到,模拟了拨打电话。
除了拨打电话,还可以实现发送短信等。
5.扫码
uni.scanCode(OBJECT)用于调起客户端扫码界面,并在扫码成功后返回对应的结果。
OBJECT 参数及其含义如下:
| 参数名 | 类型 | 必填 | 说明 |
|---|---|---|---|
| onlyFromCamera | Boolean | 否 | 是否只能从相机扫码,不允许从相册选择图片 |
| scanType | Array | 否 | 扫码类型,参数类型是数组,二维码是’qrCode’,一维码是’barCode’,DataMatrix是‘datamatrix’,pdf417是‘pdf417’ |
| success | Function | 否 | 接口调用成功的回调 |
| fail | Function | 否 | 接口调用失败的回调函数(识别失败、用户取消等情况下触发) |
| complete | Function | 否 | 接口调用结束的回调函数(调用成功、失败都会执行) |
其中,success 返回参数如下:
| 参数 | 说明 |
|---|---|
| result | 所扫码的内容 |
| scanType | 所扫码的类型 |
| charSet | 所扫码的字符集 |
| path | 当所扫的码为当前应用的合法二维码时,会返回此字段,内容为二维码携带的 path |
简单使用如下:
<template>
	<view>
		<button type="primary" @click="sca">扫描二维码</button>
	</view></template><script>
	export default {
		data() {
			return {}
		},
		onLoad() {
		},
		onShow() {
			console.log('index onshow')
		},
		onHide() {
			console.log('index onhide')
		},
		methods: {
			sca: function(){
				uni.scanCode({
					success:function(res){
						console.log(res)
					}
				})
			},
		}
	}</script><style></style>
6.剪贴板
uni.setClipboardData(OBJECT)用于设置系统剪贴板的内容。
OBJECT参数和含义如下:
| 参数名 | 类型 | 必填 | 说明 |
|---|---|---|---|
| data | String | 是 | 需要设置的内容 |
| success | Function | 否 | 接口调用成功的回调 |
| fail | Function | 否 | 接口调用失败的回调函数 |
| complete | Function | 否 | 接口调用结束的回调函数(调用成功、失败都会执行) |
uni.getClipboardData(OBJECT)用于获取系统剪贴板内容。
OBJECT 参数和含义如下:
| 参数名 | 类型 | 必填与否 | 说明 |
|---|---|---|---|
| success | Function | 否 | 接口调用成功的回调 |
| fail | Function | 否 | 接口调用失败的回调函数 |
| complete | Function | 否 | 接口调用结束的回调函数(调用成功、失败都会执行) |
如下:
<template>
	<view>
		<button type="primary" @click="sca">复制文字</button>
		<text>{{txt}}</text>
	</view></template><script>
	var _self;
	export default {
		data() {
			return {
				txt: "hello"
			}
		},
		onLoad() {
			_self = this
		},
		onShow() {
			console.log('index onshow')
		},
		onHide() {
			console.log('index onhide')
		},
		methods: {

			sca: function(){
				uni.setClipboardData({
					data: 'https://blog.csdn.net/CUFEECR',
					success:function(res){
						console.log(res);
						uni.getClipboardData({
							success:function(gres){
								console.log(gres.data)
								_self.txt = gres.data							}
						})
					}
				})
			},
		}
	}</script><style></style>
显示: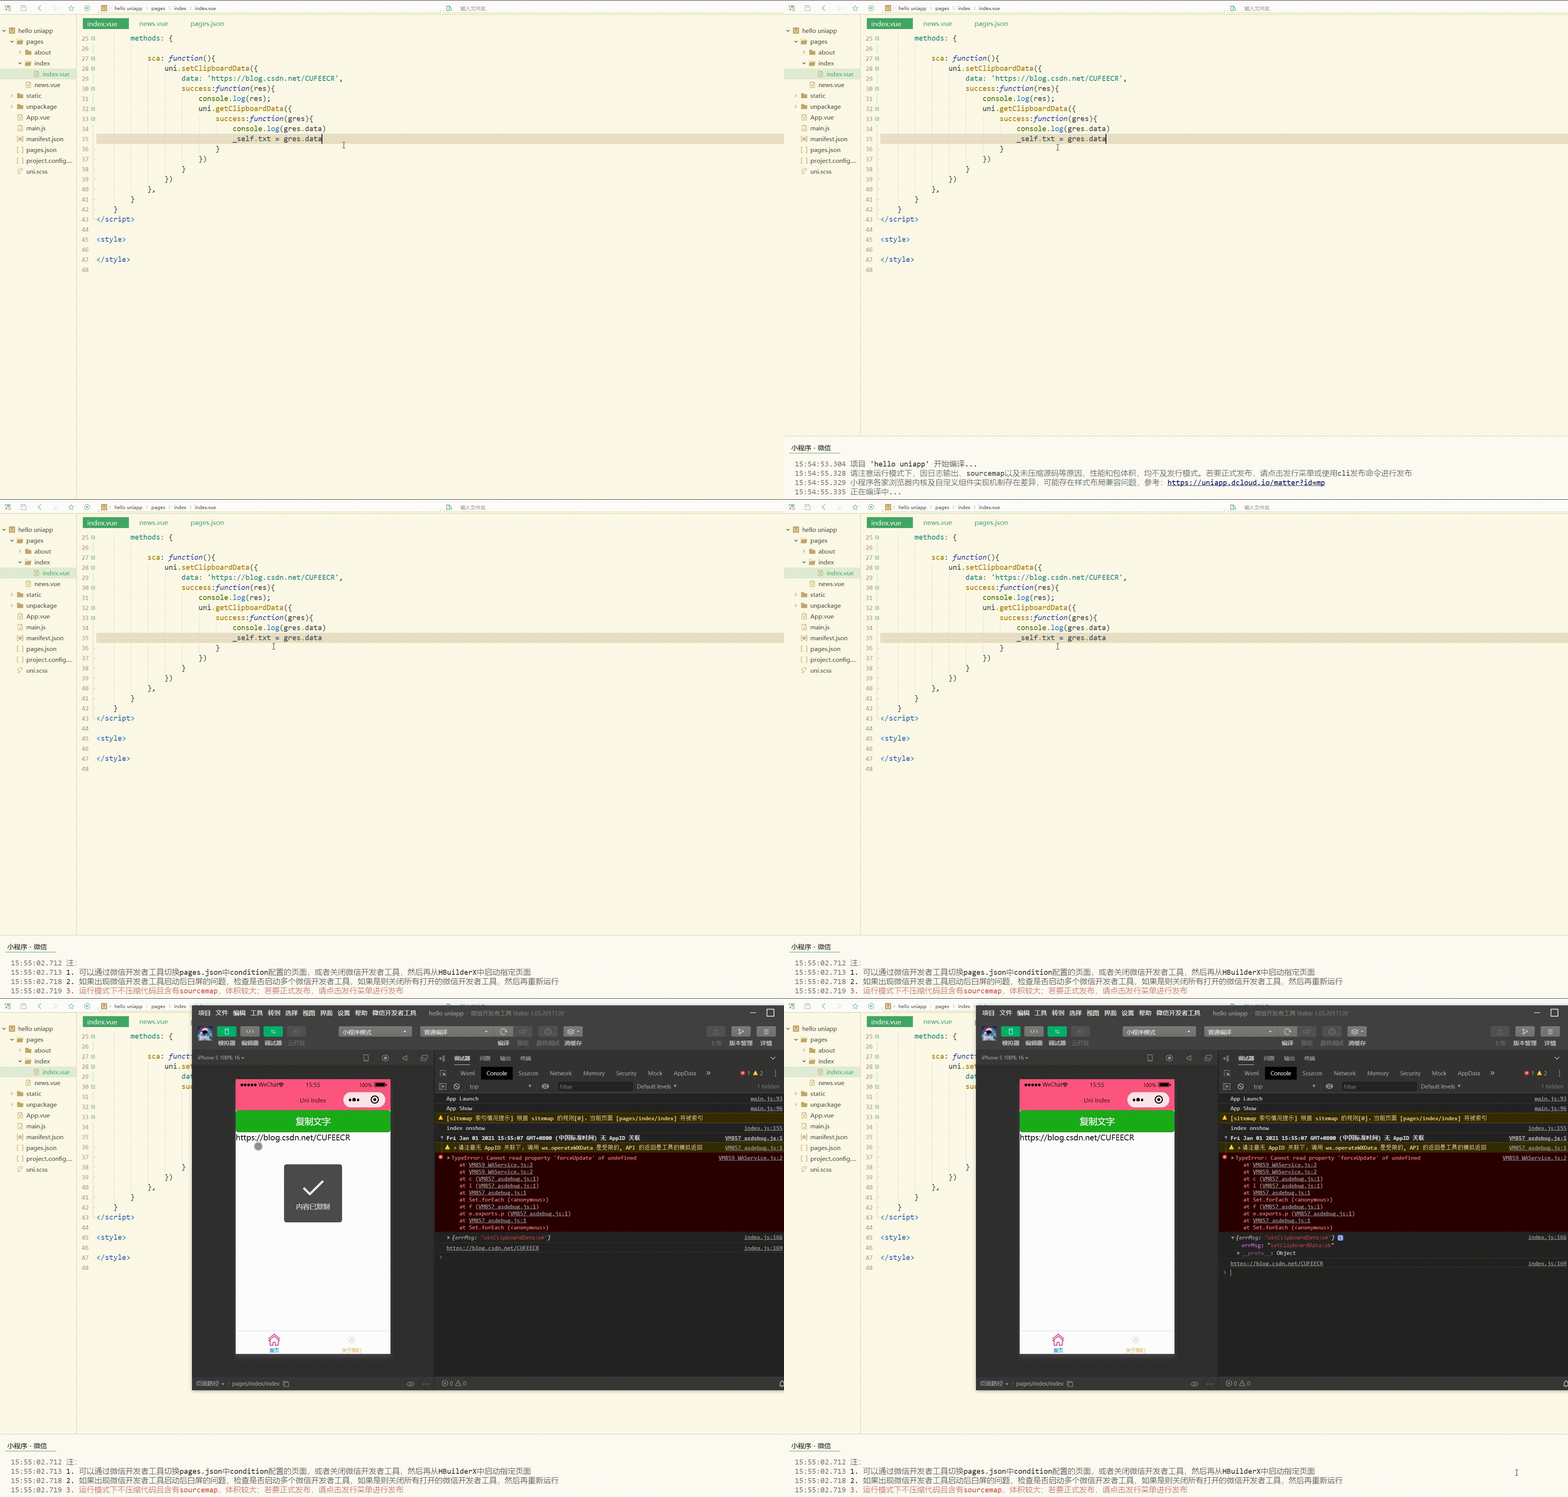
7.屏幕
uni.setScreenBrightness(OBJECT)用于设置屏幕亮度。
OBJECT 参数如下:
| 参数名 | 类型 | 必填与否 | 说明 |
|---|---|---|---|
| value | Number | 是 | 屏幕亮度值,范围 0~1,0 最暗,1 最亮 |
| success | Function | 否 | 接口调用成功的回调 |
| fail | Function | 否 | 接口调用失败的回调函数 |
| complete | Function | 否 | 接口调用结束的回调函数(调用成功、失败都会执行) |
uni.getScreenBrightness(OBJECT)用于获取屏幕亮度。
OBJECT 参数如下:
| 参数名 | 类型 | 必填与否 | 说明 |
|---|---|---|---|
| success | Function | 否 | 接口调用成功的回调 |
| fail | Function | 否 | 接口调用失败的回调函数 |
| complete | Function | 否 | 接口调用结束的回调函数(调用成功、失败都会执行) |
uni.setKeepScreenOn(OBJECT)用于设置是否保持常亮状态。仅在当前应用生效,离开应用后设置失效。
OBJECT 参数如下:
| 参数名 | 类型 | 必填与否 | 说明 |
|---|---|---|---|
| keepScreenOn | Boolean | 是 | 是否保持屏幕常亮 |
| success | Function | 否 | 接口调用成功的回调 |
| fail | Function | 否 | 接口调用失败的回调函数 |
| complete | Function | 否 | 接口调用结束的回调函数(调用成功、失败都会执行) |
例如:
<template>
	<view>
		<button type="primary" @click="srn">设置屏幕亮度</button>
	</view></template><script>
	var _self;
	export default {
		data() {
			return {
				txt: "hello"
			}
		},
		onLoad() {
			_self = this
		},
		onShow() {
			console.log('index onshow')
		},
		onHide() {
			console.log('index onhide')
		},
		methods: {
			srn: function(){
				uni.setScreenBrightness({
					value: 0.1,
					success:function(){
						console.log('set success')
					}
				})
			},
		}
	}</script><style></style>
7.振动
uni.vibrate(OBJECT)用于使手机发生振动。
OBJECT 参数如下:
| 参数名 | 类型 | 必填与否 | 说明 |
|---|---|---|---|
| success | Function | 否 | 接口调用成功的回调 |
| fail | Function | 否 | 接口调用失败的回调函数 |
| complete | Function | 否 | 接口调用结束的回调函数(调用成功、失败都会执行) |
uni.vibrateLong(OBJECT)用于使手机发生较长时间的振动(400ms),uni.vibrateShort(OBJECT)用于使手机发生较短时间的振动(15ms),OBJECT参数与uni.vibrate(OBJECT)相同。
8.手机联系人
uni.addPhoneContact(OBJECT)调用后,用户可以选择将该表单以“新增联系人”或“添加到已有联系人”的方式,写入手机系统通讯录,完成手机通讯录联系人和联系方式的增加。
| 参数名 | 类型 | 必填与否 | 说明 |
|---|---|---|---|
| photoFilePath | String | 否 | 头像本地文件路径 |
| lastName | String | 否 | 姓氏 |
| firstName | String | 是 | 名字 |
| mobilePhoneNumber | String | 否 | 手机号 |
| workPhoneNumber | String | 否 | 工作电话 |
| String | 否 | 电子邮件 | |
| url | String | 否 | 网站 |
| success | Function | 否 | 接口调用成功的回调 |
| fail | Function | 否 | 接口调用失败的回调函数 |
| complete | Function | 否 | 接口调用结束的回调函数(调用成功、失败都会执行) |
二、导航设置
之前导航栏是通过配置实现的,但是不够灵活,这时可以使用接口实现导航栏。
uni.setNavigationBarTitle(OBJECT)用于动态设置当前页面的标题。
OBJECT参数如下:
| 参数名 | 类型 | 必填与否 | 说明 |
|---|---|---|---|
| title | String | 是 | 页面标题 |
| success | Function | 否 | 接口调用成功的回调 |
| fail | Function | 否 | 接口调用失败的回调函数 |
| complete | Function | 否 | 接口调用结束的回调函数(调用成功、失败都会执行) |
uni.setNavigationBarColor(OBJECT)用于设置页面导航条颜色。如果需要进入页面就设置颜色,请延迟执行,防止被框架内设置颜色逻辑覆盖。
OBJECT参数如下:
| 参数名 | 类型 | 必填与否 | 说明 |
|---|---|---|---|
| frontColor | String | 是 | 前景颜色值,包括按钮、标题、状态栏的颜色,仅支持 #ffffff 和 #000000 |
| backgroundColor | String | 是 | 背景颜色值,有效值为十六进制颜色 |
| animation | Object | 否 | 动画效果,{duration,timingFunc} |
| success | Function | 否 | 接口调用成功的回调函数 |
| fail | Function | 否 | 接口调用失败的回调函数 |
| complete | Function | 否 | 接口调用结束的回调函数(调用成功、失败都会执行) |
uni.showNavigationBarLoading(OBJECT)用于在当前页面显示导航条加载动画,uni.hideNavigationBarLoading(OBJECT)在当前页面隐藏导航条加载动画。
它们的OBJECT参数如下:
| 参数名 | 类型 | 必填与否 | 说明 |
|---|---|---|---|
| success | Function | 否 | 接口调用成功的回调函数 |
| fail | Function | 否 | 接口调用失败的回调函数 |
| complete | Function | 否 | 接口调用结束的回调函数(调用成功、失败都会执行) |
示例如下:
<template>
	<view>
		<button type="primary" @click="setTitle">设置标题</button>
	</view></template><script>
	var _self;
	export default {
		data() {
			return {
				txt: "hello"
			}
		},
		onLoad() {
			uni.showNavigationBarLoading();
		},
		onShow() {
			console.log('index onshow')
		},
		onHide() {
			console.log('index onhide')
		},
		methods: {
			setTitle: function(){
				uni.setNavigationBarTitle({
					title: 'hello...'
				});
				uni.hideNavigationBarLoading();
			},
		}
	}</script><style></style>
显示: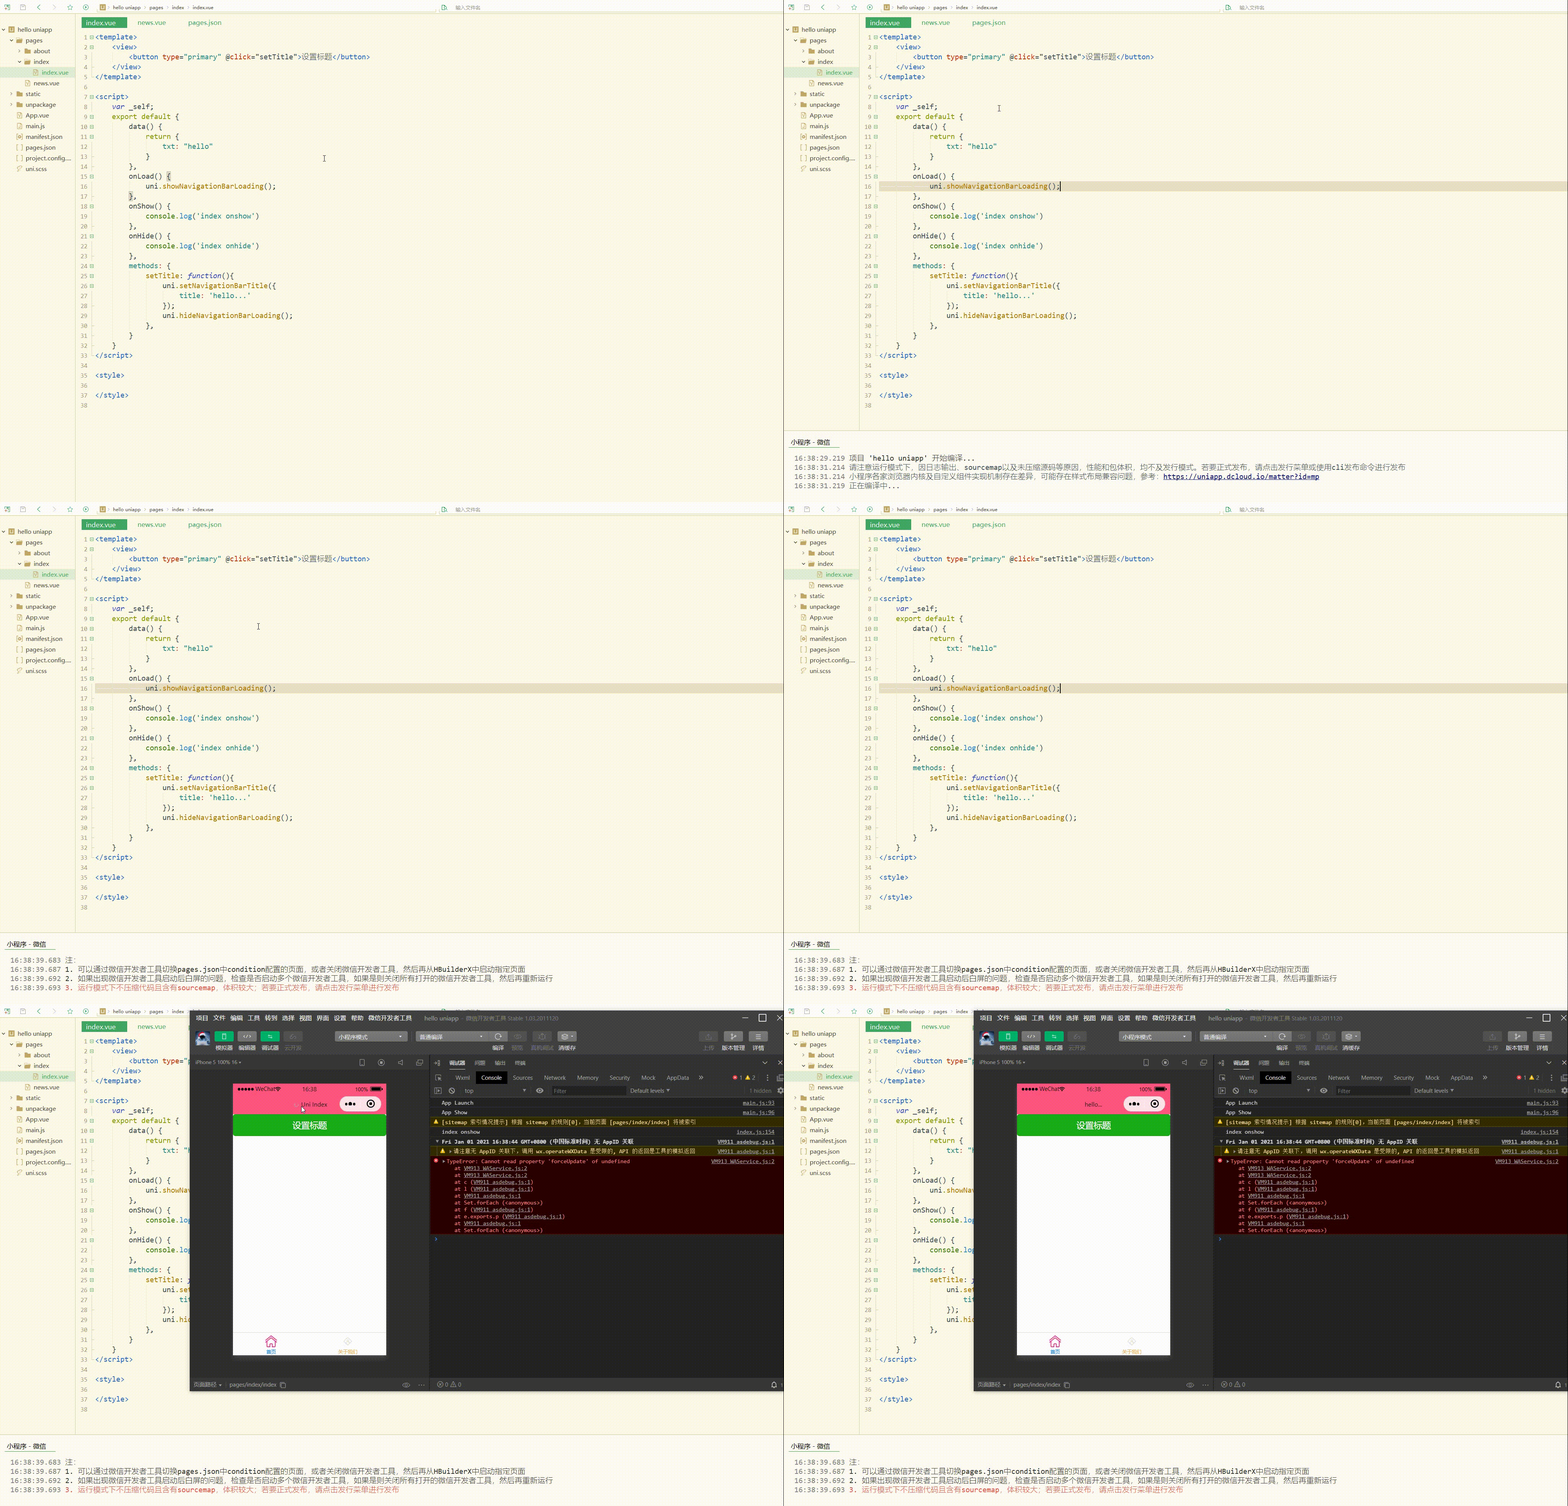
可以看到,实现了设置标题和控制加载。
三、下拉和上拉
1.下拉刷新
onPullDownRefresh是一个处理函数,和onLoad等生命周期函数同级,用于监听该页面用户下拉刷新事件。
使用前,需要在 pages.json 里,找到的当前页面的pages节点,并在 style 选项中开启 enablePullDownRefresh;
当处理完数据刷新后,uni.stopPullDownRefresh 可以停止当前页面的下拉刷新。
uni.startPullDownRefresh(OBJECT)用于开始下拉刷新,调用后触发下拉刷新动画,效果与用户手动下拉刷新一致。
| 参数名 | 类型 | 必填与否 | 说明 |
|---|---|---|---|
| success | Function | 否 | 接口调用成功的回调函数 |
| fail | Function | 否 | 接口调用失败的回调函数 |
| complete | Function | 否 | 接口调用结束的回调函数(调用成功、失败都会执行) |
uni.stopPullDownRefresh()用于停止当前页面下拉刷新。
如下:
<template>
	<view>
		<view v-for="(item, index) in newslist" class="newslist">{{item}}</view>
	</view></template><script>
	var _self;
	export default {
		data() {
			return {
				newslist: []
			}
		},
		onLoad() {
			_self = this
		},
		onShow() {
			console.log('index onshow')
		},
		onHide() {
			console.log('index onhide')
		},
		onPullDownRefresh() {
			this.getNews()
		},
		methods: {
			getNews: function() {
				uni.showNavigationBarLoading();
				uni.request({
					url: 'https://demo.hcoder.net/index.php?user=hcoder&pwd=hcoder&m=list1&page=1',
					success:function(res){
						console.log(res);
						var newslist = res.data.split('--hcSplitor--');
						_self.newslist = newslist;
						uni.stopPullDownRefresh();
						uni.hideNavigationBarLoading();
					}
				})
			}
		}
	}</script><style>
	.newslist {
		line-height: 2em;
		padding: 20px;
	}</style>
显示: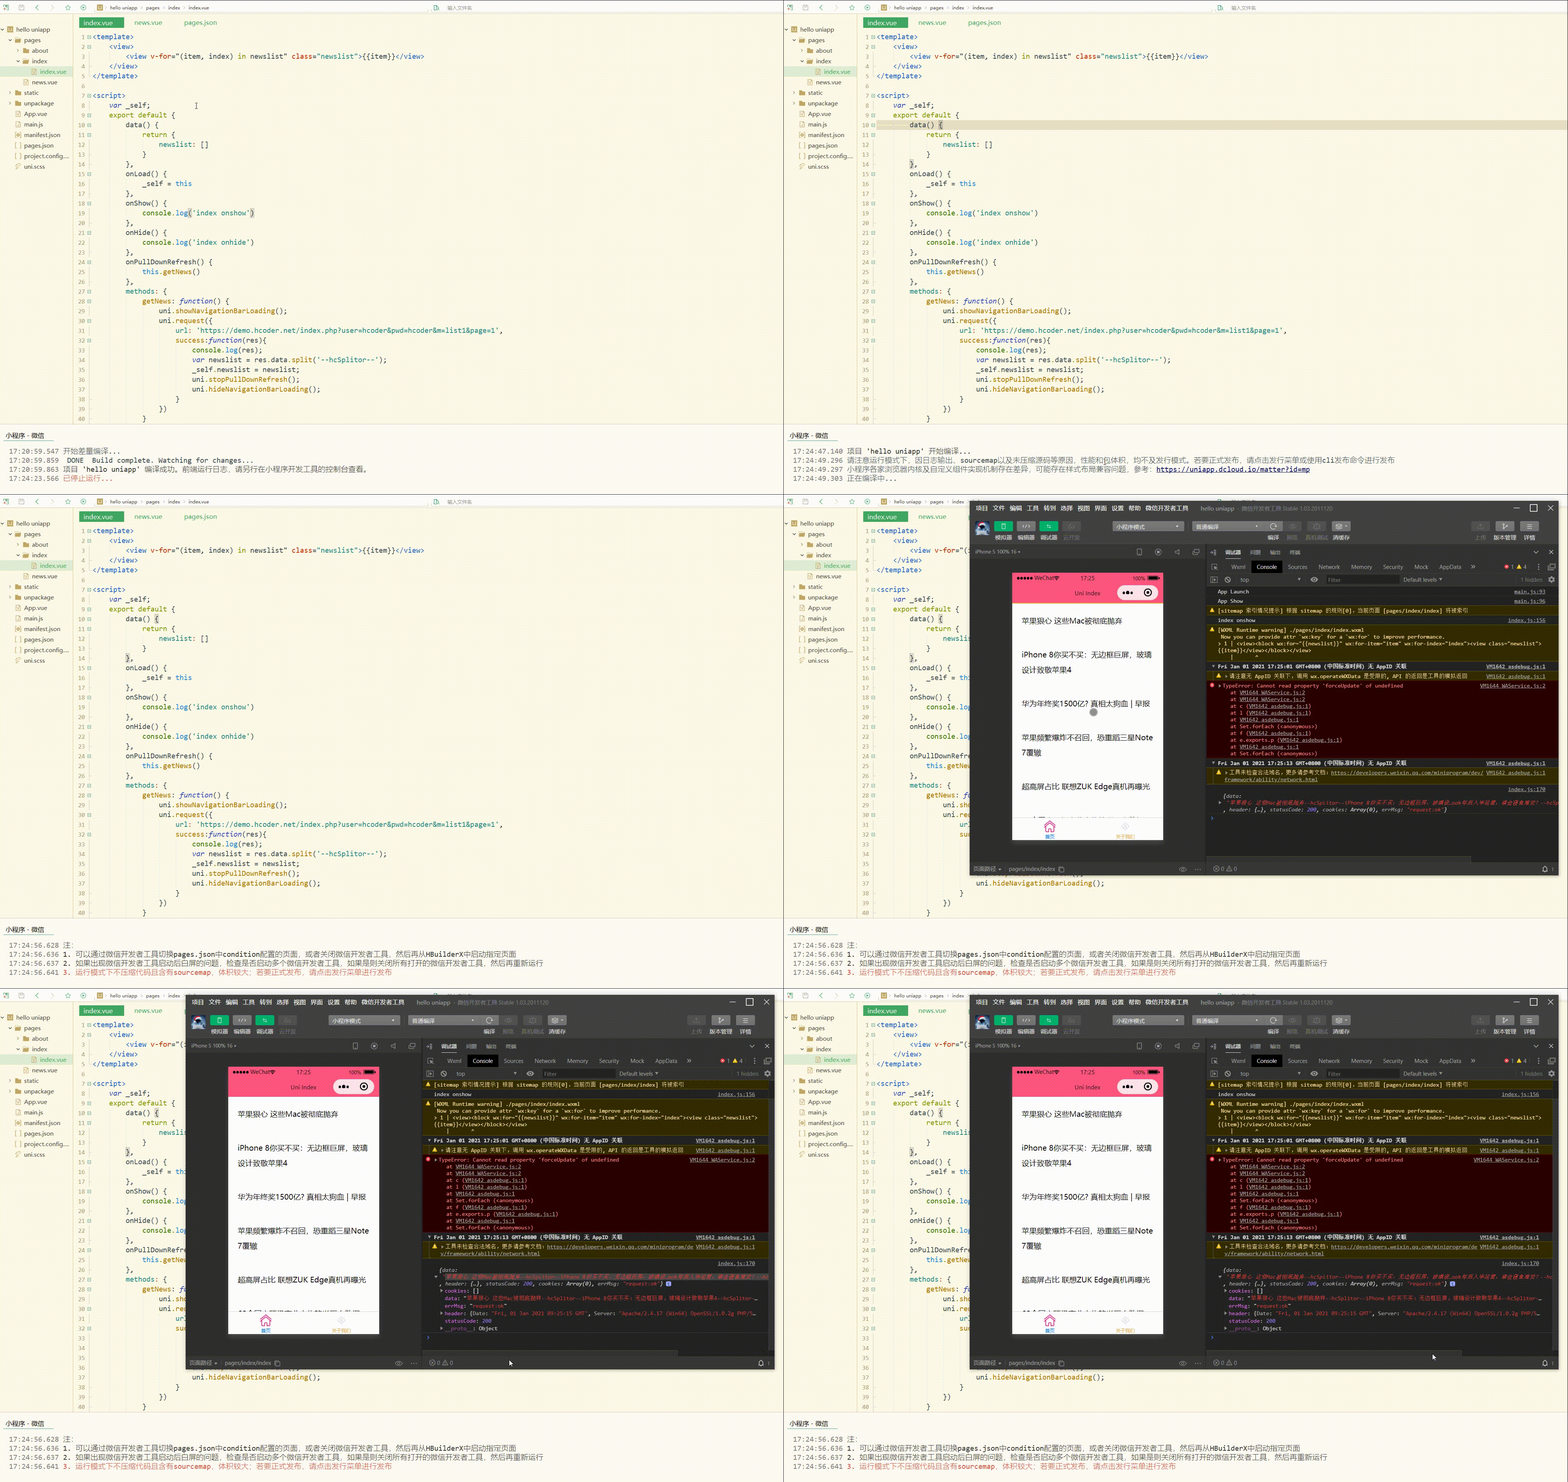
可以看到,实现了下拉刷新加载数据。
2.案例–上拉加载更多
上拉加载更多有两种实现方式:
- 通过scroll-view组件,识别滚动区域,滚动到底部出发加载事件;
- 识别页面滚动到底部来触发加载事件。
这里使用第二种方式,即生命周期函数onReachBottom来实现,即滚动条滚动到底部时触发事件。
初步实现如下:
<template>
	<view>
		<view v-for="(item, index) in newslist" class="newslist">{{item}}</view>
	</view></template><script>
	// 添加page全局变量
	var _self, page;
	export default {
		data() {
			return {
				newslist: []
			}
		},
		onLoad() {
			_self = this
		},
		onShow() {
			console.log('index onshow')
		},
		onHide() {
			console.log('index onhide')
		},
		onPullDownRefresh() {
			this.getNews()
		},
		onReachBottom() {
			this.getMoreNews()
		},
		methods: {
			getNews: function() {
				page = 1;
				uni.showNavigationBarLoading();
				uni.request({
					url: 'https://demo.hcoder.net/index.php?user=hcoder&pwd=hcoder&m=list1&page='+page,
					success:function(res){
						console.log(res);
						var newslist = res.data.split('--hcSplitor--');
						_self.newslist = _self.newslist.concat(newslist);
						uni.stopPullDownRefresh();
						uni.hideNavigationBarLoading();
						page++;
					}
				})
			},
			getMoreNews: function() {
				uni.showNavigationBarLoading();
				uni.request({
					url: 'https://demo.hcoder.net/index.php?user=hcoder&pwd=hcoder&m=list1&page='+page,
					success:function(res){
						console.log(res);
						uni.hideNavigationBarLoading();
						if(res.data == null){
							return false
						};
						var newslist = res.data.split('--hcSplitor--');
						_self.newslist = newslist;
						uni.stopPullDownRefresh();
						page++;
					}
				})
			}
		}
	}</script><style>
	.newslist {
		line-height: 2em;
		padding: 20px;
	}</style>
其中,添加全局变量page用于指定需要请求的数据的页数;
定义函数分别实现第一次获取数据和加载更多数据。
显示: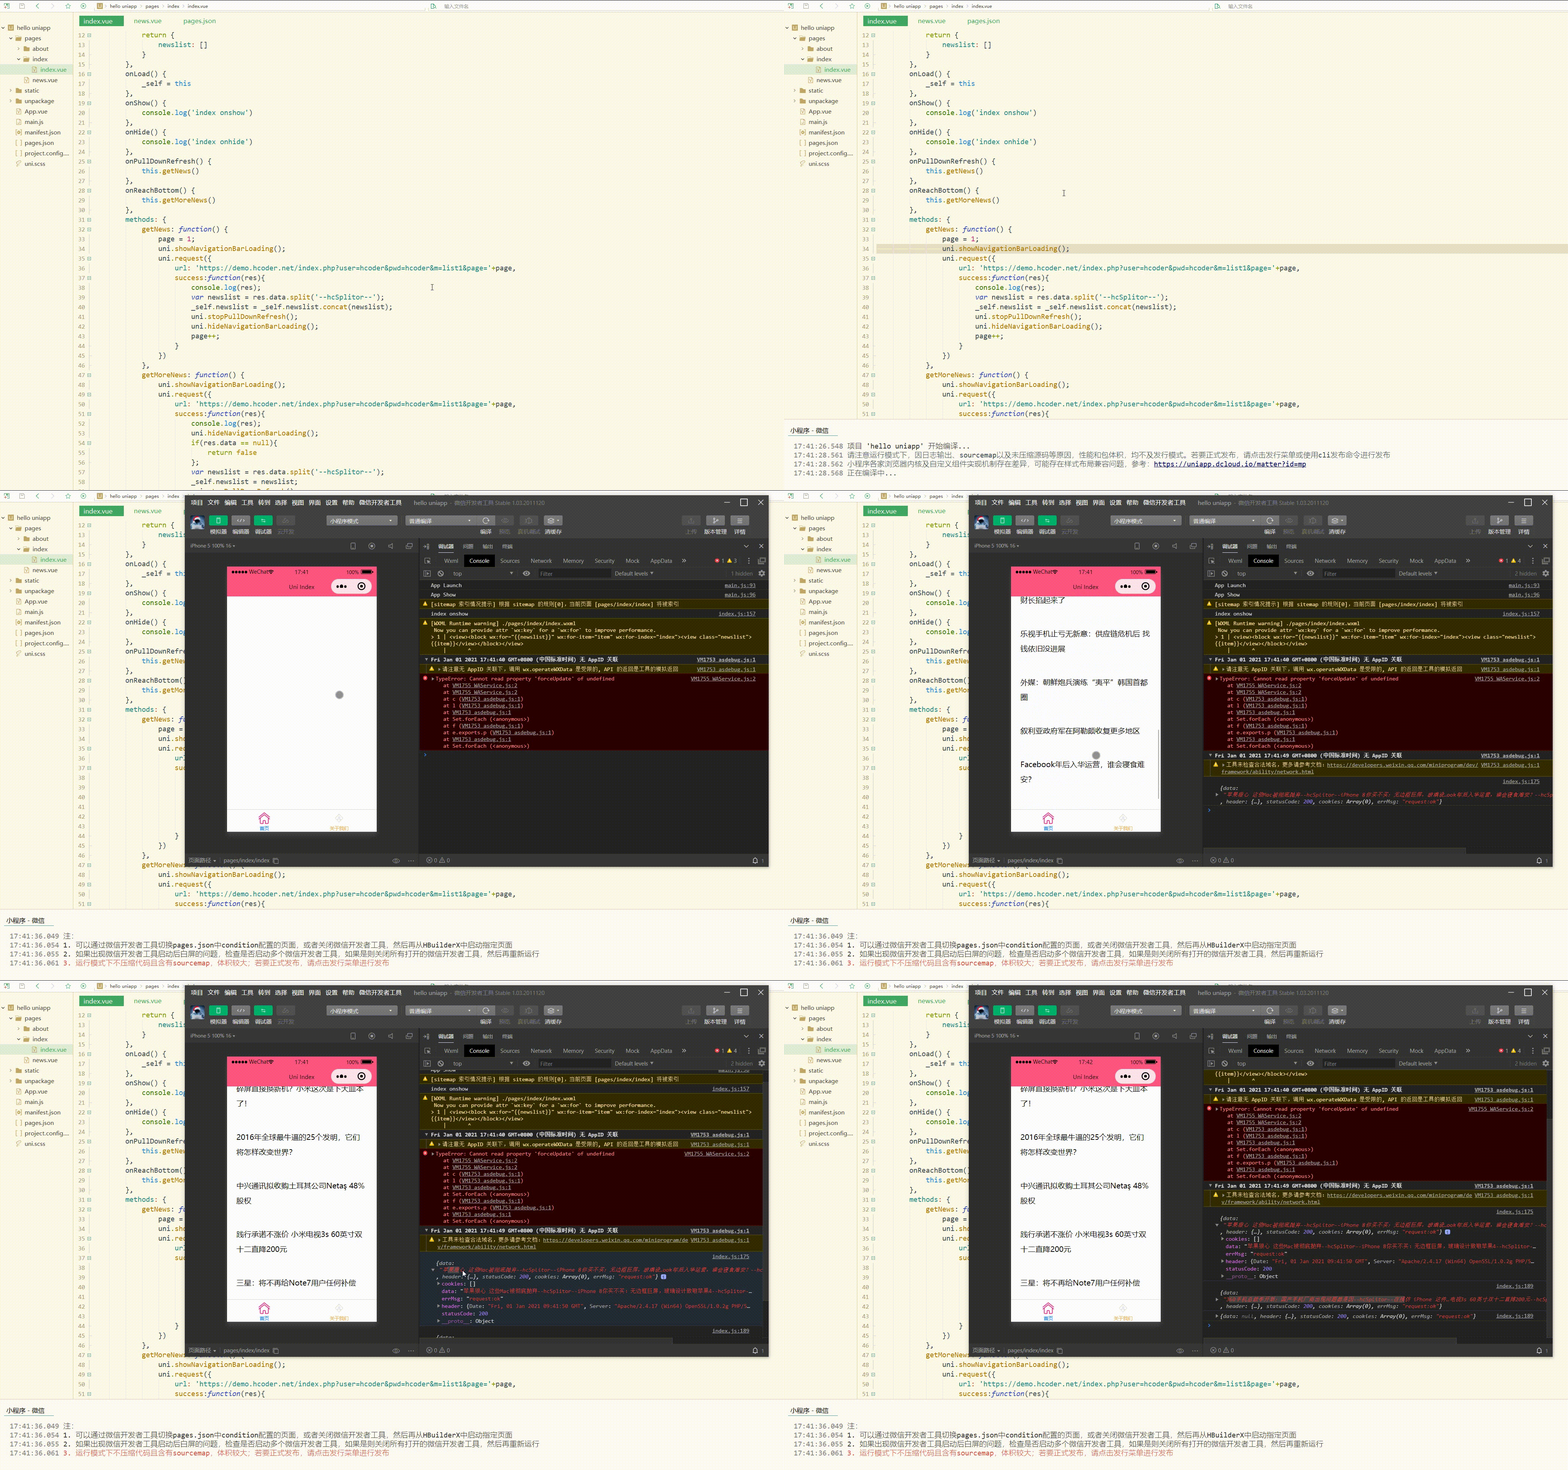
可以看到,加载了2页数据后,就不能再加载数据了。
此时还可以进行完善,如添加“加载更多”文本提示。
如下:
<template>
	<view>
		<view v-for="(item, index) in newslist" class="newslist">{{item}}</view>
		<view class="loading">{{loadingText}}</view>
	</view></template><script>
	// 添加page、timer全局变量
	var _self, page, timer = null;
	export default {
		data() {
			return {
				newslist: [],
				loadingText: "下拉加载"
			}
		},
		onLoad() {
			_self = this
		},
		onShow() {
			console.log('index onshow')
		},
		onHide() {
			console.log('index onhide')
		},
		onPullDownRefresh() {
			this.getNews()
		},
		onReachBottom() {
			if(timer != null){
				clearTimeout(timer)
			};
			timer = setTimeout(function(){
				_self.getMoreNews()
			}, 500);
		},
		methods: {
			getNews: function() {
				page = 1;
				uni.showNavigationBarLoading();
				uni.request({
					url: 'https://demo.hcoder.net/index.php?user=hcoder&pwd=hcoder&m=list1&page='+page,
					success:function(res){
						console.log(res);
						var newslist = res.data.split('--hcSplitor--');
						_self.newslist = _self.newslist.concat(newslist);
						uni.stopPullDownRefresh();
						uni.hideNavigationBarLoading();
						page++;
					}
				})
			},
			getMoreNews: function() {
				if(_self.loadingText == "已加载完毕"){
					return false
				};
				_self.loadingText = "加载中";
				uni.showNavigationBarLoading();
				uni.request({
					url: 'https://demo.hcoder.net/index.php?user=hcoder&pwd=hcoder&m=list1&page='+page,
					success:function(res){
						console.log(res);
						uni.hideNavigationBarLoading();
						if(res.data == null){
							_self.loadingText = "已加载完毕";
							return false
						};
						var newslist = res.data.split('--hcSplitor--');
						_self.newslist = newslist;
						uni.stopPullDownRefresh();
						_self.loadingText = "加载更多";
						page++;
					}
				})
			}
		}
	}</script><style>
	.newslist {
		line-height: 2em;
		padding: 20px;
	}
	.loading {
		line-height: 2em;
		text-align: center;
		color: #DD524D;
		margin-top: 30px;
	}</style>
使用延时器让页面先渲染完,再加载数据;
同时在getMoreNews函数中,先判断是否加载完毕,如果已加载完毕则可以不再执行该函数。
显示: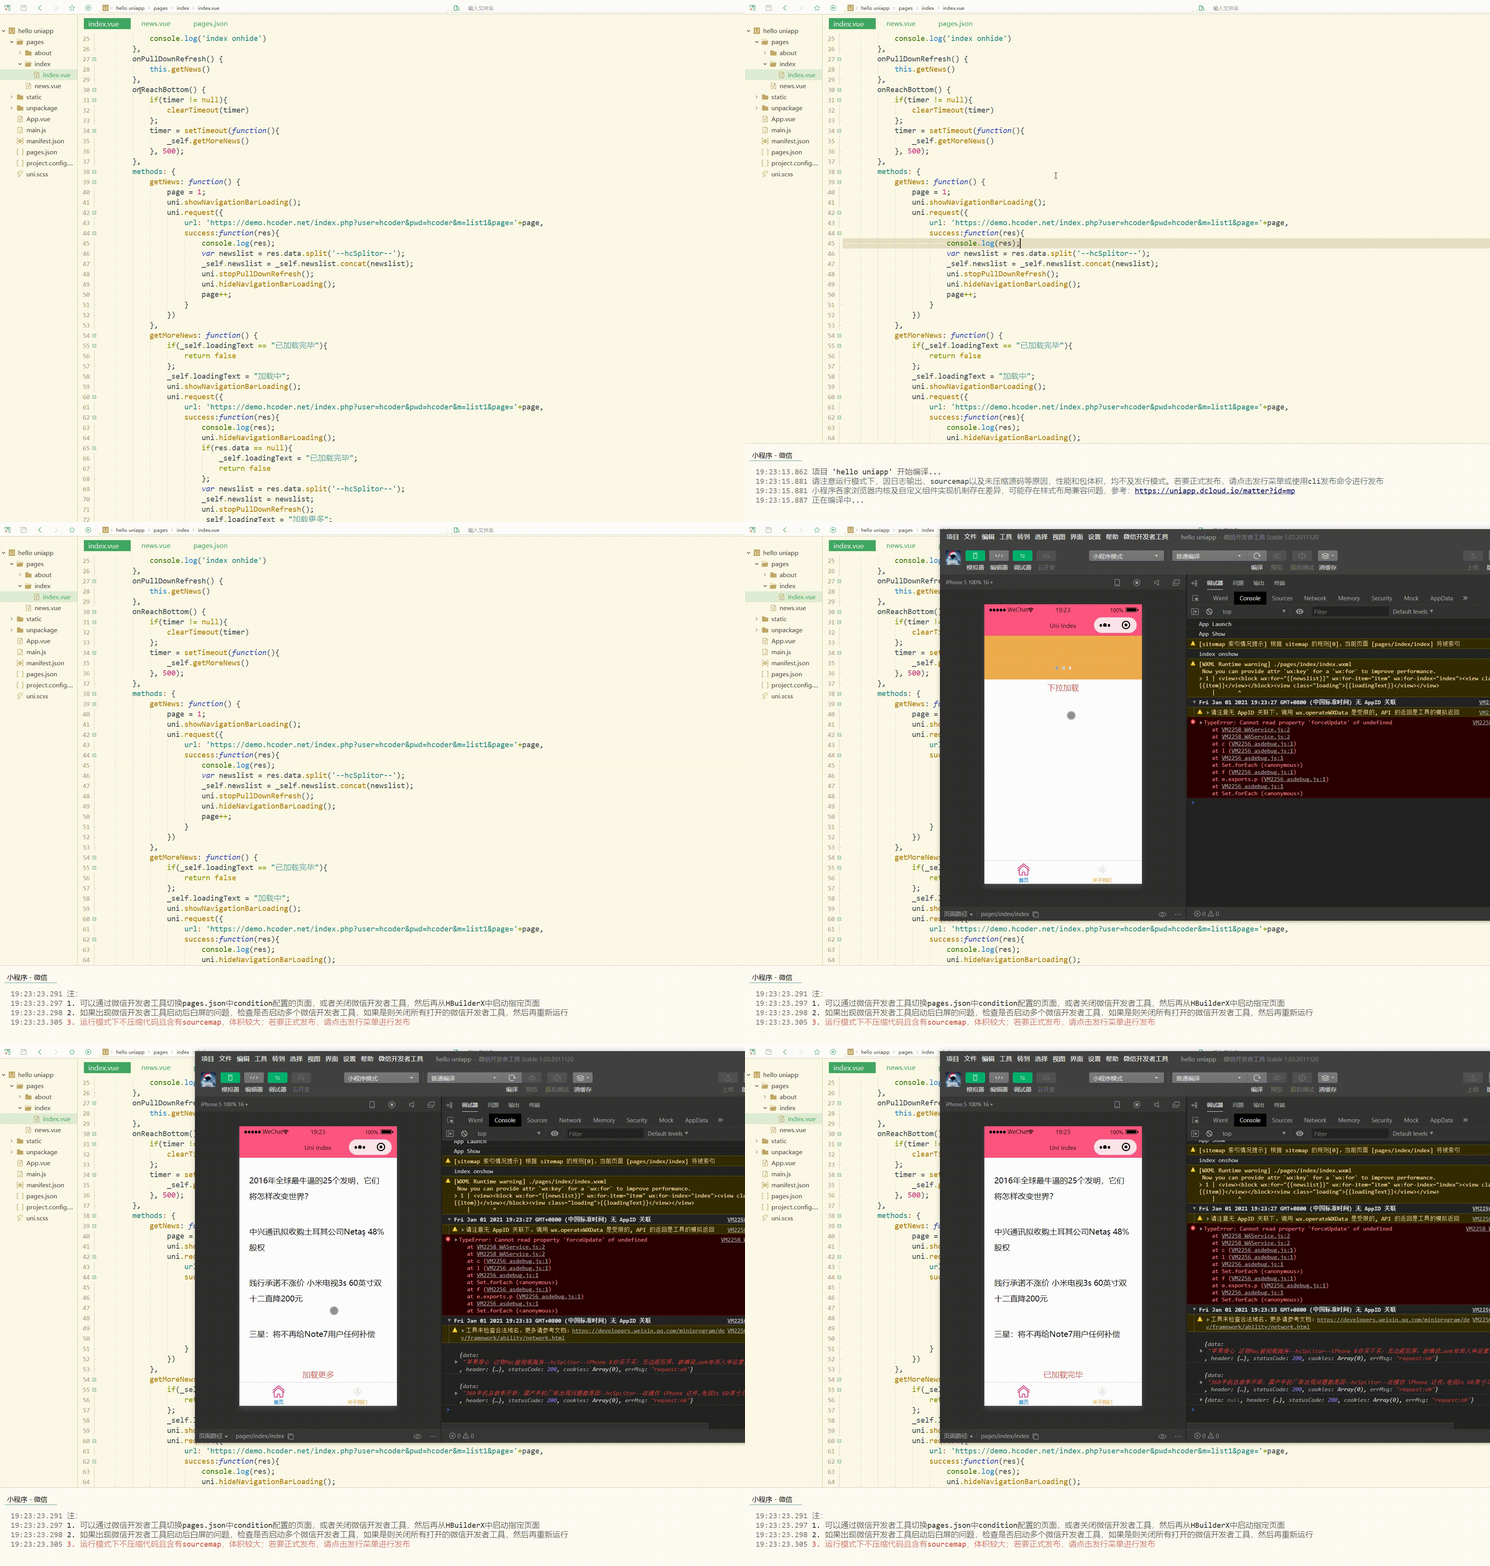
显然,此时表现更好。
四、跨端兼容
很多时候,每个平台有自己的一些特性,小程序和APP上实现是有一定区别的,可能不一定能兼容所有平台。
此时需要使用条件编译,即用特殊的注释作为标记,在编译时根据这些特殊的注释,将注释里面的代码编译到不同平台,即使用#ifdef、#ifndef和#endif来判断平台类型,其中:
| 符号 | 含义 |
|---|---|
| #ifdef | if defined 仅在某平台存在 |
| #ifndef | if not defined 除了某平台均存在 |
| %PLATFORM% | 平台名称 |
对于API、组件、样式等,有不同的注释方式,具体如下:
| 方式 | 适用平台 |
|---|---|
| API和pages.json |
// #ifdef PLATFORM和// #endif
|
| 组件 |
<!-- #ifdef PLATFORM -->和<!-- #endif -->
|
| 样式 |
/* #ifdef PLATFORM */和/* #endif */
|
测试如下:
<template>
	<view>
		<!-- #ifdef MP-WEIXIN -->
		<view class="wx">微信小程序</view>
		<!-- #endif -->
		<!-- #ifdef APP-PLUS -->
		<view class="h5">H5+APP</view>
		<!-- #endif -->
	</view></template><script>
	export default {
		data() {
			return {
			}
		},
		onLoad() {
			//#ifdef MP-WEIXIN
			console.log('wx...')
			//#endif
			//#ifdef APP-PLUS
			console.log('app...')
			//#endif
		},
		onShow() {
			console.log('index onshow')
		},
		onHide() {
			console.log('index onhide')
		},
		methods: {
		}
	}</script><style></style>
显示: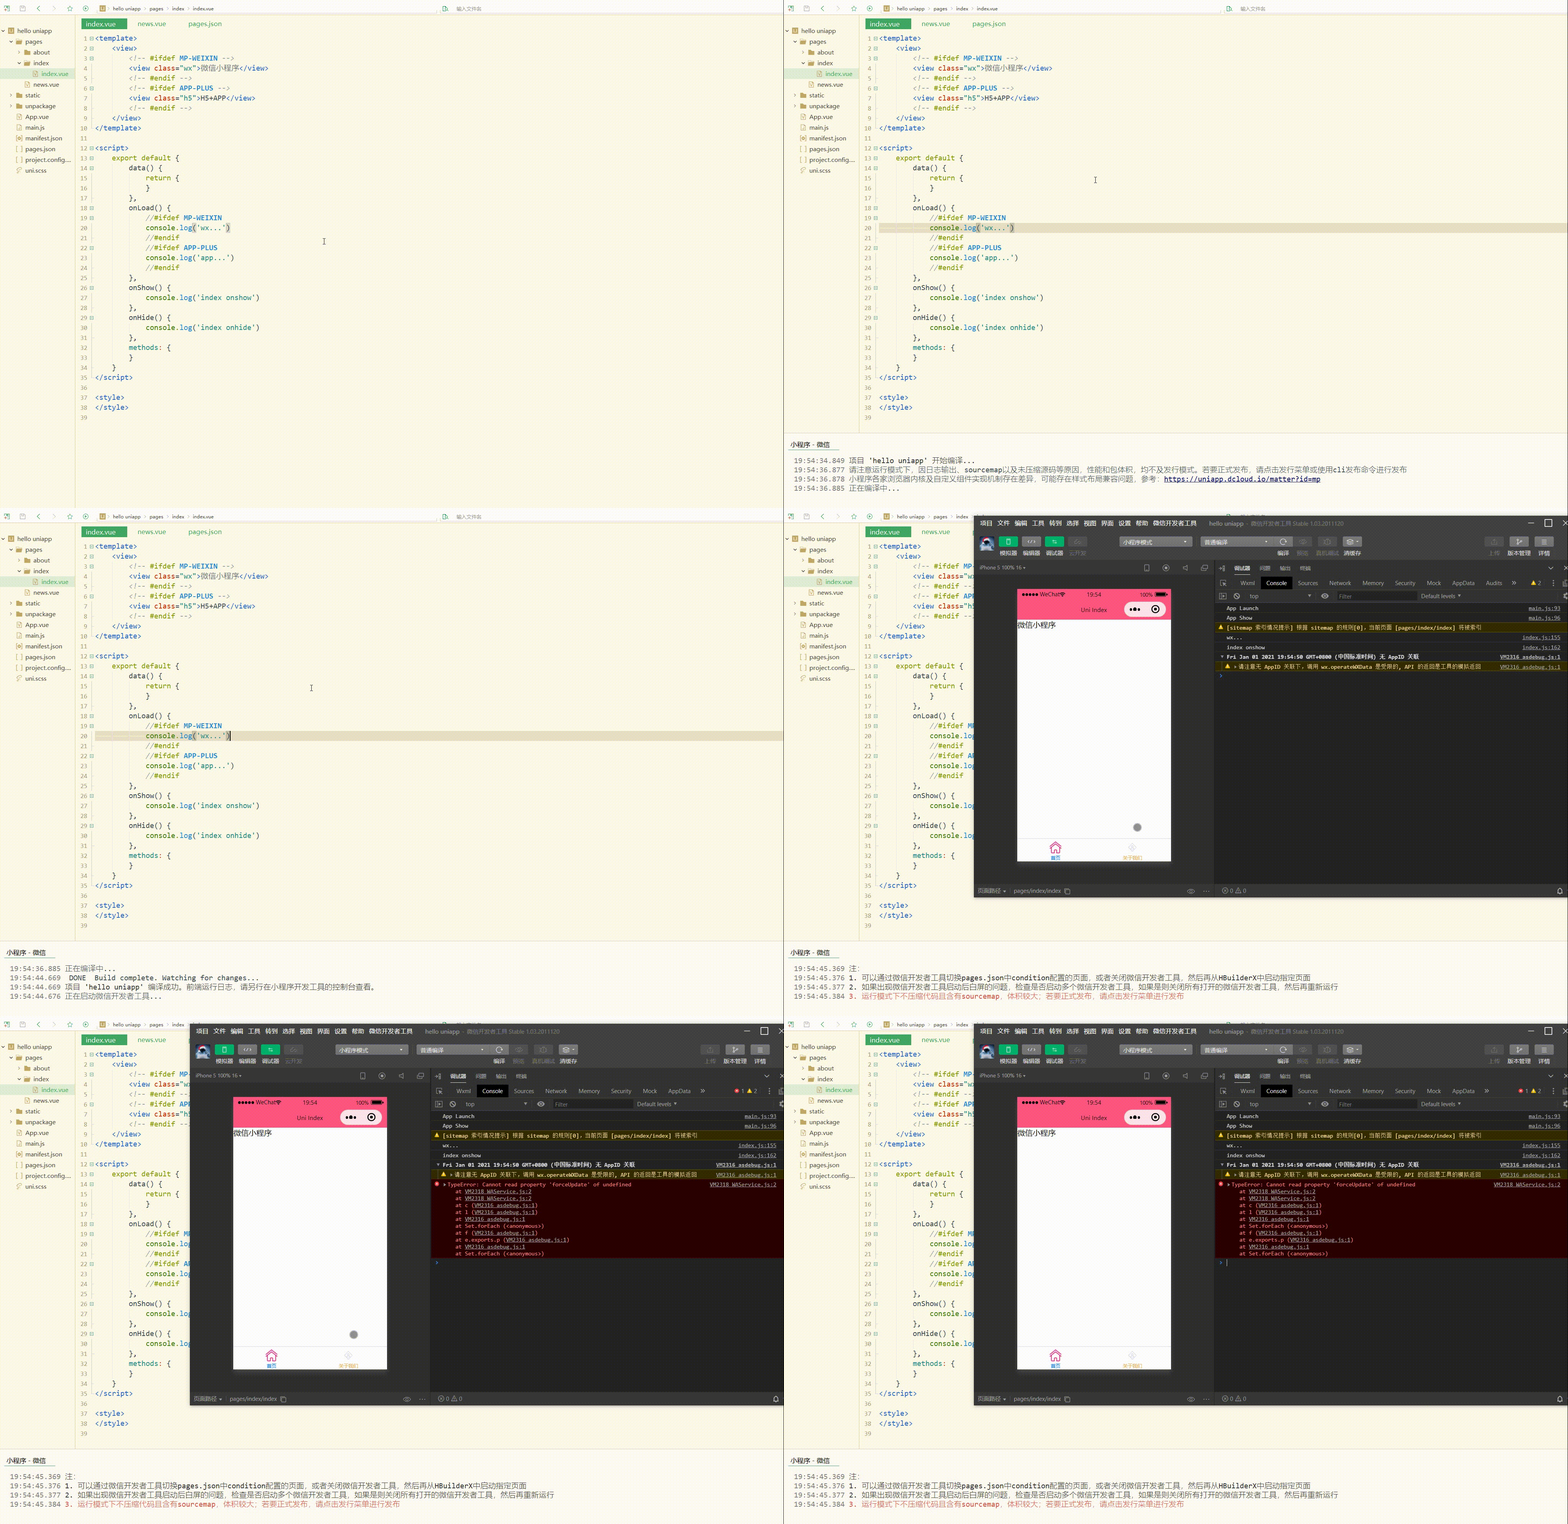
显然,判断出了当前为微信小程序平台。
五、交互反馈
交互反馈包括提示框、加载等的设置。
1.uni.showToast(OBJECT)和uni.hideToast()
分别用于显示和隐藏消息提示框。
OBJECT参数和含义如下:
| 参数名 | 类型 | 必填与否 | 说明 |
|---|---|---|---|
| title | String | 是 | 提示的内容,长度与 icon 取值有关 |
| icon | String | 否 | 图标,有效值详见下方说明。 |
| image | String | 否 | 自定义图标的本地路径 |
| mask | Boolean | 否 | 是否显示透明蒙层,防止触摸穿透,默认:false |
| duration | Number | 否 | 提示的延迟时间,单位毫秒,默认:1500 |
| position | String | 否 | 纯文本轻提示显示位置,填写有效值后只有 title 属性生效, 有效值详见下方说明。 |
| success | Function | 否 | 接口调用成功的回调函数 |
| fail | Function | 否 | 接口调用失败的回调函数 |
| complete | Function | 否 | 接口调用结束的回调函数(调用成功、失败都会执行) |
2.uni.showLoading(OBJECT)和uni.hideLoading()
前者用于显示 loading 提示框,需主动调用后者才能关闭提示框。
OBJECT参数和含义如下:
| 参数名 | 类型 | 必填与否 | 说明 |
|---|---|---|---|
| title | String | 是 | 提示的内容 |
| mask | Boolean | 否 | 是否显示透明蒙层,防止触摸穿透,默认:false |
| success | Function | 否 | 接口调用成功的回调函数 |
| fail | Function | 否 | 接口调用失败的回调函数 |
| complete | Function | 否 | 接口调用结束的回调函数(调用成功、失败都会执行) |
测试如下:
<template>
	<view>
		<button type="default" @click="showToast">显示提示框</button>
		<button type="default" @click="showLoading">显示并关闭Loading提示框</button>
	</view></template><script>
	export default {
		data() {
			return {
			}
		},
		onLoad() {
		},
		onShow() {
			console.log('index onshow')
		},
		onHide() {
			console.log('index onhide')
		},
		methods: {
			showToast: function(){
				uni.showToast({
					title: 'hello...',
					icon: 'success'
				})
			},
			showLoading: function(){
				uni.showLoading({
					title: 'loading...',
					mask: true,
					success:function(){
						setTimeout(function(){
							uni.hideLoading()
						}, 3000)
					}
				})
			}
		}
	}</script><style></style>
显示: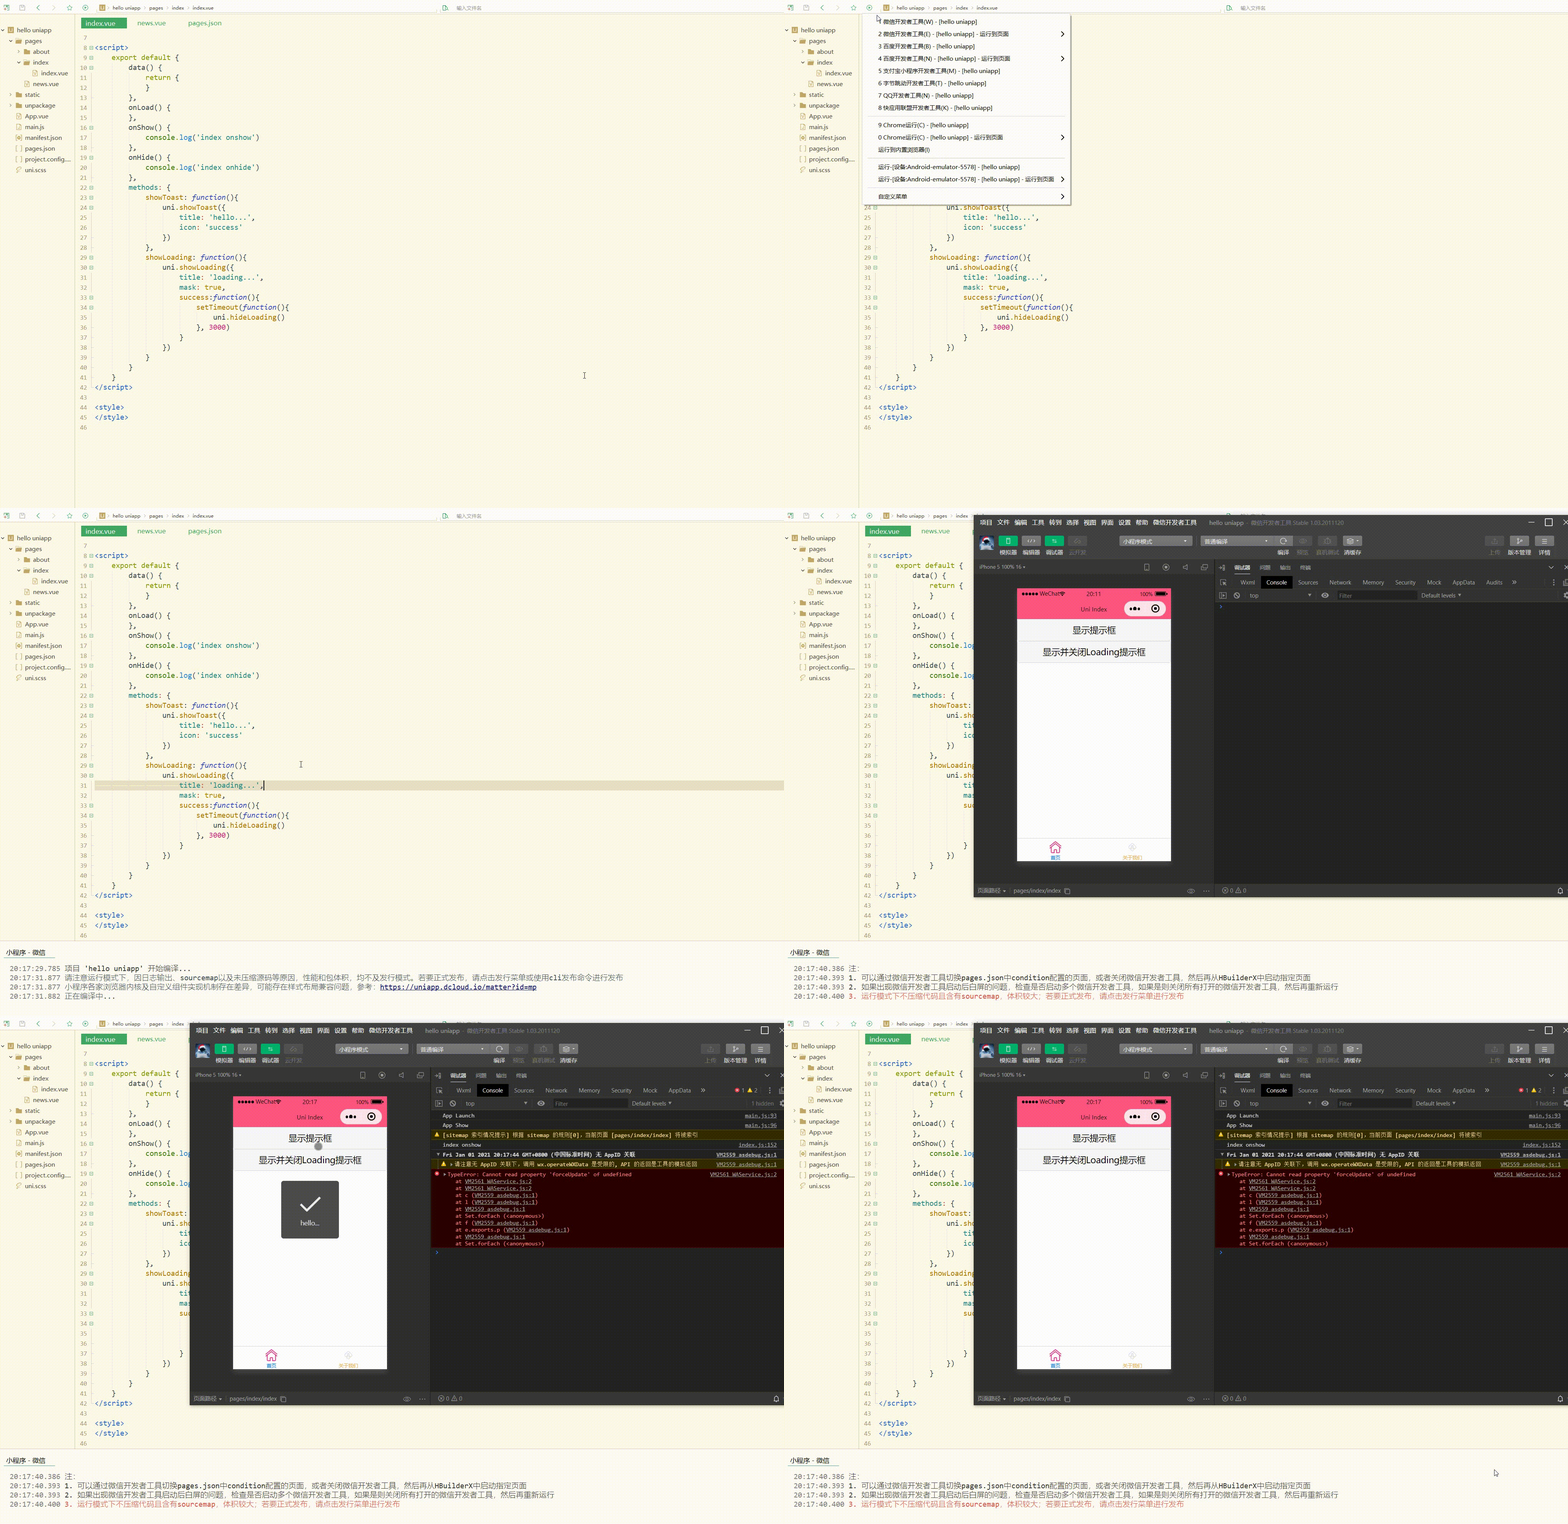
可以看到,可正常显示、关闭提示框和loading。
3.uni.showModal(OBJECT)
用于显示模态弹窗,类似于标准 html 的消息框alert、confirm。
OBJECT参数和含义如下:
| 参数名 | 类型 | 必填与否 | 说明 |
|---|---|---|---|
| title | String | 否 | 提示的标题 |
| content | String | 否 | 提示的内容 |
| showCancel | Boolean | 否 | 是否显示取消按钮,默认为 true |
| cancelText | String | 否 | 取消按钮的文字,默认为"取消",最多 4 个字符 |
| cancelColor | HexColor | 否 | 取消按钮的文字颜色,默认为"#000000" |
| confirmText | String | 否 | 确定按钮的文字,默认为"确定",最多 4 个字符 |
| confirmColor | HexColor | 否 | 确定按钮的文字颜色,H5平台默认为"#007aff",微信小程序平台默认为"#3CC51F",百度小程序平台默认为"#3c76ff" |
| fail | Function | 否 | 接口调用失败的回调函数 |
| complete | Function | 否 | 接口调用结束的回调函数(调用成功、失败都会执行) |
4.uni.showActionSheet(OBJECT)
用于显示操作菜单。
OBJECT参数和含义如下:
| 参数名 | 类型 | 必填与否 | 说明 |
|---|---|---|---|
| itemList | Array | 是 | 按钮的文字数组 |
| itemColor | HexColor | 否 | 按钮的文字颜色,字符串格式,默认为"#000000" |
| success | Function | 否 | 接口调用成功的回调函数,详见返回参数说明 |
| fail | Function | 否 | 接口调用失败的回调函数 |
| complete | Function | 否 | 接口调用结束的回调函数(调用成功、失败都会执行) |
测试如下:
<template>
	<view>
		<button type="default" @click="showModal">显示模态弹窗</button>
		<button type="default" @click="showActionSheet">显示操作菜单</button>
	</view></template><script>
	var actions = ['Music', 'Reading'];
	export default {
		data() {
			return {
			}
		},
		onLoad() {
		},
		onShow() {
			console.log('index onshow')
		},
		onHide() {
			console.log('index onhide')
		},
		methods: {
			showModal: function(){
				uni.showModal({
					title: 'hello...',
					content: 'Modal Window',
					success:function(res){
						if(res.confirm){
							console.log('Confirm')
						}else if(res.cancel){
							console.log('Cancel')
						}
					}
				})
			},
			showActionSheet: function(){
				uni.showActionSheet({
					itemList: actions,
					success:function(res){
						console.log(actions[res.tapIndex])
					},
					fail:function(res){
						console.log(res.errMsg)
					}
				})
			}
		}
	}</script><style></style>
显示: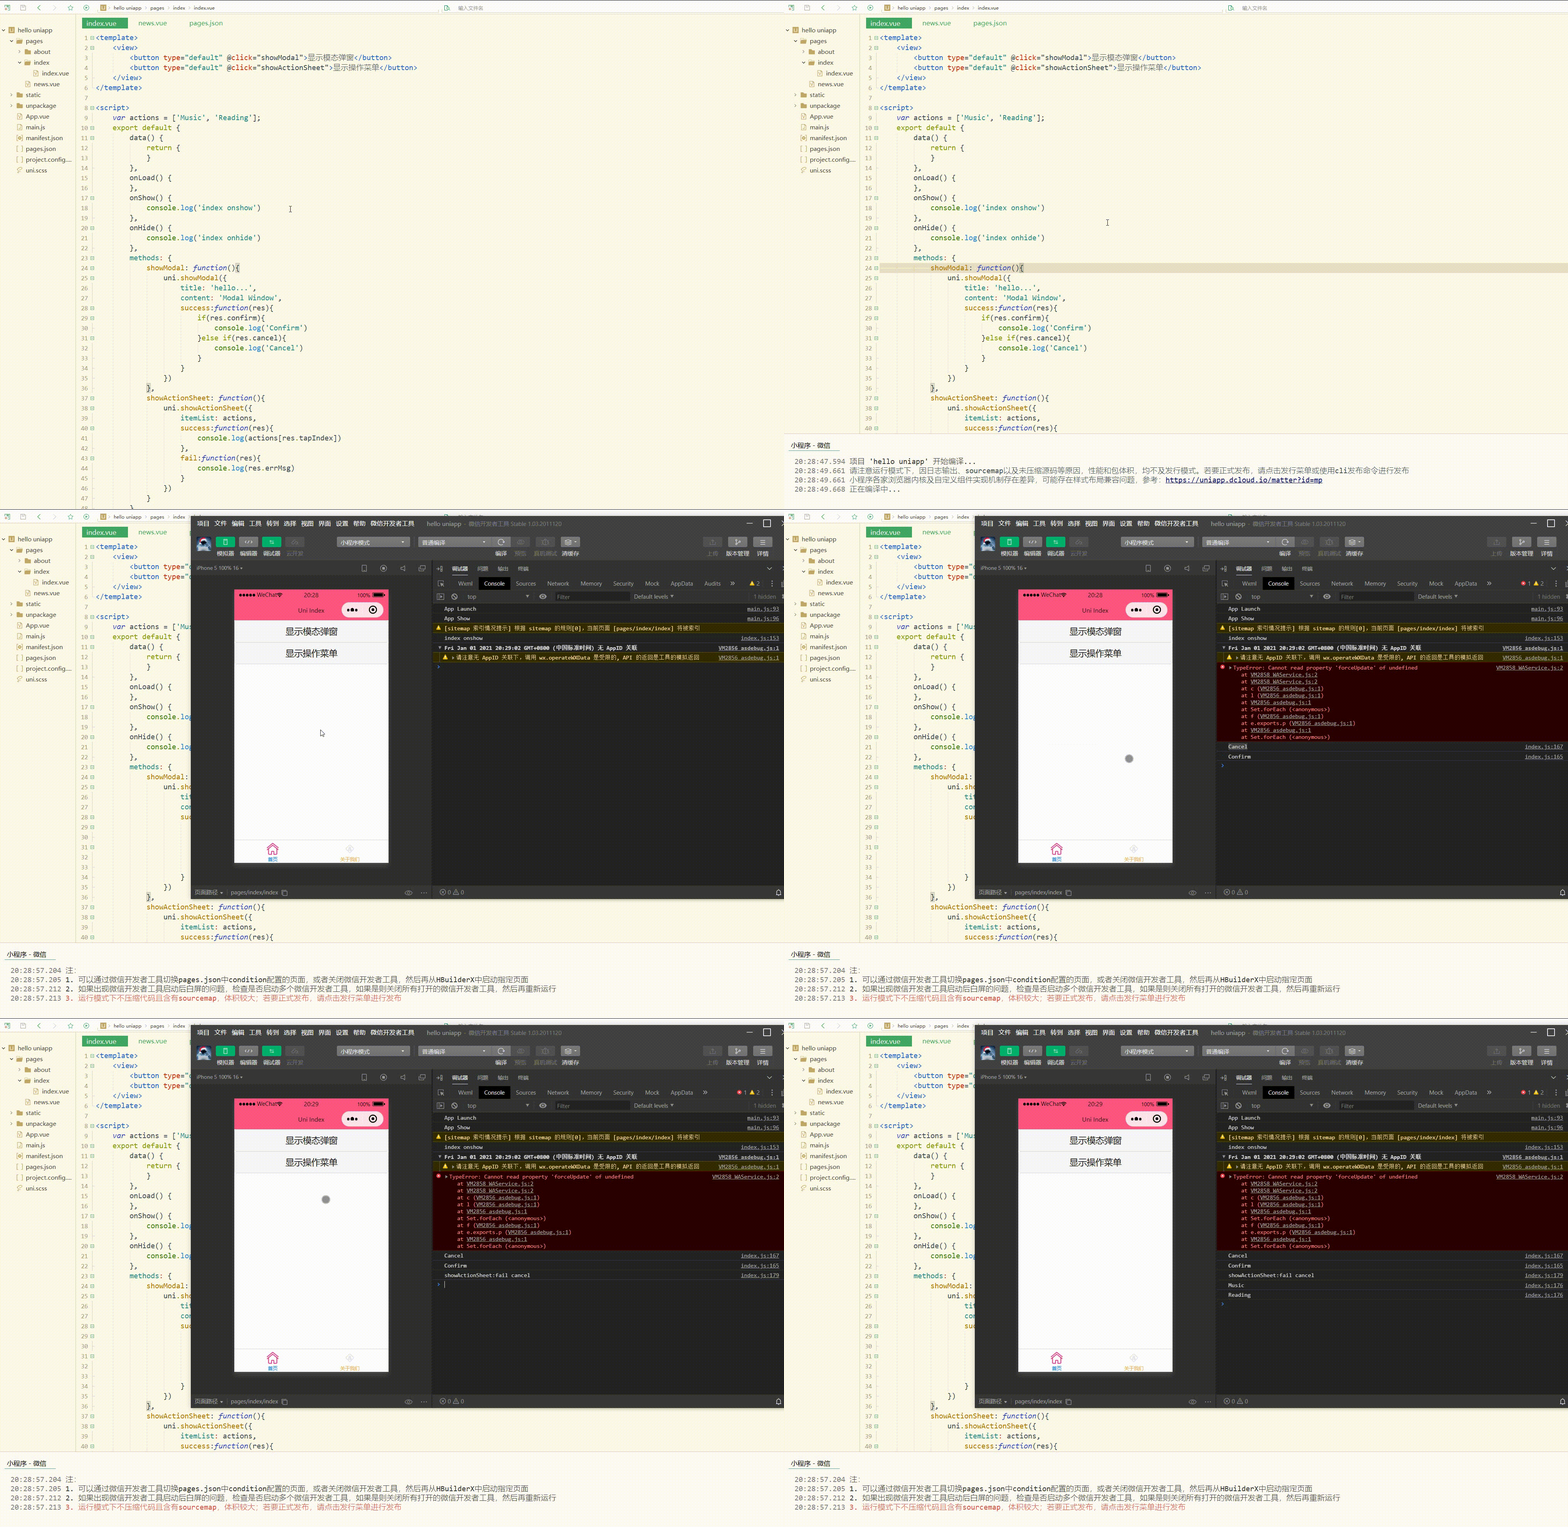
可以看到,可以对模态弹窗和操作菜单进行操作。
总结
uni-app的家口为开发者提供了丰富的功能,包括设备、界面等,我们只需要直接调用即可实现所需功能,减少了自己开发的麻烦,有利于快速开发。
更多精品文章敬请关注uni-app开发教程栏目!
以上是uni-app入门教程之 接口的扩展应用的详细内容。更多信息请关注PHP中文网其他相关文章!
 您如何在不同平台(例如移动,Web)上调试问题?Mar 27, 2025 pm 05:07 PM
本文讨论了有关移动和网络平台的调试策略,突出显示了Android Studio,Xcode和Chrome DevTools等工具,以及在OS和性能优化的一致结果的技术。
 哪些调试工具可用于Uniapp开发?Mar 27, 2025 pm 05:05 PM
文章讨论了用于Uniapp开发的调试工具和最佳实践,重点关注Hbuilderx,微信开发人员工具和Chrome DevTools等工具。
 您如何为Uniapp应用程序执行端到端测试?Mar 27, 2025 pm 05:04 PM
本文讨论了跨多个平台的Uniapp应用程序的端到端测试。它涵盖定义测试方案,选择诸如Appium和Cypress之类的工具,设置环境,写作和运行测试,分析结果以及集成
 您可以在Uniapp应用程序中执行哪些不同类型的测试?Mar 27, 2025 pm 04:59 PM
本文讨论了针对Uniapp应用程序的各种测试类型,包括单元,集成,功能,UI/UX,性能,跨平台和安全测试。它还涵盖了确保跨平台兼容性,并推荐Jes等工具
 Uniapp中有哪些常见的性能反版?Mar 27, 2025 pm 04:58 PM
本文讨论了UNIAPP开发中的共同绩效抗模式,例如过度的全球数据使用和效率低下的数据绑定,并提供策略来识别和减轻这些问题,以提高应用程序性能。
 如何优化Uniapp中的Web性能的图像?Mar 27, 2025 pm 04:50 PM
本文讨论了通过压缩,响应式设计,懒惰加载,缓存和使用WebP格式来优化Uniapp中的图像,以更好地进行Web性能。


热AI工具

Undresser.AI Undress
人工智能驱动的应用程序,用于创建逼真的裸体照片

AI Clothes Remover
用于从照片中去除衣服的在线人工智能工具。

Undress AI Tool
免费脱衣服图片

Clothoff.io
AI脱衣机

AI Hentai Generator
免费生成ai无尽的。

热门文章

热工具

VSCode Windows 64位 下载
微软推出的免费、功能强大的一款IDE编辑器

Dreamweaver CS6
视觉化网页开发工具

WebStorm Mac版
好用的JavaScript开发工具

安全考试浏览器
Safe Exam Browser是一个安全的浏览器环境,用于安全地进行在线考试。该软件将任何计算机变成一个安全的工作站。它控制对任何实用工具的访问,并防止学生使用未经授权的资源。

禅工作室 13.0.1
功能强大的PHP集成开发环境


