
组件通信
尽管子组件可以用this.$parent访问它的父组件及其父链上任意的实例,不过子组件应当避免直接依赖父组件的数据,尽量显式地使用 props 传递数据。
另外,在子组件中修改父组件的状态是非常糟糕的做法,因为:
这让父组件与子组件紧密地耦合;
只看父组件,很难理解父组件的状态。因为它可能被任意子组件修改!理想情况下,只有组件自己能修改它的状态。
每个Vue实例都是一个事件触发器:
$on()——监听事件。
$emit()——把事件沿着作用域链向上派送。(触发事件)
$dispatch()——派发事件,事件沿着父链冒泡。
$broadcast()——广播事件,事件向下传导给所有的后代。
监听与触发
v-on监听自定义事件:
<!DOCTYPE html>
<html>
<head>
<meta charset="UTF-8">
<title></title>
</head>
<body>
<!--子组件模板-->
<template id="child-template">
<input v-model="msg" />
<button v-on:click="notify">Dispatch Event</button>
</template>
<!--父组件模板-->
<div id="events-example">
<p>Messages: {{ messages | json }}</p>
<child v-on:child-msg="handleIt"></child>
</div>
</body>
<script src="js/vue.js"></script>
<script>
// 注册子组件
// 将当前消息派发出去
Vue.component('child', {
template: '#child-template',
data: function (){
return { msg: 'hello' }
},
methods: {
notify: function() {
if(this.msg.trim()){
this.$dispatch('child-msg',this.msg);
this.msg = '';
}
}
}
})
// 初始化父组件
// 在收到消息时将事件推入一个数组中
var parent = new Vue({
el: '#events-example',
data: {
messages: []
},
methods:{
'handleIt': function(){
alert("a");
}
}
})
</script>
</html>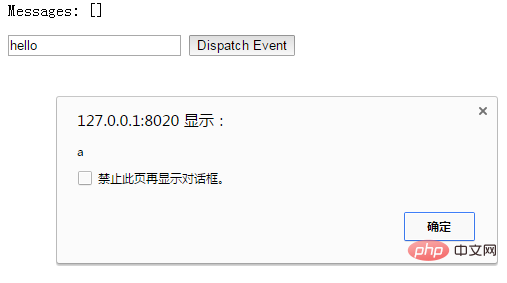
父组件可以在使用子组件的地方直接用 v-on 来监听子组件触发的事件:
<!DOCTYPE html>
<html>
<head>
<meta charset="UTF-8">
<title></title>
</head>
<body>
<div id="counter-event-example">
<p>{{ total }}</p>
<button-counter v-on:increment="incrementTotal"></button-counter>
<button-counter v-on:increment="incrementTotal"></button-counter>
</div>
</body>
<script src="js/vue.js" type="text/javascript" charset="utf-8"></script>
<script type="text/javascript">
Vue.component('button-counter', {
template: '<button v-on:click="increment">{{ counter }}</button>',
data: function () {
return {
counter: 0
}
},
methods: {
increment: function () {
this.counter += 1
this.$emit('increment')
}
},
})
new Vue({
el: '#counter-event-example',
data: {
total: 0
},
methods: {
incrementTotal: function () {
this.total += 1
}
}
})
</script>
</html>
在某个组件的根元素上监听一个原生事件。可以使用 .native 修饰v-on 。例如:
<my-component v-on:click.native="doTheThing"></my-component>
派发事件——$dispatch()
<!DOCTYPE html>
<html>
<head>
<meta charset="UTF-8">
<title></title>
</head>
<body>
<div id="app">
<p>Messages: {{ messages | json }}</p>
<child-component></child-component>
</div>
<template id="child-component">
<input v-model="msg" />
<button v-on:click="notify">Dispatch Event</button>
</template>
<script src="js/vue.js"></script>
<script>
// 注册子组件
Vue.component('child-component', {
template: '#child-component',
data: function() {
return {
msg: ''
}
},
methods: {
notify: function() {
if (this.msg.trim()) {
this.$dispatch('child-msg', this.msg)
this.msg = ''
}
}
}
})
// 初始化父组件
new Vue({
el: '#app',
data: {
messages: []
},
events: {
'child-msg': function(msg) {
this.messages.push(msg)
}
}
})
</script>
</body>
</html>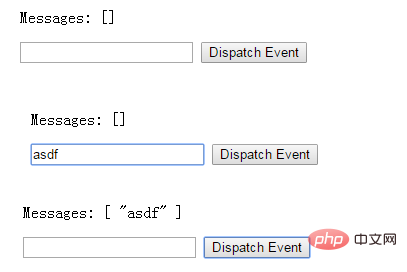
子组件的button元素绑定了click事件,该事件指向notify方法
子组件的notify方法在处理时,调用了$dispatch,将事件派发到父组件的child-msg事件,并给该该事件提供了一个msg参数
父组件的events选项中定义了child-msg事件,父组件接收到子组件的派发后,调用child-msg事件。
广播事件——$broadcast()
<!DOCTYPE html>
<html>
<head>
<meta charset="UTF-8">
<title></title>
</head>
<body>
<div id="app">
<input v-model="msg" />
<button v-on:click="notify">Broadcast Event</button>
<child-component></child-component>
</div>
<template id="child-component">
<ul>
<li v-for="item in messages">
父组件录入了信息:{{ item }}
</li>
</ul>
</template>
<script src="js/vue.js"></script>
<script>
// 注册子组件
Vue.component('child-component', {
template: '#child-component',
data: function() {
return {
messages: []
}
},
events: {
'parent-msg': function(msg) {
this.messages.push(msg)
}
}
})
// 初始化父组件
new Vue({
el: '#app',
data: {
msg: ''
},
methods: {
notify: function() {
if (this.msg.trim()) {
this.$broadcast('parent-msg', this.msg)
}
}
}
})
</script>
</body>
</html>和派发事件相反。前者在子组件绑定,调用$dispatch派发到父组件;后者在父组件中绑定,调用$broadcast广播到子组件。
父子组件之间的访问
父组件访问子组件:使用$children或$refs
子组件访问父组件:使用$parent
子组件访问根组件:使用$root
$children:
<!DOCTYPE html>
<html>
<head>
<meta charset="UTF-8">
<title></title>
</head>
<body>
<div id="app">
<parent-component></parent-component>
</div>
<template id="parent-component">
<child-component1></child-component1>
<child-component2></child-component2>
<button v-on:click="showChildComponentData">显示子组件的数据</button>
</template>
<template id="child-component1">
<h2>This is child component 1</h2>
</template>
<template id="child-component2">
<h2>This is child component 2</h2>
</template>
<script src="js/vue.js"></script>
<script>
Vue.component('parent-component', {
template: '#parent-component',
components: {
'child-component1': {
template: '#child-component1',
data: function() {
return {
msg: 'child component 111111'
}
}
},
'child-component2': {
template: '#child-component2',
data: function() {
return {
msg: 'child component 222222'
}
}
}
},
methods: {
showChildComponentData: function() {
for (var i = 0; i < this.$children.length; i++) {
alert(this.$children[i].msg)
}
}
}
})
new Vue({
el: '#app'
})
</script>
</body>
</html>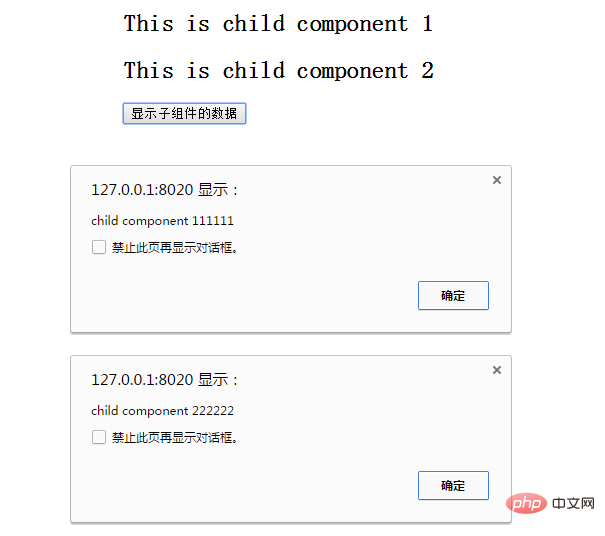
$ref可以给子组件指定索引ID:
<!DOCTYPE html>
<html>
<head>
<meta charset="UTF-8">
<title></title>
</head>
<body>
<div id="app">
<parent-component></parent-component>
</div>
<template id="parent-component">
<!--<child-component1></child-component1>
<child-component2></child-component2>-->
<child-component1 v-ref:cc1></child-component1>
<child-component2 v-ref:cc2></child-component2>
<button v-on:click="showChildComponentData">显示子组件的数据</button>
</template>
<template id="child-component1">
<h2>This is child component 1</h2>
</template>
<template id="child-component2">
<h2>This is child component 2</h2>
</template>
<script src="js/vue.js"></script>
<script>
Vue.component('parent-component', {
template: '#parent-component',
components: {
'child-component1': {
template: '#child-component1',
data: function() {
return {
msg: 'child component 111111'
}
}
},
'child-component2': {
template: '#child-component2',
data: function() {
return {
msg: 'child component 222222'
}
}
}
},
methods: {
showChildComponentData: function() {
// for (var i = 0; i < this.$children.length; i++) {
// alert(this.$children[i].msg)
// }
alert(this.$refs.cc1.msg);
alert(this.$refs.cc2.msg);
}
}
})
new Vue({
el: '#app'
})
</script>
</body>
</html>效果与$children相同。
$parent:
<!DOCTYPE html>
<html>
<head>
<meta charset="UTF-8">
<title></title>
</head>
<body>
<div id="app">
<parent-component></parent-component>
</div>
<template id="parent-component">
<child-component></child-component>
</template>
<template id="child-component">
<h2>This is a child component</h2>
<button v-on:click="showParentComponentData">显示父组件的数据</button>
</template>
<script src="js/vue.js"></script>
<script>
Vue.component('parent-component', {
template: '#parent-component',
components: {
'child-component': {
template: '#child-component',
methods: {
showParentComponentData: function() {
alert(this.$parent.msg)
}
}
}
},
data: function() {
return {
msg: 'parent component message'
}
}
})
new Vue({
el: '#app'
})
</script>
</body>
</html>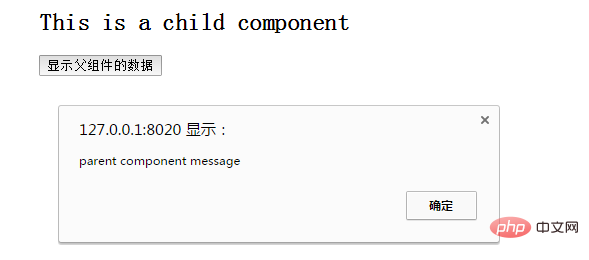
如开篇所提,不建议在子组件中修改父组件的状态。
非父子组件通信
有时候非父子关系的组件也需要通信。在简单的场景下,使用一个空的 Vue 实例作为中央事件总线:
var bus = new Vue()
// 触发组件 A 中的事件
bus.$emit('id-selected', 1)
// 在组件 B 创建的钩子中监听事件
bus.$on('id-selected', function (id) {
    // ...
})
相关推荐:
更多编程相关知识,请访问:编程入门!!
以上是vue组件间如何进行通信?方法介绍的详细内容。更多信息请关注PHP中文网其他相关文章!
 vue.js的功能:增强前端的用户体验Apr 19, 2025 am 12:13 AM
Vue.js通过多种功能提升用户体验:1.响应式系统实现数据即时反馈;2.组件化开发提高代码复用性;3.VueRouter提供平滑导航;4.动态数据绑定和过渡动画增强交互效果;5.错误处理机制确保用户反馈;6.性能优化和最佳实践提升应用性能。
 vue.js:定义其在网络开发中的作用Apr 18, 2025 am 12:07 AM
Vue.js在Web开发中的角色是作为一个渐进式JavaScript框架,简化开发过程并提高效率。1)它通过响应式数据绑定和组件化开发,使开发者能专注于业务逻辑。2)Vue.js的工作原理依赖于响应式系统和虚拟DOM,优化性能。3)实际项目中,使用Vuex管理全局状态和优化数据响应性是常见实践。
 了解vue.js:主要是前端框架Apr 17, 2025 am 12:20 AM
Vue.js是由尤雨溪在2014年发布的渐进式JavaScript框架,用于构建用户界面。它的核心优势包括:1.响应式数据绑定,数据变化自动更新视图;2.组件化开发,UI可拆分为独立、可复用的组件。
 Netflix的前端:React(或VUE)的示例和应用Apr 16, 2025 am 12:08 AM
Netflix使用React作为其前端框架。1)React的组件化开发模式和强大生态系统是Netflix选择它的主要原因。2)通过组件化,Netflix将复杂界面拆分成可管理的小块,如视频播放器、推荐列表和用户评论。3)React的虚拟DOM和组件生命周期优化了渲染效率和用户交互管理。
 前端景观:Netflix如何处理其选择Apr 15, 2025 am 12:13 AM
Netflix在前端技术上的选择主要集中在性能优化、可扩展性和用户体验三个方面。1.性能优化:Netflix选择React作为主要框架,并开发了SpeedCurve和Boomerang等工具来监控和优化用户体验。2.可扩展性:他们采用微前端架构,将应用拆分为独立模块,提高开发效率和系统扩展性。3.用户体验:Netflix使用Material-UI组件库,通过A/B测试和用户反馈不断优化界面,确保一致性和美观性。
 React与Vue:Netflix使用哪个框架?Apr 14, 2025 am 12:19 AM
NetflixusesAcustomFrameworkcalled“ Gibbon” BuiltonReact,notReactorVueDirectly.1)TeamExperience:selectBasedAsedonFamiliarity.2)ProjectComplexity:vueforsimplerprojects,vueforsimplerprojects,reactforforforecomplexones.3)cocatizationNeedsneeds:reactofficatizationneedneeds:reactofferizationneedneedneedneeds:reactoffersizatization needeffersefersmoreflexiblesimore.4)ecosyaka
 框架的选择:是什么推动了Netflix的决定?Apr 13, 2025 am 12:05 AM
Netflix在框架选择上主要考虑性能、可扩展性、开发效率、生态系统、技术债务和维护成本。1.性能与可扩展性:选择Java和SpringBoot以高效处理海量数据和高并发请求。2.开发效率与生态系统:使用React提升前端开发效率,利用其丰富的生态系统。3.技术债务与维护成本:选择Node.js构建微服务,降低维护成本和技术债务。
 反应,vue和Netflix前端的未来Apr 12, 2025 am 12:12 AM
Netflix主要使用React作为前端框架,辅以Vue用于特定功能。1)React的组件化和虚拟DOM提升了Netflix应用的性能和开发效率。2)Vue在Netflix的内部工具和小型项目中应用,其灵活性和易用性是关键。


热AI工具

Undresser.AI Undress
人工智能驱动的应用程序,用于创建逼真的裸体照片

AI Clothes Remover
用于从照片中去除衣服的在线人工智能工具。

Undress AI Tool
免费脱衣服图片

Clothoff.io
AI脱衣机

AI Hentai Generator
免费生成ai无尽的。

热门文章

热工具

螳螂BT
Mantis是一个易于部署的基于Web的缺陷跟踪工具,用于帮助产品缺陷跟踪。它需要PHP、MySQL和一个Web服务器。请查看我们的演示和托管服务。

SublimeText3 Linux新版
SublimeText3 Linux最新版

SublimeText3汉化版
中文版,非常好用

Atom编辑器mac版下载
最流行的的开源编辑器

SublimeText3 Mac版
神级代码编辑软件(SublimeText3)


