本文目标:
1、掌握CSS3中线性渐变(linear-gradient)的实现方法
问题:
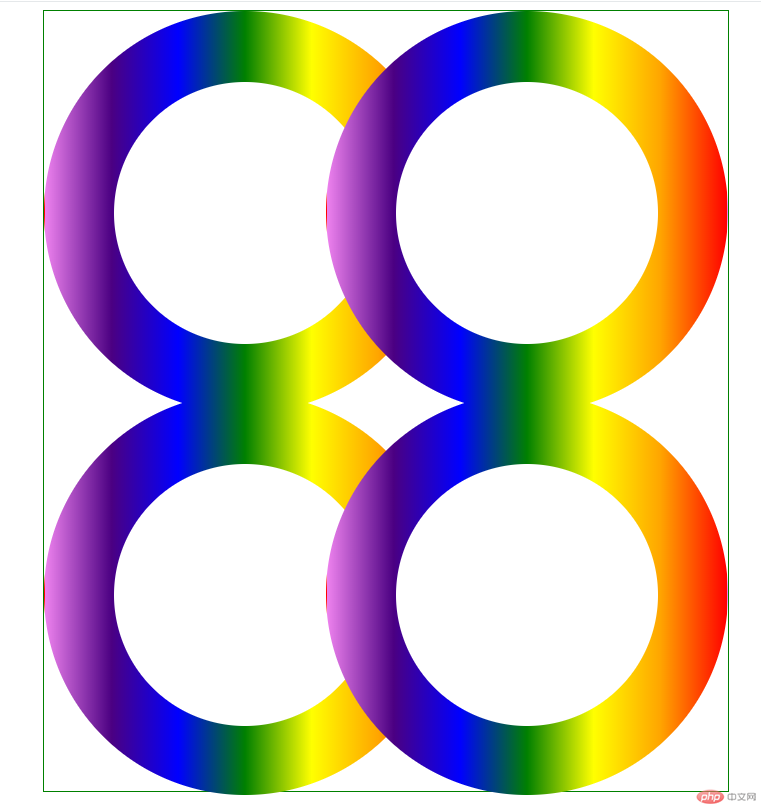
要求实现以下效果,使用纯DIV+CSS,必须使用知识点 线性渐变(linear-gradient),且居中显示

附加说明:
1、一个彩色圆环的大小是400px*400px,里面空白圆环大小为260px*260px
2、右边圆环和左边圆环的左移距离为120px
3、下边圆环和上边圆环的上移距离为20px
思路分析:
1、最外层是一个绿色边框的div,里面包裹着4个圆环
2、div分上下两部分,两部分其实都是一样的,只要实现了上面部分,下面部分其实是可以拷贝,只是margin-top要更改一下
3、每个圆环其实都是一样,只是位置不同,所以只要把一个渐变圆环实现出来,其他所有的圆环都可以复制第一个圆环
现在来具体操作
1、创建好index.html,写好架构
架构思路:
1、外层容器我们就叫做.container容器,里面分成.top,.bottom两部分,每个部分里面包含两个圆环div,
并行的两个div圆环,因为要水平排列,所以肯定需要float,既然float,了,在容器的最后需要加上一个.clear的div,清除浮动,这样可以让容器依然包裹住两个float的圆环div
2、每个圆环其实也是由两个部分组成,一个外层彩色圆环和内层一个白色的小的圆环
根据分析得出以下架构代码
<!DOCTYPE html>
<html lang="en">
<head>
    <meta charset="UTF-8">
    <meta name="viewport" content="width=device-width, initial-scale=1.0">
    <title>渐变圆环</title>

</head>
<body>
    <div class="container">
        <div class="top">
             <!-- 第一个圆环 -->
            <div class="colorcircle circle1">
                <div class="smallcircle">
                </div>
            </div>
            <!-- 第二个圆环 -->
            <div class="colorcircle circle2">
                <div class="smallcircle">
                </div>
            </div>
            <div class="clear"> </div>
        </div>
        <div class="bottom">
            <!-- 第一个圆环 -->
           <div class="colorcircle circle1">
               <div class="smallcircle">
               </div>
           </div>
           <!-- 第二个圆环 -->
           <div class="colorcircle circle2">
               <div class="smallcircle">
               </div>
           </div>
           <div class="clear"> </div>
       </div>
    </div>
</body>
</html>
2、接下来,写样式
1、创建css文件夹,方便管理所有的css文件,创建index.css,里面的样式怎么写呢,思路如下:
1、.container *
思路分析
1、为了设置容器里的所有元素的公共样式,我们可以将这些公共代码写入.container * 样式内
所以index.css中添加代码如下:
.container *{
    padding:0;
    margin: 0;
}
2、外层彩色圆环.colorcircle
思路分析
1、根据要求得知,width:400px,height:400px,因为是圆形的,所以需要设置边框圆角为400px即border-radius: 400px;,
2、因为背景是七彩色的,所以需要用到线线渐变,而且颜色渐变从左到右依次是红橙黄绿青蓝紫,所以转成代码即background-image:linear-gradient(to left, red, orange,yellow,green,blue,indigo,violet);
3、然后用到了圆角,需要设置border,否则不会生效,但是它的边框是透明的,所以转成代码即border:1px solid transparent;
4、为了确保圆环并行排列,所以需要让它float:left
根据分析,继续在index.css中添加代码如下:
.colorcircle{
    width:400px;
    height:400px;
    border-radius: 400px;
    background-image:linear-gradient(to left, red, orange,yellow,green,blue,indigo,violet);
    border:1px solid transparent;
    float: left;
}
3、圆环内层白色小圆环 .smallcircle
思路分析:
1、根据要求得知,width: 260px,height:260px,因为是圆形的,所以需要设置边框圆角为260px即border-radius: 260px;,背景白色background-color: white;
因为要居中,所以它的左间距,上间距为70px=(400-260)/2
2、然后用到了圆角,需要设置border,否则不会生效,但是它的边框是透明的,所以转成代码即border:1px solid transparent;
继续index.css中添加代码如下:
.smallcircle{
    width: 260px;
    height: 260px;
    border-radius: 260px;
    background-color: white;
    margin:70px auto;
    border:1px solid transparent;
}
4、.clear样式
思路分析:
1、需要清除浮动,所以需要float:none,clear:both
2、这种div里面没有内容,为了不影响布局,需要设置width,height都为0
继续index.css中添加代码如下:
.clear{
    clear: both;
    float: none;
    width: 0;
    height: 0;
}
5、右边圆环.circle2
思路分析:
1、根据要求得知,左移量为120px,所以margin-left:-120px
继续index.css中添加代码如下:
.circle2{
    margin-left:-120px;
}
6、下面部分.bottom
思路分析:
1、根据要求得知,上移量为20px,所以margin-top:-20px
继续index.css中添加代码如下:
.bottom{
    margin-top:-20px;
}
7、最外层.container
思路分析
1、因为整体要居中,所以转成代码即 margin:0 auto;因为是绿色边框所以 border:1px solid green;
2、div默认宽度是100%,为了让它居中,需要设置宽才可以,width=684px(400+400+4【圆环4个border】-120),高度=784(400+400+4【圆环4个border】-20)
继续index.css中添加代码如下:
.container{
    border:1px solid green;
    width:684px;
    margin:0 auto;
    height: 784px;
}
到此为止,index.css所有内容如下:
.container *{
    padding:0;
    margin: 0;
}

.colorcircle{
    width:400px;
    height:400px;
    border-radius: 400px;
    background-image:linear-gradient(to left, red, orange,yellow,green,blue,indigo,violet);

    border:1px solid transparent;
    float: left;
}
.smallcircle{
    width: 260px;
    height: 260px;

    border-radius: 260px;
    background-color: white;
    margin:70px auto;
    border:1px solid transparent;
}
.clear{
    clear: both;
    float: none;
    width: 0;
    height: 0;
}
.circle2{
    margin-left:-120px;
}


.bottom{
    margin-top:-20px;
}
.container{
    border:1px solid green;
    width:684px;
    margin:0 auto;
    height: 784px;
}
然后将index.css引入index.html中
<!DOCTYPE html>
<html lang="en">
<head>
    <meta charset="UTF-8">
    <meta name="viewport" content="width=device-width, initial-scale=1.0">
    <title>渐变圆环</title>
    <link rel="stylesheet" href="css/index.css" />
</head>
<body>
    <div class="container">
        <div class="top">
             <!-- 第一个圆环 -->
            <div class="colorcircle circle1">
                <div class="smallcircle">
                </div>
            </div>
            <!-- 第二个圆环 -->
            <div class="colorcircle circle2">
                <div class="smallcircle">
                </div>
            </div>
            <div class="clear"> </div>
        </div>
        <div class="bottom">
            <!-- 第一个圆环 -->
           <div class="colorcircle circle1">
               <div class="smallcircle">
               </div>
           </div>
           <!-- 第二个圆环 -->
           <div class="colorcircle circle2">
               <div class="smallcircle">
               </div>
           </div>
           <div class="clear"> </div>
       </div>
    </div>
</body>
</html>
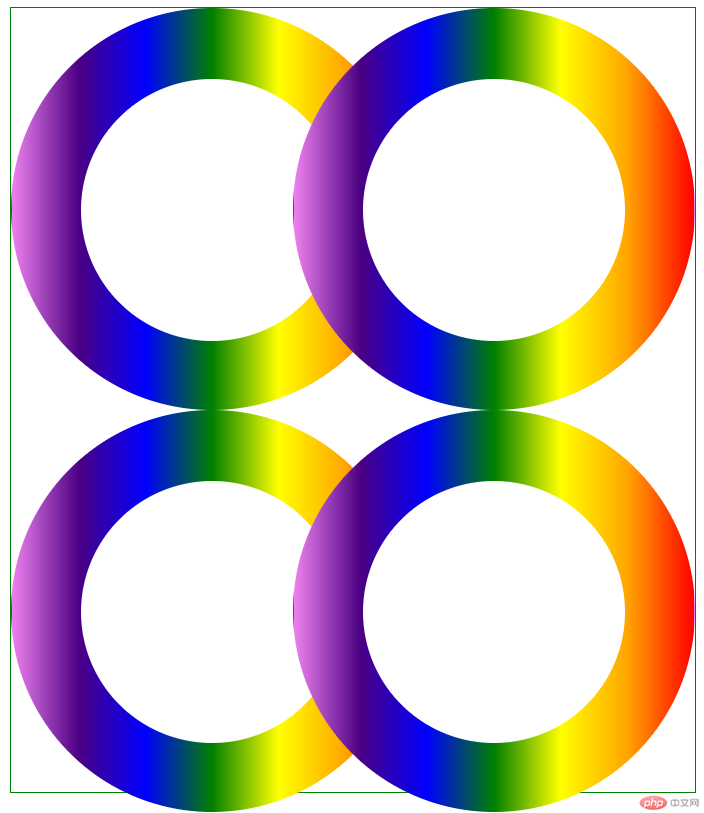
运行结果如下:

发现下面部分.bottom的margin-top好像失效了,其实如果我们将.bottom的border设置成红色,可以看出,其实也是上移了20px,但是因为里面圆环是float的,且默认的postion为relative,所以圆环是无法再上移的,怎么办呢?这里提供两种解决方案:
1、我们将.bottom的postion设置为absoute
index.css中.bottom代码修改如下:
.bottom{
    margin-top:-20px;
    position: absolute;
}
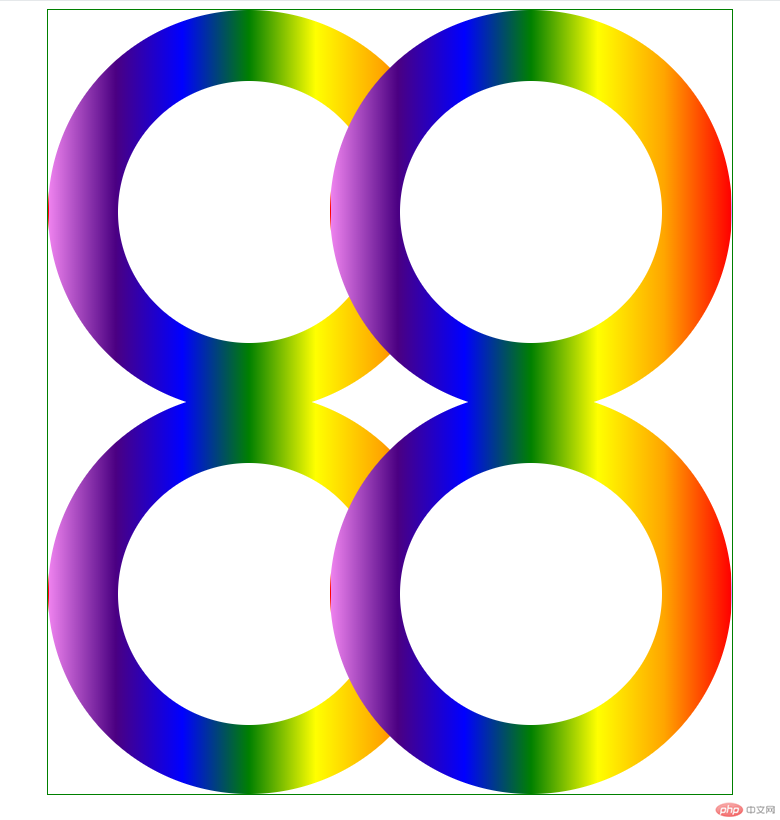
我们再来运行效果:

我们发现效果实现了
还有一种方法就是
2、通过让.top,.bottom上下两个div都float:left,也可以解决,只不过这样在.container的最后需要添加.clear 块
index.html代码修改如下:
<!DOCTYPE html>
<html lang="en">
<head>
    <meta charset="UTF-8">
    <meta name="viewport" content="width=device-width, initial-scale=1.0">
    <title>渐变圆环</title>
    <link rel="stylesheet" href="css/index.css" />
</head>
<body>
    <div class="container">
        <div class="top">
             <!-- 第一个圆环 -->
            <div class="colorcircle circle1">
                <div class="smallcircle">
                </div>
            </div>
            <!-- 第二个圆环 -->
            <div class="colorcircle circle2">
                <div class="smallcircle">
                </div>
            </div>
            <div class="clear"> </div>
        </div>
        <div class="bottom">
            <!-- 第一个圆环 -->
           <div class="colorcircle circle1">
               <div class="smallcircle">
               </div>
           </div>
           <!-- 第二个圆环 -->
           <div class="colorcircle circle2">
               <div class="smallcircle">
               </div>
           </div>
           <div class="clear"> </div>
       </div>
       <!--如果.top,.bottom都float了,需要加上此行-->
       <div class="clear"> </div>
    </div>
</body>
</html>
index.css代码如下:
.container *{
    padding:0;
    margin: 0;
}

.colorcircle{
    width:400px;
    height:400px;
    border-radius: 400px;
    background-image:linear-gradient(to left, red, orange,yellow,green,blue,indigo,violet);

    border:1px solid transparent;
    float: left;
}
.smallcircle{
    width: 260px;
    height: 260px;

    border-radius: 260px;
    background-color: white;
    margin:70px auto;
    border:1px solid transparent;
}
.clear{
    clear: both;
    float: none;
    width: 0;
    height: 0;
}
.circle2{
    margin-left:-120px;
}

/* 解决上移问题 */
.bottom{
    margin-top:-20px;
    float: left;
}
.top{
    float: left;
}
/* end */
.container{
    border:1px solid green;
    width:684px;
    margin:0 auto;
    height: 784px;
}
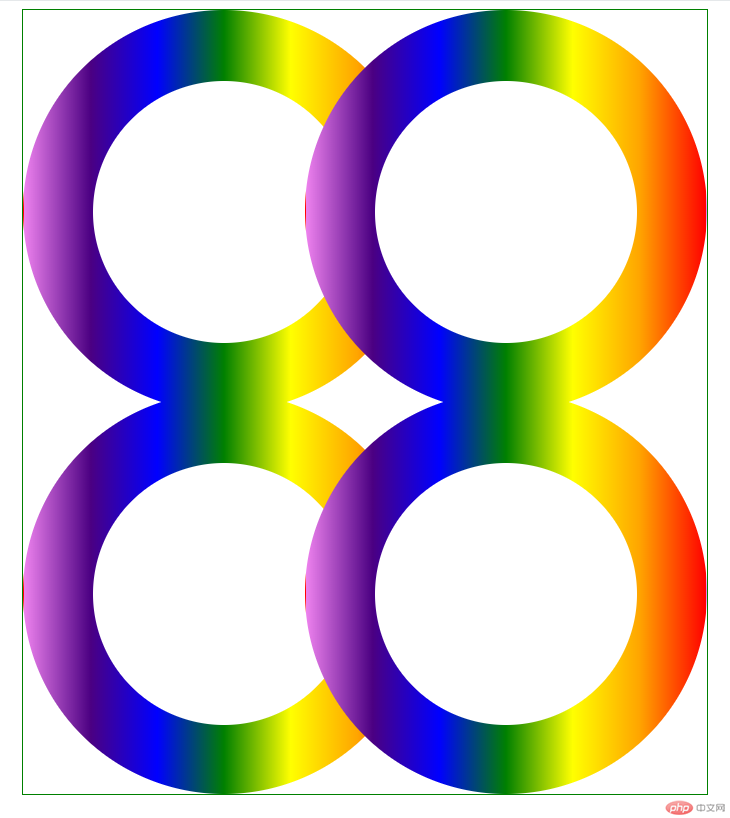
运行结果为:

效果还是一样的
到此为止,我们就实现了全部的需求
总结:
1、学习了CSS3中线线渐变的语法如
linear-gradient(to left, red, orange,yellow,green,blue,indigo,violet);
其中方向left也可以是right,后面的颜色,可以2个或者3个都可以自定义
希望本文能给大家带来一定的帮助,谢谢!!!
以上是CSS3线性渐变实现4圆环相连(代码实例)的详细内容。更多信息请关注PHP中文网其他相关文章!
 如何使用HTML,CSS和JavaScript创建动画倒计时计时器Apr 11, 2025 am 11:29 AM
您是否曾经在项目上需要一个倒计时计时器?对于这样的东西,可以自然访问插件,但实际上更多


热AI工具

Undresser.AI Undress
人工智能驱动的应用程序,用于创建逼真的裸体照片

AI Clothes Remover
用于从照片中去除衣服的在线人工智能工具。

Undress AI Tool
免费脱衣服图片

Clothoff.io
AI脱衣机

AI Hentai Generator
免费生成ai无尽的。

热门文章

热工具

WebStorm Mac版
好用的JavaScript开发工具

螳螂BT
Mantis是一个易于部署的基于Web的缺陷跟踪工具,用于帮助产品缺陷跟踪。它需要PHP、MySQL和一个Web服务器。请查看我们的演示和托管服务。

SecLists
SecLists是最终安全测试人员的伙伴。它是一个包含各种类型列表的集合,这些列表在安全评估过程中经常使用,都在一个地方。SecLists通过方便地提供安全测试人员可能需要的所有列表,帮助提高安全测试的效率和生产力。列表类型包括用户名、密码、URL、模糊测试有效载荷、敏感数据模式、Web shell等等。测试人员只需将此存储库拉到新的测试机上,他就可以访问到所需的每种类型的列表。

VSCode Windows 64位 下载
微软推出的免费、功能强大的一款IDE编辑器

Atom编辑器mac版下载
最流行的的开源编辑器


