本篇文章主要介绍了Vue2.0 多 Tab切换组件的封装实例,内容挺不错的,现在分享给大家,也给大家做个参考。
Vue2.0 多 Tab切换组件简单封装,满足自己简单的功能,可以直接拿去使用!
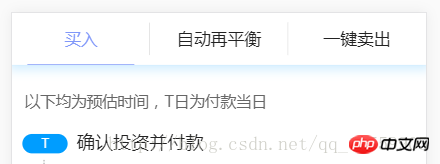
首先上效果图:

功能简单介绍:
1、支持tab切换
2、支持tab定位
3、支持tab自动化
仿React多Tab实现,总之可以正常使用满足日常需求,
1、使用方法:
==index.vue文件==
<TabItems>
  <p name="买入" class="first">
    <Content :isContTab = "0" />
  </p>
  <p name="自动再平衡" class="second">
    <Content :isContTab = "1" />
  </p>
  <p name="一键卖出" class="three">
    <Content :isContTab = "2" />
  </p>
</TabItems>
PS:TabItems是我的TabSwitch组件,tab页面标题就是 p 中的name值,俩面是内容,也可以是子组件。
接下来展示TabItems组件
2、组件
index.less文件
body,html {margin: 0;}

* {
  opacity: 1;
  -webkit-backface-visibility: hidden;
}

.tabItems {
  .Tab_tittle_wrap {
    position: absolute;
    width: 100%;
    top: 0;
    z-index: 2;
    background: @ffffff;
    display: -webkit-box;
    height: 80px;
    line-height: 80px;
    text-align: center;
    color: @222222;
    border-bottom: 1px solid rgba(46, 177, 255, 0.08);
    box-shadow: 0px 0px 25px 6px rgba(46, 177, 255, 0.21);
    span {
      display: block;
      text-align: center;
      width: 26%;
      margin: 0 24px;
      font-size: 26px;
      position: relative;
      i {
        display: inline-block;
        position: absolute;
        width: 1px;
        height: 50px;
        top: 15px;
        right: -24px;
        background: @dddddd;
      }
      &:last-child {
        i {
          display: none;
        }
      }
    }
    .router-link-active {
      color: #8097f9;
      border-bottom: 1px solid #8097f9;
    }
  }
  .Tab_item_wrap {
    position: absolute;
    top: 82px;
    width: 100%;
    z-index: 0;
    background: @ffffff;
    bottom: 0;
    overflow-x: hidden;
    -webkit-overflow-scrolling: touch;
  }
  .showAnminous {
    opacity: 1;
    -webkit-backface-visibility: hidden;
    -webkit-animation-name: "rightMove";
    /*动画名称,需要跟@keyframes定义的名称一致*/
    -webkit-animation-duration: .3s;
    /*动画持续的时间长*/
    -webkit-animation-iteration-count: 1;
    /*动画循环播放的次数为1 infinite为无限次*/
  }
}

@-webkit-keyframes rightMove {
  0% {
    -webkit-transform: translate(110%, 0);
  }
  100% {
    -webkit-transform: translate(0, 0);
  }
}

@-ms-keyframes rightMove {
  0% {
    -ms-transform: translate(110%, 0);
  }
  100% {
    -ms-transform: translate(0, 0);
  }
}

@keyframes rightMove {
  0% {
    -webkit-transform: translate(110%, 0);
    -ms-transform: translate(110%, 0);
    transform: translate(110%, 0);
  }
  100% {
    -webkit-transform: translate(0, 0);
    -ms-transform: translate(0, 0);
    transform: translate(0, 0);
  }
}
TabItems.vue
<template>
<p class="tabItems">
<p class="Tab_tittle_wrap" @click="tabswitch">
<span v-for="(v,i) in tabTitle" :style="{width:(100/tabTitle.length-7.5)+'%'}" :class="isShowTab==i?'router-link-active':''">{{v}}<i></i></span>
</p>
<p class="Tab_item_wrap">
<slot></slot>
</p>
</p>
</template>
<style lang="less">
@import "./less/index";
</style>
<script>
export default {
data() {
return {
tabTitle: [],
isShowTab: 0,
}
},
created: function() {
let is = sessionStorage.getItem("isTabShow");
if(is) {
this.isShowTab = is;
} else {
let URL = libUtils.GetURLParamObj();
this.isShowTab = URL.isShowTab ? URL.isShowTab : "0";
}
setTimeout(function() {
this.tabswitch(document.querySelector(".Tab_tittle_wrap").children[this.isShowTab].click());
}.bind(this), 0);
},
mounted() {
let slot = this.$slots.default;
for(let i = 0; i < slot.length; i++) {
if(slot[i].tag == "p") {
this.tabTitle.push(slot[i].data.attrs.name);
if(slot[i].elm) {
slot[i].elm.className = "hide";
if(this.isShowTab == i) {
slot[i].elm.className = "";
}
};
}
}
},
methods: {
tabswitch() {
if(!event) return;
let target = event.target;
if(target.nodeName.toLowerCase() !== 'span') {
return;
}
let len = target.parentNode.children;
for(let i = 0; i < len.length; i++) {
len[i].index = i;
len[i].removeAttribute('class');
}
target.setAttribute('class', 'router-link-active');
this.isShowTab = target.index;
//tabItems
let child = this.$el.children[1].children;
for(let k = 0; k < child.length; k++) {
child[k].className = "hide";
if(k == target.index) {
child[k].className = "showAnminous";
}
}
try {
sessionStorage.setItem("isTabShow", target.index);
} catch(err) {
console.log(err);
}
}
}
}
</script>
PS:
created、mounted这两个方法不需要过多介绍,Vue生命周期
1、created方法介绍。
获取浏览器链接地址:libUtils.GetURLParamObj();获取浏览器链接地址的
created这个方法主要是用来定位tab具体显示哪个页面的
2、mounted方法介绍
主要是用于隐藏内容容器的
3、tabswitch方法
用来切换组件容器的显示的页面!
以上就是本文的全部内容,希望对大家的学习有所帮助,更多相关内容请关注PHP中文网!
相关推荐:
Vue添加请求拦截器及vue-resource 拦截器的使用
以上是Vue2.0 多 Tab切换组件的封装介绍的详细内容。更多信息请关注PHP中文网其他相关文章!
 JavaScript评论:使用//和 / * * / * / * /May 13, 2025 pm 03:49 PM
JavaScriptusestwotypesofcomments:single-line(//)andmulti-line(//).1)Use//forquicknotesorsingle-lineexplanations.2)Use//forlongerexplanationsorcommentingoutblocksofcode.Commentsshouldexplainthe'why',notthe'what',andbeplacedabovetherelevantcodeforclari
 Python vs. JavaScript:开发人员的比较分析May 09, 2025 am 12:22 AM
Python和JavaScript的主要区别在于类型系统和应用场景。1.Python使用动态类型,适合科学计算和数据分析。2.JavaScript采用弱类型,广泛用于前端和全栈开发。两者在异步编程和性能优化上各有优势,选择时应根据项目需求决定。
 Python vs. JavaScript:选择合适的工具May 08, 2025 am 12:10 AM
选择Python还是JavaScript取决于项目类型:1)数据科学和自动化任务选择Python;2)前端和全栈开发选择JavaScript。Python因其在数据处理和自动化方面的强大库而备受青睐,而JavaScript则因其在网页交互和全栈开发中的优势而不可或缺。
 Python和JavaScript:了解每个的优势May 06, 2025 am 12:15 AM
Python和JavaScript各有优势,选择取决于项目需求和个人偏好。1.Python易学,语法简洁,适用于数据科学和后端开发,但执行速度较慢。2.JavaScript在前端开发中无处不在,异步编程能力强,Node.js使其适用于全栈开发,但语法可能复杂且易出错。
 JavaScript的核心:它是在C还是C上构建的?May 05, 2025 am 12:07 AM
javascriptisnotbuiltoncorc; saninterpretedlanguagethatrunsonenginesoftenwritteninc.1)javascriptwasdesignedAsalightweight,解释edganguageforwebbrowsers.2)Enginesevolvedfromsimpleterterterpretpreterterterpretertestojitcompilerers,典型地提示。
 JavaScript应用程序:从前端到后端May 04, 2025 am 12:12 AM
JavaScript可用于前端和后端开发。前端通过DOM操作增强用户体验,后端通过Node.js处理服务器任务。1.前端示例:改变网页文本内容。2.后端示例:创建Node.js服务器。
 Python vs. JavaScript:您应该学到哪种语言?May 03, 2025 am 12:10 AM
选择Python还是JavaScript应基于职业发展、学习曲线和生态系统:1)职业发展:Python适合数据科学和后端开发,JavaScript适合前端和全栈开发。2)学习曲线:Python语法简洁,适合初学者;JavaScript语法灵活。3)生态系统:Python有丰富的科学计算库,JavaScript有强大的前端框架。
 JavaScript框架:为现代网络开发提供动力May 02, 2025 am 12:04 AM
JavaScript框架的强大之处在于简化开发、提升用户体验和应用性能。选择框架时应考虑:1.项目规模和复杂度,2.团队经验,3.生态系统和社区支持。


热AI工具

Undresser.AI Undress
人工智能驱动的应用程序,用于创建逼真的裸体照片

AI Clothes Remover
用于从照片中去除衣服的在线人工智能工具。

Undress AI Tool
免费脱衣服图片

Clothoff.io
AI脱衣机

Video Face Swap
使用我们完全免费的人工智能换脸工具轻松在任何视频中换脸!

热门文章

热工具

EditPlus 中文破解版
体积小,语法高亮,不支持代码提示功能

Dreamweaver CS6
视觉化网页开发工具

Atom编辑器mac版下载
最流行的的开源编辑器

SublimeText3汉化版
中文版,非常好用

适用于 Eclipse 的 SAP NetWeaver 服务器适配器
将Eclipse与SAP NetWeaver应用服务器集成。


