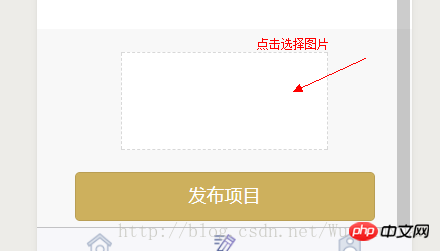
这篇文章主要介绍了微信小程序上传图片到服务器的实例代码,在文章给大家补充介绍了微信小程序上传一或多张图片 的方法,本文给大家介绍的非常详细,具有参考借鉴加载,需要的朋友可以参考下
上传图片到服务器:
1.先在前端写一个选择图片的区域来触发wx.chooseImage接口并用wx.setStorage接口把图片路径存起来。

-wxml
<view class="shangchuan" bindtap="choose">
<image style="width:100%;height:100%;" src="{{tempFilePaths}}"></image>
</view>
<button formType='submit' class="fabu">发布项目</button>
/**选择图片 */
choose: function () {
var that = this
wx.chooseImage({
count: 1,
sizeType: ['original', 'compressed'], // 可以指定是原图还是压缩图,默认二者都有
sourceType: ['album', 'camera'], // 可以指定来源是相册还是相机,默认二者都有
success: function (res) {
var tempFilePaths = res.tempFilePaths
that.setData({
tempFilePaths: res.tempFilePaths
})
console.log(res.tempFilePaths)
wx.setStorage({ key: "card", data: tempFilePaths[0] })
}
})
},
2.使用wx.uploadFile将刚才上传的图片上传到服务器上
 formSubmit2: function (e) {
    var that = this
    var card = wx.getStorageSync('card')
    wx.uploadFile({
     url: app.globalData.create_funds,
     filePath: card,
     name: 'card',
     formData: {
      'user_id': app.globalData.user_id,
      'person': e.detail.value.person,
      'company': e.detail.value.company,
     },
     success: function (res) {
      console.log(res)
     }
    })
   }
  }
 },
PS: 微信小程序上传一或多张图片
一.要点
1.选取图片
wx.chooseImage({
   sizeType: [], // original 原图,compressed 压缩图,默认二者都有
   sourceType: [], // album 从相册选图,camera 使用相机,默认二者都有
   success: function (res) {
    console.log(res);
    var array = res.tempFilePaths, //图片的本地文件路径列表
   }
  })
2.上传图片
wx.uploadFile({
   url: '', //开发者服务器的 url
   filePath: '', // 要上传文件资源的路径 String类型!!!
   name: 'uploadFile', // 文件对应的 key ,(后台接口规定的关于图片的请求参数)
   header: {
    'content-type': 'multipart/form-data'
   }, // 设置请求的 header
   formData: { }, // HTTP 请求中其他额外的参数
   success: function (res) {
   },
   fail: function (res) {
   }
  })
二.代码示例
// 点击上传图片
upShopLogo: function () {
  var that = this;
  wx.showActionSheet({
   itemList: ['从相册中选择', '拍照'],
   itemColor: "#f7982a",
   success: function (res) {
    if (!res.cancel) {
     if (res.tapIndex == 0) {
      that.chooseWxImageShop('album')
     } else if (res.tapIndex == 1) {
      that.chooseWxImageShop('camera')
     }
    }
   }
  })
 },
 chooseWxImageShop: function (type) {
  var that = this;
  wx.chooseImage({
   sizeType: ['original', 'compressed'],
   sourceType: [type],
   success: function (res) {
/*上传单张
    that.data.orderDetail.shopImage = res.tempFilePaths[0],
    that.upload_file(API_URL + 'shop/shopIcon', res.tempFilePaths[0])
*/
 /*上传多张(遍历数组,一次传一张)
    for (var index in res.tempFilePaths) {
       that.upload_file(API_URL + 'shop/shopImage', res.tempFilePaths[index])
    }
*/
   }
  })
 },
upload_file: function (url, filePath) {
  var that = this;
  wx.uploadFile({
   url: url,
   filePath: filePath,
   name: 'uploadFile',
   header: {
    'content-type': 'multipart/form-data'
   }, // 设置请求的 header
   formData: { 'shopId': wx.getStorageSync('shopId') }, // HTTP 请求中其他额外的 form data
   success: function (res) {
    wx.showToast({
       title: "图片修改成功",
       icon: 'success',
       duration: 700
      })
   },
   fail: function (res) {
   }
  })
 },
以上就是本文的全部内容,希望对大家的学习有所帮助,更多相关内容请关注PHP中文网!
相关推荐
以上是关于微信小程序上传图片到服务器的代码的详细内容。更多信息请关注PHP中文网其他相关文章!
声明
本文内容由网友自发贡献,版权归原作者所有,本站不承担相应法律责任。如您发现有涉嫌抄袭侵权的内容,请联系admin@php.cn

热AI工具

Undresser.AI Undress
人工智能驱动的应用程序,用于创建逼真的裸体照片

AI Clothes Remover
用于从照片中去除衣服的在线人工智能工具。

Undress AI Tool
免费脱衣服图片

Clothoff.io
AI脱衣机

Video Face Swap
使用我们完全免费的人工智能换脸工具轻松在任何视频中换脸!

热门文章
刺客信条阴影:贝壳谜语解决方案
3 周前ByDDD
Windows 11 KB5054979中的新功能以及如何解决更新问题
2 周前ByDDD
在哪里可以找到原子中的起重机控制钥匙卡
3 周前ByDDD
<🎜>:死铁路 - 如何完成所有挑战
4 周前ByDDD
Atomfall指南:项目位置,任务指南和技巧
4 周前ByDDD

热工具

适用于 Eclipse 的 SAP NetWeaver 服务器适配器
将Eclipse与SAP NetWeaver应用服务器集成。

Dreamweaver Mac版
视觉化网页开发工具

SublimeText3 英文版
推荐:为Win版本,支持代码提示!

螳螂BT
Mantis是一个易于部署的基于Web的缺陷跟踪工具,用于帮助产品缺陷跟踪。它需要PHP、MySQL和一个Web服务器。请查看我们的演示和托管服务。

WebStorm Mac版
好用的JavaScript开发工具


