


这篇文章主要为大家详细介绍了HTML5本地图片裁剪并上传的相关资料,具有一定的参考价值,感兴趣的小伙伴们可以参考一下
最近做了一个项目,这个项目中需要实现的一个功能是:用户自定义头像(用户在本地选择一张图片,在本地将图片裁剪成满足系统要求尺寸的大小)。这个功能的需求是:头像最初剪切为一个正方形。如果选择的图片小于规定的头像要求尺寸,那么这整张图片都会作为头像。如果大于规定的尺寸,那么用户可以选择要裁剪的区域。用户点击确定按钮,就将裁剪得到的图片数据发送到服务器,在后端将图片数据保存成一个文件。
要完成上述功能,涉及到的知识有:ajax,canvas和html5中的files接口。我将实现这个功能的代码封装到了4个模块中,分别是ajax.js,preview.js,shear.js和customerImg.js。
ajax.js:用于发送ajax请求。
preview.js:用于图片预览
shear.js:用于裁剪图片
customer.js:自定义头像。在这个模块中药引入ajax.js,preview.js和shear.js
我使用webpack进行打包。我还使用了jquery和jquery-ui。
我从这个项目中抽离出了这个功能。下面是这个功能的详细代码。
1.HTML代码
<p class="m-warp" id="warp">
  <p class="item">
   <input type="file" name="img" id="img" hidden>
   <label for="img">选择图片</label>
  </p>
  <p class="item clearfix">
   <p class="col col-1">
    <p class="preview" id="preview">
     <p class="mask"></p>
     <canvas class="cvsMove" id="cvsMove"></canvas>
    </p>
   </p>

   <p class="thum col-2 col">
    <p>预览</p>
    <img src="" id="thum">
    <p class="f-text-l f-marTop-20">
     <button class="shear" id="submit">确定</button>
    </p>
   </p>
  </p>
 </p>
2.CSS代码
.clearfix:after{
content: "";
display: block;
clear: both;
height: 0;
overflow: hidden;
visibility: hidden;
}
img{
vertical-align: middle;
max-width:100%
}
.m-warp{
width: 800px;
}
.item{
margin-top: 20px;
}
.col{
float: left;
}
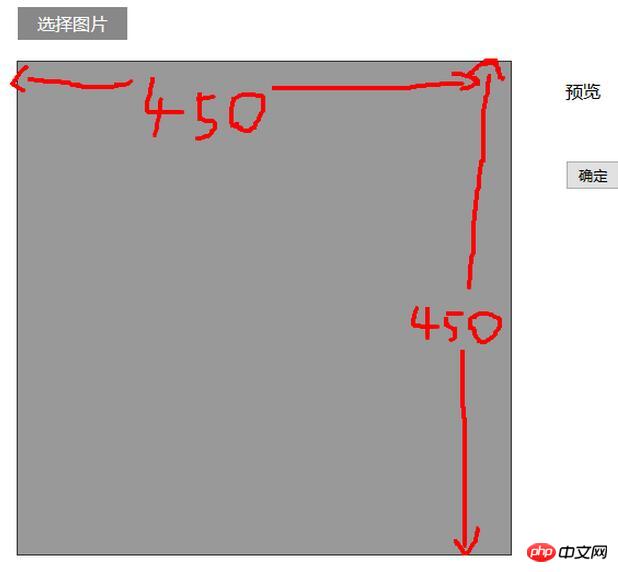
.col-1{
position: relative;
width: 450px;
height: 450px;
outline: 1px solid #333;
}
.preview{
display: inline-block;
}
.col-2{
width: 300px;
margin-left: 50px;
}
label{
display: block;
text-align: center;
width: 100px;
font-size: 16px;
color: #fff;
background-color: #888888;
height: 30px;
line-height: 30px;
}
.mask{
position: absolute;
z-index: 1;
top:0;
left: 0;
bottom: 0;
right: 0;
background-color: rgba(0,0,0,.4);
}
.cvsMove{
position: absolute;
z-index: 2;
outline: 2px dotted #333;
cursor: move;
display: none;
}
有了css和html的运行结果如下:
3.js代码
customerImg.js
var $ = require('jquery');
var ajax = require('./ajax.js');
var preview = require('./preview.js');
var shear = require('./shear.js');
/**
* 自定义头像
* @constructor
*/
function CustomerImg() {
this.isSupport = null;
this.previewBox = null;
this.warp = null;
}
/**
* 入口
* @param warp 操作区域 jquery节点
*/
CustomerImg.prototype.start = function (warp) {
var info,me,warpBox;
me = this;
this.isSupport = this.__isSupport();
if(!this.isSupport) {
info = $('<p>你的浏览器不支持自定义头像,可更换高版本的浏览器自定义头像</p>');
$('body').html(info);
return this;
}
//判断操作区域示范存在
if(warp && warp.length > 0){
this.warp = warp;
}else{
return this;
}
//预览
preview.start(warp,shear.start.bind(shear,warp));
this.previewBox = warp.find('#preview');
//确定
warp
.find('#submit')
.unbind('click')
.on('click',me.__submit.bind(me));
};
/**
* 提交
* @private
*/
CustomerImg.prototype.__submit = function () {
var cvsMove,data,fd;
cvsMove = this.previewBox.find('#cvsMove');
data = cvsMove[0].toDataURL('image/jpg',1);
fd = {
'customerImg':data
};
ajax.upload(fd);
};
/**
* 判断是否支持自定义头像
* @returns {boolean}
* @private
*/
CustomerImg.prototype.__isSupport = function () {
var canvas,context;
canvas= document.createElement('canvas');
if(typeof FileReader === 'function'&& canvas.getContext && canvas.toDataURL){
return true;
}else{
return false;
}
};
var customerImg = new CustomerImg();
module.exports = customerImg;
preview.js
/**
* Created by star on 2017/3/7.
*/
var $ = require('jquery');
/**
* 预览类
* @constructor
*/
function Preview() {
this.boxElem = null;
this.callback = null;
this.type = null;
}
/**
* 入口
* @param boxElem 操作区域
* @param callback 预览结束的回调函数
*/
Preview.prototype.start = function (boxElem,callback) {
var chooseFile,me;
me = this;
if(! boxElem || boxElem.length <= 0) return this;
this.boxElem = boxElem;
if(typeof callback === 'function'){
this.callback = callback;
}
if(this.__isSupport()){
chooseFile = boxElem.find('input[type="file"]');
chooseFile
.on('change',me.fileChange.bind(me))
}
};
/**
* 选择图片的事件处理程序
* @param event
*/
Preview.prototype.fileChange = function (event) {
var target,reader,file,me,type;
target = event.target;
me = this;
file = target.files[0];
type = file.type;
this.type = type;
if(type !== 'image/png' && type !== 'image/jpg' && type !== 'image/jpeg'){
alert('文件格式不正确');
return this;
}
reader = new FileReader();
if(file){
reader.readAsDataURL(file);
}
reader.onload = function () {
me.show(reader);
}
};
/**
* 显示从本地选择的图片
* @param reader fileReader对象
*/
Preview.prototype.show = function (reader) {
var preView,img,me;
preView = this.boxElem.find('#preview');
img = preView.find('#preImg');
me = this;
if(img.length <= 0){
preView.append($('<img id="preImg">'));
}
img = preView.find('#preImg');
//确保图片加载完成后再执行回调
img.on('load',function () {
if(me.callback){
me.callback(me.type);
}
});
img.attr('src',reader.result);
};
/**
* 是否支持预览
* @returns {boolean}
* @private
*/
Preview.prototype.__isSupport = function () {
return typeof FileReader === 'function';
};
var preview = new Preview();
module.exports = preview;
shear.js
var $ = require('jquery');
//由于要使用jquery-ui,所以将$暴露到window上。
window.$ = $;
require('./jquery-ui.min.js');
/**
* 切割
* @constructor
*/
function Shear() {
this.previewBox = null;
this.cvsMove = null;
this.maxW = 200;
this.maxH = 200;
this.thum = null;
this.fileType = 'image/jpeg';
}
/**
* 入口
* @param previewBox 预览元素的父元素
* @param fileType 裁剪的图片的类型 如:'image/jpg'
* @returns {Shear}
*/
Shear.prototype.start = function (previewBox,fileType) {
if(!arguments.length) return this;
var me = this;
this.previewBox = previewBox;
if(fileType){
this.fileType = fileType;
}
this.thum = this.previewBox.find('#thum');
this.cvsMove = this.previewBox.find('#cvsMove');
this.showCanvas();
return this;
};
/**
* 显示出canvas
*/
Shear.prototype.showCanvas = function () {
var preImg,h,w,me,cvsH,cvsW,rateH,rateW,naturalH,naturalW,preview;
me = this;
preImg = this.previewBox.find('#preImg');
preview = this.previewBox.find('#preview');
naturalH = preImg[0].naturalHeight;
naturalW = preImg[0].naturalWidth;
//将canvas显示出来
this.cvsMove.show();
//将canvas置于(0,0)
this.cvsMove
.css({
"left":'0',
'top':'0'
});
h = preImg.height();
w = preImg.width();
//规定裁剪出的图片尺寸为200px*200px
//要保证裁剪的图片不变形
if(h < this.maxH || w < this.maxW){
this.cvsMove[0].width = cvsW = Math.min(h,w);
this.cvsMove[0].height = cvsH = Math.min(h,w);
}else{
this.cvsMove[0].width= cvsW = this.maxW;
this.cvsMove[0].height= cvsH = this.maxH;
}
rateH = h/naturalH;
rateW = w/naturalW;
this.__drawImg(preImg,0,0,cvsW/rateW,cvsH/rateH,0,0,cvsW,cvsH);
//使用jquery-ui中的功能使canvas可以移动
this.cvsMove.draggable(
{
containment: "parent",
drag:function (event,ui) {
var left,top;
left = ui.position.left;
top = ui.position.top;
//canvas每次移动都有从新绘制图案
me.__drawImg(preImg,left/rateW,top/rateH,cvsW/rateW,cvsH/rateH,0,0,cvsW,cvsH);
}
}
)
};
/**
* 在canvas上显示图片
* @param myImg 要显示的图片节点
* @param sx 图片的起点在原图片上的x坐标
* @param sy 图片的起点在原图上的y坐标
* @param sW 在原图上的宽度
* @param sH 在原图上的高度
* @param dx 起点在canvas上的x坐标
* @param dy 起点在canvas上的y坐标
* @param dW 在canvas上的宽度
* @param dH 在canvas上的高度
* @private
*/
Shear.prototype.__drawImg = function (myImg,sx,sy,sW,sH,dx,dy,dW,dH) {
var cxt,thum,me;
me = this;
cxt = this.cvsMove[0].getContext('2d');
cxt.drawImage(myImg[0],sx,sy,sW,sH,dx,dy,dW,dH);
thum = this.thum;
//将canvas上的图案显示到右侧
thum
.attr('src',this.cvsMove[0].toDataURL(me.fileType,1))
.width(this.maxW)
.height(this.maxH)
};
var shear = new Shear();
module.exports = shear;
ajax.js
var $ = require('jquery');
function Ajax() {

}
/**
 * 上传图片数据
 */
Ajax.prototype.upload = function (data) {
 $.ajax({
  type:'POST',
  data:data,
  dataType:'json',
  url:'/test/PHP/upload.php',
  success:function (result) {
   if(result.status){
    location.reload();
   }else{
    alert(result.msg);
   }
  }
 });
};
var ajax = new Ajax();
module.exports = ajax;
最后在另一个文件中,调用customerImg对象的start方法
var $ = require('jquery');
var customerImg =require('./customerImg.js');
customerImg.start($('#warp'));
webpack的配置文件如下:
var webpack = require('webpack');
module.exports = {
 entry:{
  'customerImg':'./js/test.js',
  'jQuery':['jquery']
 },
 output:{
  filename:'[name].js',
  library:'jQuery',
  libraryTarget:'umd'
 },
 plugins:[
  new webpack.optimize.CommonsChunkPlugin({
   name:'jQuery',
   filename:'jquery.js'
  })
 ]
};
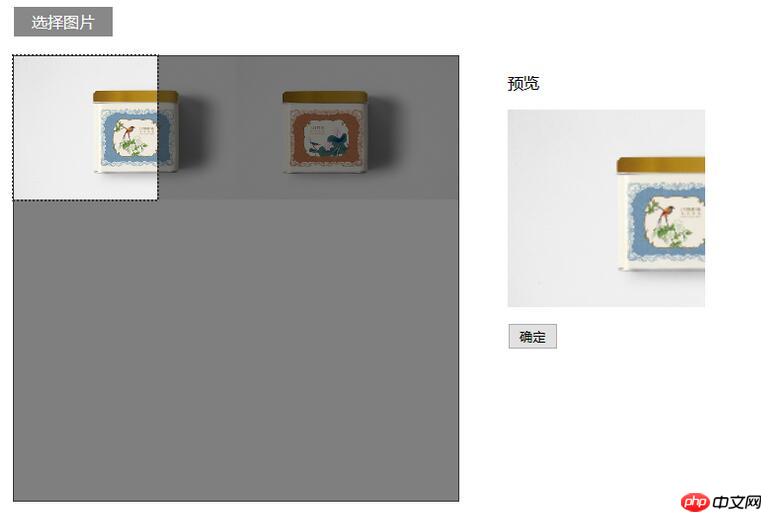
效果:
4.php代码
if(!empty($_POST) && isset($_POST['customerImg'])){
 $img = $_POST['customerImg'];
 $imgdata = explode(',', $img);
 $uniName = md5 ( uniqid ( microtime ( true ), true ) );
 $a = file_put_contents('./../uploads/'.$uniName.'.jpg', base64_decode($imgdata[1]));
}
以上就是本文的全部内容,希望对大家的学习有所帮助,更多相关内容请关注PHP中文网!
相关推荐:
以上是HTML5和JS实现本地图片裁剪并上传功能的详细内容。更多信息请关注PHP中文网其他相关文章!

 H5:网络标准和技术的发展Apr 15, 2025 am 12:12 AM
Web标准和技术从HTML4、CSS2和简单的JavaScript演变至今,经历了显着的发展。 1)HTML5引入了Canvas、WebStorage等API,增强了Web应用的复杂性和互动性。 2)CSS3增加了动画和过渡功能,使页面效果更加丰富。 3)JavaScript通过Node.js和ES6的现代化语法,如箭头函数和类,提升了开发效率和代码可读性,这些变化推动了Web应用的性能优化和最佳实践的发展。
 H5是HTML5的速记吗?探索细节Apr 14, 2025 am 12:05 AM
H5不仅仅是HTML5的简称,它代表了一个更广泛的现代网页开发技术生态:1.H5包括HTML5、CSS3、JavaScript及相关API和技术;2.它提供更丰富、互动、流畅的用户体验,能在多设备上无缝运行;3.使用H5技术栈可以创建响应式网页和复杂交互功能。
 H5和HTML5:网络开发中常用的术语Apr 13, 2025 am 12:01 AM
H5与HTML5指的是同一个东西,即HTML5。HTML5是HTML的第五个版本,带来了语义化标签、多媒体支持、画布与图形、离线存储与本地存储等新功能,提升了网页的表现力和交互性。
 H5指的是什么?探索上下文Apr 12, 2025 am 12:03 AM
H5referstoHTML5,apivotaltechnologyinwebdevelopment.1)HTML5introducesnewelementsandAPIsforrich,dynamicwebapplications.2)Itsupportsmultimediawithoutplugins,enhancinguserexperienceacrossdevices.3)SemanticelementsimprovecontentstructureandSEO.4)H5'srespo
 H5:工具,框架和最佳实践Apr 11, 2025 am 12:11 AM
H5开发需要掌握的工具和框架包括Vue.js、React和Webpack。1.Vue.js适用于构建用户界面,支持组件化开发。2.React通过虚拟DOM优化页面渲染,适合复杂应用。3.Webpack用于模块打包,优化资源加载。
 HTML5的遗产:当前了解H5Apr 10, 2025 am 09:28 AM
HTML5hassignificantlytransformedwebdevelopmentbyintroducingsemanticelements,enhancingmultimediasupport,andimprovingperformance.1)ItmadewebsitesmoreaccessibleandSEO-friendlywithsemanticelementslike,,and.2)HTML5introducednativeandtags,eliminatingthenee
 H5代码:可访问性和语义HTMLApr 09, 2025 am 12:05 AM
H5通过语义化元素和ARIA属性提升网页的可访问性和SEO效果。1.使用、、等元素组织内容结构,提高SEO。2.ARIA属性如aria-label增强可访问性,辅助技术用户可顺利使用网页。
 H5与HTML5相同吗?Apr 08, 2025 am 12:16 AM
"h5"和"HTML5"在大多数情况下是相同的,但它们在某些特定场景下可能有不同的含义。1."HTML5"是W3C定义的标准,包含新标签和API。2."h5"通常是HTML5的简称,但在移动开发中可能指基于HTML5的框架。理解这些区别有助于在项目中准确使用这些术语。


热AI工具

Undresser.AI Undress
人工智能驱动的应用程序,用于创建逼真的裸体照片

AI Clothes Remover
用于从照片中去除衣服的在线人工智能工具。

Undress AI Tool
免费脱衣服图片

Clothoff.io
AI脱衣机

AI Hentai Generator
免费生成ai无尽的。

热门文章
热工具

记事本++7.3.1
好用且免费的代码编辑器

禅工作室 13.0.1
功能强大的PHP集成开发环境

SecLists
SecLists是最终安全测试人员的伙伴。它是一个包含各种类型列表的集合,这些列表在安全评估过程中经常使用,都在一个地方。SecLists通过方便地提供安全测试人员可能需要的所有列表,帮助提高安全测试的效率和生产力。列表类型包括用户名、密码、URL、模糊测试有效载荷、敏感数据模式、Web shell等等。测试人员只需将此存储库拉到新的测试机上,他就可以访问到所需的每种类型的列表。

DVWA
Damn Vulnerable Web App (DVWA) 是一个PHP/MySQL的Web应用程序,非常容易受到攻击。它的主要目标是成为安全专业人员在合法环境中测试自己的技能和工具的辅助工具,帮助Web开发人员更好地理解保护Web应用程序的过程,并帮助教师/学生在课堂环境中教授/学习Web应用程序安全。DVWA的目标是通过简单直接的界面练习一些最常见的Web漏洞,难度各不相同。请注意,该软件中

适用于 Eclipse 的 SAP NetWeaver 服务器适配器
将Eclipse与SAP NetWeaver应用服务器集成。

