

这篇文章主要介绍了vue实现裁切图片同时实现放大、缩小、旋转功能,现在分享给大家,也给大家做个参考。
本篇文章主要介绍了vue实现裁切图片同时实现放大、缩小、旋转功能,分享给大家,具体如下:
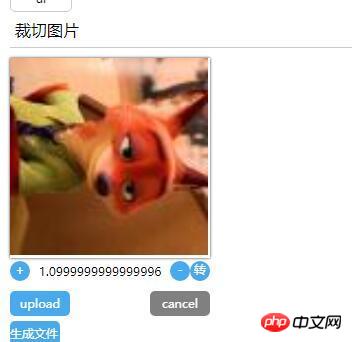
实现效果:
裁切指定区域内的图片
旋转图片
放大图片
输出bolb 格式数据 提供给 formData 对象
效果图


大概原理:
利用h5 FileReader 对象, 获取 d9fae9a589f7d7312c0f67fffbcf927a “上传到浏览器的文件” ,文件形式 为base64形式, 把 base64 赋给canvas的上下文。
然后给canvas 元素上加入对(mousedown)监听事件。 当用户鼠标左键在canvas按下时:
挂载对 window 对象mousemove事件 ---> 获取 鼠标移动x,y距离.从而操作 canvas里的图像的位置移动。
挂载对 window 对象mouseup 事件, 清除 mousemove事件的绑定。(同时该事件触发后会被删除)
剩下的 放大、缩小 、 旋转 是对 canvas 对象的操作/坐标体系的操作。具体api详见mdn canvas 文档
代码
dom.js
export const on = ({el, type, fn}) => {
if (typeof window) {
if (window.addEventListener) {
el.addEventListener(type, fn, false)
} else {
el.attachEvent(`on${type}`, fn)
}
}
}
export const off = ({el, type, fn}) => {
if (typeof window) {
if (window.addEventListener) {
el.removeEventListener(type, fn)
} else {
el.detachEvent(`on${type}`, fn)
}
}
}
export const once = ({el, type, fn}) => {
const hyFn = (event) => {
try {
fn(event)
}
finally {
off({el, type, fn: hyFn})
}
}
on({el, type, fn: hyFn})
}
// 最后一个
export const fbTwice = ({fn, time = 300}) => {
let [cTime, k] = [null, null]
// 获取当前时间
const getTime = () => new Date().getTime()
// 混合函数
const hyFn = () => {
const ags = argments
return () => {
clearTimeout(k)
k = cTime = null
fn(...ags)
}
}
return () => {
if (cTime == null) {
k = setTimeout(hyFn(...arguments), time)
cTime = getTime()
} else {
if ( getTime() - cTime < 0) {
// 清除之前的函数堆 ---- 重新记录
clearTimeout(k)
k = null
cTime = getTime()
k = setTimeout(hyFn(...arguments), time)
}
}}
}
export const contains = function(parentNode, childNode) {
if (parentNode.contains) {
return parentNode != childNode && parentNode.contains(childNode)
} else {
return !!(parentNode.compareDocumentPosition(childNode) & 16)
}
}
export const addClass = function (el, className) {
if (typeof el !== "object") {
console.log('el is not elem')
return null
}
let classList = el['className']
classList = classList === '' ? [] : classList.split(/\s+/)
if (classList.indexOf(className) === -1) {
classList.push(className)
el.className = classList.join(' ')
} else {
console.warn('warn className current')
}
}
export const removeClass = function (el, className) {
let classList = el['className']
classList = classList === '' ? [] : classList.split(/\s+/)
classList = classList.filter(item => {
return item !== className
})
el.className = classList.join(' ')
}
export const delay = ({fn, time}) => {
let oT = null
let k = null
return () => {
// 当前时间
let cT = new Date().getTime()
const fixFn = () => {
k = oT = null
fn()
}
if (k === null) {
oT = cT
k = setTimeout(fixFn, time)
return
}
if (cT - oT < time) {
oT = cT
clearTimeout(k)
k = setTimeout(fixFn, time)
}
}
}
export const Event = function () {
// 类型
this.typeList = {}
}
Event.prototype.on = function ({type, fn}){
if (this.typeList.hasOwnProperty(type)) {
this.typeList[type].push(fn)
} else {
this.typeList[type] = []
this.typeList[type].push(fn)
}
}
Event.prototype.off = function({type, fn}) {
if (this.typeList.hasOwnProperty(type)) {
let list = this.typeList[type]
let index = list.indexOf(fn)
if (index !== -1 ) {
list.splice(index, 1)
}
} else {
console.warn('not has this type')
}
}
Event.prototype.once = function ({type, fn}) {
const fixFn = () => {
fn()
this.off({type, fn: fixFn})
}
this.on({type, fn: fixFn})
}
Event.prototype.trigger = function (type){
if (this.typeList.hasOwnProperty(type)) {
this.typeList[type].forEach(fn => {
fn()
})
}
}
组件模板
<template>
<p class="jc-clip-image" :style="{width: `${clip.width}`}">
<canvas ref="ctx"
:width="clip.width"
:height="clip.height"
@mousedown="handleClip($event)"
>
</canvas>
<input type="file" ref="file" @change="readFileMsg($event)">
<p class="clip-scale-btn">
<a class="add" @click="handleScale(false)">+</a>
<a @click="rotate" class="right-rotate">转</a>
<a class="poor" @click="handleScale(true)">-</a>
<span>{{scale}}</span>
</p>
<p class="upload-warp">
<a class="upload-btn" @click="dispatchUpload($event)">upload</a>
<a class="upload-cancel">cancel</a>
</p>
<p class="create-canvas">
<a class="to-send-file" @click="outFile" title="请打开控制台">生成文件</a>
</p>
</p>
</template>
<script>
import {on, off, once} from '../../utils/dom'
export default {
ctx: null,
file: null,
x: 0, // 点击canvas x 鼠标地址
y: 0,// 点击canvas y 鼠标地址
xV: 0, // 鼠标移动 x距离
yV: 0, // 鼠标移动 y距离
nX: 0, // 原始坐标点 图像 x
nY: 0,// 原始坐标点 图像 y
img: null,
props: {
src: {
type: String,
default: null
},
clip: {
type: Object,
default () {
return {width: '200px', height: '200px'}
}
}
},
data () {
return {
isShow: false,
base64: null,
scale: 1.5, //放大比例
deg: 0 //旋转角度
}
},
computed: {
width () {
const {clip} = this
return parseFloat(clip.width.replace('px', ''))
},
height () {
const {clip} = this
return parseFloat(clip.height.replace('px', ''))
}
},
mounted () {
const {$options, $refs, width, height} = this
// 初始化 canvas file nX nY
Object.assign($options, {
ctx: $refs.ctx.getContext('2d'),
file: $refs.file,
nX: -width / 2,
nY: -height / 2
})
},
methods: {
// 旋转操作
rotate () {
const {$options, draw} = this
this.deg = (this.deg + Math.PI /2)% (Math.PI * 2)
draw($options.img, $options.nX + $options.xV, $options.nY + $options.yV, this.scale, this.deg)
},
// 处理放大
handleScale (flag) {
const {$options, draw, deg} = this
flag && this.scale > 0.1 && (this.scale = this.scale - 0.1)
!flag && this.scale < 1.9 && (this.scale = this.scale + 0.1)
$options.img && draw($options.img, $options.nX + $options.xV, $options.nY + $options.yV, this.scale, deg)
},
// 模拟file 点击事件
dispatchUpload (e) {
this.clearState()
const {file} = this.$options
e.preventDefault()
file.click()
},
// 读取 input file 信息
readFileMsg () {
const {file} = this.$options
const {draw, createImage, $options: {nX, nY}, scale, deg} = this
const wFile = file.files[0]
const reader = new FileReader()
reader.onload = (e) => {
const img = createImage(e.target.result, (img) => {
draw(img, nX, nY, scale, deg)
})
file.value = null
}
reader.readAsDataURL(wFile)
},
// 生成 图像
createImage (src, cb) {
const img = new Image()
this.$el.append(img)
img.className = 'base64-hidden'
img.onload = () => {
cb(img)
}
img.src = src
this.$options.img = img
},
// 操作画布画图
draw (img, x = 0, y = 0, scale = 0.5,deg = Math.PI ) {
const {ctx} = this.$options
let {width, height} = this
// 图片尺寸
let imgW = img.offsetWidth
let imgH = img.offsetHeight
ctx.save()
ctx.clearRect( 0, 0, width, height)
ctx.translate( width / 2, height / 2, img)
ctx.rotate(deg)
ctx.drawImage(img, x, y, imgW * scale, imgH * scale)
ctx.restore()
},
// ... 事件绑定
handleClip (e) {
const {handleMove, $options, deg} = this
if (!$options.img) {
return
}
Object.assign(this.$options, {
x: e.screenX,
y: e.screenY
})
on({
el: window,
type: 'mousemove',
fn: handleMove
})
once({
el: window,
type: 'mouseup',
fn: (e) =>{
console.log('down')
switch (deg) {
case 0: {
Object.assign($options, {
nX: $options.nX + $options.xV,
nY: $options.nY + $options.yV,
xV: 0,
yV: 0
})
break;
}
case Math.PI / 2: {
Object.assign($options, {
nX: $options.nY + $options.yV,
nY: $options.nX - $options.xV,
xV: 0,
yV: 0
})
break;
}
case Math.PI: {
Object.assign($options, {
nX: $options.nX - $options.xV,
nY: $options.nY - $options.yV,
xV: 0,
yV: 0
})
break;
}
default: {
// $options.nY - $options.yV, $options.nX + $options.xV
Object.assign($options, {
nX: $options.nY - $options.yV,
nY: $options.nX + $options.xV,
xV: 0,
yV: 0
})
}
}
off({
el: window,
type: 'mousemove',
fn: handleMove
})
}
})
},
// ... 处理鼠标移动
handleMove (e){
e.preventDefault()
e.stopPropagation()
const {$options, draw, scale, deg} = this
Object.assign($options, {
xV: e.screenX - $options.x,
yV: e.screenY - $options.y
})
switch (deg) {
case 0: {
draw($options.img, $options.nX + $options.xV, $options.nY + $options.yV, scale, deg)
break;
}
case Math.PI / 2: {
draw($options.img, $options.nY + $options.yV, $options.nX - $options.xV, scale, deg)
break;
}
case Math.PI: {
draw($options.img, $options.nX - $options.xV, $options.nY - $options.yV, scale, deg)
break;
}
default: {
draw($options.img, $options.nY - $options.yV, $options.nX + $options.xV, scale, deg)
break;
}
}
},
// 清除状态
clearState () {
const {$options, width, height} = this
if ($options.img) {
this.$el.removeChild($options.img)
Object.assign($options, {
x: 0,
y: 0,
xV: 0,
yV: 0,
nX: -width / 2,
nY: -height / 2,
img: null,
})
}
},
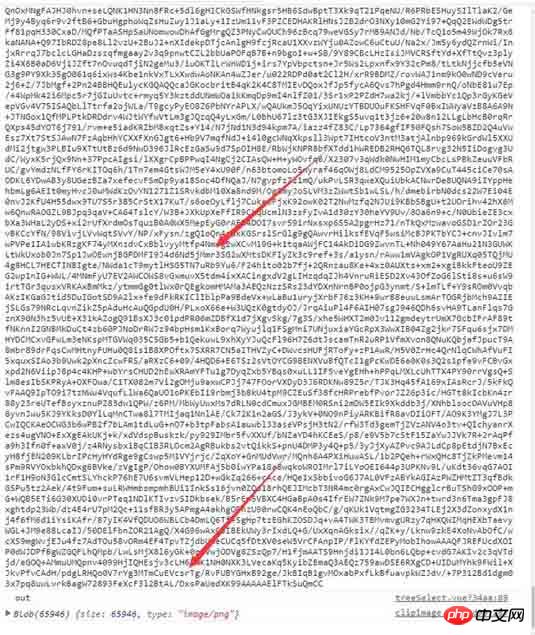
// 输出文件
outFile () {
const {$refs: {ctx}} = this
console.log(ctx.toDataURL())
ctx.toBlob((blob) => {console.log(blob)})
}
}
}
</script>
<style>
@component-namespace jc {
@component clip-image{
position: relative;
width: 100%;
canvas {
position: relative;
width: 100%;
height: 100%;
cursor: pointer;
box-shadow: 0 0 3px #333;
}
input {
display: none;
}
.base64-hidden {
position: absolute;
top: 0;
left: 0;
display: block;
width: 100%;
height: auto;
z-index: -999;
opacity: 0;
}
.clip-scale-btn {
position: relative;
@utils-clearfix;
margin-bottom: 5px;
text-align: center;
a {
float: left;
width: 20px;
height: 20px;
border-radius: 50%;
color: #fff;
background: #49a9ee;
text-align: center;
cursor: pointer;
}
&>.poor, &>.right-rotate {
float: right;
}
&>span{
position: absolute;
z-index: -9;
top: 0;
left: 0;
display: block;
position: relative;
width: 100%;
text-align: center;
height: 20px;
line-height: 20px;
}
}
.upload-warp {
@utils-clearfix;
.upload-btn,.upload-cancel {
float: left;
display:inline-block;
width: 60px;
height: 25px;
line-height: 25px;
color: #fff;
border-radius: 5px;
background: #49a9ee;
box-shadow: 0 0 0 #333;
text-align: center;
top: 0;
left: 0;
right: 0;
bottom: 0;
margin: auto;
cursor: pointer;
margin-top: 5px;
}
.upload-cancel{
background: gray;
float: right;
}
}
.to-send-file {
margin-top: 5px;
display: block;
width: 50px;
height: 25px;
line-height: 25px;
color: #fff;
border-radius: 5px;
background: #49a9ee;
cursor: pointer;
}
}
上面是我整理给大家的,希望今后会对大家有帮助。
相关文章:
以上是利用vue如何实现裁切图片同时实现放大、缩小、旋转功能(详细教程)的详细内容。更多信息请关注PHP中文网其他相关文章!

 JavaScript框架:为现代网络开发提供动力May 02, 2025 am 12:04 AM
JavaScript框架的强大之处在于简化开发、提升用户体验和应用性能。选择框架时应考虑:1.项目规模和复杂度,2.团队经验,3.生态系统和社区支持。
 JavaScript,C和浏览器之间的关系May 01, 2025 am 12:06 AM
引言我知道你可能会觉得奇怪,JavaScript、C 和浏览器之间到底有什么关系?它们之间看似毫无关联,但实际上,它们在现代网络开发中扮演着非常重要的角色。今天我们就来深入探讨一下这三者之间的紧密联系。通过这篇文章,你将了解到JavaScript如何在浏览器中运行,C 在浏览器引擎中的作用,以及它们如何共同推动网页的渲染和交互。JavaScript与浏览器的关系我们都知道,JavaScript是前端开发的核心语言,它直接在浏览器中运行,让网页变得生动有趣。你是否曾经想过,为什么JavaScr
 node.js流带打字稿Apr 30, 2025 am 08:22 AM
Node.js擅长于高效I/O,这在很大程度上要归功于流。 流媒体汇总处理数据,避免内存过载 - 大型文件,网络任务和实时应用程序的理想。将流与打字稿的类型安全结合起来创建POWE
 Python vs. JavaScript:性能和效率注意事项Apr 30, 2025 am 12:08 AM
Python和JavaScript在性能和效率方面的差异主要体现在:1)Python作为解释型语言,运行速度较慢,但开发效率高,适合快速原型开发;2)JavaScript在浏览器中受限于单线程,但在Node.js中可利用多线程和异步I/O提升性能,两者在实际项目中各有优势。
 JavaScript的起源:探索其实施语言Apr 29, 2025 am 12:51 AM
JavaScript起源于1995年,由布兰登·艾克创造,实现语言为C语言。1.C语言为JavaScript提供了高性能和系统级编程能力。2.JavaScript的内存管理和性能优化依赖于C语言。3.C语言的跨平台特性帮助JavaScript在不同操作系统上高效运行。
 幕后:什么语言能力JavaScript?Apr 28, 2025 am 12:01 AM
JavaScript在浏览器和Node.js环境中运行,依赖JavaScript引擎解析和执行代码。1)解析阶段生成抽象语法树(AST);2)编译阶段将AST转换为字节码或机器码;3)执行阶段执行编译后的代码。
 Python和JavaScript的未来:趋势和预测Apr 27, 2025 am 12:21 AM
Python和JavaScript的未来趋势包括:1.Python将巩固在科学计算和AI领域的地位,2.JavaScript将推动Web技术发展,3.跨平台开发将成为热门,4.性能优化将是重点。两者都将继续在各自领域扩展应用场景,并在性能上有更多突破。
 Python vs. JavaScript:开发环境和工具Apr 26, 2025 am 12:09 AM
Python和JavaScript在开发环境上的选择都很重要。1)Python的开发环境包括PyCharm、JupyterNotebook和Anaconda,适合数据科学和快速原型开发。2)JavaScript的开发环境包括Node.js、VSCode和Webpack,适用于前端和后端开发。根据项目需求选择合适的工具可以提高开发效率和项目成功率。


热AI工具

Undresser.AI Undress
人工智能驱动的应用程序,用于创建逼真的裸体照片

AI Clothes Remover
用于从照片中去除衣服的在线人工智能工具。

Undress AI Tool
免费脱衣服图片

Clothoff.io
AI脱衣机

Video Face Swap
使用我们完全免费的人工智能换脸工具轻松在任何视频中换脸!

热门文章
热工具

SublimeText3汉化版
中文版,非常好用

VSCode Windows 64位 下载
微软推出的免费、功能强大的一款IDE编辑器

Dreamweaver CS6
视觉化网页开发工具

Dreamweaver Mac版
视觉化网页开发工具

SublimeText3 Linux新版
SublimeText3 Linux最新版

