


很多时候我们喜欢在自己电脑的终端直接ssh连接Linux服务器,而不喜欢使用那些有UI界面的工具区连接我们的服务器。可是在终端使用ssh我们每次都需要输入账号和密码,这也是一个烦恼,所以我们可以简单的打造一个在Linux/Mac os运行的自动ssh登录远程服务器的小工具.
来个GIF动画示例下先:
概述
我们先理一下我们需要些什么功能:
1. 添加/删除连接服务器需要的IP,端口,密码2. 自动输入密码登录远程服务器
对,我们就做这么简单的功能
开始写代码
代码比较长,所以我也放在在Github和码云,地址在文章最底部:
1.我们建个模块目录osnssh(Open source noob ssh),然后在下面再建两个目录,一个用来放主程序取名叫bin吧,一个用来保存登录数据(IP, 端口,密码)叫data吧。
-osnssh
    -bin
    -data
1.设置程序:添加/删除IP,端口,密码. 建立py文件bin/setting.py:
#!/usr/bin/env python#-*-coding:utf-8-*-import re, base64, os, sys
path = os.path.dirname(os.path.abspath(sys.argv[0]))'''
选项配置管理
__author__ = 'allen woo'
'''def add_host_main():while 1:if add_host():break
print("\n\nAgain:")def add_host():'''
添加主机信息
:return:
'''
print("================Add=====================")
print("[Help]Input '#q' exit")# 输入IP
host_ip = str_format("Host IP:", "^(25[0-5]|2[0-4][0-9]|1[0-9][0-9]|[1-9]?[0-9])\.(25[0-5]|2[0-4][0-9]|1[0-9][0-9]|[1-9]?[0-9])\.(25[0-5]|2[0-4][0-9]|1[0-9][0-9]|[1-9]?[0-9])\.(25[0-5]|2[0-4][0-9]|1[0-9][0-9]|[1-9]?[0-9])$")if host_ip == "#q":return 1# 输入端口
host_port = str_format("Host port(Default 22):", "[0-9]+")if host_port == "#q":return 1# 输入密码
password = str_format("Password:", ".*")if password == "#q":return 1# 密码加密
password = base64.encodestring(password)# 输入用户名
name = str_format("User Name:", "^[^ ]+$")if name == "#q":return 1elif not name:
os.system("clear")
print("[Warning]:User name cannot be emptyg")return 0# The alias# 输入别名
alias = str_format("Local Alias:", "^[^ ]+$")if alias == "#q":return 1elif not alias:
os.system("clear")
print("[Warning]:Alias cannot be emptyg")return 0# 打开数据保存文件
of = open("{}/data/information.d".format(path))
hosts = of.readlines()# 遍历文件数据,查找是否有存在的Ip,端口,还有别名for l in hosts:
l = l.strip("\n")if not l:continue
l_list = l.split(" ")if host_ip == l_list[1] and host_port == l_list[2]:
os.system("clear")
print("[Warning]{}:{} existing".format(host_ip, host_port))return 0if alias == l_list[4]:
os.system("clear")
print("[Warning]Alias '{}' existing".format(alias))return 0
of.close()# save# 保存数据到数据文件
of = open("{}/data/information.d".format(path), "a")
of.write("\n{} {} {} {} {}".format(name.strip("\n"), host_ip.strip("\n"), host_port, password.strip("\n"), alias.strip("\n")))
of.close()
print("Add the success:{} {}@{}:{}".format(alias.strip("\n"), name.strip("\n"), host_ip.strip("\n"), host_port, password.strip("\n")))return 1def remove_host():'''
删除主机信息
:return:
'''while 1:# 打开数据文件
of = open("{}/data/information.d".format(path))
hosts = of.readlines()
of.close
l = len(hosts)if l <= 0:
os.system("clear")
print("[Warning]There is no host")return
print("================Remove================")
print("+{}+".format("-"*40))
print("| Alias UserName@IP:PORT")
hosts_temp = []
n = 0# 遍历输出所以信息(除了密码)供选择for i in range(0, l):if not hosts[i].strip():continue
v_list = hosts[i].strip().split(" ")
print("+{}+".format("-"*40))
print("| {} | {} {}@{}:{}".format(n+1, v_list[4], v_list[0], v_list[1], v_list[2]))
n += 1
hosts_temp.append(hosts[i])
hosts = hosts_temp[:]
print("+{}+".format("-"*40))
c = raw_input("[Remove]Choose the Number or Alias('#q' to exit):")
is_alias = False
is_y = Falsetry:
c = int(c)if c > l or c < 1:
os.system("clear")
print("[Warning]:There is no")continuedel hosts[c-1]
is_y = Trueexcept:
is_alias = Trueif is_alias:if c.strip() == "#q":
os.system("clear")break
n = 0for l in hosts:if c.strip() == l.split(" ")[4].strip():del hosts[n]
is_y = True
n += 1if not is_y:
os.system("clear")
print("[Warning]:There is no")continueelse: # save# 再次确认是否删除
c = raw_input("Remove?[y/n]:")if c.strip().upper() == "Y":
of = open("{}/data/information.d".format(path), "w")for l in hosts:
of.write(l)
print("Remove the success!")
of.close()def str_format(lable, rule):'''
用于验证输入的数据格式
:param lable:
:param rule:
:return:
'''while 1:
print("{} ('#q' exit)".format(lable))
temp = raw_input().strip()
m = re.match(r"{}".format(rule), temp)if m:breakelif "port" in lable:
temp = 22breakelif temp.strip() == "#q":
os.system("clear")break
os.system("clear")
print("[Warning]:Invalid format")return temp2. 我们再添加一个函数在setting.py用于输出我们的信息,也就是about me。
def about():'''
    输出关于这个程序的信息
    :return:
    '''
    of = open("{}/bin/about.dat".format(path))
    rf = of.read()try:
        info = eval(rf)
        os.system("clear")
        print("================About osnssh================")for k,v in info.items():
            print("{}: {}".format(k, v))except:
        print("For failure.")return
然后在bin目录下面建立个文件about.dat写入我们的一些信息,比如:
{"auther":"Allen Woo","Introduction":"In Linux or MAC using SSH, do not need to enter the IP and password for many times","Home page":"","Download address":"https://github.com/osnoob/osnssh","version":"1.1.0","email":"xiaopingwoo@163.com"
}
好了设置程序就这样了:
2. 自动登录远程服务器程序:在bin建个py文件叫auto_ssh.py:
注意:这里我们需要先安装个包叫:pexpect, 用户终端交互,捕捉交互信息实现自动输入密码。
安装pexpect:
pip install pexpect
然后开始写代码:
#!/usr/bin/env python#-*-coding:utf-8-*-import os, sys, base64import pexpect
path = os.path.dirname(os.path.abspath(sys.argv[0]))def choose():# 打开我们的数据文件
of = open("{}/data/information.d".format(path))
hosts = of.readlines()
hosts_temp = []for h in hosts:if h.strip():
hosts_temp.append(h)
hosts = hosts_temp[:]
l = len(hosts)if l <= 0:
os.system("clear")
print("[Warning]Please add the host server")returnwhile 1:
print("=================SSH===================")
print("+{}+".format("-"*40))
print("| Alias UserName@IP:PORT")for i in range(0, l):
v_list = hosts[i].strip().split(" ")
print("+{}+".format("-"*40))
print("| {} | {} {}@{}:{}".format(i+1, v_list[4], v_list[0], v_list[1], v_list[2]))
print("+{}+".format("-"*40))
c = raw_input("[SSH]Choose the number or alias('#q' exit):")
is_alias = False
is_y = Falsetry:
c = int(c)if c > l or c < 1:
os.system("clear")
print("[Warning]:There is no")continue
l_list = hosts[c-1].split(" ")
name = l_list[0]
host = l_list[1]
port = l_list[2]
password = l_list[3]
is_y = Trueexcept:
is_alias = Trueif is_alias:if c.strip() == "#q":
os.system("clear")returnfor h in hosts:if c.strip() == h.split(" ")[4].strip():
l_list = h.split(" ")
name = l_list[0]
host = l_list[1]
port = l_list[2]
password = l_list[3]
is_y = Trueif not is_y:continue# ssh# 将加密保存的密码解密
password = base64.decodestring(password)
print("In the connection...")# 准备远程连接,拼接ip:port
print("{}@{}".format(name, host))if port == "22":
connection("ssh {}@{}".format(name, host), password)else:
connection("ssh {}@{}:{}".format(name, host, port), password)def connection(cmd, pwd):'''
连接远程服务器
:param cmd:
:param pwd:
:return:
'''
child = pexpect.spawn(cmd)
i = child.expect([".*password.*", ".*continue.*?", pexpect.EOF, pexpect.TIMEOUT])if( i == 0 ):# 如果交互中出现.*password.*,就是叫我们输入密码# 我们就把密码自动填入下去
child.sendline("{}\n".format(pwd))
child.interact()elif( i == 1):# 如果交互提示是否继续,一般第一次连接时会出现# 这个时候我们发送"yes",然后再自动输入密码
child.sendline("yes\n")
child.sendline("{}\n".format(pwd))#child.interact() else:# 连接失败
print("[Error]The connection fails")好了,现在我们只需要启动文件了,也就是打开程序后的第一个菜单
3.再osnssh目录下建个osnssh.py 文件:
#!/usr/bin/env python#-*-coding:utf-8-*-import os, sys
sys.path.append("../")from bin import setting, auto_ssh
path = os.path.dirname(os.path.abspath(sys.argv[0]))'''
方便在LINUX终端使用ssh,保存使用的IP:PORT , PASSWORD
自动登录
__author__ = 'allen woo'
'''def main():while 1:
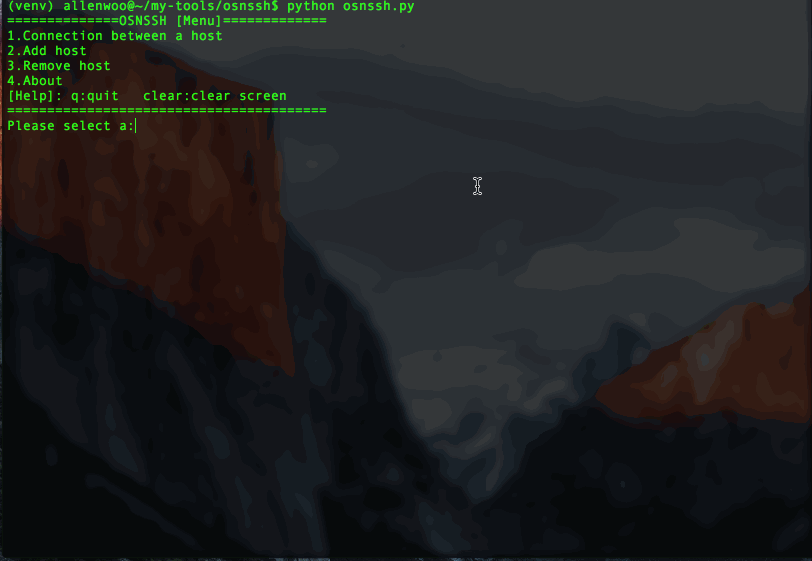
print("==============OSNSSH [Menu]=============")
print("1.Connection between a host\n2.Add host\n3.Remove host\n4.About\n[Help]: q:quit clear:clear screen")
print("="*40)
c = raw_input("Please select a:")if c == 1 or c == "1":
auto_ssh.choose()if c == 2 or c == "2":
setting.add_host_main()if c == 3 or c == "3":
setting.remove_host()if c == 4 or c == "4":
setting.about()elif c == "clear":
os.system("clear")elif c == "q" or c == "Q" or c == "quit":
print("Bye")
sys.exit()else:
print("\n")if __name__ == '__main__':try:
of = open("{}/data/information.d".format(path))except:
of = open("{}/data/information.d".format(path), "w")
of.close()
main()终于写完了,我们可以试一试了:
$python osnssh.py
具体的演示,就是我在文章开头放了张GIF动画图片源码加群
学习过程中遇到什么问题或者想获取学习资源的话,欢迎加入学习交流群
626062078,我们一起学Python!
以上是分享用Python写个自动ssh登录远程服务器的实例的详细内容。更多信息请关注PHP中文网其他相关文章!

 2小时的Python计划:一种现实的方法Apr 11, 2025 am 12:04 AM
2小时内可以学会Python的基本编程概念和技能。1.学习变量和数据类型,2.掌握控制流(条件语句和循环),3.理解函数的定义和使用,4.通过简单示例和代码片段快速上手Python编程。
 Python:探索其主要应用程序Apr 10, 2025 am 09:41 AM
Python在web开发、数据科学、机器学习、自动化和脚本编写等领域有广泛应用。1)在web开发中,Django和Flask框架简化了开发过程。2)数据科学和机器学习领域,NumPy、Pandas、Scikit-learn和TensorFlow库提供了强大支持。3)自动化和脚本编写方面,Python适用于自动化测试和系统管理等任务。
 您可以在2小时内学到多少python?Apr 09, 2025 pm 04:33 PM
两小时内可以学到Python的基础知识。1.学习变量和数据类型,2.掌握控制结构如if语句和循环,3.了解函数的定义和使用。这些将帮助你开始编写简单的Python程序。
 如何在10小时内通过项目和问题驱动的方式教计算机小白编程基础?Apr 02, 2025 am 07:18 AM
如何在10小时内教计算机小白编程基础?如果你只有10个小时来教计算机小白一些编程知识,你会选择教些什么�...
 如何在使用 Fiddler Everywhere 进行中间人读取时避免被浏览器检测到?Apr 02, 2025 am 07:15 AM
使用FiddlerEverywhere进行中间人读取时如何避免被检测到当你使用FiddlerEverywhere...
 Python 3.6加载Pickle文件报错"__builtin__"模块未找到怎么办?Apr 02, 2025 am 07:12 AM
Python3.6环境下加载Pickle文件报错:ModuleNotFoundError:Nomodulenamed...
 如何提高jieba分词在景区评论分析中的准确性?Apr 02, 2025 am 07:09 AM
如何解决jieba分词在景区评论分析中的问题?当我们在进行景区评论分析时,往往会使用jieba分词工具来处理文�...
 如何使用正则表达式匹配到第一个闭合标签就停止?Apr 02, 2025 am 07:06 AM
如何使用正则表达式匹配到第一个闭合标签就停止?在处理HTML或其他标记语言时,常常需要使用正则表达式来�...


热AI工具

Undresser.AI Undress
人工智能驱动的应用程序,用于创建逼真的裸体照片

AI Clothes Remover
用于从照片中去除衣服的在线人工智能工具。

Undress AI Tool
免费脱衣服图片

Clothoff.io
AI脱衣机

AI Hentai Generator
免费生成ai无尽的。

热门文章
热工具

记事本++7.3.1
好用且免费的代码编辑器

螳螂BT
Mantis是一个易于部署的基于Web的缺陷跟踪工具,用于帮助产品缺陷跟踪。它需要PHP、MySQL和一个Web服务器。请查看我们的演示和托管服务。

ZendStudio 13.5.1 Mac
功能强大的PHP集成开发环境

SublimeText3汉化版
中文版,非常好用

Atom编辑器mac版下载
最流行的的开源编辑器

