


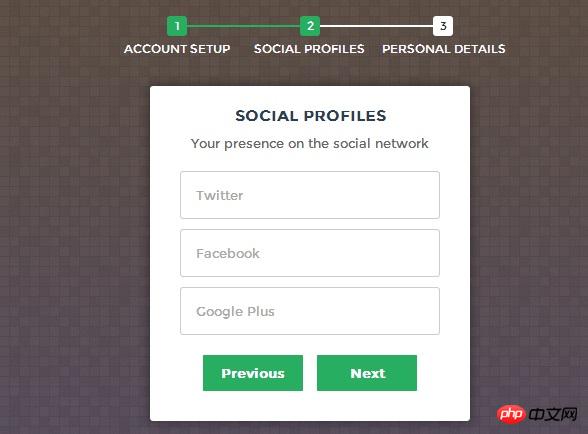
分步骤的登录注册表单现在也比较多,主要是能提高用户体验,用户可以有选择性的填写相应的表单信息,不至于让用户看到一堆表单望而却步。今天和大家分享的就是一款基于HTML5和CSS3的分步骤注册登录表单,外观不用说,非常漂亮。你看一下DEMO就知道了。
接下来我们要来一起看看实现的过程是怎样的。代码有点复杂,主要由HTML代码、CSS3代码以及Javascript代码组成。
HTML代码:
<form id="msform">
    <!-- progressbar -->
    <ul id="progressbar">
        <li>Account Setup</li>
        <li>Social Profiles</li>
        <li>Personal Details</li>
    </ul>
    <!-- fieldsets -->
    <fieldset>
        <h2>Create your account</h2>
        <h3>This is step 1</h3>
        <input type="text" name="email" placeholder="Email" />
        <input type="password" name="pass" placeholder="Password" />
        <input type="password" name="cpass" placeholder="Confirm Password" />
        <input type="button" name="next" value="Next" />
    </fieldset>
    <fieldset>
        <h2>Social Profiles</h2>
        <h3>Your presence on the social network</h3>
        <input type="text" name="twitter" placeholder="Twitter" />
        <input type="text" name="facebook" placeholder="Facebook" />
        <input type="text" name="gplus" placeholder="Google Plus" />
        <input type="button" name="previous" value="Previous" />
        <input type="button" name="next" value="Next" />
    </fieldset>
    <fieldset>
        <h2>Personal Details</h2>
        <h3>We will never sell it</h3>
        <input type="text" name="fname" placeholder="First Name" />
        <input type="text" name="lname" placeholder="Last Name" />
        <input type="text" name="phone" placeholder="Phone" />
        <textarea name="address" placeholder="Address"></textarea>
        <input type="button" name="previous" value="Previous" />
        <input type="submit" name="submit" value="Submit" />
    </fieldset></form>
HTML代码看起来很多,但是很简单,主要是描述了一form表单。
CSS代码:
/*form styles*/#msform {
    width: 400px;
    margin: 50px auto;
    text-align: center;
    position: relative;
}#msform fieldset {
    background: white;
    border: 0 none;
    border-radius: 3px;
    box-shadow: 0 0 15px 1px rgba(0, 0, 0, 0.4);
    padding: 20px 30px;

    box-sizing: border-box;
    width: 80%;
    margin: 0 10%;    /*stacking fieldsets above each other*/
    position: absolute;
}/*Hide all except first fieldset*/#msform fieldset:not(:first-of-type) {
    display: none;
}/*inputs*/#msform input, #msform textarea {
    padding: 15px;
    border: 1px solid #ccc;
    border-radius: 3px;
    margin-bottom: 10px;
    width: 100%;
    box-sizing: border-box;
    font-family: montserrat;
    color: #2C3E50;
    font-size: 13px;
}/*buttons*/#msform .action-button {
    width: 100px;
    background: #27AE60;
    font-weight: bold;
    color: white;
    border: 0 none;
    border-radius: 1px;
    cursor: pointer;
    padding: 10px 5px;
    margin: 10px 5px;
}#msform .action-button:hover, #msform .action-button:focus {
    box-shadow: 0 0 0 2px white, 0 0 0 3px #27AE60;
}/*headings*/.fs-title {
    font-size: 15px;
    text-transform: uppercase;
    color: #2C3E50;
    margin-bottom: 10px;
}.fs-subtitle {
    font-weight: normal;
    font-size: 13px;
    color: #666;
    margin-bottom: 20px;
}/*progressbar*/#progressbar {
    margin-bottom: 30px;
    overflow: hidden;    /*CSS counters to number the steps*/
    counter-reset: step;
}#progressbar li {
    list-style-type: none;
    color: white;
    text-transform: uppercase;
    font-size: 9px;
    width: 33.33%;
    float: left;
    position: relative;
}#progressbar li:before {
    content: counter(step);
    counter-increment: step;
    width: 20px;
    line-height: 20px;
    display: block;
    font-size: 10px;
    color: #333;
    background: white;
    border-radius: 3px;
    margin: 0 auto 5px auto;
}/*progressbar connectors*/#progressbar li:after {
    content: '';
    width: 100%;
    height: 2px;
    background: white;
    position: absolute;
    left: -50%;
    top: 9px;
    z-index: -1;
    /*put it behind the numbers*/}
    #progressbar li:first-child:after {
    /*connector not needed before the first step*/
    content: none;
}
/*marking active/completed steps green*/
/*The number of the step and the connector before it = green*/
#progressbar li.active:before,
#progressbar li.active:after{
    background: #27AE60;
    color: white;
}这里我们只是将渲染表单的CSS代码贴了出来,这让我们的表单看起来非常清新自然。另外要说明的一点是,这里我们利用了CSS3的:before属性。
最后是Javascript代码,可以实现注册表单的步骤跳转。
Javascript代码:
var current_fs, next_fs, previous_fs; //fieldsets
var left, opacity, scale; //fieldset properties which we will animate
var animating; //flag to prevent quick multi-click glitches

$(".next").click(function(){
    if(animating) return false;
    animating = true;

    current_fs = $(this).parent();
    next_fs = $(this).parent().next();

    //activate next step on progressbar using the index of next_fs
    $("#progressbar li").eq($("fieldset").index(next_fs)).addClass("active");

    //show the next fieldset
    next_fs.show();
    //hide the current fieldset with style
    current_fs.animate({opacity: 0}, {
        step: function(now, mx) {
            //as the opacity of current_fs reduces to 0 - stored in "now"
            //1. scale current_fs down to 80%
            scale = 1 - (1 - now) * 0.2;
            //2. bring next_fs from the right(50%)
            left = (now * 50)+"%";
            //3. increase opacity of next_fs to 1 as it moves in
            opacity = 1 - now;
            current_fs.css({'transform': 'scale('+scale+')'});
            next_fs.css({'left': left, 'opacity': opacity});
        },
        duration: 800,
        complete: function(){
            current_fs.hide();
            animating = false;
        },
        //this comes from the custom easing plugin
        easing: 'easeInOutBack'
    });
});

$(".previous").click(function(){
    if(animating) return false;
    animating = true;

    current_fs = $(this).parent();
    previous_fs = $(this).parent().prev();

    //de-activate current step on progressbar
    $("#progressbar li").eq($("fieldset").index(current_fs)).removeClass("active");

    //show the previous fieldset
    previous_fs.show();
    //hide the current fieldset with style
    current_fs.animate({opacity: 0}, {
        step: function(now, mx) {
            //as the opacity of current_fs reduces to 0 - stored in "now"
            //1. scale previous_fs from 80% to 100%
            scale = 0.8 + (1 - now) * 0.2;
            //2. take current_fs to the right(50%) - from 0%
            left = ((1-now) * 50)+"%";
            //3. increase opacity of previous_fs to 1 as it moves in
            opacity = 1 - now;
            current_fs.css({'left': left});
            previous_fs.css({'transform': 'scale('+scale+')', 'opacity': opacity});
        },
        duration: 800,
        complete: function(){
            current_fs.hide();
            animating = false;
        },
        //this comes from the custom easing plugin
        easing: 'easeInOutBack'
    });
});

$(".submit").click(function(){
    return false;
})这里我们可以看到,利用jQuery代码变得非常简洁。主要是3个事件:next、previous、submit,同时在next和previous时利用jQuery实现淡入淡出的动画效果,是不是很迷人?最后你也可以下载源代码。
以上是HTML5/CSS3实现漂亮的分步骤注册登录表单的示例代码分享的详细内容。更多信息请关注PHP中文网其他相关文章!

 H5和HTML5之间的连接:相似性和差异Apr 24, 2025 am 12:01 AM
H5和HTML5是不同的概念:HTML5是HTML的一个版本,包含新元素和API;H5是基于HTML5的移动应用开发框架。HTML5通过浏览器解析和渲染代码,H5应用则需要容器运行并通过JavaScript与原生代码交互。
 H5代码的基础:密钥元素及其目的Apr 23, 2025 am 12:09 AM
HTML5的关键元素包括、、、、、等,用于构建现代网页。1.定义头部内容,2.用于导航链接,3.表示独立文章内容,4.组织页面内容,5.展示侧边栏内容,6.定义页脚,这些元素增强了网页的结构和功能性。
 HTML5和H5:了解常见用法Apr 22, 2025 am 12:01 AM
HTML5和H5没有区别,H5是HTML5的简称。1.HTML5是HTML的第五个版本,增强了网页的多媒体和交互功能。2.H5常用于指代基于HTML5的移动网页或应用,适用于各种移动设备。
 HTML5:现代网络的基础(H5)Apr 21, 2025 am 12:05 AM
HTML5是超文本标记语言的最新版本,由W3C标准化。HTML5引入了新的语义化标签、多媒体支持和表单增强,提升了网页结构、用户体验和SEO效果。HTML5引入了新的语义化标签,如、、、等,使网页结构更清晰,SEO效果更好。HTML5支持多媒体元素和,无需第三方插件,提升了用户体验和加载速度。HTML5增强了表单功能,引入了新的输入类型如、等,提高了用户体验和表单验证效率。
 H5代码:编写清洁有效的HTML5Apr 20, 2025 am 12:06 AM
如何写出干净高效的HTML5代码?答案是通过语义化标签、结构化代码、性能优化和避免常见错误。1.使用语义化标签如、等,提升代码可读性和SEO效果。2.保持代码结构化和可读性,使用适当缩进和注释。3.优化性能,通过减少不必要的标签、使用CDN和压缩代码。4.避免常见错误,如标签未闭合,确保代码有效性。
 H5:如何增强网络上的用户体验Apr 19, 2025 am 12:08 AM
H5通过多媒体支持、离线存储和性能优化提升网页用户体验。1)多媒体支持:H5的和元素简化开发,提升用户体验。2)离线存储:WebStorage和IndexedDB允许离线使用,提升体验。3)性能优化:WebWorkers和元素优化性能,减少带宽消耗。
 解构H5代码:标签,元素和属性Apr 18, 2025 am 12:06 AM
HTML5代码由标签、元素和属性组成:1.标签定义内容类型,用尖括号包围,如。2.元素由开始标签、内容和结束标签组成,如内容。3.属性在开始标签中定义键值对,增强功能,如。这些是构建网页结构的基本单位。
 了解H5代码:HTML5的基本原理Apr 17, 2025 am 12:08 AM
HTML5是构建现代网页的关键技术,提供了许多新元素和功能。1.HTML5引入了语义化元素如、、等,增强了网页结构和SEO。2.支持多媒体元素和,无需插件即可嵌入媒体。3.表单增强了新输入类型和验证属性,简化了验证过程。4.提供了离线和本地存储功能,提升了网页性能和用户体验。


热AI工具

Undresser.AI Undress
人工智能驱动的应用程序,用于创建逼真的裸体照片

AI Clothes Remover
用于从照片中去除衣服的在线人工智能工具。

Undress AI Tool
免费脱衣服图片

Clothoff.io
AI脱衣机

Video Face Swap
使用我们完全免费的人工智能换脸工具轻松在任何视频中换脸!

热门文章
热工具

mPDF
mPDF是一个PHP库,可以从UTF-8编码的HTML生成PDF文件。原作者Ian Back编写mPDF以从他的网站上“即时”输出PDF文件,并处理不同的语言。与原始脚本如HTML2FPDF相比,它的速度较慢,并且在使用Unicode字体时生成的文件较大,但支持CSS样式等,并进行了大量增强。支持几乎所有语言,包括RTL(阿拉伯语和希伯来语)和CJK(中日韩)。支持嵌套的块级元素(如P、DIV),

VSCode Windows 64位 下载
微软推出的免费、功能强大的一款IDE编辑器

记事本++7.3.1
好用且免费的代码编辑器

PhpStorm Mac 版本
最新(2018.2.1 )专业的PHP集成开发工具

ZendStudio 13.5.1 Mac
功能强大的PHP集成开发环境

