Photoshop和WPF双剑配合,打造炫酷个性的进度条控件
- 高洛峰原创
- 2017-02-18 13:42:321973浏览
现在如果想打造一款专业的App,UI的设计和操作的简便性相当重要。UI设计可以借助Photoshop或者AI等设计工具,之前了解到WPF设计工具Expression Blend可以直接导入PSD文件或者AI设计文件(当然不是全部特征支持),最近研究了一下,也费了一番周折,好在最后实现了预期的效果。下面将step by step用示例说明如何先用PS构建一个矢量图形模板,然后用Expression Blend导入PSD文件,并获取PATH的Data值,为打造一款炫酷的个性进度条控件构建美观UI。
1、打开Photoshop,新建一个空白图层,点选PS的图案图章工具:
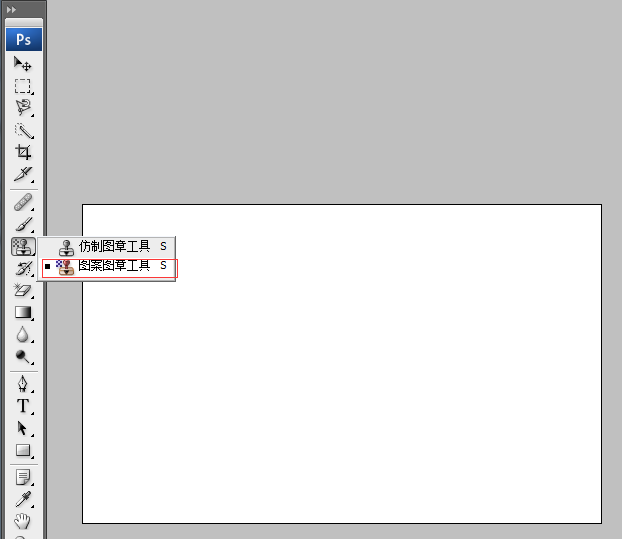
2、选择画笔,选用喜欢的笔刷(可以到网站上下载免费的笔刷),如下图:
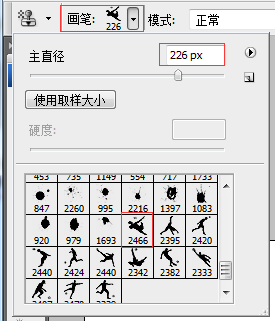
在合适位置点击后,如下图所示。
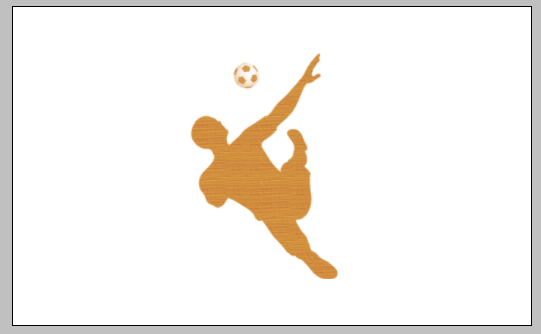
3、按住CTRL,选中图层,切换到路径面板,点击 【从选取创建工作路径】 按钮,如下图:
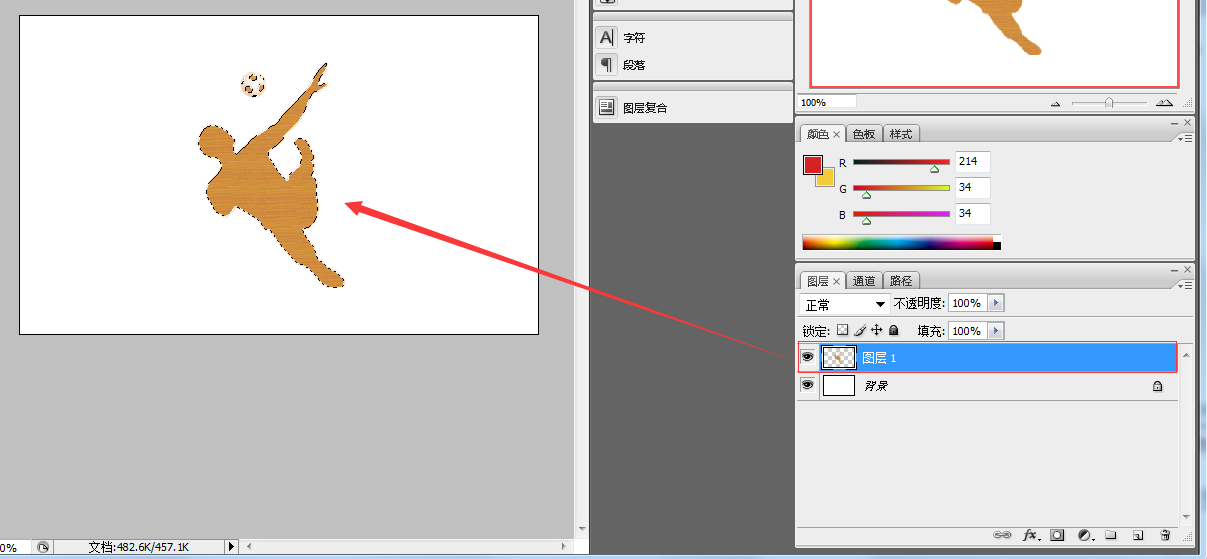
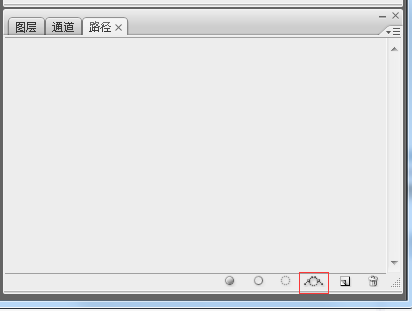
注意上图的红框按钮,就是【从选取创建工作路径】,点击后出现下图:
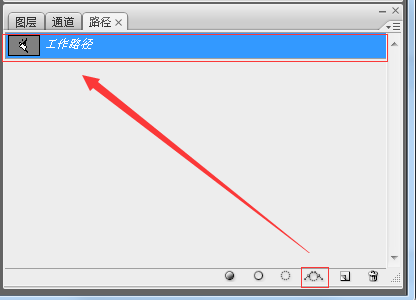
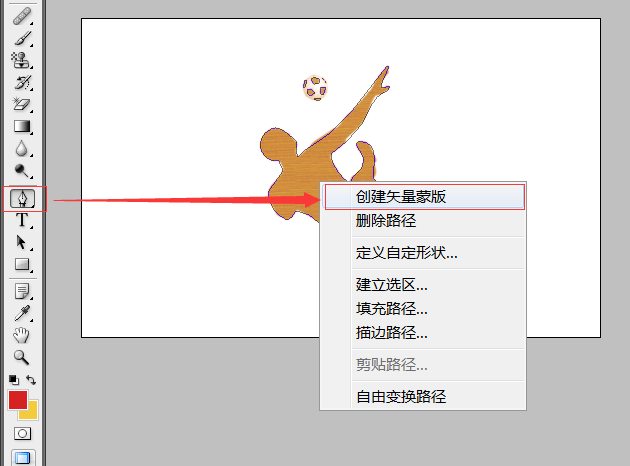
4、这是最关键的一步,创建矢量蒙板,切换到图层面板,点选【钢笔】工具,在图形上右键菜单中选择【创建矢量蒙板】项,如下图所示:
然后PS中可以看到下图的效果,说明创建成功。
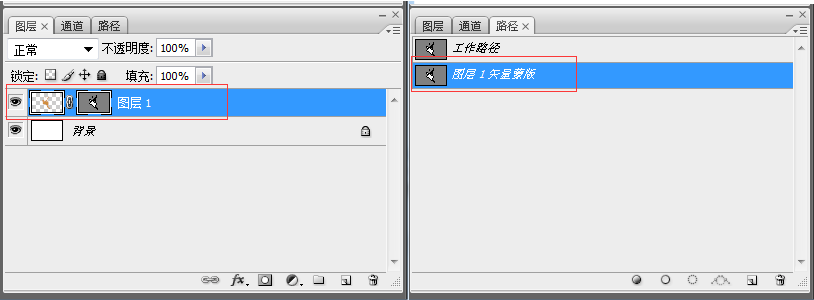
保存PS文件为进度条.PSD文件待用。
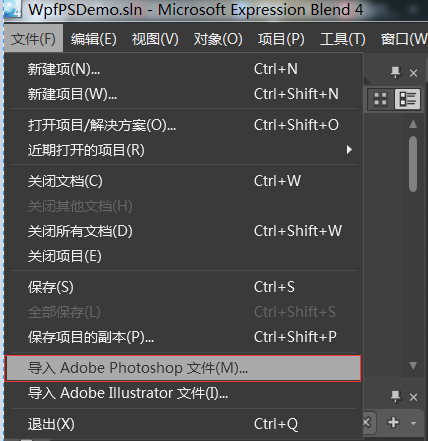
5、打开Expression Blend 4新建一个WPF项目,然后导入PSD文件,如下图:
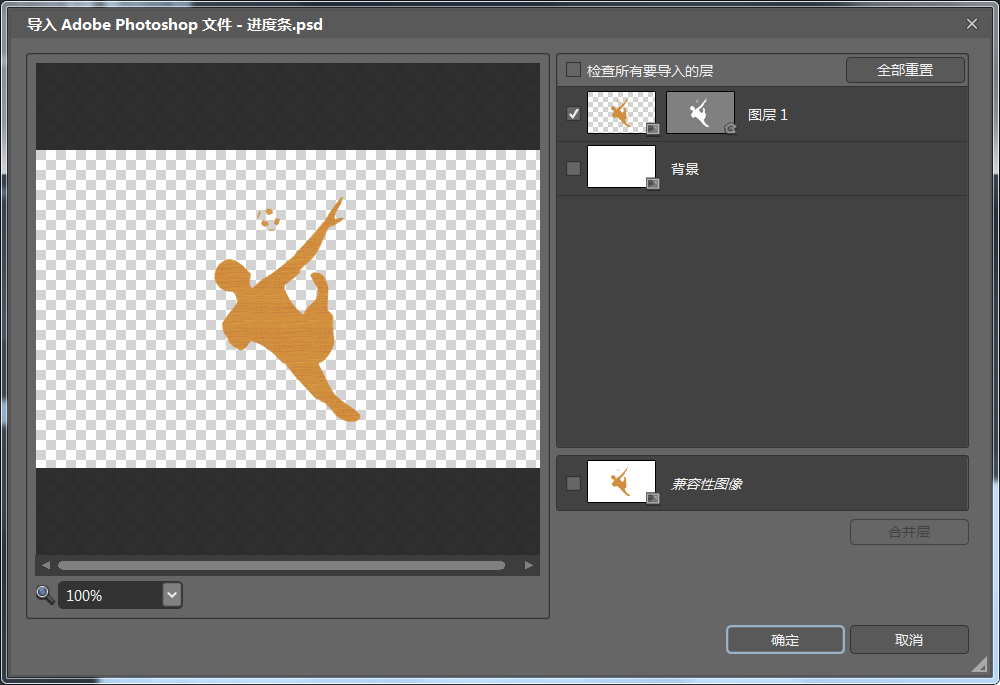
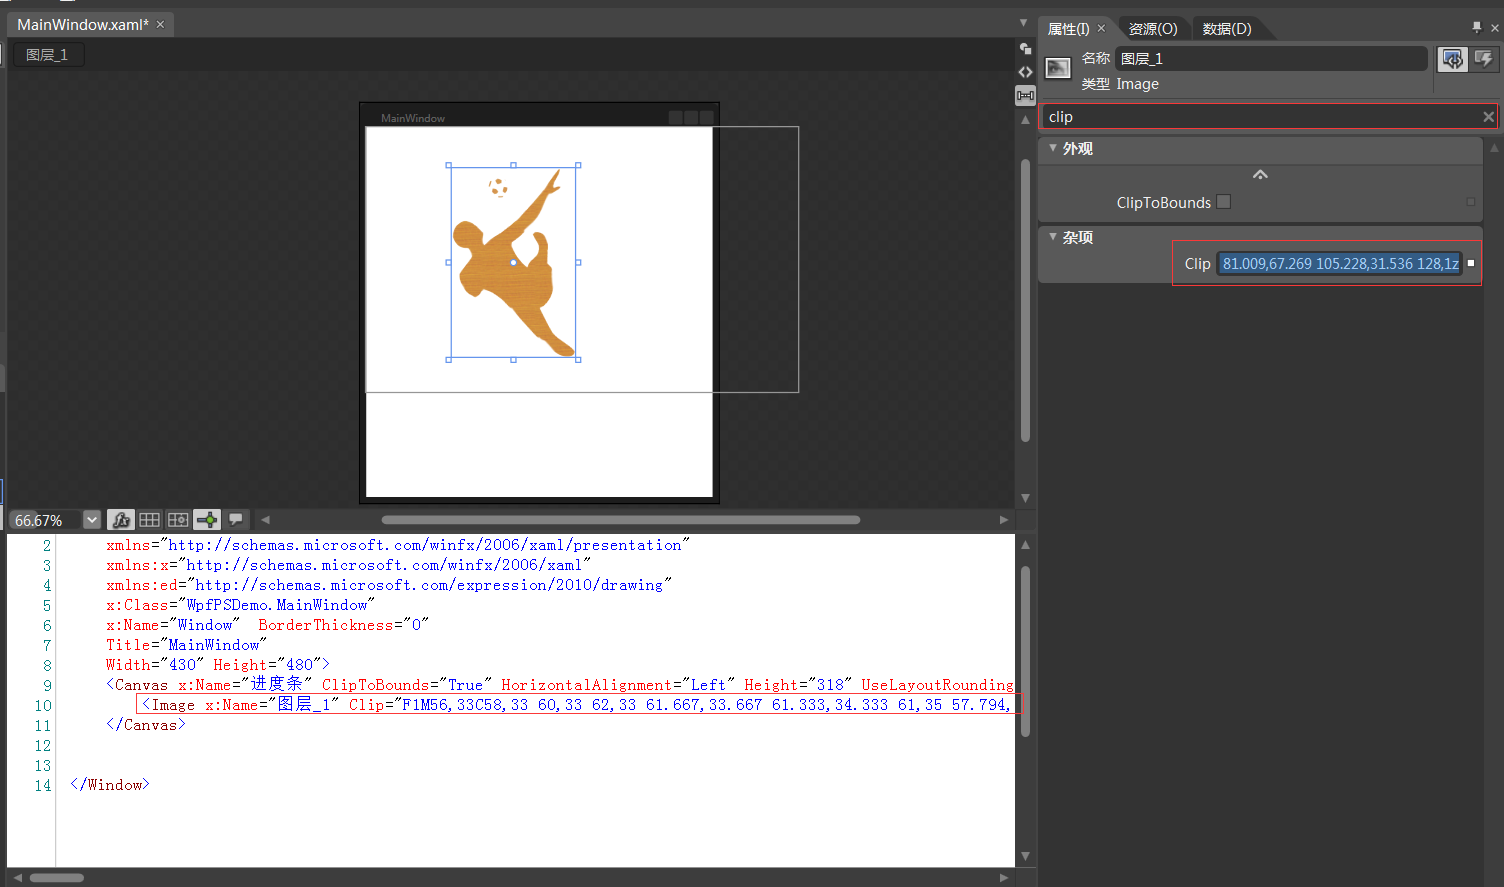
导入成功后,可以复制该图形的clip数据,这就是WPF中PATH所需要的Data值。
下面来创建一个炫酷的WPF进度条控件。
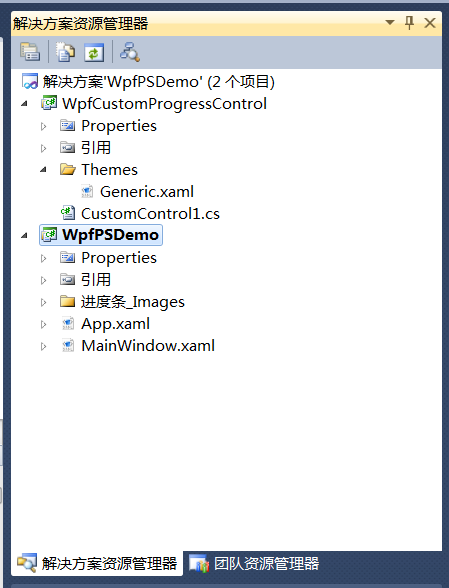
6、在VS2010中重新打开该项目,并添加一个WPF自定义控件库,如下图:
17 编写控件UI和后台代码,如下所示:
ea0bb6e90983a762005b3ef7118c67ed

    933b65fd37276eeb7f580230dd7cf921
        f0c795ee9c794e60ec00ae99696ec1ad
            165b7c875a818622adc59cf863d17a18
                f13241cf9c1517f1e277a5c2d764b859
                    5e7519494498afdc1983acd5045672f3
                        d7bf199d7dcdeb64cefe2596177c34f7

                        1d254c5f45ba31ddc939478c61772645

                        03ef43914f32d10edc3ec00c2d17b155

                        d37b6973a491a92a64199ce34df7b66a

                    c7ce43c718871e0361b81775e651c2a0
                13af2125bb1d2c8a0733398bbe4392eb
            e22df8a2f09b9f43fa03693b251469c9
        956ed55f9bbc30030566f198e8b4784a
    c233ad6b9ecdf20078a08863faeda289

e5ef3a31b9577fcb23493897d1223046
using System;
using System.Collections.Generic;
using System.Linq;
using System.Text;
using System.Windows;
using System.Windows.Controls;
using System.Windows.Data;
using System.Windows.Documents;
using System.Windows.Input;
using System.Windows.Media;
using System.Windows.Media.Imaging;
using System.Windows.Navigation;
using System.Windows.Shapes;

namespace WpfCustomProgressControl
{

    [TemplatePart(Name = "PART_mask", Type = typeof(Rectangle))]
    [TemplatePart(Name = "PART_container", Type = typeof(Grid))]
    [TemplatePart(Name = "PART_percentage_text", Type = typeof(TextBlock))]
    [TemplatePart(Name = "PART_foreground_P", Type = typeof(Path))]
    [TemplatePart(Name = "PART_outline_P", Type = typeof(Path))]

    public class CustomProgressControl : ProgressBar
    {
        static CustomProgressControl()
        {
            DefaultStyleKeyProperty.OverrideMetadata(typeof(CustomProgressControl), new FrameworkPropertyMetadata(typeof(CustomProgressControl)));

        }

        Rectangle mask;
        Grid container;
        TextBlock percentageText;
        Path foreground_P;
        Path outline_P;

        #region TextForeground 文本
        public SolidColorBrush TextForeground
        {
            get { return (SolidColorBrush)GetValue(TextForegroundProperty); }
            set { SetValue(TextForegroundProperty, value); }
        }

        public static readonly DependencyProperty TextForegroundProperty =
            DependencyProperty.Register("TextForeground", typeof(SolidColorBrush),
                                typeof(CustomProgressControl),
                                new FrameworkPropertyMetadata(new SolidColorBrush(Colors.DarkGray)));
        #endregion

        public override void OnApplyTemplate()
        {
            base.OnApplyTemplate();


            foreground_P = this.Template.FindName("PART_foreground_P", this) as Path;
            outline_P = this.Template.FindName("PART_outline_P", this) as Path;
            mask = this.Template.FindName("PART_mask", this) as Rectangle;
            container = this.Template.FindName("PART_container", this) as Grid;
            percentageText = this.Template.FindName("PART_percentage_text", this) as TextBlock;
            if (foreground_P != null)
            {
                foreground_P.Visibility = Visibility.Visible;
                outline_P.Visibility = Visibility.Visible;
            }
            Width = double.IsNaN(Width) ? 50 : Width;
            Height = double.IsNaN(Height) ? 135 : Height;

            Minimum = double.IsNaN(Minimum) ? 0 : Minimum;
            Maximum = double.IsNaN(Maximum) ? 100 : Maximum;

            if (mask != null)
            {
                var percentageValue = Value / Maximum;
                var awayMargin = percentageValue * Height;
                var percentageString = string.Empty;

                if (percentageValue > 0)
                    percentageString = (percentageValue * 100).ToString("##");
                else if (percentageValue == 0)
                    percentageString = "0";

                percentageText.Text = string.Format("{0}%", string.IsNullOrEmpty(percentageString) ? "0" : percentageString);

                mask.Margin = new Thickness(0, 0, 0, awayMargin);
            }

            container.Clip = new RectangleGeometry
            {
                Rect = new Rect(0, 0, Width, Height)
            };

            mask.Width = Width;
            mask.Height = Height;
        }

        protected override void OnValueChanged(double oldValue, double newValue)
        {
            base.OnValueChanged(oldValue, newValue);

            if (Value < Minimum)
            {
                Value = Minimum;
            }

            if (Value > Maximum)
            {
                Value = Maximum;
            }

            if (mask != null)
            {
                var percentageValue = Value / Maximum;
                var awayMargin = percentageValue * Height;
                var percentageString = string.Empty;

                if (percentageValue > 0)
                    percentageString = (percentageValue * 100).ToString("##");
                else if (percentageValue == 0)
                    percentageString = "0";

                percentageText.Text = string.Format("{0}%", string.IsNullOrEmpty(percentageString) ? "0" : percentageString);
                //蒙板来变更进度
                mask.Margin = new Thickness(0, 0, 0, awayMargin);

            }
        }
    }
}
18 在WpfPSDemo的主界面上拖入控件,并定制属性,代码如下:
 11b067805e707cab0ae168b49ce0ac96
    93e57103ac422e228f296b9c372917b2
711fbf865c9d73c98c72c9494529f49f
using System;
using System.Collections.Generic;
using System.Text;
using System.Windows;
using System.Windows.Controls;
using System.Windows.Data;
using System.Windows.Documents;
using System.Windows.Input;
using System.Windows.Media;
using System.Windows.Media.Imaging;
using System.Windows.Shapes;
using System.Threading;
namespace WpfPSDemo
{
    /// <summary>
    /// MainWindow.xaml 的交互逻辑
    /// </summary>
    public partial class MainWindow : Window
    {
        Thread timeThread;
        int i = 0;
        public MainWindow()
        {
            this.InitializeComponent();
            this.customProgressControl1.Value = 0;
            this.Background = Brushes.Yellow;
            timeThread = new Thread(new ThreadStart(DispatcherThread));
            timeThread.Start();

        }
        public void DispatcherThread()
        {
            //可以通过循环条件来控制UI的更新
            while (true)
            {
                ///线程方法委托(无参方法)
                this.customProgressControl1.Dispatcher.BeginInvoke(new Action(UpdateTime));
                Thread.Sleep(200);
            }
        }

        private void UpdateTime()
        {

            if (i < 100)
            {
                i++;
                this.customProgressControl1.Value = i;
            }
            else
            {
                timeThread.Abort();
            }

        }
    }
}
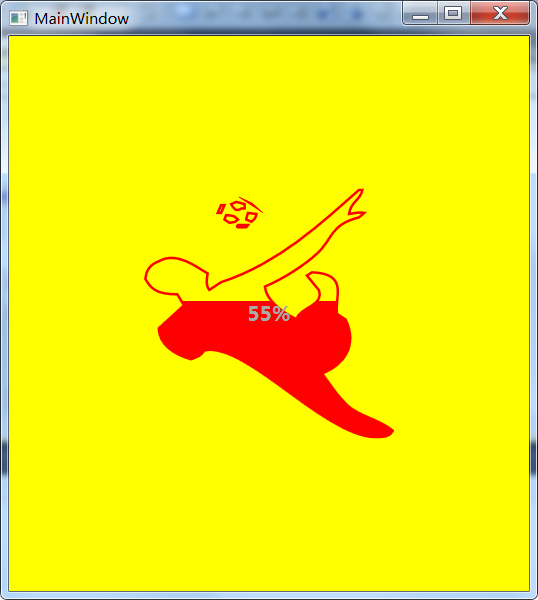
运行代码,效果如下:
更多Photoshop和WPF双剑配合,打造炫酷个性的进度条控件相关文章请关注PHP中文网!

