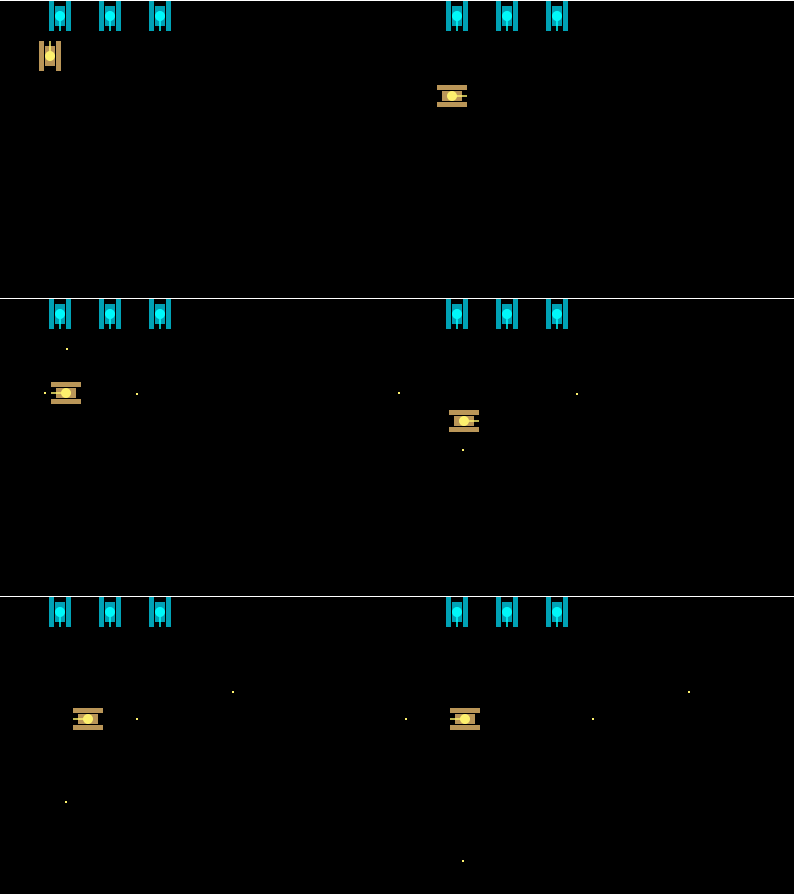
上一篇我们创建了敌人的坦克和自己的坦克,接下来就应该让坦克发子弹了,我们下面来看一下如何让我们的坦克发出子弹。
前面我们用面向对象的思想对Tank进行了封装,又利用对象冒充实现了我们的坦克和敌人的坦克,仿照这种方式我们是不是也应该封装一个Bullet,答案是肯定的。好吧,那么我们再想想这个Bullet"类“都应该封装什么东西呢?位置应该有吧、子弹飞行的方向应该有吧、飞行的速度也应该有吧、自己飞出去的动作应该有吧。好啦,大概就这些,封装后的Bulle”t类“如下:
//子弹类
function Bullet(x,y,direct,speed){
    this.x=x;
    this.y=y;
    this.speed=speed;
    this.direct=direct;
    this.timer=null;
    this.run=function(){
        switch(this.direct){
            case 0:
                this.y-=this.speed;
                break;
            case 1:
                this.x+=this.speed;
                break;
            case 2:
                this.y+=this.speed;
                break;
            case 3:
                this.x-=this.speed;
                break;
        }

    }
}
我们已经创建好子弹的模型了,下面就用我们的坦克创造子弹将子弹发出去,在Hero类中添加shotEnemy方法。
//定义一个Hero类
function Hero(x,y,direct,color){
    //下面两句话的作用是通过对象冒充达到继承的效果
    this.tank=Tank;
    this.tank(x,y,direct,color);
    //射击敌人函数
    this.shotEnemy=function(){
        switch(this.direct){
            case 0:
                heroBullet=new Bullet(this.x+10,this.y,this.direct,1);
                break;
            case 1:
                heroBullet=new Bullet(this.x+30-4,this.y+10+4,this.direct,1);
                break;
            case 2:
                heroBullet=new Bullet(this.x+10,this.y+30,this.direct,1);
                break;
            case 3:
                heroBullet=new Bullet(this.x-4,this.y+10+4,this.direct,1);
                break;
        }
        //把这个子弹放入数组中——》push函数
        //调用我们子弹的run
        //var timer=window.setInterval("heroBullet.run()",50);
        //heroBullet.timer=timer;
        heroBullets.push(heroBullet);
        var timer=window.setInterval("heroBullets["+(heroBullets.length-1)+"].run()",50);
        heroBullets[heroBullets.length-1].timer=timer;

    }
}
再在按键监听函数中添加一个监听发射子弹的键“J"
case 74: //J  :发子弹
    hero.shotEnemy();
    break;
好了我们来试着发射一下子弹吧!子弹怎么只能发一颗,而且越发越快,这是怎么回事呢?再看看我们上面写的代码,原来我们的子弹一旦发出去就不能停止了,虽然跑出了我们的”战场“但是还是在朝一个方向跑,一旦发第二颗子弹第一颗子弹就会由于重新刷新界面没有重绘子弹而消失。好了既然知道原因了下面我们判断一下子弹是否出界,然后给子弹一个状态isLive(这个状态标记子弹是否存在,如果不存在则在重绘子弹的时候不再重绘),修改后的代码如下:
//子弹类
unction Bullet(x,y,direct,speed){
this.x=x;
this.y=y;
this.speed=speed;
this.direct=direct;
this.timer=null;
this.isLive=true;
this.run=function(){
    //判断子弹是否已经到边界了
    if(this.x<=0||this.x>=400||this.y<=0||this.y>=300){
        //子弹要停止
        window.clearInterval(this.timer);
        //子弹死亡
        this.isLive=false;
    }else{
        //可以去修改坐标
        switch(this.direct){
            case 0:
                this.y-=this.speed;
                break;
            case 1:
                this.x+=this.speed;
                break;
            case 2:
                    break;
        }
    }
}
如果子弹超出了canvas的范围则将isLive属性该为false
然后我们在前面的刷新界面函数中添加一个刷新子弹函数
//定时刷新我们的作战区(定时重绘)
//自己的坦克,敌人坦克,子弹,炸弹,障碍物
function flashTankMap(){
    //把画布清理
    cxt.clearRect(0,0,400,300);
    //我的坦克
    drawTank(hero);
    //我的子弹
    drawHeroBullet();
    //敌人的坦克
    for(var i=0;i<3;i++){
        drawTank(enemyTanks[i]);
    }
}
//画出自己的子弹
function drawHeroBullet(){
for(var i=0;i<heroBullets.length;i++){
var heroBullet=heroBullets[i];
if(heroBullet!=null&&heroBullet.isLive){
cxt.fillStyle="#FEF26E";
cxt.fillRect(heroBullet.x,heroBullet.y,2,2);
}
}
}可以看到上面的drawHeroBullet中判断了子弹的isLive属性。
看看运行结果吧

全部源代码如下:
tankGame06.js
//为了编程方便,我们定义两个颜色数组
var heroColor=new Array("#BA9658","#FEF26E");
var enemyColor=new Array("#00A2B5","#00FEFE");
//子弹类
function Bullet(x,y,direct,speed){
this.x=x;
this.y=y;
this.speed=speed;
this.direct=direct;
this.timer=null;
this.isLive=true;
this.run=function(){
//判断子弹是否已经到边界了
if(this.x<=0||this.x>=400||this.y<=0||this.y>=300){
//子弹要停止
window.clearInterval(this.timer);
//子弹死亡
this.isLive=false;
}else{
//可以去修改坐标
switch(this.direct){
case 0:
this.y-=this.speed;
break;
case 1:
this.x+=this.speed;
break;
case 2:
this.y+=this.speed;
break;
case 3:
this.x-=this.speed;
break;
}
}
}
}
//定义一个Tank类(基类)
function Tank(x,y,direct,color){
this.x=x;
this.y=y;
this.speed=1;
this.direct=direct;
this.color=color;
//上移
this.moveUp=function(){
this.y-=this.speed;
this.direct=0;
}
//右移
this.moveRight=function(){
this.x+=this.speed;
this.direct=1;
}
//下移
this.moveDown=function(){
this.y+=this.speed;
this.direct=2;
}
//左移
this.moveLeft=function(){
this.x-=this.speed;
this.direct=3;
}
}
//定义一个Hero类
function Hero(x,y,direct,color){
//下面两句话的作用是通过对象冒充达到继承的效果
this.tank=Tank;
this.tank(x,y,direct,color);
//设计敌人函数
this.shotEnemy=function(){
switch(this.direct){
case 0:
heroBullet=new Bullet(this.x+10,this.y,this.direct,1);
break;
case 1:
heroBullet=new Bullet(this.x+30-4,this.y+10+4,this.direct,1);
break;
case 2:
heroBullet=new Bullet(this.x+10,this.y+30,this.direct,1);
break;
case 3:
heroBullet=new Bullet(this.x-4,this.y+10+4,this.direct,1);
break;
}
//把这个子弹放入数组中——》push函数
//调用我们子弹的run
//var timer=window.setInterval("heroBullet.run()",50);
//heroBullet.timer=timer;
heroBullets.push(heroBullet);
var timer=window.setInterval("heroBullets["+(heroBullets.length-1)+"].run()",50);
heroBullets[heroBullets.length-1].timer=timer;
}
}
//定义一个EnemyTank类
function EnemyTank(x,y,direct,color){
this.tank=Tank;
this.tank(x,y,direct,color);
}
//绘制坦克
function drawTank(tank){
//考虑方向
switch(tank.direct){
case 0: //向上
case 2: //向下
//设置颜色
cxt.fillStyle=tank.color[0];
//左边的矩形
cxt.fillRect(tank.x,tank.y,5,30);
//右边的矩形
cxt.fillRect(tank.x+17,tank.y,5,30);
//画中间的矩形
cxt.fillRect(tank.x+6,tank.y+5,10,20);
//画出坦克的盖子
cxt.fillStyle=tank.color[1];
cxt.arc(tank.x+11,tank.y+15,5,0,Math.PI*2,true);
cxt.fill();
//画出炮筒
cxt.strokeStyle=tank.color[1];
cxt.lineWidth=1.5;
cxt.beginPath();
cxt.moveTo(tank.x+11,tank.y+15);
if(tank.direct==0){ //只是炮筒的方向不同
cxt.lineTo(tank.x+11,tank.y);
}else{
cxt.lineTo(tank.x+11,tank.y+30);
}
cxt.closePath();
cxt.stroke();
break;
case 1:
case 3:
//设置颜色
cxt.fillStyle="#BA9658";
//上边的矩形
cxt.fillRect(tank.x-4,tank.y+4,30,5);
//下边的矩形
cxt.fillRect(tank.x-4,tank.y+17+4,30,5);
//画中间的矩形
cxt.fillRect(tank.x+5-4,tank.y+6+4,20,10);
//画出坦克的盖子
cxt.fillStyle="#FEF26E";
cxt.arc(tank.x+15-4,tank.y+11+4,5,0,Math.PI*2,true);
cxt.fill();
//画出炮筒
cxt.strokeStyle="#FEF26E";
cxt.lineWidth=1.5;
cxt.beginPath();
cxt.moveTo(tank.x+15-4,tank.y+11+4);
if(tank.direct==1){ //只是炮筒的方向不同
cxt.lineTo(tank.x+30-4,tank.y+11+4);
}else{
cxt.lineTo(tank.x-4,tank.y+11+4);
}
cxt.closePath();
cxt.stroke();
break;
}
}坦克大战.html
<!DOCTYPE html>
<html>
<head>
<meta charset="utf-8"/>
</head>
<body onkeydown="getCommand();">
<h1>html5-坦克大战</h1>
<!--坦克大战的战场-->
<canvas id="tankMap" width="400px" height="300px" style="background-color:black"></canvas>
<!--将tankGame04.js引入-->
<script type="text/javascript" src="tankGame06.js"></script>
<script type="text/javascript">
//得到画布
var canvas1=document.getElementById("tankMap");
//得到绘图上下文
var cxt=canvas1.getContext("2d");
//我的tank
//规定0向上、1向右、2向下、3向左
var hero=new Hero(40,40,0,heroColor);
//定义子弹数组
var heroBullets=new Array();
//敌人的tank
var enemyTanks=new Array();
for(var i=0;i<3;i++){
var enemyTank = new EnemyTank((i+1)*50,0,2,enemyColor);
enemyTanks[i]=enemyTank;
}
//画出自己的子弹
function drawHeroBullet(){
    for(var i=0;i<heroBullets.length;i++){
        var heroBullet=heroBullets[i];
        if(heroBullet!=null&&heroBullet.isLive){
            cxt.fillStyle="#FEF26E";
            cxt.fillRect(heroBullet.x,heroBullet.y,2,2);
        }
    }
}
//定时刷新我们的作战区(定时重绘)
//自己的坦克,敌人坦克,子弹,炸弹,障碍物
function flashTankMap(){
//把画布清理
cxt.clearRect(0,0,400,300);
//我的坦克
drawTank(hero);
//我的子弹
drawHeroBullet();
//敌人的坦克
for(var i=0;i<3;i++){
drawTank(enemyTanks[i]);
}
}
flashTankMap();
//接收用户按键的函数
function getCommand(){
var code = event.keyCode; //键盘上字幕的ASCII码
switch(code){
case 87: //W :上
hero.moveUp();
break;
case 68: //D :右
hero.moveRight();
break;
case 83: //S :下
hero.moveDown();
break;
case 65: //A :左
hero.moveLeft();
break;
case 74: //J :发子弹
hero.shotEnemy();
break;
}
flashTankMap();
}
//每隔100毫秒去刷新一次作战区
window.setInterval("flashTankMap()",100);
</script>
</body>
</html>以上就是 小强的HTML5移动开发之路(9)——坦克大战游戏3的内容,更多相关内容请关注PHP中文网(www.php.cn)!
 H5和HTML5:网络开发中常用的术语Apr 13, 2025 am 12:01 AM
H5与HTML5指的是同一个东西,即HTML5。HTML5是HTML的第五个版本,带来了语义化标签、多媒体支持、画布与图形、离线存储与本地存储等新功能,提升了网页的表现力和交互性。
 H5指的是什么?探索上下文Apr 12, 2025 am 12:03 AM
H5referstoHTML5,apivotaltechnologyinwebdevelopment.1)HTML5introducesnewelementsandAPIsforrich,dynamicwebapplications.2)Itsupportsmultimediawithoutplugins,enhancinguserexperienceacrossdevices.3)SemanticelementsimprovecontentstructureandSEO.4)H5'srespo
 H5:工具,框架和最佳实践Apr 11, 2025 am 12:11 AM
H5开发需要掌握的工具和框架包括Vue.js、React和Webpack。1.Vue.js适用于构建用户界面,支持组件化开发。2.React通过虚拟DOM优化页面渲染,适合复杂应用。3.Webpack用于模块打包,优化资源加载。
 HTML5的遗产:当前了解H5Apr 10, 2025 am 09:28 AM
HTML5hassignificantlytransformedwebdevelopmentbyintroducingsemanticelements,enhancingmultimediasupport,andimprovingperformance.1)ItmadewebsitesmoreaccessibleandSEO-friendlywithsemanticelementslike,,and.2)HTML5introducednativeandtags,eliminatingthenee
 H5代码:可访问性和语义HTMLApr 09, 2025 am 12:05 AM
H5通过语义化元素和ARIA属性提升网页的可访问性和SEO效果。1.使用、、等元素组织内容结构,提高SEO。2.ARIA属性如aria-label增强可访问性,辅助技术用户可顺利使用网页。
 H5与HTML5相同吗?Apr 08, 2025 am 12:16 AM
"h5"和"HTML5"在大多数情况下是相同的,但它们在某些特定场景下可能有不同的含义。1."HTML5"是W3C定义的标准,包含新标签和API。2."h5"通常是HTML5的简称,但在移动开发中可能指基于HTML5的框架。理解这些区别有助于在项目中准确使用这些术语。
 H5的功能是什么?Apr 07, 2025 am 12:10 AM
H5,即HTML5,是HTML的第五个版本,它为开发者提供了更强大的工具集,使得创建复杂的网页应用变得更加简单。H5的核心功能包括:1)元素允许在网页上绘制图形和动画;2)语义化标签如、等,使网页结构清晰,利于SEO优化;3)新API如GeolocationAPI,支持基于位置的服务;4)跨浏览器兼容性需要通过兼容性测试和Polyfill库来确保。
 h5链接怎么做Apr 06, 2025 pm 12:39 PM
如何创建 H5 链接?确定链接目标:获取 H5 页面或应用程序的 URL。创建 HTML 锚点:使用 <a> 标记创建锚点并指定链接目标URL。设置链接属性(可选):根据需要设置 target、title 和 onclick 属性。添加到网页:将 HTML 锚点代码添加到希望链接出现的网页中。


热AI工具

Undresser.AI Undress
人工智能驱动的应用程序,用于创建逼真的裸体照片

AI Clothes Remover
用于从照片中去除衣服的在线人工智能工具。

Undress AI Tool
免费脱衣服图片

Clothoff.io
AI脱衣机

AI Hentai Generator
免费生成ai无尽的。

热门文章

热工具

MinGW - 适用于 Windows 的极简 GNU
这个项目正在迁移到osdn.net/projects/mingw的过程中,你可以继续在那里关注我们。MinGW:GNU编译器集合(GCC)的本地Windows移植版本,可自由分发的导入库和用于构建本地Windows应用程序的头文件;包括对MSVC运行时的扩展,以支持C99功能。MinGW的所有软件都可以在64位Windows平台上运行。

WebStorm Mac版
好用的JavaScript开发工具

SecLists
SecLists是最终安全测试人员的伙伴。它是一个包含各种类型列表的集合,这些列表在安全评估过程中经常使用,都在一个地方。SecLists通过方便地提供安全测试人员可能需要的所有列表,帮助提高安全测试的效率和生产力。列表类型包括用户名、密码、URL、模糊测试有效载荷、敏感数据模式、Web shell等等。测试人员只需将此存储库拉到新的测试机上,他就可以访问到所需的每种类型的列表。

Dreamweaver Mac版
视觉化网页开发工具

安全考试浏览器
Safe Exam Browser是一个安全的浏览器环境,用于安全地进行在线考试。该软件将任何计算机变成一个安全的工作站。它控制对任何实用工具的访问,并防止学生使用未经授权的资源。


