GPS定位是目前很多手机都有的功能,且非常实用。本文以实例形式讲述了Android中GPS定位的用法。分享给大家供大家参考之用。具体方法如下:
一般在Android中通过GPS获得当前位置,首先要获得一个LocationManager实例,通过该实例的getLastKnownLocation()方法获得第一个的位置,该方法的说明如下:
void android.location.LocationManager.requestLocationUpdates(String provider, long minTime, float minDistance, LocationListener listener)
provider即定位方式,可以采用GPS定位(LocationManager.GPS_PROVIDER)或者网络定位(LocationManager.NETWORK_PROVIDER),本文是GPS定位,因此使用LocationManager.GPS_PROVIDER。minTime是位置更新的间隔时间。listener是位置改变的监听器,自己定义一个LocationListener(),重写onLocationChanged(),加入位置改变时的动作。
布局文件如下:
<LinearLayout xmlns:android="http://schemas.android.com/apk/res/android"
  xmlns:tools="http://schemas.android.com/tools"
  android:layout_width="match_parent"
  android:layout_height="match_parent"
  android:orientation="vertical"
  android:paddingBottom="@dimen/activity_vertical_margin"
  android:paddingLeft="@dimen/activity_horizontal_margin"
  android:paddingRight="@dimen/activity_horizontal_margin"
  android:paddingTop="@dimen/activity_vertical_margin"
  tools:context=".MainActivity" >

  <TextView
    android:id="@+id/txt_time"
    style="@style/my_text"
    android:layout_width="fill_parent"
    android:layout_height="wrap_content"
    android:text="时间:" />

  <TextView
    android:id="@+id/txt_lat"
    style="@style/my_text"
    android:layout_width="fill_parent"
    android:layout_height="wrap_content"
    android:text="经度:" />

  <TextView
    android:id="@+id/txt_lng"
    style="@style/my_text"
    android:layout_width="fill_parent"
    android:layout_height="wrap_content"
    android:text="纬度:" />

</LinearLayout>
MainActivity.java文件如下:
package com.hzhi.my_gps;
import java.text.SimpleDateFormat;
import java.util.Date;
import java.util.Timer;
import java.util.TimerTask;
import android.location.Criteria;
import android.location.Location;
import android.location.LocationListener;
import android.location.LocationManager;
import android.os.Bundle;
import android.os.Handler;
import android.os.Message;
import android.app.Activity;
import android.content.Context;
import android.view.Menu;
import android.widget.TextView;
public class MainActivity extends Activity {

  TextView txt_time;
  TextView txt_lat;
  TextView txt_lng;
  LocationManager lom;
  Location loc;
  Double lat;
  Double lng;
  SimpleDateFormat formatter = new SimpleDateFormat("yyyy-MM-dd HH:mm:ss");
  Date now;
  String str_date;
  Timer timer;

  @Override
  protected void onCreate(Bundle savedInstanceState) {

    super.onCreate(savedInstanceState);
    setContentView(R.layout.activity_main);

    get_con();
    get_gps();

    timer = new Timer(true);
    timer.schedule(task, 0, 1000);
  }

  @Override
  public boolean onCreateOptionsMenu(Menu menu) {
    // Inflate the menu; this adds items to the action bar if it is present.
    getMenuInflater().inflate(R.menu.main, menu);
    return true;
  }

  public void get_gps(){

    lom = (LocationManager) getSystemService(Context.LOCATION_SERVICE);
    loc = lom.getLastKnownLocation(LocationManager.GPS_PROVIDER);

    if (loc != null) {
      lat = loc.getLatitude();
      lng = loc.getLongitude();
      txt_lat.setText("纬度:" + String.valueOf(lat));
      txt_lng.setText("经度:" + String.valueOf(lng));
    }
    else{
      txt_lat.setText("纬度:未知" );
      txt_lng.setText("经度:未知" );
    }

    Criteria criteria = new Criteria();
    criteria.setAccuracy(Criteria.ACCURACY_FINE);
    criteria.setAltitudeRequired(false);
    criteria.setBearingRequired(false);
    criteria.setCostAllowed(true);
    criteria.setPowerRequirement(Criteria.POWER_LOW);
    String provider = lom.getBestProvider(criteria, true);

    lom.requestLocationUpdates(provider, 1000, 10, los);
  }

  LocationListener los = new LocationListener(){
    public void onLocationChanged(Location location){
      if (location != null) {
        lat = location.getLatitude();
        lng = location.getLongitude();
        txt_lat.setText("纬度:" + String.valueOf(lat));
        txt_lng.setText("经度:" + String.valueOf(lng));
      }
      else{
        txt_lat.setText("纬度:未知" );
        txt_lng.setText("经度:未知" );
      }
    };

    public void onProviderDisabled(String provider){

    };

    public void onProviderEnabled(String provider){ };

    public void onStatusChanged(String provider, int status,
    Bundle extras){ };
  };

  // 获取控件
  public void get_con(){

    txt_time = (TextView) findViewById(R.id.txt_time);
    txt_lat = (TextView) findViewById(R.id.txt_lat);
    txt_lng = (TextView) findViewById(R.id.txt_lng);
  }

  Handler handler = new Handler(){

    public void handleMessage(Message msg){
      switch (msg.what){
      case 1:
        get_time();
        break;
      }
    }
  };

  TimerTask task = new TimerTask(){
     public void run() {
       Message message = new Message();
       message.what = 1;
       handler.sendMessage(message);
    }
  };

  // 获取时间
  public void get_time(){

    now = new Date(System.currentTimeMillis());
    str_date = formatter.format(now);
    txt_time.setText("时间:" + str_date);
  }
}
在AndroidManifest.xml文件中加入权限:
<uses-permission android:name="android.permission.ACCESS_FINE_LOCATION"/>
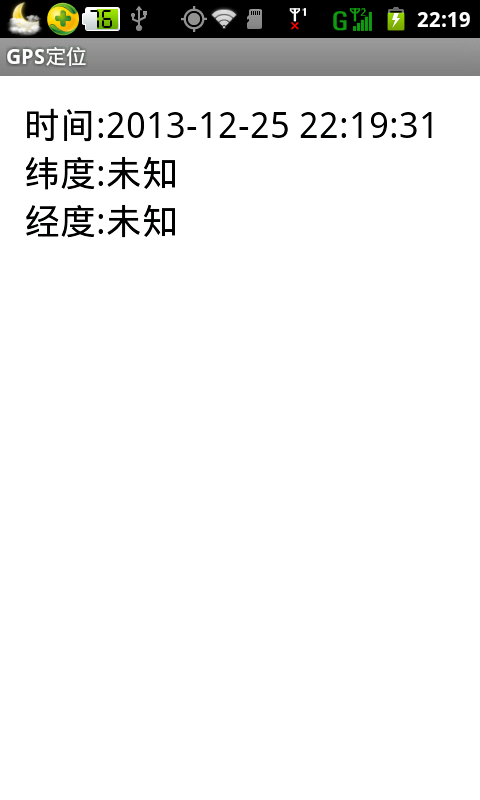
运行前先打开GPS卫星,运行结果如下图所示:

读者可以在室外信号充足的地方试试,是可以获取GPS位置的。
希望本文所述对大家的Android程序设计有所帮助。
更多Android中GPS定位的用法实例相关文章请关注PHP中文网!

热AI工具

Undresser.AI Undress
人工智能驱动的应用程序,用于创建逼真的裸体照片

AI Clothes Remover
用于从照片中去除衣服的在线人工智能工具。

Undress AI Tool
免费脱衣服图片

Clothoff.io
AI脱衣机

AI Hentai Generator
免费生成ai无尽的。

热门文章

热工具

VSCode Windows 64位 下载
微软推出的免费、功能强大的一款IDE编辑器

记事本++7.3.1
好用且免费的代码编辑器

MinGW - 适用于 Windows 的极简 GNU
这个项目正在迁移到osdn.net/projects/mingw的过程中,你可以继续在那里关注我们。MinGW:GNU编译器集合(GCC)的本地Windows移植版本,可自由分发的导入库和用于构建本地Windows应用程序的头文件;包括对MSVC运行时的扩展,以支持C99功能。MinGW的所有软件都可以在64位Windows平台上运行。

WebStorm Mac版
好用的JavaScript开发工具

SublimeText3 Linux新版
SublimeText3 Linux最新版


