
如何使用 PowerShell 轻松管理 Windows Defender

- Linda Hamilton原创
- 2024-09-23 15:01:28984浏览
Windows Defender 是内置于 Windows 操作系统中的防病毒软件。在此,本 MiniTool 教程将引导您了解如何使用 PowerShell 命令行管理 Windows Defender。您将学习如何使用 Windows Defender PowerShell 命令检查防病毒状态、运行快速/全面扫描、启用/禁用实时保护等。
Windows Defender 和 PowerShell 概述
Windows Defender 是 Microsoft 开发的 Windows 上默认的防病毒软件。它用于扫描您的计算机是否存在病毒、恶意软件或其他威胁,然后将其删除以保护您的设备。 PowerShell 是一种用于管理计算机任务的工具。例如,您可以使用 PowerShell 清空回收站、使用 PowerShell 检查文件是否存在等等。
在本文中,我们将向您展示如何使用 PowerShell 管理 Windows Defender。继续阅读以获取特定命令行。
如何使用 PowerShell 管理 Windows Defender
检查 Windows Defender 是否启用
首先,我们将向您展示如何检查当前使用 PowerShell 查看 Windows Defender 的状态。
步骤 1. 在 Windows 搜索框中,键入 PowerShell,然后选择 Windows PowerShell以管理员身份运行 🎜> 在右侧窗格中。
步骤 2. 如果出现 UAC 窗口,请单击是 选项继续。
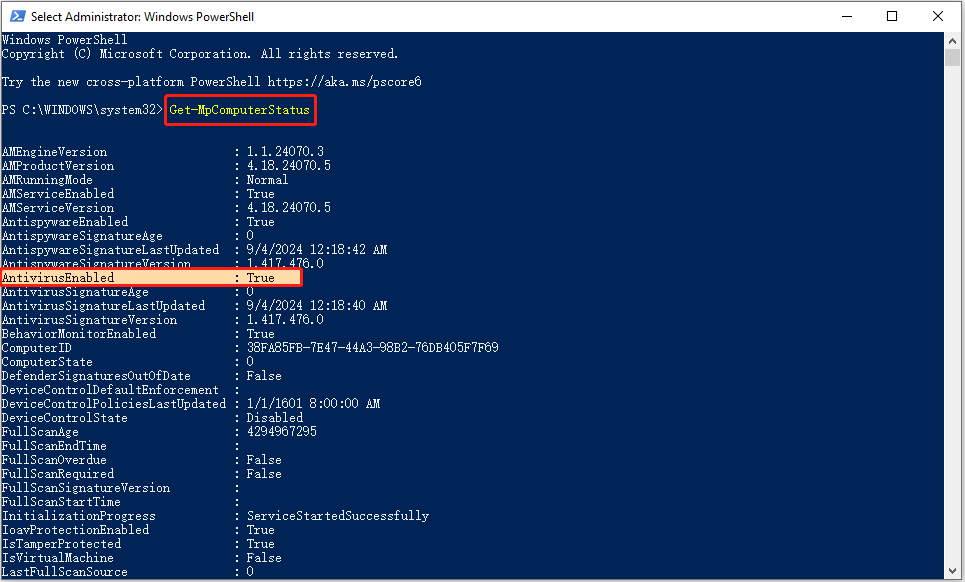
步骤 3. 在命令行窗口中,输入Get-MpComputerStatus 并按 Enter。
步骤 4. 在新窗口中,如果AntivirusEnabled 的值为 True ,这意味着Windows Defender防病毒软件正在运行。如果AntivirusEnabled状态显示为False,则表示Windows Defender已禁用。
Set-MpPreference - DisableRealtimeMonitoring $false
禁用 Windows Defender 防病毒实时保护的命令行为:Set-MpPreference -DisableRealtimeMonitoring $true
运行快速扫描/完整扫描/自定义扫描/离线扫描在这里您可以了解如何使用 Windows Defender PowerShell 命令执行快速/完整/自定义/离线扫描。快速扫描:
在命令行窗口中键入此命令:Start-MpScan -ScanType QuickScan,然后按Enter。然后将开始快速扫描。
全面扫描:
要进行全面病毒扫描,您需要执行此命令行:Start-MpScan -ScanType FullScan.
自定义扫描:
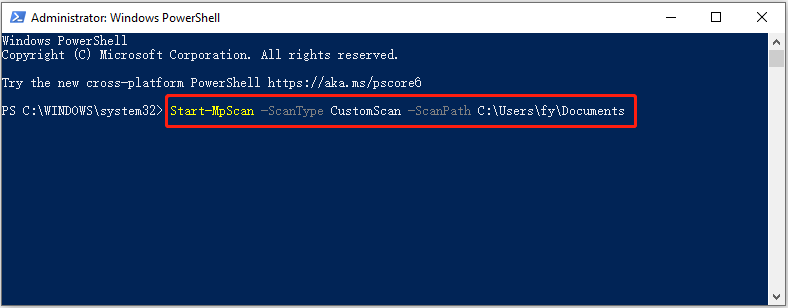
Windows Defender 允许您选择特定驱动器或位置来检查病毒。在这里您可以了解如何通过 PowerShell 完成此任务。首先,确认要扫描的位置/驱动器。其次,键入Start-MpScan -ScanType CustomScan -ScanPath文件位置路径并按Enter。您需要将文件位置路径替换为实际目录。例如,您可以输入 Start-MpScan -ScanType CustomScan -ScanPath C:UsersusernameDocuments 并按 Enter 扫描 Documents 文件夹。请记得将用户名替换为实际用户名。
离线扫描:
Windows Defender 为您提供离线扫描选项,可帮助您检测和删除持久性恶意软件或病毒。此扫描在 Windows 内核之外运行,因此可以更彻底地检查和清理您的系统。输入Start-MpWDOScan并按Enter开始离线扫描病毒。
这就是如何使用PowerShell管理Windows Defender。
Windows数据恢复软件推荐:
由于病毒感染而导致数据丢失的情况很多。有些病毒可以直接删除计算机上的文件,而另一些病毒可能会损坏硬盘驱动器文件系统,使文件无法访问或无法读取。如果您遇到这样的情况并且丢失了文件,您可以使用MiniTool Power Data Recovery来恢复已删除的文件。
该数据恢复软件的免费版支持恢复1GB的文档、图片、视频、音频、免费的电子邮件等。您可以下载并尝试一下。
底线
如何使用 PowerShell 管理 Windows Defender?现在您应该了解用于检查 Windows Defender 状态、启用/禁用实时保护以及运行不同类型的病毒扫描的命令行。
以上是如何使用 PowerShell 轻松管理 Windows Defender的详细内容。更多信息请关注PHP中文网其他相关文章!