 手游教程
手游教程 手游攻略
手游攻略 How do you destroy the Mining Rigs during the \"In Service of Asgard\" Favour in God of War Ragnarok?
Now that God of War Ragnarok is finally available on PC, a whole horde of new players get to join Kratos, Atreus, and Mimir on their journey, which at one point takes them through the Dwarven city of Nidavellir in search of Durlin. It's at this point in the story that they happen across a bard, Raeb, in a deserted tavern.
Apparently, Mimir is not well liked by the dwarves of Svartalfheim because of his hand in Odin’s subjugation of the realm. In the nearby Bay of Bounty, the dwarves maintain three Mining Rigs in service of Asgard.
To go some way to making amends for his deceitful past, Kratos and Atreus agree to help Mimir take the Mining Rigs out of commission and sever one of Odin’s key holds over Svartalfheim.
To begin the In Service of Asgard Favour, after making your way through the Aurvangar Wetlands and Nidavellir, leave the tavern by the far door and board the boat at the end of the dock outside. Then bear right at the fork into the Bay of Bounty rather than left towards Durlin’s office.
Your goal is to shut down three Mining Rigs: Modvitnir’s Rig in the southwest, Radsvinn’s Rig in the middle next to Sindri’s shop and Althjof’s Rig in the northwest.
God of War Ragnarok In Service of Asgard Mining Rigs
Are you stuck on a particular section of this quest? Navigate using the links below to the solution for each Mining Rig.
- Is the In Service of Asgard Favour worth completing in God of War Ragnarok?
- How do you shut down Modvitnir’s Rig in God of War Ragnarok?
- How do you shut down Radsvinn’s Rig in God of War Ragnarok?
- How do you shut down Althjof’s Rig in God of War Ragnarok?
Is the In Service of Asgard Favour worth completing in God of War Ragnarok?
While not all of the Favours in God of War Ragnarok yield incredible rewards, In Service of Asgard is one of the most important early side quests and gives you fast access to one of the best armor sets in the whole game.
It’s also a great introduction to the mix of combat, puzzles and story that makes up the majority of God of War Ragnarok, so not only is it worth doing for the reward, but to acclimatise you to the game’s mechanics as well.
How do you shut down Modvitnir’s Rig in God of War Ragnarok?

Paddle up to the dock at Modvitnir’s Rig and disembark, then hop up the ledge and get ready to squish some Wild Wretches.

Once they’re dealt with, take a right and grapple up this second ledge, then throw your Leviathan Axe at the target on the right after grabbing the sack of hacksilver.
Hitting the target lowers the gate in front of you can lets Kratos leap over the broken bridge on the other side.

Climb the wooden structure and loot the chest on top, then head to the right. Inside the chest is the first half of the Muspelheim seed, which you won’t be able to complete until much later in your adventure.

Before you swing over the gap, look down and to the right and you should see a barking Ormr. This is a special enemy that you can only defeat from behind. Throw your axe from this vantage point and they will drop some good items for scavenging, including forged iron and slag deposits.

Now swing across and drop down to the right to grab your Ormr items. Back up top, look over out across the bay and throw your axe at the target on the right-hand side of the crane to swing it across the inaccessible gap ahead of you. Hit the right-hand target again to move it the full distance.
Now swing across, defeat the wretches, then loot the chest on your left by swinging the crane further around so you can cross the gap.
Next drop the golden chain behind you to give a quick way back to the beach you landed on, then climb the chain up to the top level.

Here you have a tough slog against a Bergsra Mother to face up to, but once it’s down approach the furnace and cut into its grate with your Blades of Chaos.
This shuts down the first Mining Rig and rewards you with a piece of forged iron and some Nidavellir Ore which you can take to Sindri to make a great piece of equipment.
Use the chains to return to your boat and press forward onto the second Mining Rig.
How do you shut down Radsvinn’s Rig in God of War Ragnarok?

On the middle island in the Bay of Bounty you find Sindri at a makeshift smithy. Craft or upgrade any items you need because next up is a tough fight.
Radsvinn’s Rig is more of a combat challenge than a puzzle, so head east from Sindri, climb the ledge with your blades and then the wooden structure at the top of it.

The Rig is lousy with venomous Grim, either attached to the walls or stalking around the furnace. From your vantage point you can take the fight to the Grim before they realise you’re there and knock down a couple of them with a well-placed ranged attack.
Stay mobile, using the grapple points to swing over to the second level of the rig if necessary, to avoid the globs of poison and claw attacks from the Grim. After a few are defeated some Nightmares - giant flying eyeballs - appear, who are best dealt with using ranged attacks.
Once they’re all defeated, approach the burning furnace, cut into it with your blades and claim your second Nidavellir Ore along with some rawhide and hacksilver.

We have a full page on how to solve all of the Nornir chests in God of War Ragnarok, but quickly, to grab the one here you need to light the three braziers in the near vicinity with your blades by aiming with L2, then pressing R2.

The first brazier is just to the left of the chest, the second is 360 behind you obscured by a grate. To light it, swing up to the second level of the Mining Rig and throw your axe at the pot above it.

The third is to the right of the chest, behind some barrels that shimmer green and need to be destroyed by an arrow from Atreus.

There’s also one of Odin’s spies perched on a fishhook overlooking the bay.
How do you shut down Althjof’s Rig in God of War Ragnarok?

Approach Althjof’s Rig from the water and disembark at the dock. Climb up the chain in front of you and just to your left, through a hole in the wall, is one of Odin’s Ravens.

To progress the Mining Rig puzzle, approach the wheel on the right and interact with it. Wheel the crane down until you can use the grapple point to swing across the gap.

Then go to the crane and use your blades to pull down the cage platform so you have a clear path across.

Swing over, then use your blades to blow open a path on the left using your Blades of Chaos.
In the next area, bear left and climb the wall on the other side of the platform. Follow the path around to the right and break the shields on your left as you go to clear a quick way back up here.

Next, wrench open the wood and metal gate on the right and drop down on the other side. Use the red barrel to blow open another path and continue left, climbing up the painted wood on the right.

After your climb, smash through the floor below and defeat the draugr. To get the chest on the other side of the gap you can see down here, return to the wheel from the start of the puzzle and roll the crane swing all the way to the bottom so you can hop across. You get a couple of pieces of forged iron.

While you’re down here, use your blades on the crane floor to hurl the platform back up to the top of the crane structure, then go back to the wheel and roll the swing up to match the platform.

Next, grapple up to your left and use the now raised platform and swing to get across to the other side of the Mining Rig. Drop the golden chain on the right for a quick way back, but your goal is at the top of the painted wooden wall.
Defeat the Grim and Draugr, then approach the furnace to destroy Althjof’s Rig and claim your final piece of Nidavellir Ore. Take it back to Sindri for your prize at your leisure.
This completes the In Service of Asgard Favour and dishes out a good chunk of XP for both Kratos and Atreus, as well as lifting a load from Mimir’s conscience.

However, your work isn’t quite done on Althjof’s Rig. As you look away from the furnace on your left are some barrels that can be destroyed by Atreus’ arrows.
Break them and climb around to the platform they were blocking. Grapple across then look to your right - there’s another room you can smash into if you raise the crane again.

Drop the chain on the left, use the wheel to raise the crane, then climb back up the chain and use the swing to crash through the wall. Follow the path around to the right and you find a chest containing a Runic attack for your Axe.
With that in hand, you can now return to the boat and either make your way to Durlin’s office or take on the Weight of Chains Favour.
以上是How do you destroy the Mining Rigs during the \"In Service of Asgard\" Favour in God of War Ragnarok?的详细内容。更多信息请关注PHP中文网其他相关文章!
 野蛮星球的复仇:所有的quasadron ix自拍照位置May 09, 2025 pm 08:03 PM
Quasadron IX是《野蛮星球》报仇的第二大世界,在伏击巴布特人的情况下提出了一个具有挑战性的自拍狩猎。 本指南指出了所有四个自拍照位置,详细介绍了它们与最近的传送器的接近度。记住,乔恩
 黑手党:旧国家预订指南 - 版本,价格和奖金May 09, 2025 pm 06:04 PM
黑手党回来了! 在上一部主要部分近十年之后,该系列与黑手党:旧国家返回,这是1900年代初期西西里岛的前传。 与以前的城市环境的不同之处提供了一个新的视角,展示了主角
 Wordle答案和提示 - 2025年5月10日解决方案#1,421May 09, 2025 pm 06:03 PM
今天的Wordle挑战在等待! 认为你可以征服吗? 想让它变得更加艰难吗?尝试硬模式!需要一点帮助吗?我们已经覆盖了你。 所有解决方案和字母仍然隐藏,以防止意外破坏。 但是,我们提供SOM
 NYT迷你填字游戏答案和提示 - 2025年5月9日May 09, 2025 pm 12:02 PM
卡在了今天的纽约时报迷你填字游戏中? 需要对这些棘手的线索有新的看法吗?不用担心,我们已经覆盖了您! 有时,您需要一个不同的角度来破解代码。 无论您是在寻找微妙的轻推还是完全答案,
 所有神奇宝贝TCG列出的秘密任务列出了May 09, 2025 am 11:27 AM
PokémonTCG口袋中的秘密任务正是他们听起来的样子 - 当您首次启动PokémonPocket时,您将不知道的任务存在。实际上,游戏只会让您知道它们的存在
 PokémonGo可能会进行现场研究任务及其奖励解释May 09, 2025 am 11:26 AM
Pokémon Go 的田野调查任务于 2018 年加入游戏,为玩家提供了新的任务。完成这些任务可以获得独特的奖励,例如研究突破奖励,而特殊研究任务则能帮助你发现前所未见的宝可梦,包括难以捉摸的神奇宝可梦梦幻。 本文涵盖: Pokémon Go 五月份田野调查任务及研究突破奖励 Pokémon Go 田野调查任务详解 研究突破详解 特殊研究任务是什么? Pokémon Go 研究任务你需要了解的其他一切 任务类型示例包括: 捕捉一到两只特定宝可梦(例如 3 只小拉达或黑暗鸦) 捕捉特定属
 <🎜>巨型演变列表以及如何获得巨型能量May 09, 2025 am 11:18 AM
神奇宝贝Go Mega Evolution:您的强大转型指南 Pokémon中的大型演变暂时将您的神奇宝贝提升为令人难以置信的力量。 他们首先在神奇宝贝X和Y中出现,现在需要在PokémonGo中进行大型能量。 4月20日的重大更新
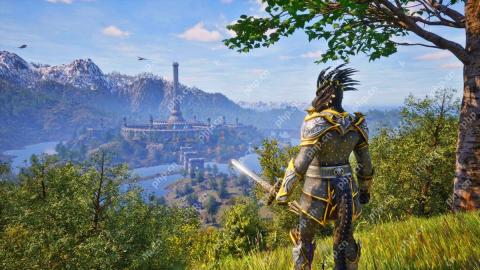
 遗忘重新制作中的最佳mod以及如何安装它们May 09, 2025 am 11:15 AM
遗忘重新制作:增强您使用最佳mod的体验 Oblivion重新制作了精美的原始游戏,同时保留其魅力。 但是,与其他Bethesda头衔一样,改装社区已经在努力工作,提供


热AI工具

Undresser.AI Undress
人工智能驱动的应用程序,用于创建逼真的裸体照片

AI Clothes Remover
用于从照片中去除衣服的在线人工智能工具。

Undress AI Tool
免费脱衣服图片

Clothoff.io
AI脱衣机

Video Face Swap
使用我们完全免费的人工智能换脸工具轻松在任何视频中换脸!

热门文章

热工具

VSCode Windows 64位 下载
微软推出的免费、功能强大的一款IDE编辑器

SublimeText3汉化版
中文版,非常好用

mPDF
mPDF是一个PHP库,可以从UTF-8编码的HTML生成PDF文件。原作者Ian Back编写mPDF以从他的网站上“即时”输出PDF文件,并处理不同的语言。与原始脚本如HTML2FPDF相比,它的速度较慢,并且在使用Unicode字体时生成的文件较大,但支持CSS样式等,并进行了大量增强。支持几乎所有语言,包括RTL(阿拉伯语和希伯来语)和CJK(中日韩)。支持嵌套的块级元素(如P、DIV),

禅工作室 13.0.1
功能强大的PHP集成开发环境

Dreamweaver Mac版
视觉化网页开发工具


