


In this guide, we'll walk through building a dynamic user feedback form using the @perseid/form library, a powerful alternative to Formik and React Hook Form. You'll see how @perseid/form makes it easy to manage form state, validation, and conditional rendering. The form we'll build will ask users to rate a service and provide feedback. Depending on the rating, it will either show a "thank you" message or prompt the user to provide additional feedback.
? Let's get started!
Step 1: Setting Up the Form Configuration
The first step is to define the form configuration. This configuration outlines how the form behaves, including the fields, steps, and the flow between them. Here, we're going to create fields for a rating and a review, with conditional logic based on the user's rating. We'll also define messages for both positive and negative feedback.
Here's the configuration code:
import { type Configuration } from "@perseid/form";

const formConfiguration: Configuration = {
  // Root step-the form will start from there.
  root: "feedback",
  // Callback triggered on form submission.
  onSubmit(data) {
    alert(`Submitting the following JSON: ${JSON.stringify(data)}`);
    return Promise.resolve();
  },
  // `fields` define the data model the form is going to deal with.
  // Expect the submitted data JSON to match this schema.
  fields: {
    rating: {
      type: "integer",
      required: true,
    },
    review: {
      type: "string",
      required: true,
      // Display this field only if condition is met...
      condition: (inputs) =>
        inputs.rating !== null && (inputs.rating as number) < 3,
    },
    // Type `null` means that the value of this field will not be included in submitted data.
    submit: {
      type: "null",
      submit: true,
    },
    message_good: {
      type: "null",
    },
    message_bad: {
      type: "null",
    },
  },
  // Now that fields are defined, you can organize them in a single or multiple steps,
  // depending on the UI you want to build!
  steps: {
    feedback: {
      fields: ["rating", "review", "submit"],
      // Whether to submit the form at the end of this step.
      submit: true,
      // Next step is conditionned to previous user inputs...
      nextStep: (inputs) =>
        (inputs.rating as number) < 3 ? "thanks_bad" : "thanks_good",
    },
    thanks_good: {
      fields: ["message_good"],
    },
    thanks_bad: {
      fields: ["message_bad"],
    },
  },
};
In this configuration:
- The form starts at the feedback step.
- The form contains two fields: rating (required) and review (optional unless the rating is below 3).
- Based on the rating, the form navigates to either the "good" or "bad" feedback message.
- Upon form submission, a simple alert is triggered with the submitted data.
The key point to grasp here is the function of the fields property. It defines the structure of the data that will be submitted, essentially acting as a data model. In contrast, the steps property outlines the form's flow, determining how these fields will be presented to the user.
Step 2: Creating the Form's React Components
Now that we have the configuration, it's time to build the actual UI that will render the form. Using @perseid/form/react, we can create custom field components to manage user interactions for each part of the form.
Here's the core React component:
import React from "react";
import Form, { type FormFieldProps } from "@perseid/form/react";
// The actual React component, used to build the UI!
function Field(props: FormFieldProps): JSX.Element {
const { path, engine, value, status } = props;
const [currentRating, setCurrentRating] = React.useState(0);
// Display a different element depending on the field...
if (path === "thanks_good.1.message_good") {
return (
<div className="message">
<h1>Thanks for the feedback ?</h1>
<p>We are glad you enjoyed!</p>
</div>
);
}
if (path === "thanks_bad.1.message_bad") {
return (
<div className="message">
<h1>We're sorry to hear that ?</h1>
<p>We'll do better next time, promise!</p>
</div>
);
}
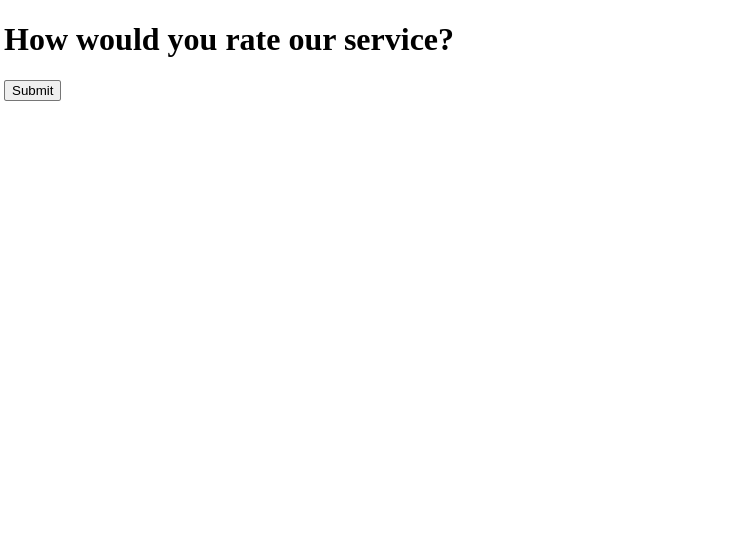
if (path === "feedback.0.rating") {
return (
// Depending on the field status, define some extra classes for styling...
<div
className={`rating ${status === "error" ? "rating--error" : ""}`}
onMouseLeave={() => {
setCurrentRating((value as number | null) ?? 0);
}}
>
<h1>How would you rate our service?</h1>
{[1, 2, 3, 4, 5].map((rating) => (
<span
key={rating}
className={`rating__star ${
currentRating >= rating ? "rating__star--active" : ""
}`}
onMouseEnter={() => {
setCurrentRating(rating);
}}
onClick={() => {
// On click, notify the form engine about new user input.
engine.userAction({ type: "input", path, data: rating });
}}
></span>
))}
</div>
);
}
if (path === "feedback.0.review") {
return (
<div className={`review ${status === "error" ? "review--error" : ""}`}>
<label>Could you tell us more?</label>
<textarea
onChange={(e) =>
engine.userAction({ type: "input", path, data: e.target.value })
}
/>
</div>
);
}
// path === 'feedback.0.submit'
return (
<button
className="submit"
onClick={() => {
engine.userAction({ type: "input", path, data: true });
}}
>
Submit
</button>
);
}
Here, the Field component uses the path prop to decide what to render:
- A rating component where users can select a star rating.
- A textarea for users to provide additional feedback.
"Thank you" messages that appear based on the rating. The form will dynamically adjust its fields and steps based on user input.
Pretty cool, right?

Step 3: Running the Application
Now that our form configuration and component are ready, let's integrate them into a basic React app. Here's the code to initialize and render the form:
import { createRoot, type Root } from "react-dom/client";

// Let's run the app!
let app: Root;

// Creating React root...
const container = document.querySelector("#root") as unknown as HTMLElement;
app = createRoot(container);
app.render(
  // Router is the main component for any Perseid app.
  <Form Field={Field} configuration={formConfiguration} />
);
This code mounts the form to the DOM using React's createRoot API. The Form component, which connects our configuration and Field component, handles everything else.
Step 4: Adding Styles
Alright, we have our app logic, but if you run the code now, you'll see that it's a bit... raw ?
So, let's pimp the form by adding some styles and animations! Below is a simple stylesheet that makes it way more appealing:
// A few animations for fun...

@keyframes swipe-out {
  0% {
    opacity: 1;
    transform: translateX(0);
  }
  75% {
    opacity: 0;
    transform: translateX(-100%);
  }
  100% {
    opacity: 0;
    transform: translateX(-100%);
  }
}

@keyframes swipe-in-one {
  0% {
    opacity: 0;
    transform: translateX(100%);
  }
  75% {
    transform: translateX(0);
  }
  100% {
    opacity: 1;
    transform: translateX(0);
  }
}

@keyframes swipe-in-two {
  0% {
    opacity: 0;
    transform: translateX(0);
  }
  75% {
    transform: translateX(-100%);
  }
  100% {
    opacity: 1;
    transform: translateX(-100%);
  }
}

@keyframes bubble-in {
  0% {
    transform: scale(0.5);
  }
  75% {
    transform: scale(1.5);
  }
  100% {
    transform: scale(1);
  }
}

@keyframes fade-in {
  0% {
    opacity: 0;
  }
  100% {
    opacity: 1;
  }
}

// Some global basic styling...

* {
  box-sizing: border-box;
}

body {
  margin: 0;
  display: grid;
  height: 100vh;
  color: #aaaaaa;
  align-items: center;
  font-family: "Helvetica", sans-serif;
}

// And form-specific styling.

.perseid-form {
  width: 100%;
  margin: auto;

  &__steps {
    display: flex;
    overflow: hidden;
  }

  &__step {
    min-width: 100%;
    padding: 1rem 3rem;
    animation: 500ms ease-in-out forwards swipe-out;

    &__fields {
      display: grid;
      row-gap: 2rem;
    }
  }

  &__step[class*="active"]:first-child {
    animation: 500ms ease-in-out forwards swipe-in-one;
  }
  &__step[class*="active"]:last-child:not(:first-child) {
    animation: 500ms ease-in-out forwards swipe-in-two;
  }
}

.submit {
  border: none;
  cursor: pointer;
  padding: 1rem 2rem;
  border-radius: 8px;
  color: #fefefe;
  font-size: 1.25rem;
  background: #46c0b0;
  justify-self: flex-end;
  transition: all 250ms ease-in-out;

  &:hover {
    background: #4cccbb;
  }
}

.rating {
  position: relative;
  padding: 0.25rem 0;

  &__star {
    cursor: pointer;
    display: inline-block;
    font-size: 2rem;
    min-width: 2rem;
    min-height: 2rem;

    &::after {
      content: "⚪️";
    }

    &--active {
      animation: 250ms ease-in-out forwards bubble-in;
      &::after {
        content: "?";
      }
    }
  }

  &[class*="error"] {
    &::after {
      left: 0;
      bottom: -1.5rem;
      color: #f13232;
      position: absolute;
      font-size: 0.75rem;
      content: "? This field is required";
      animation: 250ms ease-in-out forwards fade-in;
    }
  }
}

.review {
  display: grid;
  row-gap: 1rem;
  position: relative;
  animation: 250ms ease-in-out forwards fade-in;

  label {
    font-size: 1.25rem;
  }

  textarea {
    resize: none;
    min-height: 5rem;
    border-radius: 8px;
    border: 1px solid #46c0b0;
    transition: all 250ms ease-in-out;
  }

  &[class*="error"] {
    &::after {
      left: 0;
      bottom: -1.5rem;
      color: #f13232;
      position: absolute;
      font-size: 0.75rem;
      content: "? This field is required";
      animation: 250ms ease-in-out forwards fade-in;
    }
  }
}

@media screen and (min-width: 30rem) {
  .perseid-form {
    max-width: 30rem;
  }
}
And voilà ?
Conclusion
Congratulations! ? You've just built a dynamic user feedback form with Perseid and React.
In this tutorial, we went over how to:
- Define a form configuration with conditional logic.
- Build custom React components to handle user interactions.
- Render the form in your app and style it with animations and custom CSS.
Feel free to experiment with additional fields and steps to suit your use case. Have fun building awesome forms! ?
- ? More examples
- ✅ Complete documentation
- ? Join our Discord
- ? Star the project on GitHub
- ❤️ Sponsor Perseid
以上是Building a User Feedback Form with Perseid and React的详细内容。更多信息请关注PHP中文网其他相关文章!

 Python vs. JavaScript:开发人员的比较分析May 09, 2025 am 12:22 AM
Python和JavaScript的主要区别在于类型系统和应用场景。1.Python使用动态类型,适合科学计算和数据分析。2.JavaScript采用弱类型,广泛用于前端和全栈开发。两者在异步编程和性能优化上各有优势,选择时应根据项目需求决定。
 Python vs. JavaScript:选择合适的工具May 08, 2025 am 12:10 AM
选择Python还是JavaScript取决于项目类型:1)数据科学和自动化任务选择Python;2)前端和全栈开发选择JavaScript。Python因其在数据处理和自动化方面的强大库而备受青睐,而JavaScript则因其在网页交互和全栈开发中的优势而不可或缺。
 Python和JavaScript:了解每个的优势May 06, 2025 am 12:15 AM
Python和JavaScript各有优势,选择取决于项目需求和个人偏好。1.Python易学,语法简洁,适用于数据科学和后端开发,但执行速度较慢。2.JavaScript在前端开发中无处不在,异步编程能力强,Node.js使其适用于全栈开发,但语法可能复杂且易出错。
 JavaScript的核心:它是在C还是C上构建的?May 05, 2025 am 12:07 AM
javascriptisnotbuiltoncorc; saninterpretedlanguagethatrunsonenginesoftenwritteninc.1)javascriptwasdesignedAsalightweight,解释edganguageforwebbrowsers.2)Enginesevolvedfromsimpleterterterpretpreterterterpretertestojitcompilerers,典型地提示。
 JavaScript应用程序:从前端到后端May 04, 2025 am 12:12 AM
JavaScript可用于前端和后端开发。前端通过DOM操作增强用户体验,后端通过Node.js处理服务器任务。1.前端示例:改变网页文本内容。2.后端示例:创建Node.js服务器。
 Python vs. JavaScript:您应该学到哪种语言?May 03, 2025 am 12:10 AM
选择Python还是JavaScript应基于职业发展、学习曲线和生态系统:1)职业发展:Python适合数据科学和后端开发,JavaScript适合前端和全栈开发。2)学习曲线:Python语法简洁,适合初学者;JavaScript语法灵活。3)生态系统:Python有丰富的科学计算库,JavaScript有强大的前端框架。
 JavaScript框架:为现代网络开发提供动力May 02, 2025 am 12:04 AM
JavaScript框架的强大之处在于简化开发、提升用户体验和应用性能。选择框架时应考虑:1.项目规模和复杂度,2.团队经验,3.生态系统和社区支持。
 JavaScript,C和浏览器之间的关系May 01, 2025 am 12:06 AM
引言我知道你可能会觉得奇怪,JavaScript、C 和浏览器之间到底有什么关系?它们之间看似毫无关联,但实际上,它们在现代网络开发中扮演着非常重要的角色。今天我们就来深入探讨一下这三者之间的紧密联系。通过这篇文章,你将了解到JavaScript如何在浏览器中运行,C 在浏览器引擎中的作用,以及它们如何共同推动网页的渲染和交互。JavaScript与浏览器的关系我们都知道,JavaScript是前端开发的核心语言,它直接在浏览器中运行,让网页变得生动有趣。你是否曾经想过,为什么JavaScr


热AI工具

Undresser.AI Undress
人工智能驱动的应用程序,用于创建逼真的裸体照片

AI Clothes Remover
用于从照片中去除衣服的在线人工智能工具。

Undress AI Tool
免费脱衣服图片

Clothoff.io
AI脱衣机

Video Face Swap
使用我们完全免费的人工智能换脸工具轻松在任何视频中换脸!

热门文章
热工具

禅工作室 13.0.1
功能强大的PHP集成开发环境

Dreamweaver Mac版
视觉化网页开发工具

螳螂BT
Mantis是一个易于部署的基于Web的缺陷跟踪工具,用于帮助产品缺陷跟踪。它需要PHP、MySQL和一个Web服务器。请查看我们的演示和托管服务。

SublimeText3汉化版
中文版,非常好用

SublimeText3 英文版
推荐:为Win版本,支持代码提示!

