


There are 12 trinkets to be found in The Casting of Frank Stone. This guide breaks down how to find all trinkets from each of the fourteen chapters in the game.
Table of contents
- How to find all trinkets in The Casting of Frank Stone
- Chapter 1 trinket locations
- Chapter 2 trinket locations
- Chapter 3 trinket locations
- Chapter 4 trinket locations
- Chapter 5 trinket locations
- Chapter 6 trinket locations
- Chapter 7 trinket locations
- Chapter 8 trinket locations
- Chapter 9 trinket locations
- Chapter 10 trinket locations
- Chapter 11 trinket locations
- Chapter 12 trinket locations
- Chapter 13 trinket locations
- Chapter 14 trinket locations
How to find all trinkets in The Casting of Frank Stone
Trinkets are collectibles in The Casting of Frank Stone that are generally off the beaten path and well hidden. I recommend taking your time and reading through this guide as you complete each chapter, so you don’t accidentally miss one. Without further ado, here’s how to find all trinkets in The Casting of Frank Stone.
Chapter 1 trinket locations
Players can find two trinkets in Chapter 1 of The Casting of Frank Stone. Luckily, they’re not very well hidden. Here’s how to find both.
Trinket #1: Iridescent King

The first trinket can be found at the start of the game, right when you first gain control of the policeman. Head forward past the truck, and make your way towards the red barrels. On the left, you will find a gap in the wall that you can squeeze through.

In the corner of the room, you will find a small container. Open the container to snag the trinket.

Trinket #2: Wooden Horse

The second trinket in Chapter 1 can be found immediately upon dropping into the grate and reaching the sewers. Once you enter the sewers, turn around and go straight down the hallway. Take the first left, where you’ll find an open brown door on the right-hand side.

Go through this door to find a container at the end of the hallway. Open the container to grab the trinket.

Chapter 2 trinket locations
There are no trinkets in Chapter 2 of The Casting of Frank Stone. In other words, no need to waste much time exploring every nook and cranny.
Chapter 3 trinket locations
There is one trinket to be found in Chapter 3, when everyone goes into town to get the camera fixed.
Trinket #3: Waterlogged Shoe

The only trinket in Chapter 3 can be found upon entering the Drugstore. From the door, head over to the last aisle on the right to find a container on the bottom shelf about halfway down the aisle next to a stack of toilet paper. Inside the container, you’ll find a trinket.

Chapter 4 trinket locations
There are no trinkets in Chapter 4 of The Casting of Frank Stone.
Chapter 5 trinket locations
Five trinkets can be found in Chapter 5 of The Casting of Frank Stone. They become available once everyone leaves the garage and parks at the Mill. Unfortunately, two trinkets have to be acquired in different playthroughs as each requires a different choice/action.
Trinket #4: The Iridescent Head

The fourth trinket, The Iridescent Head, takes a while to get. There’s a step you need to take early in Chapter 5 in order actually to acquire the trinket later on in the same Chapter. First, you need to get the Casting Shed Key, which can be obtained in the sewers on the way to the Mill when playing as Chris.
When first entering the sewer, continue forward until you find a small opening in the wall that you can climb over.

Continue straight and go through the door to reach a large open room. In the corner of the room, you will find a box with a key inside. This is the Casting Shed Key.

The next step in acquiring the Iridescent trinket occurs after playing as Linda for the first time in the Mill.
Right when you gain control of Chris again, you’ll encounter a large brown door with the words “Casting Shed” above it. Use the Casting Shed Key you found earlier to enter.

Head to the edge of this room to find large shelves that you can interact with and move.

Move these shelves outward until they lock in place. Make sure to move both of them. Now head to the center of the room to find a red dresser that you can interact with.

Move this red dresser and place it under the yellow towel that’s hanging down from the upper floor.

Now climb on top of the red dresser and climb to the top floor. Continue straight, looping around and going through the crevice, until you reach the large shelves you moved earlier. Jump over the large shelves to find the fourth trinket in a container lying on the ground.

Trinket #5: Tattooed Middle Finger

After parking at the Mill and watching the short cutscene of the group of friends making it to the creek, Robert will ask which way they should go to reach their location. Make sure you pick “Cross” to get the next trinket.
After crossing the creek, continue forward on the main path until you reach the first building and cross over the plank. You’ll notice a stone platform to your left, which has another plank leading to a standalone platform. The red arrow below shows the location of the trinket.

Cross the second plank to reach the trinket. Make sure not to fall when crossing the plank.

Trinket #6: Mother Daughter Ring

Another trinket can be found by choosing the choice “Climb” when Robert asks which way everyone should go from the creek. Immediately after climbing the fence, you can find the trinket under a tarp on the left-hand side. To reach it, go through a crevice in the rocks.

Trinket #7: Wooden Oni Mask

The next trinket can be found when you first gain control of Linda in Chapter 5. It is located in a locked shed, where you’ll need to use a crowbar in order to open. To find the crowbar head to the southeastern corner, where you’ll find a grate next to the building of a wall. Next to the grate is the crowbar.

After picking up the crowbar, head to the northwestern section of the area to find a shed. The image below shows which shed you should be looking for (the door is open since I already used the crowbar on it).

Use the crowbar on the shed and you’ll find a container with a trinket in the back.

Trinket #8: Blighted Rat

Trinket #8 can be found once the player enters the Mill for the first time as Linda. After entering, follow your friends over the steel pathway until you reach the ground floor. To your right, you will find a small staircase.

Climb these stairs to find a crevice you can squeeze through. On the other side of the crevice you will find a handle that you’ll need in a minute.

Backtrack to where you came from (where you entered the mill) to find a contraption you can interact with and attach the handle you just found.

Rotate the handle to bring a platform closer to you. On the platform is a container containing the Blighted Rat trinket.

Chapter 6 trinket locations
There is only one trinket available in Chapter 6 of The Casting of Frank Stone. The good news is that it’s pretty hard to miss.
Trinket #9: Victor’s Solder

The ninth trinket, Victor’s Soldier, can be found once the player unlocks the metal door and reaches Augustine’s reliquary. After the short cutscene, head towards the fire pit and pass it to find a trinket container lying on the ground next to a statue.

Chapter 7 trinket locations
There is one trinket in Chapter 7 of The Casting of Frank Stone. It becomes available when you gain control of Linda.
Trinket #10: Diamond Cufflinks

The Diamond Cufflinks trinket can be found after completing the battle sequence with Frank Stone and using the forklift. The forklift is on the main path and is impossible to miss.
After riding the forklift to the top, proceed out of the garage and walk across the steel narrow walkway to your right.

On the other side, you’ll find the Diamond Cufflinks next to the small light.

Chapter 8 trinket locations
There are no trinkets available in Chapter 8 of The Casting of Frank Stone.
Chapter 9 trinket locations
There are no trinkets available in Chapter 9 of The Casting of Frank Stone.
Chapter 10 trinket locations
There are no trinkets available in Chapter 10 of The Casting of Frank Stone.
Chapter 11 trinket locations
There are no trinkets available in Chapter 11 of The Casting of Frank Stone.
Chapter 12 trinket locations
There is one trinket in Chapter 12 and can be easily found at the start of the chapter. Make sure you don’t go through any rooms that tell you to hold the open button, or else you’ll lock yourself out of getting this trinket.
Trinket #11: Sacrificial Knife

The Sacrificial Knife trinket can be found at the start of Chapter 12 when you gain control of Madison. Go through the hallway and enter the door on the left to enter a bedroom. On the table in front of a bed is a book, open it and turn the page to gain a key.

Next, walk over to the table on the opposite side of the room that has a small container on it, located right next to a statue of a head.

Interact with it use the key on it and turn the key to open a secret doorway. The secret doorway is right next to where you originally found the key in the book.
Continue through the secret door and when you reach the bottom take a left. Do not go through the door on the right or you’ll lock yourself out of this section.
Follow the hallway to find the Sacrificial Knife trinket in a container on a small table.

Chapter 13 trinket locations
There are no trinkets available in Chapter 13 of The Casting of Frank Stone.
Chapter 14 trinket locations
There is one trinket in the final chapter of The Casting of Frank Stone. It’s easily found at the start of the chapter.
Trinket #12: Blacksmith’s Hammer

The final trinket, Blacksmith’s Hammer, can be found right when you gain control of Linda in Chapter 14 and after Frank Stone comes out of the projector. After the cutscene, go down the hallway and take the first turn to find the container for the Blacksmith’s Hammer trinket on the small table. It’s a really dark room, so it may be hard to see.

We hope this guide has helped you find all 12 trinkets in The Casting of Frank Stone. Next, take the time to read our Casting of Frank Stone multiplayer guide.
以上是《弗兰克·斯通选角》中的全部 12 个饰品位置的详细内容。更多信息请关注PHP中文网其他相关文章!

 R.E.P.O.能量晶体解释及其做什么(黄色晶体)Mar 18, 2025 am 12:07 AM
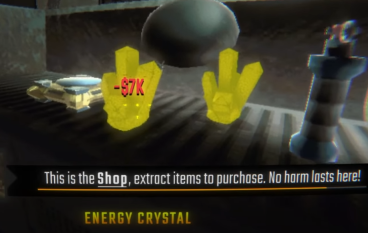
在《R.E.P.O.》中购买了昂贵的武器或无人机却发现能量耗尽,变得毫无用处?别担心,您无需再花费50,000美元购买替换品,只需为您的装备充电即可! 您卡车后部的那个奇怪机器并非摆设。以下是如何获得能量水晶并利用它们让您的装备持续运行,避免破产的方法。 更多阅读: 所有R.E.P.O.物品 如何获得能量水晶 您可以在关卡之间的服务商店购买能量水晶。 它们通常售价在7,000美元到9,000美元之间——虽然价格不菲,但远比重新购买装备便宜得多。 在前几个关卡,无需购买。您暂时不需要它们,所以将
 仓库:如何复兴队友Mar 04, 2025 am 02:44 AM
在可怕的合作恐怖游戏中,R.E.P.O,您和您的朋友必须收集战利品并提取贵重物品。 浏览令人毛骨悚然的走廊和阴暗的房间是危险的,每个角落都潜伏着敌人和恐怖。 (或者,老实说,
 Hello Kitty Island冒险:如何获得巨型种子Mar 05, 2025 am 04:03 AM
在Hello Kitty Island冒险中探索迷人的Merry Meadows!本指南揭示了解锁和利用巨型种子在这款令人愉快的游戏中达到新高度的秘诀。 友谊岛最初提供五个区域,但另外三个区域
 击败分裂小说需要多长时间?Mar 07, 2025 am 04:16 AM
《Split Fiction》游戏时长详解:主线、支线及100%完成度 如同Hazelight工作室之前的作品,《Split Fiction》是一款剧情相对线性的游戏,但也包含一些额外的趣味内容。游戏中有一些支线故事、可选对话和彩蛋,但可收集要素并不多。 尽管关卡较长,且包含多种机制和Boss战,但完成《Split Fiction》仍需相当时间,尤其想达成100%完成度。以下是对游戏时长的详细分析: 主线剧情时长 在双人游玩(玩家水平相当)的情况下,通关主线剧情耗时约12小时。但这款游戏更适
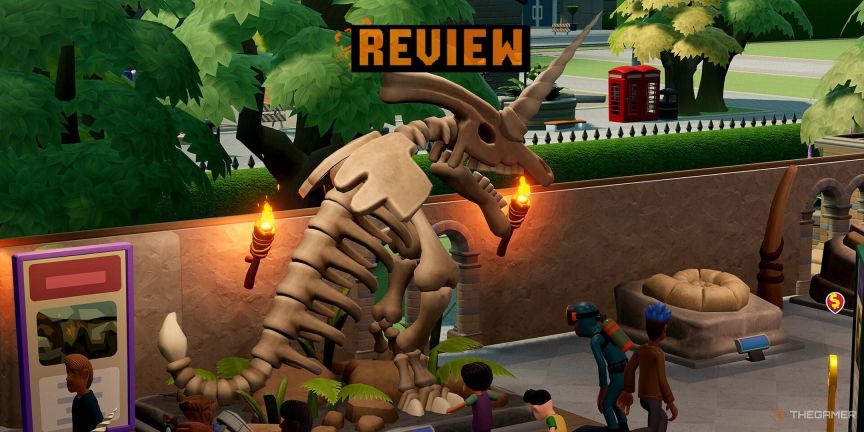 两个点博物馆:所有展览以及在哪里可以找到它们Mar 05, 2025 am 01:02 AM
两点博物馆:展览综合指南 在两个点博物馆的各个地方进行激动人心的探险,为您的博物馆发掘了许多好奇心。 本指南详细介绍了如何计划探险,管理鳍
 Monster Hunter Wilds弓指南:建造与连击Mar 01, 2025 am 02:03 AM
掌握怪物猎人野生弓:综合指南 Monster Hunter Wilds中的弓提供了技术能力和令人振奋的游戏玩法的激动人心的融合。它的多功能性通过其各种元素选择,使疾病的衰弱,f,f
 王国来:拯救2-农民的起义探索演练Mar 01, 2025 pm 02:05 PM
王国来:Deliverance 2的广阔世界提供了无数的冒险。本指南重点是完成农民在库滕贝格地区的起义追求。 开始任务: 完成“谈论魔鬼”的主要任务后,locat
 Suikoden 1 HD Remaster:如何与Teo将军赢得决斗Mar 06, 2025 pm 06:03 PM
在《苏醒1&2高清重制版》中,一些看似无法战胜的Boss战实际上是可以赢的,将军提奥与潘恩的决斗就是最好的例子。在困难难度下,这场战斗非常棘手,你可能认为潘恩必死无疑。 但事实并非如此。本指南将详细讲解这场关键决斗:决斗时机、潘恩最佳装备、战斗前需达到的条件,以及将军提奥的行动预判,助你战胜他。 潘恩推荐等级和装备 首先,前往帝苑将潘恩的爪子磨砺到12级(游戏此阶段最高等级)。然后,装备忍者服、头饰和两个护身戒指(可在安泰的军械库购买)。 最后,潘恩的等级应高于30级,至少30级,越接近35


热AI工具

Undresser.AI Undress
人工智能驱动的应用程序,用于创建逼真的裸体照片

AI Clothes Remover
用于从照片中去除衣服的在线人工智能工具。

Undress AI Tool
免费脱衣服图片

Clothoff.io
AI脱衣机

AI Hentai Generator
免费生成ai无尽的。

热门文章
热工具

禅工作室 13.0.1
功能强大的PHP集成开发环境

SublimeText3汉化版
中文版,非常好用

SublimeText3 Linux新版
SublimeText3 Linux最新版

记事本++7.3.1
好用且免费的代码编辑器

Dreamweaver CS6
视觉化网页开发工具

