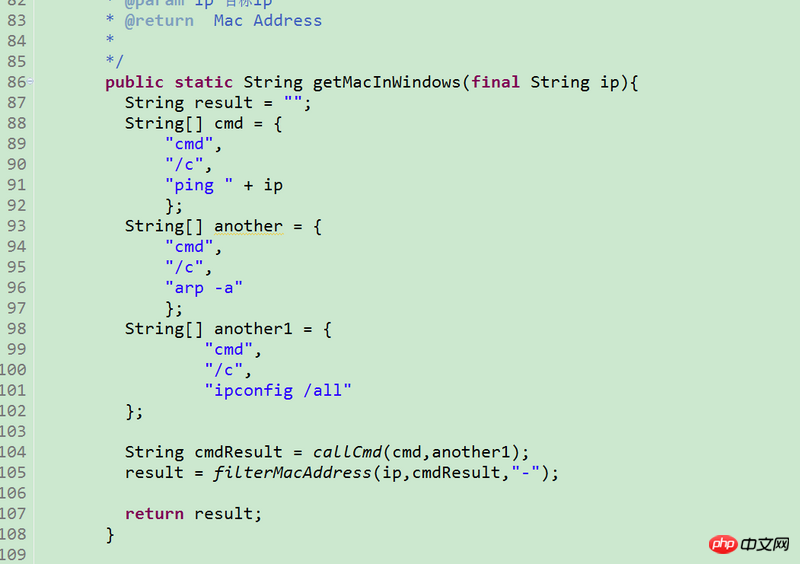
怎麼在java中取得到使用者客戶端MAC位址,試過很多方法取得到的都是取得伺服器端MAC位址,也要考慮使用者有多個網路卡的情況,如果有多個網路卡就會有多個mac位址,需要取得聯網的網路卡的mac位址,系統沒有使用反向代理。 
巴扎黑2017-05-27 17:43:02
用java.net.NetworkInterface
Enumeration<NetworkInterface> nets = NetworkInterface.getNetworkInterfaces();
for (NetworkInterface netint : Collections.list(nets)) {
    System.out.printf("Name: %s\n", netint.getName());
    for (InetAddress inetAddress : Collections.list(inetAddresses)) {
        System.out.printf("InetAddress: %s\n", inetAddress);
    }
    System.out.printf("Hardware address: %s\n", Arrays.toString(netint.getHardwareAddress()));
    ...
}给我你的怀抱2017-05-27 17:43:02
你的這段程式碼在哪裡運行就拿到的是哪的mac位址
如果你是web應用,除非你的客戶端和你的應用程式伺服器在同一個區域網,否則你拿不到的
如果你是c/s應用,那就在c端獲取,在報文裡傳給s端
具體原因,可以看下OSI7層網路模型
仅有的幸福2017-05-27 17:43:02
聲明本答案轉載,如需刪除,請告知。 http://blog.csdn.net/yfkiss/a...
import java.io.BufferedReader;
import java.io.IOException;
import java.io.InputStreamReader;
import java.net.InetAddress;
import java.net.NetworkInterface;

/**
 * 与系统相关的一些常用工具方法.
 *
 * @author lvbogun
 * @version 1.0.0
 */
public class SystemTool {

    /**
     * 获取当前操作系统名称. return 操作系统名称 例如:windows xp,linux 等.
     */
    public static String getOSName() {
        return System.getProperty("os.name").toLowerCase();
    }

    /**
     * 获取unix网卡的mac地址. 非windows的系统默认调用本方法获取.
     * 如果有特殊系统请继续扩充新的取mac地址方法.
     *
     * @return mac地址
     */
    public static String getUnixMACAddress() {
        String mac = null;
        BufferedReader bufferedReader = null;
        Process process = null;
        try {
            // linux下的命令,一般取eth0作为本地主网卡
            process = Runtime.getRuntime().exec("ifconfig eth0");
            // 显示信息中包含有mac地址信息
            bufferedReader = new BufferedReader(new InputStreamReader(
                    process.getInputStream()));
            String line = null;
            int index = -1;
            while ((line = bufferedReader.readLine()) != null) {
                // 寻找标示字符串[hwaddr]
                index = line.toLowerCase().indexOf("hwaddr");
                if (index >= 0) {// 找到了
                    // 取出mac地址并去除2边空格
                    mac = line.substring(index + "hwaddr".length() + 1).trim();
                    break;
                }
            }
        } catch (IOException e) {
            e.printStackTrace();
        } finally {
            try {
                if (bufferedReader != null) {
                    bufferedReader.close();
                }
            } catch (IOException e1) {
                e1.printStackTrace();
            }
            bufferedReader = null;
            process = null;
        }
        return mac;
    }

    /**
     * 获取widnows网卡的mac地址.
     *
     * @return mac地址
     */
    public static String getWindowsMACAddress() {
        String mac = null;
        BufferedReader bufferedReader = null;
        Process process = null;
        try {
            // windows下的命令,显示信息中包含有mac地址信息
            process = Runtime.getRuntime().exec("ipconfig /all");
            bufferedReader = new BufferedReader(new InputStreamReader(
                    process.getInputStream()));
            String line = null;
            int index = -1;
            while ((line = bufferedReader.readLine()) != null) {
                System.out.println(line);
                // 寻找标示字符串[physical
                index = line.toLowerCase().indexOf("physical address");

                if (index >= 0) {// 找到了
                    index = line.indexOf(":");// 寻找":"的位置
                    if (index >= 0) {
                        System.out.println(mac);
                        // 取出mac地址并去除2边空格
                        mac = line.substring(index + 1).trim();
                    }
                    break;
                }
            }
        } catch (IOException e) {
            e.printStackTrace();
        } finally {
            try {
                if (bufferedReader != null) {
                    bufferedReader.close();
                }
            } catch (IOException e1) {
                e1.printStackTrace();
            }
            bufferedReader = null;
            process = null;
        }

        return mac;
    }

    /**
     * windows 7 专用 获取MAC地址
     *
     * @return
     * @throws Exception
     */
    public static String getMACAddress() throws Exception {

        // 获取本地IP对象
        InetAddress ia = InetAddress.getLocalHost();
        // 获得网络接口对象(即网卡),并得到mac地址,mac地址存在于一个byte数组中。
        byte[] mac = NetworkInterface.getByInetAddress(ia).getHardwareAddress();

        // 下面代码是把mac地址拼装成String
        StringBuffer sb = new StringBuffer();

        for (int i = 0; i < mac.length; i++) {
            if (i != 0) {
                sb.append("-");
            }
            // mac[i] & 0xFF 是为了把byte转化为正整数
            String s = Integer.toHexString(mac[i] & 0xFF);
            sb.append(s.length() == 1 ? 0 + s : s);
        }

        // 把字符串所有小写字母改为大写成为正规的mac地址并返回
        return sb.toString().toUpperCase();
    }

    /**
     * 测试用的main方法.
     *
     * @param argc 运行参数.
     * @throws Exception
     */
    public static void main(String[] argc) throws Exception {
        String os = getOSName();
        System.out.println(os);
        if (os.equals("windows 7")) {
            String mac = getMACAddress();
            System.out.println(mac);
        } else if (os.startsWith("windows")) {
            // 本地是windows
            String mac = getWindowsMACAddress();
            System.out.println(mac);
        } else {
            // 本地是非windows系统 一般就是unix
            String mac = getUnixMACAddress();
            System.out.println(mac);
        }
    }
}