AutoCompleteTextView(自動完成文字方塊)的基本使用
本節引言:
本節繼續來學習Adapter類別的控件,這次帶來的是AutoCompleteTextView(自動完成文字方塊), 相信細心的你發現了,和Adapter搭邊的控件,都可以自己定義item的樣式,對吧! 或者說每個Item的版面~想怎麼玩就怎麼玩~嗯,話不多說,開始本節內容~ 對了貼下官方API:AutoCompleteTextView
#1.相關屬性:
另外其實還有個
- ##android:completionHint:設定下拉式選單中的提示標題
- android:completionHintView:定義提示檢視中顯示下拉式選單
- android:completionThreshold:指定使用者至少輸入多少個字元才會顯示提示
- android:dropDownAnchor:設定下拉式選單的定位"錨點"元件,如果沒有指定改變屬性, 將使用該TextView作為定位"錨點"元件
- android:dropDownHeight:設定下拉式選單的高度
- android:dropDownWidth:設定下拉選單的寬度
- android:dropDownHorizontalOffset:指定下拉式選單與文字之間的水平間距
- android:dropDownVerticalOffset:指定下拉式選單與文字之間的垂直間距
- android:dropDownSelector:設定下拉式選單點選效果
- android:popupBackground:設定下拉式選單的背景
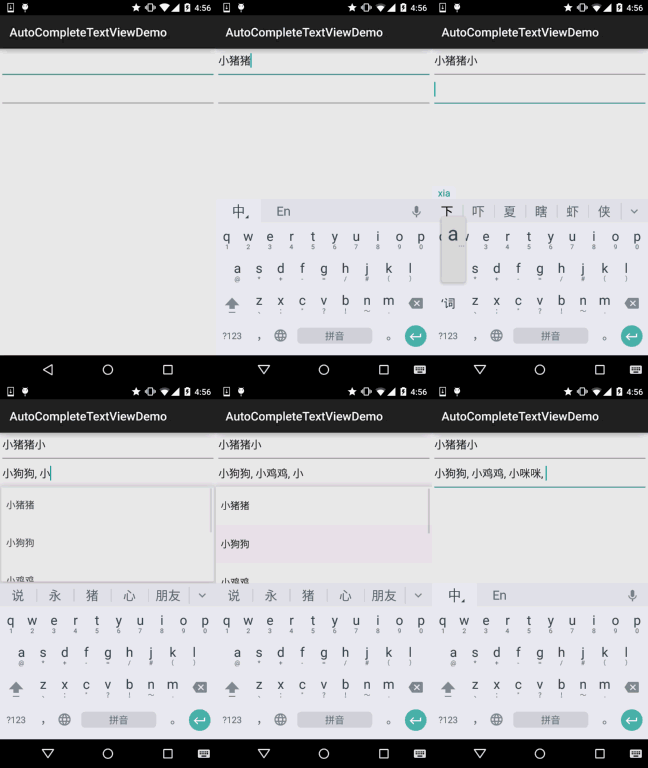
MultiAutoCompleteTextView(多提示項目的自動完成文字方塊) 跟這個AutoCompleteTextView作用差不多,屬性也一樣,具體區別在哪裡, 我們在下面的程式碼中來體驗~另外這兩個都是全詞匹配的,例如,小豬豬: 你輸入小->會提示小豬豬,但是輸入豬豬->卻不會提示小豬豬!
2.程式碼範例:
執行效果圖:

:這裡的話就不自訂佈局了,直接用ArrayAdapter來實現吧!
佈局檔案:
activity_main.xml: MainActivity.java: 部分程式碼分析:
xmlns:tools="http://schemas.android.com/tools"
android:layout_width="match_parent"
android:layout_height="match_parent"
android:orientation=" AutoCompleteTextView
android:id="@+id/atv_content"
android:layout_width="match_content android:layout_width="match_parent android:completionHint="請輸入搜尋內容"
android:completionThreshold="1"
android:dropDownHorizontalOffset="5dp" />> +id/matv_content"
android: layout_width="match_parent"
android:layout_height="48dp"
android android:text="" />
私有 AutoCompleteTextView atv_content;# #te # # private static final String[] data = new String[]{
"小豬豬豬} ;
@Override
# protected void onCreate(Bundle savedInstanceState) {
View(R.layout.activity_main);
atv_content = (AutoCompleteTextView) findViewById(R.id.atv_content);
matv_content = (MultiAutoCompleteTextView) find檢視 轉接器 = new ArrayAdapter
this, android.R.layout.simple_drop. ArrayAdapter
MultiAutoCompleteTextView.CommaTokenizer());
}
#}
#
3.範例程式碼下載:AutoCompleteTextViewDemo.zip
本節小結: 本節介紹了AutoCompleteTextView(自動完成文字方塊),非常簡單~
大家可依實際開發需求自行拓展~好的,就說這麼多,謝謝~


