使用Twig和Timber圖像、選單和用戶,快速啟動WordPress開發
- 王林原創
- 2023-09-04 15:37:141370瀏覽
到目前為止,您已經了解了透過 Timber 使用 Twig 的基本概念,同時建立了模組化 WordPress 主題。我們也基於 DRY 原則,使用 Twig 研究了區塊嵌套和多重繼承。今天,我們將探討如何透過 Timber 外掛程式使用 Twig 在主題中顯示附件圖像、WordPress 選單和使用者。
木材中的圖像
圖片是任何 WordPress 主題的重要元素之一。在常規的 WordPress 編碼實踐中,圖像與 PHP 整合在正常的 HTML 圖像標籤內。但是,Timber 提供了一種相當全面的方法來處理 img(圖像)標籤,該方法是模組化且乾淨的。
貼文的縮圖欄位中附加了圖片。這些可以透過 {{ post.thumbnail }} 透過 Twig 檔案輕鬆檢索。就是這麼簡單!
用法
讓我們從一個實際的例子開始。我們的 single.php 檔案如下所示:
<?php
/**
 * Single Template
 *
 * The Template for displaying all single posts.
 *
 * @since 1.0.0
 */

// Context array
$context         = Timber::get_context();
$post            = new TimberPost();
$context['post'] = $post;

// Timber ender().
Timber::render( 'single.twig', $context );
在這裡,出於非常明顯的原因,我使用了 TimberPost() 函數。它在整個 Timber 中用於表示從 WordPress 檢索的帖子,使它們可用於 Twig 模板。
由於特色圖像附加到帖子資料中,我們現在需要在前端檢索它。因此,它的 Twig 檔案 single.twig 將如下所示:
{# Sinlge Template: `single.twig` #}

{% extends "base.twig" %}

{% block content %}

    <div class="single_content">

        <img  src="/static/imghwm/default1.png"  data-src="https://img.php.cn/upload/article/000/465/014/169381303714882.jpg"  class="lazy" / alt="使用Twig和Timber圖像、選單和用戶,快速啟動WordPress開發" >

    </div>

{% endblock %}
在第 9 行,程式碼 {{ post.thumbnail.src }} 擷取貼文的特色(縮圖)圖片並如下顯示:

您可以使用此程式碼語法檢索任意數量的縮圖。
使用 Timber 時,您也可以對這些影像進行更多實驗。例如,您也可以透過以下方式調整它們的大小:
<img src="/static/imghwm/default1.png" data-src="https://img.php.cn/upload/article/000/465/014/169381303849158.jpg" class="lazy" / alt="使用Twig和Timber圖像、選單和用戶,快速啟動WordPress開發" >
透過使用resize() 函數,您可以為映像新增尺寸,其中第一個參數是width,第二個參數是高度 。如果您想按比例縮放圖像,請忽略 height 屬性。現在語法變成:
<img src="/static/imghwm/default1.png" data-src="https://img.php.cn/upload/article/000/465/014/169381303849158.jpg" class="lazy" / alt="使用Twig和Timber圖像、選單和用戶,快速啟動WordPress開發" >
前端顯示相同的圖像,如下所示:

如果您想探索更多內容,請嘗試圖像食譜。
使用 TimberImage()
考慮這樣一個場景:開發者想要透過圖像 ID 取得圖像,或想要透過 URL 顯示外部圖像等。對於這個擴充方法,Timber 提供了一個類,TimberImage (),表示從 WordPress 檢索到的圖片。
用法
讓我們以 single.php 檔案為例,現在看起來像這樣:
<?php
/**
 * Single Template
 *
 * The Template for displaying all single posts.
 *
 * @since 1.0.0
 */

// Context array
$context         = Timber::get_context();
$post            = new TimberPost();
$context['post'] = $post;

// Using the TimberImage() function
// to retrieve the image via its ID i.e 8
$context['custom_img'] = new TimberImage( 8 );

// Timber ender().
Timber::render( 'single.twig', $context );
這次,我使用 TimberImage() 類,該類將圖像 ID 8 作為其參數。編碼例程的其餘部分是相同的。讓我們透過 Twig 檔案 single.twig 檢索此圖片。
<img src="/static/imghwm/default1.png" data-src="https://img.php.cn/upload/article/000/465/014/169381303714882.jpg" class="lazy" / alt="使用Twig和Timber圖像、選單和用戶,快速啟動WordPress開發" >
儲存在 $context custom_img 元素中的值,即 {{ custom_img }},將透過其 ID 檢索圖像以顯示在前端,如下所示:

要透過外部 URL 取代檢索影像,您可以遵循下列語法。
<?php $context[ 'img' ] = new TimberImage( 'https://domain.com/link/image.jpg' ); ?>
這次,前端顯示的不是圖片 ID,而是外部圖像 URL,如下所示:

要探索此功能的更多功能,您可以查看文件。
木材選單
現在,您將如何使用 Twig 範本渲染 WordPress 選單?這是一件很棘手的事。但是,堅持住! Timber 為您提供了 TimberMenu() 類,它可以幫助您將 Twig 檔案內的 WordPress 選單呈現為完整的循環。我們來看一下。
用法
檢索選單項目的整個概念都圍繞著選單物件。有兩種定義其上下文的方法。第一個是將選單物件新增至全域 get_context() 函數中,使選單物件在每個頁面上可用,就像我在 functions.php 檔案中所做的那樣。其次,您可以透過 ID 為特定 PHP 範本新增特定選單。
无论采用哪种方法,一旦菜单可供 Timber $context 数组使用,您就可以从中检索所有菜单项。但我更喜欢在全球范围内定义它。因此,转到 functions.php 文件并粘贴以下代码:
<?php
/**
 * Custom Context
 *
 * Context data for Timber::get_context() function.
 *
 * @since 1.0.0
 */
function add_to_context( $data ) {
    $data['foo'] = 'bar';
	$data['stuff'] = 'I am a value set in your functions.php file';
	$data['notes'] = 'These values are available everytime you call Timber::get_context();';
	$data['menu'] = new TimberMenu();
	return $data;
}
add_filter( 'timber_context', 'add_to_context' );
因此,我在这里定义了一个自定义函数调用 add_to_context。在这个函数内部有一些数据,我希望通过 get_context() 函数在每个 PHP 模板中都可以使用这些数据。在第 13 行,您可以找到 TimberMenu() 的实例,该实例针对 $data 数组中的元素菜单传递。
这将使 Twig 模板可以使用标准 WordPress 菜单作为我们可以循环访问的对象。 TimberMenu() 函数可以采用菜单项或 ID 等参数。
让我们创建一个名为 menu.twig 文件的 Twig 模板。
{# Menu Template: `menu.twig` #}

<nav>
    <ul class="main-nav">
        {% for item in menu.get_items %}
                <li class="nav-main-item {{ item.classes | join(' ') }}">
                    <a class="nav-main-link" href="{{ item.get_link }}">{{ item.title }}</a>
                </li>
        {% endfor %}
    </ul>
</nav>
上面的代码在此 Twig 模板内运行一个循环。第 5 行为每个菜单项运行 for 循环,并在无序列表中显示每个菜单 item 的标题。循环运行,直到 menu 对象的所有键值对都被迭代并列出在前端。
我继续将 menu.twig 模板包含在第 11 行的 base.twig 模板中。
{# Base Template: `base.twig` #}

{% block html_head_container %}

    {% include 'header.twig' %}

{% endblock %}

	<body class="{{body_class}}">

		{% include "menu.twig" %}

		<div class="wrapper">

			{% block content %}

			    <!-- Add your main content here. -->
			    <p>SORRY! No content found!</p>

			{% endblock %}

		</div>
		<!-- /.wrapper -->

	{% include "footer.twig" %}

	</body>

</html>
让我们预览一下我的演示网站的后端(外观 > 菜单),其中菜单包含两个父项和一个子项。
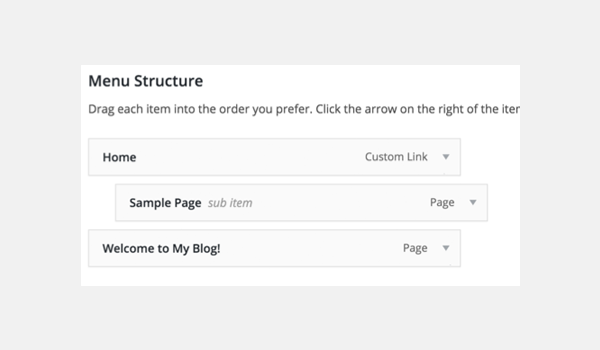
所以,让我们看一下帖子页面 - 因为我们的 single.twig 扩展了 base.twig,我们的菜单将自动出现在该页面上。
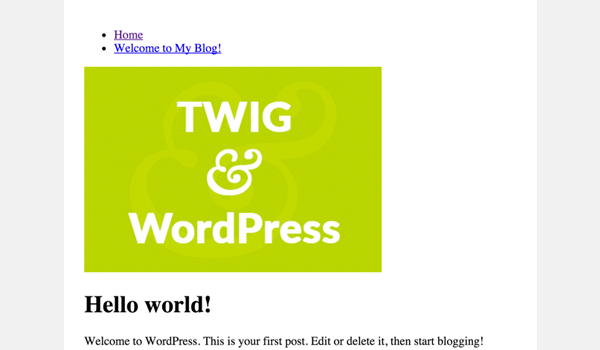
您可以看到,在我们单个帖子的顶部有一个菜单,其中包含两个父项。
子菜单项怎么样?让我们更新 menu.twig 文件以也包含子项目。
{# Menu Template: `menu.twig` #}

<nav>
    <ul class="main-nav">
        {% for item in menu.get_items %}
                <li class="nav-main-item {{ item.classes | join(' ') }}">
                    <a class="nav-main-link" href="{{ item.get_link }}">{{ item.title }}</a>

						{% if item.get_children %}

							<ul class="nav-drop">

								{% for child in item.get_children %}

								<li class="nav-drop-item">
									<a href="{{ child.get_link }}">{{ child.title }}</a>
								</li>

								{% endfor %}

							</ul>

						{% endif %}

                </li>
        {% endfor %}
    </ul>
</nav>
第 9 行到第 23 行打印子菜单项(如果有)。这次,前端显示我们第一个父项的子项。

有关 TimberMenu() 的更多详细信息,请查看文档。
Timber 中的用户
可以使用 TimberUser() 类从 WordPress 数据库检索用户。该类采用用户 ID 或 slug 作为参数来检索用户。
由于用户或博客作者与 WP 帖子相关联,我将使用 single.php 的代码,现在如下所示:
<?php
/**
 * Single Template
 *
 * The Template for displaying all single posts.
 *
 * @since 1.0.0
 */

// Context array
$context         = Timber::get_context();
$post            = new TimberPost();
$context['post'] = $post;

// Using the TimberImage() function
// to retrieve the image via its ID i.e 8
$context['custom_img'] = new TimberImage( 8 );

// Get the user object.
$context['user'] = new TimberUser();

// Timber ender().
Timber::render( 'single.twig', $context );
第 20 行初始化 TimberUser() 类并分配给上下文对象元素,即 user。让我们通过 Twig 模板显示作者姓名。
我的 single.twig 模板在第 #21 行末尾有一行新代码。
{# Sinlge Template: `single.twig` #}

{% extends "base.twig" %}

{% block content %}

    <div class="single_content">

        <img  src="/static/imghwm/default1.png"  data-src="https://img.php.cn/upload/article/000/465/014/169381303929063.png"  class="lazy" / alt="使用Twig和Timber圖像、選單和用戶,快速啟動WordPress開發" >

    	{# <img  src="/static/imghwm/default1.png"  data-src="https://img.php.cn/upload/article/000/465/014/169381303929063.png"  class="lazy" / alt="使用Twig和Timber圖像、選單和用戶,快速啟動WordPress開發" > #}

    	{# <img  src="/static/imghwm/default1.png"  data-src="https://img.php.cn/upload/article/000/465/014/169381303929063.png"  class="lazy" / alt="使用Twig和Timber圖像、選單和用戶,快速啟動WordPress開發" > #}

    	{# <img  src="/static/imghwm/default1.png"  data-src="https://img.php.cn/upload/article/000/465/014/169381303929063.png"  class="lazy" / alt="使用Twig和Timber圖像、選單和用戶,快速啟動WordPress開發" > #}

        <h1>{{ post.title }}</h1>

        <p>{{ post.get_content }}</p>

        <p>Author: {{ user }} </p>
    </div>

{% endblock %}
代码获取当前帖子的作者姓名并将其显示在前端。您可以使用 {{ 用户 | print_r }} 查看 TimberUser 对象中还有什么可用的。
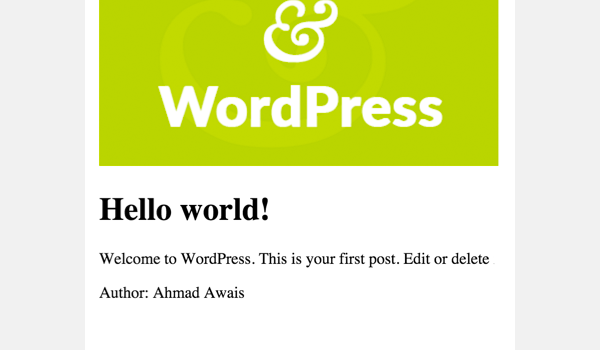
要了解有关此类的更多信息,请参阅文档。您可以在 ImagesMenusUsers 分支的 GitHub 存储库中找到本教程的代码。
结论
本文总结了整个系列。在这四篇文章中,我探索了如何使用 Timber 将 Twig 模板语言集成到 WordPress 主题中。
本系列的最终存储库可以在 GitHub 上找到,其中包含特定于教程的分支:
- 教程 #2:入门
- 教程 #3:WordPress 备忘单
- 教程 #4:TimberImages、TimberMenu 和 TimberUser
您可以查阅 Timber 的在线文档了解更多信息。
完成整个系列并实现所有解释的示例,我打赌您会喜欢 Twig。在下面的评论框中发表您的疑问。您也可以通过 Twitter 联系我。
以上是使用Twig和Timber圖像、選單和用戶,快速啟動WordPress開發的詳細內容。更多資訊請關注PHP中文網其他相關文章!

