解釋一下 ReactNative 中 VirtualizedList 元件的用法?
- 王林轉載
- 2023-08-24 13:45:021682瀏覽
當您的清單非常大時,VirtualizedList 元件是最好的。 VirtualizedList 有助於提高效能和記憶體使用率。當使用者捲動時,資料會顯示給使用者。
VirtualizedList 的基本元件如下&minuns;
<VirtualizedList data={DATA} initialNumToRender={4} renderItem={renderItem} keyExtractor={keyExtractor} getItemCount={getItemCount} getItem={getItem} />重要的VirtualizedList 屬性
| #屬性 | ##描述|
|---|---|
| #將渲染資料中的項目 VirtualizedList 內。 | |
| 要顯示的資料。 | |
| 取得單一項目的函數 | |
| 取得資料項的數量。 | |
| 開始時渲染的次數。 | |
| 每個要考慮的唯一鍵 指定索引的項目。 |
import { SafeAreaView, View, VirtualizedList, StyleSheet, Text } from 'react-native';VirtualizedList的程式碼如下-<SafeAreaView>
<VirtualizedList
data={DATA}
initialNumToRender={4}
renderItem={({ item }) => <Item title={item.title} />}
keyExtractor={item => item.id}
getItemCount={getItemCount}
getItem={getItem}
/>
</SafeAreaView>我們要顯示渲染的初始項目是4。 renderItem 屬性用於在螢幕上顯示項目。它使用定義如下所示的自訂 Item 元件 -const Item = ({ title })=> {
return (
<View style={styles.item}>
<Text style={styles.title}>{title}</Text>
</View>
);
}
keyExtractor 定義每個項目的唯一鍵。
keyExtractor={item => item.id}props getItemCount 取得將向使用者顯示的項目總數。現在它呼叫函數 getItemCount,其定義如下。 const getItemCount = (data) => {
return 100;
}
getItemCount={getItemCount}getITem 屬性用於取得要顯示的資料。它呼叫 getItem 方法,其定義如下 -const getItem = (data, index) => {
return {
id: index,
title: 'test'
}
}
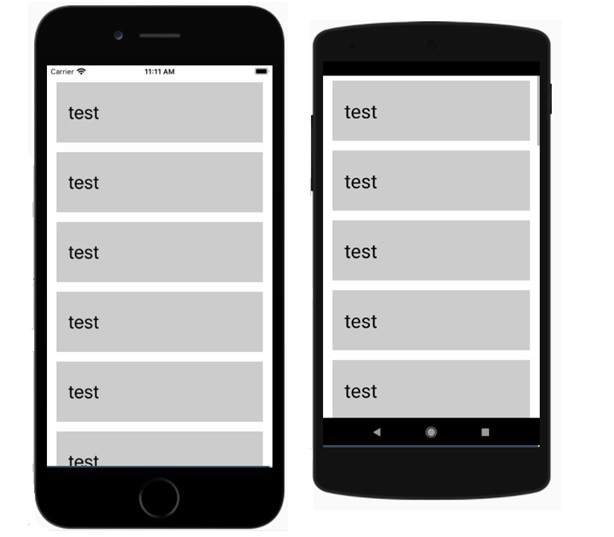
getItem={getItem}顯示VirtualizedList的完整程式碼如下 -import React from 'react';
import { SafeAreaView, View, VirtualizedList, StyleSheet, Text } from 'react-native';
const DATA = [];
const getItem = (data, index) => {
return {
id: index,
title: 'test'
}
}
const getItemCount = (data) => {
return 100;
}
const Item = ({ title })=> {
return (
{title}
);
}
const VirtualizedListExample = () => {
return (
);
}
const styles = StyleSheet.create({
item: {
backgroundColor: '#ccc',
height: 100,
justifyContent: 'center',
marginVertical: 8,
marginHorizontal: 16,
padding: 20,
},
title: {
fontSize: 32,
},
});
export default VirtualizedListExample;輸出

以上是解釋一下 ReactNative 中 VirtualizedList 元件的用法?的詳細內容。更多資訊請關注PHP中文網其他相關文章!
陳述:
本文轉載於:tutorialspoint.com。如有侵權,請聯絡admin@php.cn刪除

