
怎麼使用IDEA創建SpringBoot項目

- 王林轉載
- 2023-05-17 22:25:0420258瀏覽
1、在IDEA上新建一個Project,選擇Spring Initializr,
Project SDK 選擇安裝的JDK;
Choose Initializr Service URL 選擇預設(Default: https://start.spring.io )
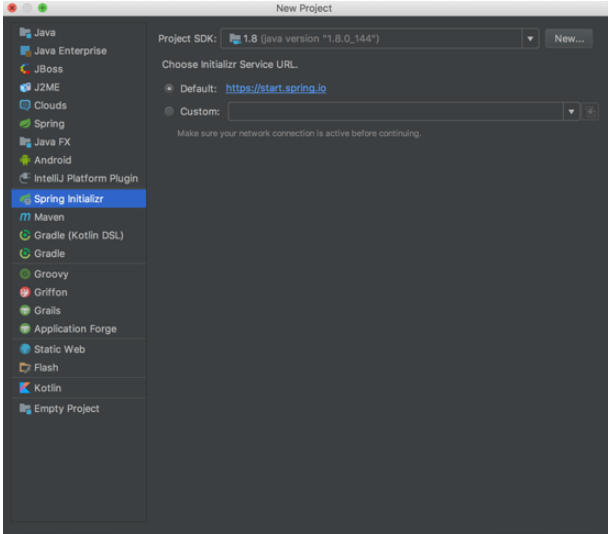
選擇專案範本
#點選Next
2、進行專案配置
設定專案陣列(group),專案識別(Artifact),Type選擇一個Maven Project 表示是一個maven專案
Version:專案版本號
Name :專案名稱
Description:專案描述
Package:專案包名
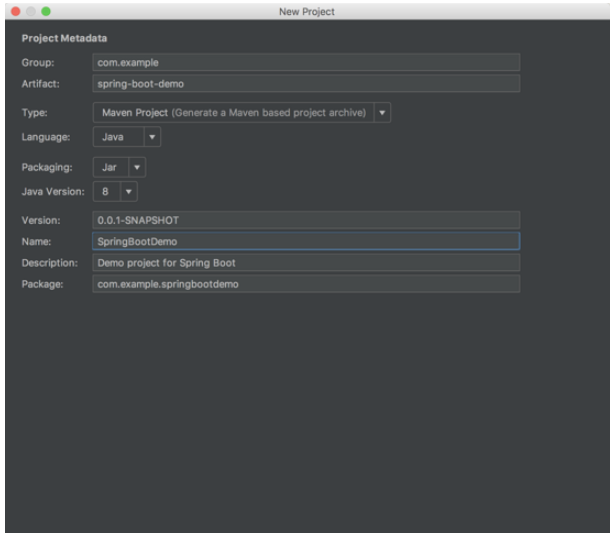
專案配置
點選Next 下一步
3、選擇專案範本
我們來選擇建立一個Web專案
選擇Spring Boot版本
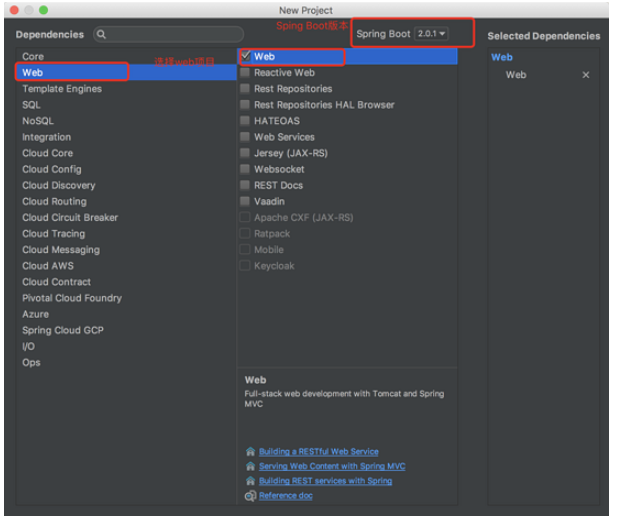
選擇專案範本
4、設定專案名稱與專案路徑
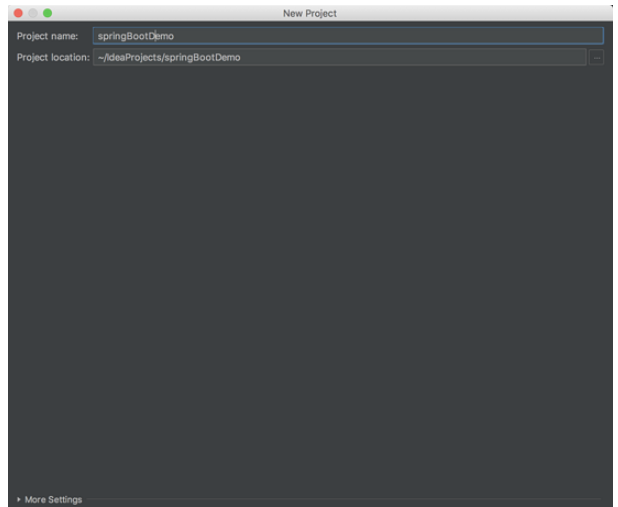
#設定專案名稱與專案路徑
#設定完專案路徑,和專案名稱後,點擊FInish,建立專案完成,需要進行專案構建,等一小會即可完成。
5、創建完成,我們刪除.mvn資料夾,mvnw檔案和mvnw.cmd檔案
#刪除檔案
#6、我們來看看maven配置的pom.xml文件,裡麵包含了SpringBoot專案運行所需的版本庫
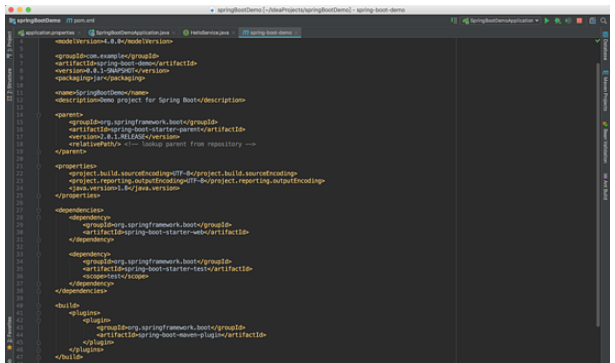
pom.xml
SpringBoot運行所需函式庫為:
<!-- SpringBoot项目的基础库文件-->
  <parent>
    <groupid>org.springframework.boot</groupid>
    <artifactid>spring-boot-starter-parent</artifactid>
    <version>2.0.1.RELEASE</version>
    <relativepath></relativepath> <!-- lookup parent from repository -->
  </parent>
<!-- SpringBoot项目的基础库文件-->
  <dependencies>
<!-- web项目库-->
    <dependency>
      <groupid>org.springframework.boot</groupid>
      <artifactid>spring-boot-starter-web</artifactid>
    </dependency>
<!-- 测试所需库-->
    <dependency>
      <groupid>org.springframework.boot</groupid>
      <artifactid>spring-boot-starter-test</artifactid>
      <scope>test</scope>
    </dependency>
  </dependencies>
7、建立一個HelloService
package com.example.springbootdemo.service;
import org.springframework.stereotype.Service;
@Service
public interface HelloService {
  String sayHello();
}
8、建立HelloService的實作類別HelloServiceImpl,實作sayHello()方法,回傳"Hello World!"
package com.example.springbootdemo.service.impl;
import com.example.springbootdemo.service.HelloService;
import org.springframework.stereotype.Component;

@Component
public class HelloServiceImpl implements HelloService {
 @Override
 public String sayHello() {
   return "Hello World!";
 }
}
9、創建HelloController,調用HelloService實現類,打印"Hello World!"到瀏覽器
package com.example.springbootdemo.service.impl;
import com.example.springbootdemo.service.HelloService;
import org.springframework.stereotype.Component;

@Component
public class HelloServiceImpl implements HelloService {
 @Override
 public String sayHello() {
   return "Hello World!";
 }
}
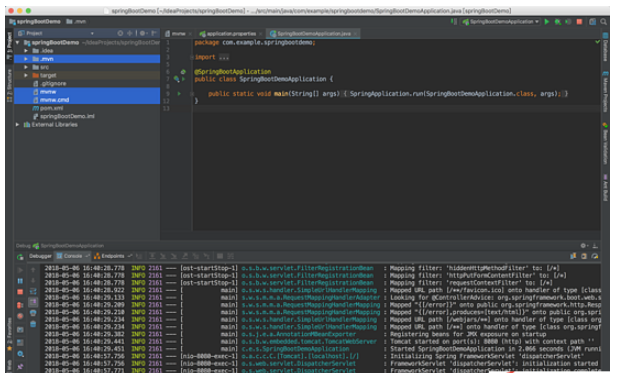
10、見證奇蹟的時刻,我們來運行一下所建項目,看能不能跟我們預期一樣,在瀏覽器輸入存取位址http://localhost:8080/hello
就可以看到Hello World!
以上是怎麼使用IDEA創建SpringBoot項目的詳細內容。更多資訊請關注PHP中文網其他相關文章!