
SpringBoot SPI機制和自訂starter怎麼實現

- WBOYWBOYWBOYWBOYWBOYWBOYWBOYWBOYWBOYWBOYWBOYWBOYWB轉載
- 2023-05-16 19:58:101641瀏覽
一、SpringBoot 中的SPI機制
什麼是spi呢,全名是Service Provider Interface。簡單翻譯的話,就是服務提供者接口,是一種尋找服務實現的機制。
其實就是一個規範定義、或者說是實現的標準。
用生活中的例子來說就是,你買了一台小米的手機。
但是你用的充電器並不一定非要是小米充電器,你可以拿其他廠商的充電器來進行充電,只要滿足協議、端口等要求,那麼就是可以充電的。這也是一種熱拔插的思想,並不是固定死的。
換成程式碼來說也是一樣的,我定義了一個接口,但是不想固定死具體的實現類,因為那樣如果要更換實現類就要改動源代碼,這往往是不合適的。
那麼我也可以定義一個規範,在之後需要更換實作類別或增加其他實作類別時,遵守這個規範,我也可以動態的去發現這些實作類別。
換在SpringBoot中,就是現在的SpringBoot這個平台定義了一些規範和標準,我現在想要讓SpringBoot平台接納我。
我該如何做呢?
很簡單,按照它的標準和規格做事。
SpringBoot在啟動的時候,會掃描所有jar包resource/META-INF/spring.factories文件,依據類別的全限定名,利用反射機制將Bean裝載進容器中。
二、自訂starter
說一說我的小實作:
在這個starter 中,實作
發送短線的Template
物件儲存的Template
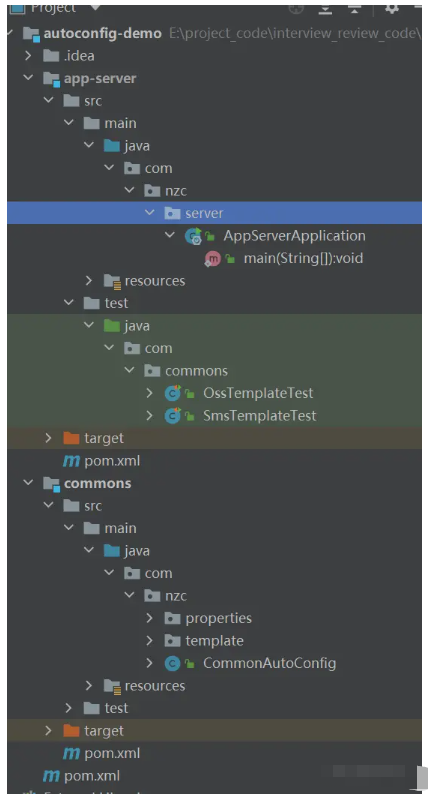
#大致就是四步:
 用於映射設定檔中的設定的類別xxxxProperties
用於操作xxxx的介面和客戶端等等,如本文中的OssTemplate
自動配置類別xxxxAutoConfiguration ,並且向容器中註入xxxxTemplate
在spring.factories中將xxxxAutoConfiguration加入到EnableAutoConfiguration的vaule集合中
物件儲存我用的是阿里雲的oss,裡面的設定都是可以用的, 簡訊的話,就是個模擬的啦~ ,不要怪啦
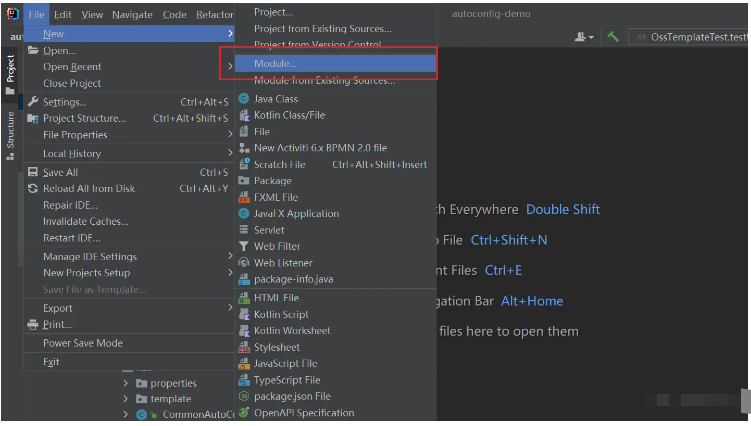
2.1、準備一個Maven專案刪除src目錄,然後再建立兩個Maven專案(我個人習慣,習慣創建空Maven項目,實際上創建SpringBoot項目也是一樣)
 <parent>
     <groupId>org.springframework.boot</groupId>
     <artifactId>spring-boot-starter-parent</artifactId>
     <version>2.5.2</version>
     <relativePath/>
 </parent>

 <properties>
     <maven.compiler.source>8</maven.compiler.source>
     <maven.compiler.target>8</maven.compiler.target>
 </properties>


 <dependencies>
     <dependency>
         <groupId>org.projectlombok</groupId>
         <artifactId>lombok</artifactId>
     </dependency>
     <dependency>
         <groupId>org.springframework.boot</groupId>
         <artifactId>spring-boot-starter-web</artifactId>
     </dependency>
     <dependency>
         <groupId>org.springframework.boot</groupId>
         <artifactId>spring-boot-starter</artifactId>
     </dependency>
     <dependency>
         <groupId>org.springframework.boot</groupId>
         <artifactId>spring-boot-starter-test</artifactId>
     </dependency>
     <dependency>
         <groupId>org.springframework.boot</groupId>
         <artifactId>spring-boot-configuration-processor</artifactId>
         <optional>true</optional>
     </dependency>
 </dependencies>
2.2、準備Properties類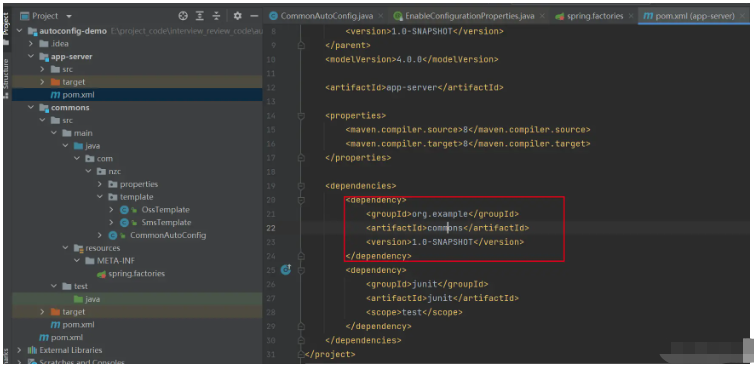 就是用來映射設定檔的~
 /**
  * @author Ning Zaichun
  */
 @Data
 @ConfigurationProperties(prefix = "nzc.oss")
 public class OssProperties {

     private String accessKey;
     private String secret;
     private String bucketName;
     private String url;
     private String endpoint;
 }
@Data
@ConfigurationProperties(prefix = "nzc.sms")
public class SmsProperties {
private String name;
}2.3、準備要注入的類別
- 就是我們最後要透過自動組裝注入進SpringBoot操作的類別
-
我這裡分別是OssTemplate 和SmsTemplate
 /**
  * @author Ning Zaichun
  */
 public class OssTemplate {

     private OssProperties ossProperties;

     public OssTemplate(OssProperties ossProperties) {
         this.ossProperties = ossProperties;
     }

     public String test() {
         System.out.println(ossProperties.getBucketName());
         return "test";
     }
     public String upload(String filename, InputStream is) {
         // yourEndpoint填写Bucket所在地域对应的Endpoint。以华东1(杭州)为例,Endpoint填写为https://oss-cn-hangzhou.aliyuncs.com。
         String endpoint = ossProperties.getEndpoint();
         // 阿里云主账号AccessKey拥有所有API的访问权限,风险很高。强烈建议您创建并使用RAM账号进行API访问或日常运维,请登录 https://ram.console.aliyun.com 创建RAM账号。
         String accessKeyId = ossProperties.getAccessKey();
         String accessKeySecret = ossProperties.getSecret();

         // 创建OSSClient实例。
         OSS ossClient = new OSSClientBuilder().build(endpoint, accessKeyId, accessKeySecret);

         String storePath = new SimpleDateFormat("yyyy/MM/dd").format(new Date()) + "/" + UUID.randomUUID() + filename.substring(filename.lastIndexOf("."));

         System.out.println(storePath);
         // 依次填写Bucket名称(例如examplebucket)和Object完整路径(例如exampledir/exampleobject.txt)。Object完整路径中不能包含Bucket名称。
         ossClient.putObject(ossProperties.getBucketName(), storePath, is);

         String url = ossProperties.getUrl() + storePath;

         // 关闭OSSClient。
         ossClient.shutdown();
         return url + "#" + storePath;
    }

     public void remove(String fileUrl) {
         // yourEndpoint填写Bucket所在地域对应的Endpoint。以华东1(杭州)为例,Endpoint填写为https://oss-cn-hangzhou.aliyuncs.com。
         String endpoint = ossProperties.getEndpoint();
         // 阿里云账号AccessKey拥有所有API的访问权限,风险很高。强烈建议您创建并使用RAM用户进行API访问或日常运维,请登录RAM控制台创建RAM用户。
         String accessKeyId = ossProperties.getAccessKey();
         String accessKeySecret = ossProperties.getSecret();
         // 填写Bucket名称。
         String bucketName = ossProperties.getBucketName();
         // 填写文件完整路径。文件完整路径中不能包含Bucket名称。
         //2022/01/21/f0870eb3-4714-4fae-9fc3-35e72202f193.jpg
         String objectName = fileUrl;

         // 创建OSSClient实例。
         OSS ossClient = new OSSClientBuilder().build(endpoint, accessKeyId, accessKeySecret);

         // 删除文件或目录。如果要删除目录,目录必须为空。
         ossClient.deleteObject(bucketName, objectName);

         // 关闭OSSClient。
         ossClient.shutdown();
     }
 }
public class SmsTemplate { private SmsProperties properties; public SmsTemplate(SmsProperties properties) { this.properties = properties; } public void sendSms(String mobile, String code){ System.out.println(properties.getName()+"=="+mobile+"===="+code); } }2.4、AutoConfiguration @EnableConfigurationProperties({ SmsProperties.class, OssProperties.class }) public class CommonAutoConfig { @Bean public SmsTemplate smsTemplate(SmsProperties smsProperties){ return new SmsTemplate(smsProperties); } @Bean public OssTemplate ossTemplate(OssProperties ossProperties){ return new OssTemplate(ossProperties); } }2.5、寫spring.factories
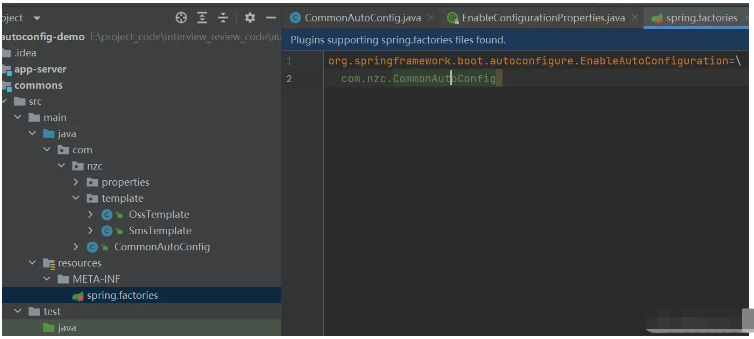
在resource目錄下,建立一個META-INF檔案夾,
在META-INF資料夾下建立一個spring.factories檔案
內容是 org.springframework.boot.autoconfigure.EnableAutoConfiguration=\
com.nzc.CommonAutoConfig
org.springframework.boot.autoconfigure.EnableAutoConfiguration=\ com.nzc.CommonAutoConfig \ com.xxx.xxx
spring:
application:
name: app-server
nzc:
sms:
name: ningzaichun
oss:
accessKey: xxx
secret: xxx
endpoint: oss-cn-shenzhen.aliyuncs.com
bucketName: xxx
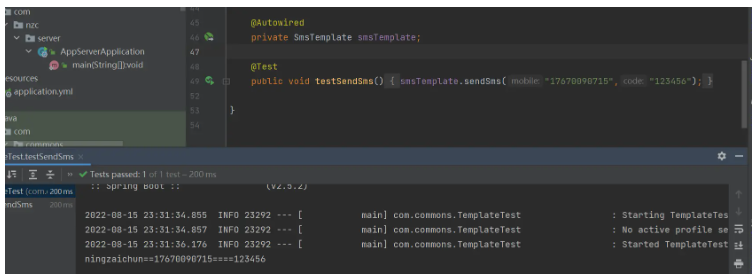
url: xxx###將oss的設定修改正確是可以用的~####### ##寫測試類別:###### @RunWith(SpringRunner.class)
@SpringBootTest(classes = AppServerApplication.class)
public class TemplateTest {
@Autowired
private OssTemplate ossTemplate;
@Test
public void testOss(){
String s = ossTemplate.test();
System.out.println(s);
}
@Test
public void testUpload(){
try {
File file = new File("D:\evectionflow01.png");
InputStream inputStream = new FileInputStream(file);
ossTemplate.upload("123.jpg",inputStream);
} catch (FileNotFoundException e) {
e.printStackTrace();
}
}
@Autowired
private SmsTemplate smsTemplate;
@Test
public void testSendSms(){
smsTemplate.sendSms("17670090715","123456");
}
}###證明是可以使用的~############以上是SpringBoot SPI機制和自訂starter怎麼實現的詳細內容。更多資訊請關注PHP中文網其他相關文章!