


dockerfile介紹
docker透過讀取dockerfile裡面的內容可以自動build image,dockerfile是一個包含了build過程中需要執行的所有指令的文字檔。也可以理解為dockfile是一種被docker程式解釋的腳本,由一條一條的指令組成,每個指令對應linux系統下面的一條指令,由docker程式將這些dockerfile指令翻譯成真正的linux指令。 dockerfile有自己書寫格式和支援的指令,docker程式解決這些指令間的依賴關係,類似makefile。
docker程式將讀取dockerfile,根據指令產生客製化的image。相較於image這種黑盒子,dockerfile這種顯而易見的腳本更容易被使用者接受,它明確的顯示image是怎麼產生的。有了dockerfile,當我們需要自訂自己額外的需求時,只需在dockerfile上新增或修改指令,重新產生image即可,省去了敲指令的麻煩。
docker建構映像的方法: commit、dockerfile
1、使用commit來建立映像:
commit是基於原有映像基礎上建置有映像基礎上建構有映像基礎上的鏡像,使用此方法建立鏡像的目的:保存鏡像裡的一些配置資訊和修改的資訊。相當於一個鏡像的快照。
2、使用dockerfile來建立映像:
dockerfile是快速建置所需(自訂)映像。
dockerfile的指令:
from:指定基礎映像(from是必備的指令,並且必須為第一個指令)。
run: 用來執行命令列命令。其基本格式:
shell格式: run ,輸入在bash環境中的命令即可,一個dockerfile允許使用run不得超過127層,所以,使用一次run, 使用' \'換行,使用' && '執行下一指令。一般使用此種格式;
exec格式:run ,此種方式像是函數呼叫中的格式;
copy: 複製檔案。其基本格式:
格式1:copy ...
」格式2:copy [## 發格式2:copy [“"]
add: 更高級的複製文件,在copy的基礎上增加了一些功能,如果複製的是壓縮包的話,會直接解壓,而不需要在使用run解壓縮;
cmd:容器啟動指令。其基本格式:
shell格式: cmd
exec格式: cmd ["可執行檔", "參數1", "參數2"...]
參數清單格式: cmd [「參數1」, 「參數2」...],在指定了entrypoint指令後,用cmd指定特定的參數
entrypoint: 入口點。其基本格式分為exec和shell,
entrypoint的目的和cmd一樣,都是在指定容器啟動程式及參數。 entrypoint在運作上可以替代,不過比cmd繁瑣,需要透過docker run 的參數--entrypoint 來指定。當指定了entrypoint後,cmd的含義就發生了改變,不在是直接執行其命令,而是將cmd的內容作為參數傳遞給entrypoint指令。其執行時就變成了:
# env: 設定環境變數。 (都可以使用這裡使用的變數)其基本格式:
格式1:env
行格式:26;
arg: 建置參數。建構參數和env的效果一樣,都是設定環境變量,不同的是arg所建構的環境變數在將來容器執行時是不存在的。其基本格式:
格式1: arg [=]
# 格式/設定 此預設值-build-arg = 來覆寫
volume: 定義匿名磁碟區。其基本格式:
格式1:volume ["", ""...]
## 路徑2>"...]##
## expose: 暴露埠。 expose指令是聲明運行時容器所提供的端口,在啟動容器時不會在因為這個聲明而開啟端口。其基本格式: 格式1: expose [...]# workdir:指定工作目錄。其基本格式: 格式1: workdir user: 指定目前使用者。 user是幫助你切換到指定使用者。其基本格式:格式1: user
healtcheck: 健康檢查,判斷容器的狀態是否正常。其基本格式:
格式1: healtcheck [選項] cmd :設定檢查容器健康狀況的指令
## 與健康指令 2: 〔健康指令格式。 ,使用此格式可以屏蔽掉其健康檢查指令建置nginx映像:
建立一個目錄,在該目錄中編寫dockerfile:[root@docker ~]# mkdir mynginx [root@docker ~]# cd mynginx/ [root@docker mynginx]# pwd /root/mynginx [root@docker mynginx]#下載nginx原始碼包到建立的目錄下(mynginx目錄下):
[root@docker ~]# wget -p /root/mynginx/ http://nginx.org/download/nginx-1.15.2.tar.gz編寫dockerfile:
[root@docker mynginx]# vi dockerfile其內容如下:
from centos
run ping -c 1 www.baidu.com
run yum -y install gcc make pcre-devel zlib-devel tar zlib
add nginx-1.15.2.tar.gz /usr/src/
run cd /usr/src/nginx-1.15.2 \
  && mkdir /usr/local/nginx \
  && ./configure --prefix=/usr/local/nginx && make && make install \
  && ln -s /usr/local/nginx/sbin/nginx /usr/local/sbin/ \
  && nginx
run rm -rf /usr/src/nginx-1.15.2
expose 80
執行docker指令建置映像:
[root@docker mynginx]# docker build -t nginx:v3 .
sending build context to docker daemon 1.029mb
step 1/7 : from centos
 ---> 5182e96772bf
step 2/7 : run ping -c 1 www.baidu.com
 ---> using cache
 ---> 2f70f8abaf2a
step 3/7 : run yum -y install gcc make pcre-devel zlib-devel tar zlib
 ---> using cache
 ---> dbdda4b7ae6f
step 4/7 : add nginx-1.15.2.tar.gz /usr/src/
 ---> using cache
 ---> 18ace6285668
step 5/7 : run cd /usr/src/nginx-1.15.2   && mkdir /usr/local/nginx   && ./configure --prefix=/usr/local/nginx && make && make install   && ln -s /usr/local/nginx/sbin/nginx /usr/local/sbin/   && nginx
 ---> using cache
 ---> 99629488ede9
step 6/7 : run rm -rf /usr/src/nginx-1.15.2
 ---> using cache
 ---> 869fbad71879
step 7/7 : expose 80
 ---> using cache
 ---> 384bed72ea6f
successfully built 384bed72ea6f
successfully tagged nginx:v3
輸出兩個successfully即為建置成功! 啟動自訂映像:使用docker images 查看建置的映像:
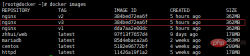
[root@docker ~]# docker run -dit -p 80:80 --name nginx nginx:v3
ecaafe1190447878b98dfb0198e92439db60ff7dab57a1674e0e9e7282a9c858
[root@docker ~]# docker ps -a
container id    image        command       created       status       ports        names
ecaafe119044    nginx:v3      "/bin/bash"     3 seconds ago    up 2 seconds    0.0.0.0:80->80/tcp  nginx
註:這時,你無論怎麼啟動這個容器,它還是一直處於exited狀態。 經過各種解決,最終,終於知道問題出在了哪。原來容器啟動時,它是在後台對應著一個線程啟動的,它在啟動時是已經啟動了,但它執行完命令後,就退出了,並沒有在後台運行著,所以使用-dit 參數讓它在後台運行即可。
[root@docker ~]# docker run -dit -p 80:80 --name nginx nginx:v3 ecaafe1190447878b98dfb0198e92439db60ff7dab57a1674e0e9e7282a9c858 [root@docker ~]# docker ps -a container id image command created status ports names ecaafe119044 nginx:v3 "/bin/bash" 3 seconds ago up 2 seconds 0.0.0.0:80->80/tcp nginx然而.......此時又出現了問題,它雖然起來了,但nginx的web網頁介面訪問不了,顯示拒絕連接! ! ! !
[root@docker ~]# curl 192.168.100.22
curl: (7) failed connect to 192.168.100.22:80; 拒绝连接
[root@docker ~]# elinks --dump 192.168.100.22
elinks: 拒绝连接
然後,又經過問百度,fq看谷歌,終於找到問題的所在了。原來只要使用 exec 進入容器裡啟動nginx就可以了。 ###
[root@docker ~]# docker exec -it nginx bash
[root@ecaafe119044 /]# nginx
[root@ecaafe119044 /]# exit
exit
[root@docker ~]# curl 192.168.100.22
<!doctype html>
<html>
<head>
<title>welcome to nginx!</title>
<style>
  body {
    width: 35em;
    margin: 0 auto;
    font-family: tahoma, verdana, arial, sans-serif;
  }
</style>
</head>
<body>
<h1 id="welcome-nbsp-to-nbsp-nginx">welcome to nginx!</h1>
<p>if you see this page, the nginx web server is successfully installed and
working. further configuration is required.</p>

<p>for online documentation and support please refer to
<a href="http://nginx.org/" rel="external nofollow" >nginx.org</a>.<br/>
commercial support is available at
<a href="http://nginx.com/" rel="external nofollow" >nginx.com</a>.</p>

<p><em>thank you for using nginx.</em></p>
</body>
</html>
以上是怎麼使用dockerfile建置nginx映像的詳細內容。更多資訊請關注PHP中文網其他相關文章!

 NGINX與Apache:性能,可伸縮性和效率Apr 19, 2025 am 12:05 AM
NGINX和Apache都是強大的Web服務器,各自在性能、可擴展性和效率上有獨特的優勢和不足。 1)NGINX在處理靜態內容和反向代理時表現出色,適合高並發場景。 2)Apache在處理動態內容時表現更好,適合需要豐富模塊支持的項目。選擇服務器應根據項目需求和場景來決定。
 終極攤牌:nginx vs. apacheApr 18, 2025 am 12:02 AM
NGINX適合處理高並發請求,Apache適合需要復雜配置和功能擴展的場景。 1.NGINX採用事件驅動、非阻塞架構,適用於高並發環境。 2.Apache採用進程或線程模型,提供豐富的模塊生態系統,適合複雜配置需求。
 nginx行動:示例和現實應用程序Apr 17, 2025 am 12:18 AM
NGINX可用於提升網站性能、安全性和可擴展性。 1)作為反向代理和負載均衡器,NGINX可優化後端服務和分擔流量。 2)通過事件驅動和異步架構,NGINX高效處理高並發連接。 3)配置文件允許靈活定義規則,如靜態文件服務和負載均衡。 4)優化建議包括啟用Gzip壓縮、使用緩存和調整worker進程。
 NGINX單元:支持不同的編程語言Apr 16, 2025 am 12:15 AM
NGINXUnit支持多種編程語言,通過模塊化設計實現。 1.加載語言模塊:根據配置文件加載相應模塊。 2.應用啟動:調用語言運行時執行應用代碼。 3.請求處理:將請求轉發給應用實例。 4.響應返回:將處理後的響應返回給客戶端。
 在Nginx和Apache之間進行選擇:適合您的需求Apr 15, 2025 am 12:04 AM
NGINX和Apache各有優劣,適合不同場景。 1.NGINX適合高並發和低資源消耗場景。 2.Apache適合需要復雜配置和豐富模塊的場景。通過比較它們的核心特性、性能差異和最佳實踐,可以幫助你選擇最適合需求的服務器軟件。

 怎麼查看nginx是否啟動Apr 14, 2025 pm 01:03 PM
確認 Nginx 是否啟動的方法:1. 使用命令行:systemctl status nginx(Linux/Unix)、netstat -ano | findstr 80(Windows);2. 檢查端口 80 是否開放;3. 查看系統日誌中 Nginx 啟動消息;4. 使用第三方工具,如 Nagios、Zabbix、Icinga。
 nginx怎麼關閉Apr 14, 2025 pm 01:00 PM
要關閉 Nginx 服務,請按以下步驟操作:確定安裝類型:Red Hat/CentOS(systemctl status nginx)或 Debian/Ubuntu(service nginx status)停止服務:Red Hat/CentOS(systemctl stop nginx)或 Debian/Ubuntu(service nginx stop)禁用自動啟動(可選):Red Hat/CentOS(systemctl disable nginx)或 Debian/Ubuntu(syst


熱AI工具

Undresser.AI Undress
人工智慧驅動的應用程序,用於創建逼真的裸體照片

AI Clothes Remover
用於從照片中去除衣服的線上人工智慧工具。

Undress AI Tool
免費脫衣圖片

Clothoff.io
AI脫衣器

AI Hentai Generator
免費產生 AI 無盡。

熱門文章
熱工具

MantisBT
Mantis是一個易於部署的基於Web的缺陷追蹤工具,用於幫助產品缺陷追蹤。它需要PHP、MySQL和一個Web伺服器。請查看我們的演示和託管服務。

PhpStorm Mac 版本
最新(2018.2.1 )專業的PHP整合開發工具

Dreamweaver CS6
視覺化網頁開發工具

SecLists
SecLists是最終安全測試人員的伙伴。它是一個包含各種類型清單的集合,這些清單在安全評估過程中經常使用,而且都在一個地方。 SecLists透過方便地提供安全測試人員可能需要的所有列表,幫助提高安全測試的效率和生產力。清單類型包括使用者名稱、密碼、URL、模糊測試有效載荷、敏感資料模式、Web shell等等。測試人員只需將此儲存庫拉到新的測試機上,他就可以存取所需的每種類型的清單。

SublimeText3漢化版
中文版,非常好用

