
基於ubuntu如何透過Nginx部署Django

- 王林轉載
- 2023-05-13 11:01:061952瀏覽
django的部署可以有很多方式,採用nginx uwsgi的方式是其中比較常見的一種方式。
在這種方式中,我們的通常做法是,將nginx作為伺服器最前端,它將接收web的所有請求,統一管理請求。 nginx把所有靜態請求自己來處理(這是nginx的強項)。然後,nginx將所有非靜態請求透過uwsgi傳遞給django,由django來進行處理,從而完成一次web請求。可見,uwsgi的作用就類似一個橋接器。起到橋樑的作用。
一、安裝nginx
nginx是一款輕量的web 伺服器/反向代理伺服器及電子郵件(imap/pop3 )代理伺服器,並在一個bsd-like 協定下發行。其特點是佔有記憶體少,並發能力強,事實上nginx的並發能力確實在同類型的網頁伺服器中表現較好。
nginx同樣為目前非常流行的網頁伺服器。利用其部署django,我們在這裡也做簡單的介紹。
nginx官網:
開啟ubuntu控制台(ctrl alt t)利用ubuntu的倉庫安裝。
fnngj@ubuntu:~$ sudo apt-get install nginx #安装
啟動nginx:
fnngj@ubuntu:~$ /etc/init.d/nginx start #启动
fnngj@ubuntu:~$ /etc/init.d/nginx stop #关闭
fnngj@ubuntu:~$ /etc/init.d/nginx restart #重启
修改nginx預設連接埠號,開啟/etc/nginx/nginx.conf 文件,修改埠號。
 server {
  listen    8088;  # 修改端口号
  server_name localhost;

  #charset koi8-r;

  #access_log logs/host.access.log main;

  location / {
    root  html;
    index index.html index.htm;
  }
大概在檔案36行的位置,將預設的80埠號改成其它埠號,如 8088。因為預設的80埠號很容易被其它應用程式佔用。
然後,透過上面指令重啟nginx。造訪:http://127.0.0.1:8088/
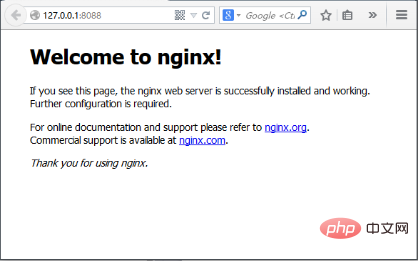
如果出現如上圖,說明nginx啟動成功。我
透過pip安裝uwsgi。 root@ubuntu:/etc# python3 -m pip install uwsgi
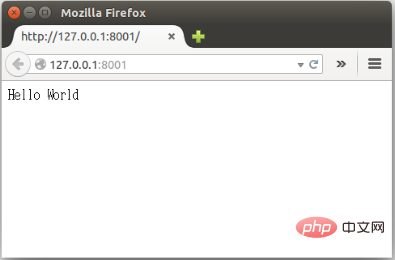
測試uwsgi,建立test.py檔案:def application(env, start_response):
start_response('200 ok', [('content-type','text/html')])
return [b"hello world"]
透過uwsgi運行該檔案。
fnngj@ubuntu:~/pydj$ uwsgi --http :8001 --wsgi-file test.py接下來設定django與uwsgi連接。此處,假定的我的django專案位置為:/home/fnngj/pydj/myweb複製程式碼 程式碼如下:
http : 協定類型與連接埠號碼
processes : 開啟的進程數量workers : 開啟的進程數量,等同於processes(官網的說法是spawn the specified number ofworkers / processes)
chdir : 指定運行目錄(chdir to specified directory before apps loading)
wsgi-file : 載入wsgi-file(load .wsgi file)
stats : 在指定的位址上,開啟狀態服務(enable the stats server on the specified address)
threads :執行執行緒。由於gil的存在,我覺得這個真心沒啥用。 (run each worker in prethreaded mode with the specified number of threads)
master : 允許主程序存在(enable master process)
daemonize : 使程序在背景執行,並將日誌打到指定的日誌檔案或udp伺服器(daemonize uwsgi)。實際上最常用的,還是把運行記錄輸出到一個本地文件上。
pidfile : 指定pid檔案的位置,記錄主行程的pid號。
vacuum : 當伺服器退出的時候自動清理環境,刪除unix socket檔案和pid檔案(try to remove all of the generated file/sockets)
#三、nginx uwsgi django且
#N對三者結合。首先羅列一下專案的所需的檔案:
myweb/

├── manage.py

├── myweb/

│  ├── __init__.py

│  ├── settings.py

│  ├── urls.py

│  └── wsgi.py

└── myweb_uwsgi.ini
在我們透過django建立myweb專案時,在子目錄myweb下已經幫我們產生的 wsgi.py檔案。所以,我們只需要再建立myweb_uwsgi.ini設定檔即可,當然,uwsgi支援多種類型的設定文件,如xml,ini等。此處,使用ini類型的配置。 这个配置,其实就相当于在上一小节中通过wsgi命令,后面跟一堆参数的方式,给文件化了。 socket 指定项目执行的端口号。 chdir 指定项目的目录。 module myweb.wsgi ,可以这么来理解,对于myweb_uwsgi.ini文件来说,与它的平级的有一个myweb目录,这个目录下有一个wsgi.py文件。 其它几个参数,可以参考上一小节中参数的介绍。 接下来,切换到myweb项目目录下,通过uwsgi命令读取myweb_uwsgi.ini文件启动项目。 注意查看uwsgi的启动信息,如果有错,就要检查配置文件的参数是否设置有误。 再接下来要做的就是修改nginx.conf配置文件。打开/etc/nginx/nginx.conf文件,添加如下内容。 listen 指定的是nginx代理uwsgi对外的端口号。 server_name 网上大多资料都是设置的一个网址(例,www.example.com),我这里如果设置成网址无法访问,所以,指定的到了本机默认ip。 在进行配置的时候,我有个问题一直想不通。nginx到底是如何uwsgi产生关联。现在看来大概最主要的就是这两行配置。 include uwsgi_params; uwsgi_pass 127.0.0.1:8000; include 必须指定为uwsgi_params;而uwsgi_pass指的本机ip的端口与myweb_uwsgi.ini配置文件中的必须一直。 现在重新启动nginx,翻看上面重启动nginx的命令。然后,访问:http://127.0.0.1:8099/ 通过这个ip和端口号的指向,请求应该是先到nginx的。如果你在页面上执行一些请求,就会看到,这些请求最终会转到uwsgi来处理。# myweb_uwsgi.ini file
[uwsgi]
# django-related settings
socket = :8000
# the base directory (full path)
chdir = /home/fnngj/pydj/myweb
# django s wsgi file
module = myweb.wsgi
# process-related settings
# master
master = true
# maximum number of worker processes
processes = 4
# ... with appropriate permissions - may be needed
# chmod-socket = 664
# clear environment on exit
vacuum = true
fnngj@ubuntu:~$ cd /home/fnngj/pydj/myweb/
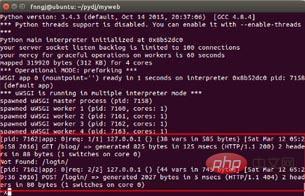
fnngj@ubuntu:~/pydj/myweb$ uwsgi --ini myweb_uwsgi.ini
[uwsgi] getting ini configuration from myweb_uwsgi.ini
*** starting uwsgi 2.0.12 (32bit) on [sat mar 12 13:05:06 2016] ***
compiled with version: 4.8.4 on 26 january 2016 06:14:41
os: linux-3.19.0-25-generic #26~14.04.1-ubuntu smp fri jul 24 21:18:00 utc 2015
nodename: ubuntu
machine: i686
clock source: unix
detected number of cpu cores: 2
current working directory: /home/fnngj/pydj/myweb
detected binary path: /usr/local/bin/uwsgi
!!! no internal routing support, rebuild with pcre support !!!
chdir() to /home/fnngj/pydj/myweb
your processes number limit is 15962
your memory page size is 4096 bytes
detected max file descriptor number: 1024
lock engine: pthread robust mutexes
thunder lock: disabled (you can enable it with --thunder-lock)
uwsgi socket 0 bound to tcp address :8000 fd 3
python version: 3.4.3 (default, oct 14 2015, 20:37:06) [gcc 4.8.4]
*** python threads support is disabled. you can enable it with --enable-threads ***
python main interpreter initialized at 0x8b52dc0
your server socket listen backlog is limited to 100 connections
your mercy for graceful operations on workers is 60 seconds
mapped 319920 bytes (312 kb) for 4 cores
*** operational mode: preforking ***
wsgi app 0 (mountpoint='') ready in 1 seconds on interpreter 0x8b52dc0 pid: 7158 (default app)
*** uwsgi is running in multiple interpreter mode ***
spawned uwsgi master process (pid: 7158)
spawned uwsgi worker 1 (pid: 7160, cores: 1)
spawned uwsgi worker 2 (pid: 7161, cores: 1)
spawned uwsgi worker 3 (pid: 7162, cores: 1)
spawned uwsgi worker 4 (pid: 7163, cores: 1)
……
server {
  listen     8099;
  server_name  127.0.0.1
  charset utf-8;
  access_log   /var/log/nginx/myweb_access.log;
  error_log    /var/log/nginx/myweb_error.log;

  client_max_body_size 75m;

  location / {
    include uwsgi_params;
    uwsgi_pass 127.0.0.1:8000;
    uwsgi_read_timeout 2;
  }
  location /static {
    expires 30d;
    autoindex on;
    add_header cache-control private;
    alias /home/fnngj/pydj/myweb/static/;
   }
 }
……
以上是基於ubuntu如何透過Nginx部署Django的詳細內容。更多資訊請關注PHP中文網其他相關文章!