
Vue3怎麼使用glup打包元件庫並實現按需加載

- WBOYWBOYWBOYWBOYWBOYWBOYWBOYWBOYWBOYWBOYWBOYWBOYWB轉載
- 2023-05-12 14:58:142008瀏覽
使用glup 打包組件庫並實現按需加載
當我們使用Vite 庫模式打包的時候,vite 會將樣式文件全部打包到同一個文件中,這樣的話我們每次都要全量引入所有樣式檔案做不到按需引入的效果。所以打包的時候我們可以不讓 vite 打包樣式檔,樣式檔將使用 gulp 進行打包。那麼本篇文章將介紹如何使用 gulp 打包樣式檔案,以及如何按需載入樣式檔案。
自動按需引入插件
現在很多元件庫的按需引入都是藉助插件來解決的,比如ElementPlus是使用unplugin-vue- components和unplugin-auto-import,這兩個插件可以實現
import { Button } from "easyest";

//相当于
import "easyest/es/src/button/style/index.css";
import "easyest/es/src/button/index.mjs";
從而實現按需引入,這裡不再過多展開這些插件的使用,因為本篇文章的重點不在這裡,感興趣的可以直接去查詢使用方式unplugin-vue-components
#刪除打包檔案
我們都知道,在打包之前是需要將前面打包的檔案刪除的,所以需要先寫一個刪除函數。在此之前,我們先在 components 新建一個 script 資料夾用於存放我們的腳本相關內容,script 下的 build 資料夾裡的內容則是本篇文章要介紹的打包相關內容。
在script/utils 中新建paths.ts 用於維護元件庫路徑,記得先安裝
pnpm add @types/node -D -w
import { resolve } from "path";

//组件库根目录
export const componentPath = resolve(__dirname, "../../");

//pkg根目录
export const pkgPath = resolve(__dirname, "../../../");
刪除打包目錄函數可以放在bulid/utils 中的delpath.ts,注意這裡因為打包後的easyest 套件是我們最終要發布的套件,所以我們需要將package.json和README.md保留下來
import fs from "fs";
import { resolve } from "path";
import { pkgPath } from "./paths";
//保留的文件
const stayFile = ["package.json", "README.md"];

const delPath = async (path: string) => {
  let files: string[] = [];

  if (fs.existsSync(path)) {
    files = fs.readdirSync(path);

    files.forEach(async (file) => {
      let curPath = resolve(path, file);

      if (fs.statSync(curPath).isDirectory()) {
        // recurse
        if (file != "node_modules") await delPath(curPath);
      } else {
        // delete file
        if (!stayFile.includes(file)) {
          fs.unlinkSync(curPath);
        }
      }
    });

    if (path != `${pkgPath}/easyest`) fs.rmdirSync(path);
  }
};
export default delPath;
使用gulp
我們需要使用ts 以及新的es6 語法,而gulp 是不支援的,所以我們需要安裝一些依賴使得gulp 支援這些,其中sucras 讓我們執行gulp 可以使用最新語法並且支援ts
pnpm i gulp @types/gulp sucrase -D -w
在build/index.ts 來執行刪除流程
import delPath from "../utils/delpath";
import { series, parallel } from "gulp";
import { pkgPath } from "../utils/paths";
//删除easyest

export const removeDist = () => {
  return delPath(`${pkgPath}/easyest`);
};

export default series(async () => removeDist());
在根目錄easyest/package.json 新增腳本
  "scripts": {
    "build:easyest": "gulp -f packages/components/script/build/index.ts"
},根目錄下執行pnpm run build:easyest就會發現easyest 下的檔案被刪除了
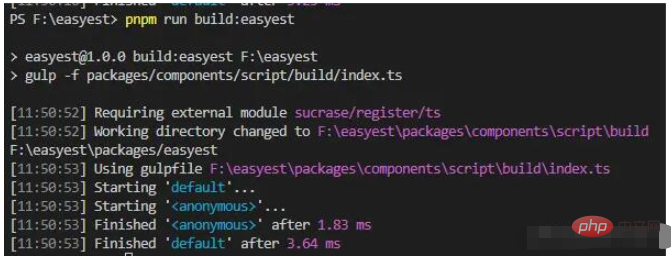
刪除完之後就可以開始打包樣式了
gulp 打包樣式
因為我們用的是less 寫的樣式,所以需要安裝gulp-less,同時在安裝一個自動補全css 前綴插件gulp-autoprefixer以及它們對應的上面文件
pnpm add gulp-less @types/gulp-less gulp-autoprefixer @types/gulp-autoprefixer -D -w
然後寫一個打包樣式的函數,這裡使用到了gulp 的dest和src函數,不知道什麼意思的樂意看上一篇文章gulp 的介紹
//打包样式
export const buildStyle = () => {
  return src(`${componentPath}/src/**/style/**.less`)
    .pipe(less())
    .pipe(autoprefixer())
    .pipe(dest(`${pkgPath}/easyest/lib/src`))
    .pipe(dest(`${pkgPath}/easyest/es/src`));
};
打包元件
最後再寫一個打包元件的函數,這裡需要寫一個執行指令的工具函數,在utils/run.ts
import { spawn } from "child_process";

export default async (command: string, path: string) => {
  //cmd表示命令,args代表参数,如 rm -rf  rm就是命令,-rf就为参数
  const [cmd, ...args] = command.split(" ");
  return new Promise((resolve, reject) => {
    const app = spawn(cmd, args, {
      cwd: path, //执行命令的路径
      stdio: "inherit", //输出共享给父进程
      shell: true, //mac不需要开启,windows下git base需要开启支持
    });
    //执行完毕关闭并resolve
    app.on("close", resolve);
  });
};
然後引入run 函數
//打包组件
export const buildComponent = async () => {
  run("pnpm run build", componentPath);
};因為打包樣式和打包元件可以並行,所以最後build/index.ts為
import delPath from "../utils/delpath";
import { series, parallel, src, dest } from "gulp";
import { pkgPath, componentPath } from "../utils/paths";
import less from "gulp-less";
import autoprefixer from "gulp-autoprefixer";
import run from "../utils/run";
//删除dist

export const removeDist = () => {
  return delPath(`${pkgPath}/easyest`);
};

//打包样式
export const buildStyle = () => {
  return src(`${componentPath}/src/**/style/**.less`)
    .pipe(less())
    .pipe(autoprefixer())
    .pipe(dest(`${pkgPath}/easyest/lib/src`))
    .pipe(dest(`${pkgPath}/easyest/es/src`));
};

//打包组件
export const buildComponent = async () => {
  run("pnpm run build", componentPath);
};
export default series(
  async () => removeDist(),
  parallel(
    async () => buildStyle(),
    async () => buildComponent()
  )
);
最後vite 打包的時候忽略less 檔案,components/vite. config.ts
import { defineConfig } from "vite";
import vue from "@vitejs/plugin-vue";
import dts from "vite-plugin-dts";
import DefineOptions from "unplugin-vue-define-options/vite";
export default defineConfig({
build: {
//打包文件目录
outDir: "es",
//压缩
//minify: false,
rollupOptions: {
//忽略打包vue和.less文件
external: ["vue", /\.less/],
...
}
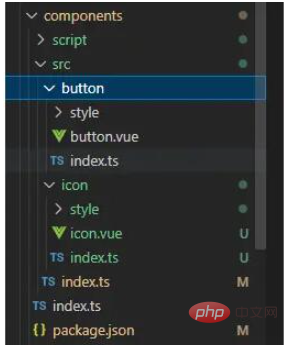
});為了更好的看打包後的效果,我們可以再寫一個簡單的Icon 元件,目錄如下
最後根目錄執行pnpm run build,即可完成打包
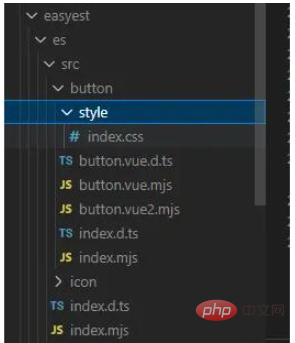
#由於vite 打包忽略了less 檔案打包,所以打包後的檔案遇到.less 檔案的引入會自動跳過,所以引入程式碼沒變
但是我們已經將less 檔案打包成css 檔案了,所以我們需要將程式碼中的.less 換成.css
在components/vite.config.ts 中的plugins 中新增
 plugins: [
    vue(),
    DefineOptions(),
    dts({
      entryRoot: "./src",
      outputDir: ["../easyest/es/src", "../easyest/lib/src"],
      //指定使用的tsconfig.json为我们整个项目根目录下,如果不配置,你也可以在components下新建tsconfig.json
      tsConfigFilePath: "../../tsconfig.json",
    }),
    {
      name: "style",
      generateBundle(config, bundle) {
        //这里可以获取打包后的文件目录以及代码code
        const keys = Object.keys(bundle);

        for (const key of keys) {
          const bundler: any = bundle[key as any];
          //rollup内置方法,将所有输出文件code中的.less换成.css,因为我们当时没有打包less文件

          this.emitFile({
            type: "asset",
            fileName: key, //文件名名不变
            source: bundler.code.replace(/\.less/g, ".css"),
          });
        }
      },
    },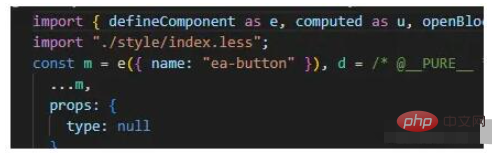
],此時執行pnpm run build: easyest,然後再看打包後檔案引入
此時.less已經被替換成了.css ,打包完畢,接下來要做的就是發布了!
以上是Vue3怎麼使用glup打包元件庫並實現按需加載的詳細內容。更多資訊請關注PHP中文網其他相關文章!