


這是一款基於jquery實現的帶翻頁動畫的電子雜誌,小編有時就在想我們讀的紙質課本可不可以都改成電子書,這要是不是會更節省資源吶?
記得以前我們有介紹過不少書本翻頁的動畫,像是這款CSS3書本翻頁動畫,製作就非常逼真。今天要分享的這款jQuery書本翻頁3D動畫功能更加強大,可以支援任意數量頁的翻閱,並且也有非常美觀的視覺效果。書本的內容支援任意HTML元素,相當靈活。
運作效果圖 ---------------------------------查看效果 下載源碼------------------------------------
為大家分享的jquery帶翻頁動畫的電子雜誌代碼如下
<head>
<title>jQuery书本翻页动画效果DEMO演示</title>
<meta http-equiv="Content-Type" content="text/html; charset=UTF-8">
<script type="text/javascript" src="http://code.jquery.com/jquery-1.4.4.min.js"></script>
<script src="booklet/jquery.easing.1.3.js" type="text/javascript"></script>
<script src="booklet/jquery.booklet.1.1.0.min.js" type="text/javascript"></script>
<link href="booklet/jquery.booklet.1.1.0.css" type="text/css" rel="stylesheet" media="screen" />
<link rel="stylesheet" href="css/style.css" type="text/css" media="screen"/>
<script src="cufon/cufon-yui.js" type="text/javascript"></script>
<script src="cufon/ChunkFive_400.font.js" type="text/javascript"></script>
<script src="cufon/Note_this_400.font.js" type="text/javascript"></script>
<script type="text/javascript">
Cufon.replace('h1,p,.b-counter');
Cufon.replace('.book_wrapper a', {hover:true});
Cufon.replace('.title', {textShadow: '1px 1px #C59471', fontFamily:'ChunkFive'});
Cufon.replace('.reference a', {textShadow: '1px 1px #C59471', fontFamily:'ChunkFive'});
Cufon.replace('.loading', {textShadow: '1px 1px #000', fontFamily:'ChunkFive'});
</script>
</head>
<body>
<div style="text-align:center;clear:both">
<script src="/gg_bd_ad_720x90.js" type="text/javascript"></script>
<script src="/follow.js" type="text/javascript"></script>
</div>
<div class="book_wrapper">
<a id="next_page_button"></a>
<a id="prev_page_button"></a>
<div id="loading" class="loading">Loading pages...</div>
<div id="mybook" style="display:none;">
<div class="b-load">
<div>
<img src="/static/imghwm/default1.png" data-src="images/1.jpg" class="lazy" alt=""/>
<h1 id="Slider-Gallery">Slider Gallery</h1>
<p>This tutorial is about creating a creative gallery with a
slider for the thumbnails. The idea is to have an expanding
thumbnails area which opens once an album is chosen.
The thumbnails will scroll to the end and move back to
the first image. The user can scroll through the thumbnails
by using the slider controls. When a thumbnail is clicked,
it moves to the center and the full image preview opens.</p>
<a href="#" class="article">Article</a>
<a href="#" class="demo">Demo</a>
</div>
<div>
<img src="/static/imghwm/default1.png" data-src="images/2.jpg" class="lazy" alt="" />
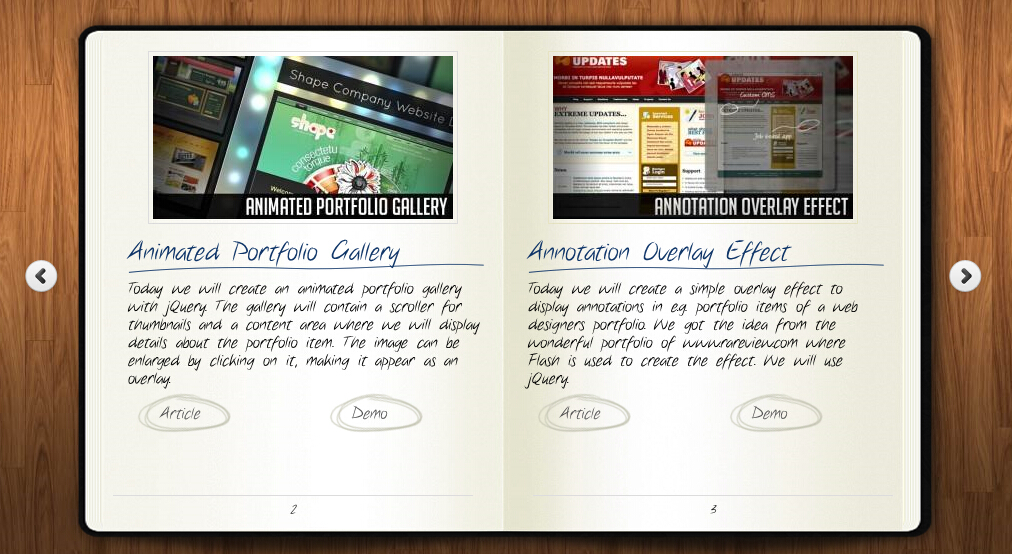
<h1 id="Animated-Portfolio-Gallery">Animated Portfolio Gallery</h1>
<p>Today we will create an animated portfolio gallery with jQuery.
The gallery will contain a scroller for thumbnails and a
content area where we will display details about the portfolio
item. The image can be enlarged by clicking on it, making
it appear as an overlay.</p>
<a href="#" class="article">Article</a>
<a href="#" class="demo">Demo</a>
</div>
<div>
<img src="/static/imghwm/default1.png" data-src="images/3.jpg" class="lazy" alt="" />
<h1 id="Annotation-Overlay-Effect">Annotation Overlay Effect</h1>
<p>Today we will create a simple overlay effect to display annotations in e.g. portfolio
items of a web designers portfolio. We got the idea from the wonderful
portfolio of www.rareview.com where Flash is used to create the
effect. We will use jQuery.</p>
<a href="#" class="article">Article</a>
<a href="#" class="demo">Demo</a>
</div>
<div>
<img src="/static/imghwm/default1.png" data-src="images/4.jpg" class="lazy" alt="" />
<h1 id="Bubbleriffic-Image-Gallery">Bubbleriffic Image Gallery</h1>
<p>In this tutorial we will create a bubbly image gallery that
shows your images in a unique way. The idea is to show the
thumbnails of albums in a rounded fashion allowing the
user to scroll them automatically by moving the mouse.
Clicking on a thumbnail will zoom in a big circle and
the full image which will be automatically resized to
fit into the screen.</p>
<a href="#" class="article">Article</a>
<a href="#" class="demo">Demo</a>
</div>
<div>
<img src="/static/imghwm/default1.png" data-src="images/5.jpg" class="lazy" alt="" />
<h1 id="Collapsing-Site-Navigation">Collapsing Site Navigation</h1>
<p>Today we will create a collapsing menu that contains vertical
navigation bars and a slide out content area. When hovering
over a menu item, an image slides down from the top and a
submenu slides up from the bottom. Clicking on one of the
submenu items will make the whole menu collapse like a card
deck and the respective content area will slide out.</p>
<a href="#" class="article">Article</a>
<a href="#" class="demo">Demo</a>
</div>
<div>
<img src="/static/imghwm/default1.png" data-src="images/6.jpg" class="lazy" alt="" />
<h1 id="Custom-Animation-Banner">Custom Animation Banner</h1>
<p>In today's tutorial we will be creating a custom animation banner with jQuery.
The idea is to have different elements in a banner that will
animate step-wise in a custom way.</p>
<p>We will be using the jQuery Easing Plugin and the jQuery 2D
Transform Plugin to create some nifty animations.</p>
<a href="#" class="article">Article</a>
<a href="#" class="demo">Demo</a>
</div>
<div>
<img src="/static/imghwm/default1.png" data-src="images/7.jpg" class="lazy" alt="" />
<h1 id="Full-Page-Image-Gallery">Full Page Image Gallery</h1>
<p>In this tutorial we are going to create a stunning full page
gallery with scrollable thumbnails and a scrollable full
screen preview. The idea is to have a thumbnails bar at
the bottom of the page that scrolls automatically when
the user moves the mouse. When a thumbnail is clicked,
it moves to the center of the page and the full screen
image is loaded in the background.</p>
<a href="#" class="article">Article</a>
<a href="#" class="demo">Demo</a>
</div>
<div>
<img src="/static/imghwm/default1.png" data-src="images/8.jpg" class="lazy" alt="" />
<h1 id="Hover-Slide-Effect">Hover Slide Effect</h1>
<p>Today we will create a neat effect with some images using
jQuery. The main idea is to have an image area with several
images that slide out when we hover over them, revealing
other images. The sliding effect will be random, i.e.
the images will slide to the top or bottom, left or
right, fading out or not. When we click on any area,
all areas will slide their images out.</p>
<a href="#" class="article">Article</a>
<a href="#" class="demo">Demo</a>
</div>
<div>
<img src="/static/imghwm/default1.png" data-src="images/9.jpg" class="lazy" alt="" />
<h1 id="Merging-Image-Boxes">Merging Image Boxes</h1>
<p>Today we will show you a nice effect for images with jQuery.
The idea is to have a set of rotated thumbnails that,
once clicked, animate to form the selected image.
You can navigate through the images with previous
and next buttons and when the big image gets clicked
it will scatter into the little box shaped thumbnails again.</p>
<a href="#" class="article">Article</a>
<a href="#" class="demo">Demo</a>
</div>
<div>
<img src="/static/imghwm/default1.png" data-src="images/10.jpg" class="lazy" alt="" />
<h1 id="Compact-News-Previewer">Compact News Previewer</h1>
<p>Today we will create a news previewer that let's you
show your latest articles or news in a compact way.
The news previewer will show some list of articles
on the left side and the preview of the article with a
longer description on the right. Once a news on the left
is clicked, the preview will slide in.</p>
<a href="#" class="article">Article</a>
<a href="#" class="demo">Demo</a>
</div>
<div>
<img src="/static/imghwm/default1.png" data-src="images/11.jpg" class="lazy" alt="" />
<h1 id="Overlay-Effect-Menu">Overlay Effect Menu</h1>
<p>In this tutorial we are going to create a simple menu
that will stand out once we hover over it by covering
everything except the menu with a dark overlay.
The menu will stay white and a submenu area will
expand. We will create this effect using jQuery.</p>
<a href="#" class="article">Article</a>
<a href="#" class="demo">Demo</a>
</div>
<div>
<img src="/static/imghwm/default1.png" data-src="images/12.jpg" class="lazy" alt="" />
<h1 id="Polaroid-Photobar-Gallery">Polaroid Photobar Gallery</h1>
<p>In this tutorial we are going to create an image gallery
with a Polaroid look. We will have albums that will expand
to sets of slightly rotated thumbnails that pop out on hover.
The full image will slide in from the bottom once a thumbnail
is clicked. In the full image view the user can navigate
through the pictures or simply choose another thumbnail
to be displayed.</p>
<a href="#" class="article">Article</a>
<a href="#" class="demo">Demo</a>
</div>
<div>
<img src="/static/imghwm/default1.png" data-src="images/13.jpg" class="lazy" alt="" />
<h1 id="Pull-Out-Content-Panel">Pull Out Content Panel</h1>
<p>In this tutorial we will create a content panel that
slides out at a predefined scroll position. It will
reveal a teaser with related content and it can be
expanded to full page size to show more. A custom
slider allows to scroll through many items in the
panel.</p>
<a href="#" class="article">Article</a>
<a href="#" class="demo">Demo</a>
</div>
<div>
<img src="/static/imghwm/default1.png" data-src="images/14.jpg" class="lazy" alt="" />
<h1 id="Thumbnails-Navigation-Gallery">Thumbnails Navigation Gallery</h1>
<p>In this tutorial we are going to create an extraordinary
gallery with scrollable thumbnails that slide out from a
navigation. We are going to use jQuery and some CSS3
properties for the style. The main idea is to have a
menu of albums where each item will reveal a horizontal
bar with thumbnails when clicked.</p>
<a href="#" class="article">Article</a>
<a href="#" class="demo">Demo</a>
</div>
</div>
</div>
</div>
<!-- The JavaScript -->
<script type="text/javascript">
$(function() {
var $mybook = $('#mybook');
var $bttn_next = $('#next_page_button');
var $bttn_prev = $('#prev_page_button');
var $loading = $('#loading');
var $mybook_images = $mybook.find('img');
var cnt_images = $mybook_images.length;
var loaded = 0;
//preload all the images in the book,
//and then call the booklet plugin
$mybook_images.each(function(){
var $img = $(this);
var source = $img.attr('src');
$('<img / alt="jquery帶翻頁動畫的電子雜誌代碼分享_jquery" >').load(function(){
++loaded;
if(loaded == cnt_images){
$loading.hide();
$bttn_next.show();
$bttn_prev.show();
$mybook.show().booklet({
name: null, // name of the booklet to display in the document title bar
width: 800, // container width
height: 500, // container height
speed: 600, // speed of the transition between pages
direction: 'LTR', // direction of the overall content organization, default LTR, left to right, can be RTL for languages which read right to left
startingPage: 0, // index of the first page to be displayed
easing: 'easeInOutQuad', // easing method for complete transition
easeIn: 'easeInQuad', // easing method for first half of transition
easeOut: 'easeOutQuad', // easing method for second half of transition
closed: true, // start with the book "closed", will add empty pages to beginning and end of book
closedFrontTitle: null, // used with "closed", "menu" and "pageSelector", determines title of blank starting page
closedFrontChapter: null, // used with "closed", "menu" and "chapterSelector", determines chapter name of blank starting page
closedBackTitle: null, // used with "closed", "menu" and "pageSelector", determines chapter name of blank ending page
closedBackChapter: null, // used with "closed", "menu" and "chapterSelector", determines chapter name of blank ending page
covers: false, // used with "closed", makes first and last pages into covers, without page numbers (if enabled)
pagePadding: 10, // padding for each page wrapper
pageNumbers: true, // display page numbers on each page
hovers: false, // enables preview pageturn hover animation, shows a small preview of previous or next page on hover
overlays: false, // enables navigation using a page sized overlay, when enabled links inside the content will not be clickable
tabs: false, // adds tabs along the top of the pages
tabWidth: 60, // set the width of the tabs
tabHeight: 20, // set the height of the tabs
arrows: false, // adds arrows overlayed over the book edges
cursor: 'pointer', // cursor css setting for side bar areas
hash: false, // enables navigation using a hash string, ex: #/page/1 for page 1, will affect all booklets with 'hash' enabled
keyboard: true, // enables navigation with arrow keys (left: previous, right: next)
next: $bttn_next, // selector for element to use as click trigger for next page
prev: $bttn_prev, // selector for element to use as click trigger for previous page
menu: null, // selector for element to use as the menu area, required for 'pageSelector'
pageSelector: false, // enables navigation with a dropdown menu of pages, requires 'menu'
chapterSelector: false, // enables navigation with a dropdown menu of chapters, determined by the "rel" attribute, requires 'menu'
shadows: true, // display shadows on page animations
shadowTopFwdWidth: 166, // shadow width for top forward anim
shadowTopBackWidth: 166, // shadow width for top back anim
shadowBtmWidth: 50, // shadow width for bottom shadow
before: function(){}, // callback invoked before each page turn animation
after: function(){} // callback invoked after each page turn animation
});
Cufon.refresh();
}
}).attr('src',source);
});
});
</script>
</body>
</html>
希望本文所述對大家的jQuery程式設計有所幫助。

 了解JavaScript引擎:實施詳細信息Apr 17, 2025 am 12:05 AM
理解JavaScript引擎內部工作原理對開發者重要,因為它能幫助編寫更高效的代碼並理解性能瓶頸和優化策略。 1)引擎的工作流程包括解析、編譯和執行三個階段;2)執行過程中,引擎會進行動態優化,如內聯緩存和隱藏類;3)最佳實踐包括避免全局變量、優化循環、使用const和let,以及避免過度使用閉包。
 Python vs. JavaScript:學習曲線和易用性Apr 16, 2025 am 12:12 AM
Python更適合初學者,學習曲線平緩,語法簡潔;JavaScript適合前端開發,學習曲線較陡,語法靈活。 1.Python語法直觀,適用於數據科學和後端開發。 2.JavaScript靈活,廣泛用於前端和服務器端編程。
 Python vs. JavaScript:社區,圖書館和資源Apr 15, 2025 am 12:16 AM
Python和JavaScript在社區、庫和資源方面的對比各有優劣。 1)Python社區友好,適合初學者,但前端開發資源不如JavaScript豐富。 2)Python在數據科學和機器學習庫方面強大,JavaScript則在前端開發庫和框架上更勝一籌。 3)兩者的學習資源都豐富,但Python適合從官方文檔開始,JavaScript則以MDNWebDocs為佳。選擇應基於項目需求和個人興趣。
 從C/C到JavaScript:所有工作方式Apr 14, 2025 am 12:05 AM
從C/C 轉向JavaScript需要適應動態類型、垃圾回收和異步編程等特點。 1)C/C 是靜態類型語言,需手動管理內存,而JavaScript是動態類型,垃圾回收自動處理。 2)C/C 需編譯成機器碼,JavaScript則為解釋型語言。 3)JavaScript引入閉包、原型鍊和Promise等概念,增強了靈活性和異步編程能力。
 JavaScript引擎:比較實施Apr 13, 2025 am 12:05 AM
不同JavaScript引擎在解析和執行JavaScript代碼時,效果會有所不同,因為每個引擎的實現原理和優化策略各有差異。 1.詞法分析:將源碼轉換為詞法單元。 2.語法分析:生成抽象語法樹。 3.優化和編譯:通過JIT編譯器生成機器碼。 4.執行:運行機器碼。 V8引擎通過即時編譯和隱藏類優化,SpiderMonkey使用類型推斷系統,導致在相同代碼上的性能表現不同。
 超越瀏覽器:現實世界中的JavaScriptApr 12, 2025 am 12:06 AM
JavaScript在現實世界中的應用包括服務器端編程、移動應用開發和物聯網控制:1.通過Node.js實現服務器端編程,適用於高並發請求處理。 2.通過ReactNative進行移動應用開發,支持跨平台部署。 3.通過Johnny-Five庫用於物聯網設備控制,適用於硬件交互。
 使用Next.js(後端集成)構建多租戶SaaS應用程序Apr 11, 2025 am 08:23 AM
我使用您的日常技術工具構建了功能性的多租戶SaaS應用程序(一個Edtech應用程序),您可以做同樣的事情。 首先,什麼是多租戶SaaS應用程序? 多租戶SaaS應用程序可讓您從唱歌中為多個客戶提供服務
 如何使用Next.js(前端集成)構建多租戶SaaS應用程序Apr 11, 2025 am 08:22 AM
本文展示了與許可證確保的後端的前端集成,並使用Next.js構建功能性Edtech SaaS應用程序。 前端獲取用戶權限以控制UI的可見性並確保API要求遵守角色庫


熱AI工具

Undresser.AI Undress
人工智慧驅動的應用程序,用於創建逼真的裸體照片

AI Clothes Remover
用於從照片中去除衣服的線上人工智慧工具。

Undress AI Tool
免費脫衣圖片

Clothoff.io
AI脫衣器

AI Hentai Generator
免費產生 AI 無盡。

熱門文章
熱工具

記事本++7.3.1
好用且免費的程式碼編輯器

SecLists
SecLists是最終安全測試人員的伙伴。它是一個包含各種類型清單的集合,這些清單在安全評估過程中經常使用,而且都在一個地方。 SecLists透過方便地提供安全測試人員可能需要的所有列表,幫助提高安全測試的效率和生產力。清單類型包括使用者名稱、密碼、URL、模糊測試有效載荷、敏感資料模式、Web shell等等。測試人員只需將此儲存庫拉到新的測試機上,他就可以存取所需的每種類型的清單。

禪工作室 13.0.1
強大的PHP整合開發環境

DVWA
Damn Vulnerable Web App (DVWA) 是一個PHP/MySQL的Web應用程序,非常容易受到攻擊。它的主要目標是成為安全專業人員在合法環境中測試自己的技能和工具的輔助工具,幫助Web開發人員更好地理解保護網路應用程式的過程,並幫助教師/學生在課堂環境中教授/學習Web應用程式安全性。 DVWA的目標是透過簡單直接的介面練習一些最常見的Web漏洞,難度各不相同。請注意,該軟體中

ZendStudio 13.5.1 Mac
強大的PHP整合開發環境

